
Phase 1 of 11


Pokemon Diamond and Pearl Phase 1: Coal Badge Walkthrough
 Coal Badge
 Choose a partner at Lake Verity, finish Rowan's Pokedex errand, and cross Jubilife to Oreburgh's first Gym. 8 detailed sections with Diamond/Pearl encounters, trainers, items, puzzles, boss teams, and checklists.
Phase 1 Coal Badge Twinleaf Town, Lake Verity, Sandgem, Jubilife, Oreburgh Gate, Oreburgh City, and Roark. 01 / 11 
Phase Snapshot
Phase 1: Coal Badge
Choose a partner at Lake Verity, finish Rowan's Pokedex errand, and cross Jubilife to Oreburgh's first Gym.
Data rows
Phase Sections
Major Battles And Partners
 Pokémon Trainer BarryPokémon Trainer Barry • source ID 247
Full team
Practical counters
Pokémon Trainer BarryPokémon Trainer Barry • source ID 248Full team
Practical counters
Pokémon Trainer BarryPokémon Trainer Barry • source ID 249Full team
Practical counters
 Leader RoarkLeader Roark • source ID 246
Full team
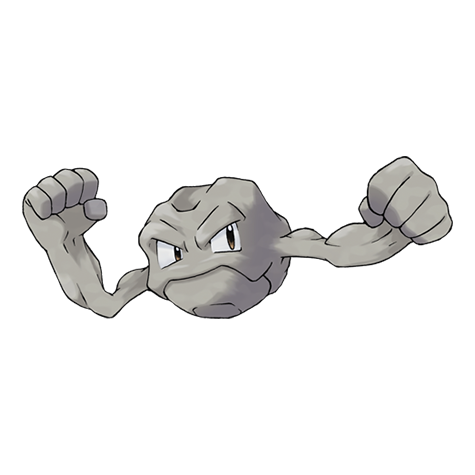 GeodudeStealth Rock / Rock Throw
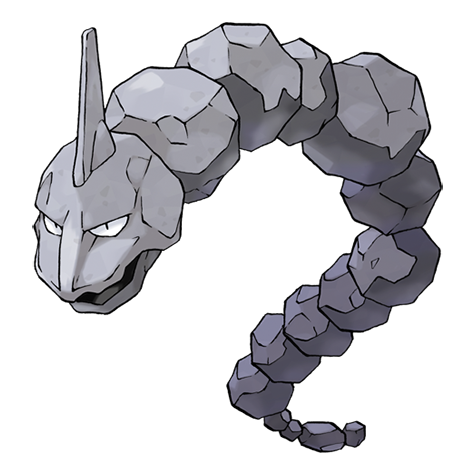 OnixStealth Rock / Rock Throw / Screech
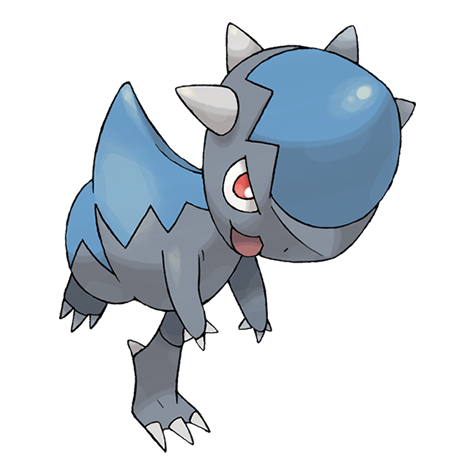 CranidosHeadbutt / Pursuit / Leer
Danger notes
Cranidos is the damage spike after Geodude and Onix; do not spend the best answer early.
Practical counters
Water, Grass, Fighting, or Ground attacks handle the entire team. Keep the Cranidos counter healthy and avoid unnecessary setup.
Data Coverage
This phase owns 79 Diamond/Pearl source maps and publishes 88 encounter rows, 28 trainer rows, 59 visible/scripted items, and 4 hidden-item rows. Counts include explicit starter/rival branches and curated systems but never substitute Platinum encounters or story maps.
Twinleaf Town and Lake Verity
Meet Barry, follow him to the lake, choose Turtwig, Chimchar, or Piplup, and survive the opening Starly attack.
Source maps
Lake Verity, Verity Lakefront, Twinleaf, Twinleaf Player House 1F, Twinleaf Player House 2F, Twinleaf Rival House 1F, Twinleaf Rival House 2F, Twinleaf Northeast House, and Twinleaf Southwest House.
Route Plan
Visit Barry's house; follow Route 201 west to Verity Lakefront; enter Lake Verity; choose one starter; return to Twinleaf and receive the Running Shoes; collect the first free Potion from the Pokemart employee on Route 201.
- The starter is a permanent one-of-three choice. Save before entering the lake if nature or gender matters to the run.
- Turtwig is the safest answer to Roark, Piplup has the smoothest early matchup spread, and Chimchar develops the strongest early answer to Gardenia and Byron.
Routes and encounters on this page are compiled from 9 pret map headers.
Lake Verity
| Pokémon | Games | Levels | Rate | Requirement / notes | ||
|---|---|---|---|---|---|---|
| Morning | Day | Night | ||||
| Grass / cave floor | ||||||
 Bidoof Bidoof | DP | 2-4 | 50% | 50% | 60% | Rate counts base slots temporarily replaced by the daily swarm, hard-shaking Poké Radar patches, and GBA dual-slot insertions. |
 Starly Starly | DP | 2-4 | 50% | 50% | 40% | Rate counts base slots temporarily replaced by the daily swarm, hard-shaking Poké Radar patches, and GBA dual-slot insertions. |
| Swarm (post-National Dex daily announcement) | ||||||
 Surskit Surskit | DP | 2 | 40% | Post-National Dex daily swarm; replaces grass slots 0-1. | ||
| Poké Radar (post-National Dex) | ||||||
 Wobbuffet Wobbuffet | DP | 3-4 | 22% | National Dex and Poké Radar required; replacement slot applies only in a hard/vigorous-shaking Radar patch. | ||
| Dual-slot GBA insertion (post-National Dex) | ||||||
 Lunatone Lunatone | DP | 4 | 8% | National Dex plus Pokémon Sapphire inserted in the Nintendo DS GBA slot; replaces grass slots 8-9. | ||
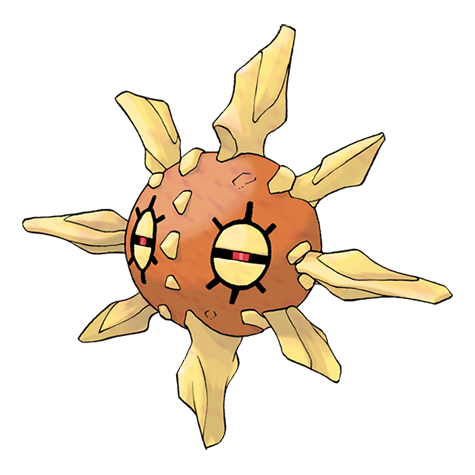 Solrock Solrock | DP | 4 | 8% | National Dex plus Pokémon Ruby inserted in the Nintendo DS GBA slot; replaces grass slots 8-9. | ||
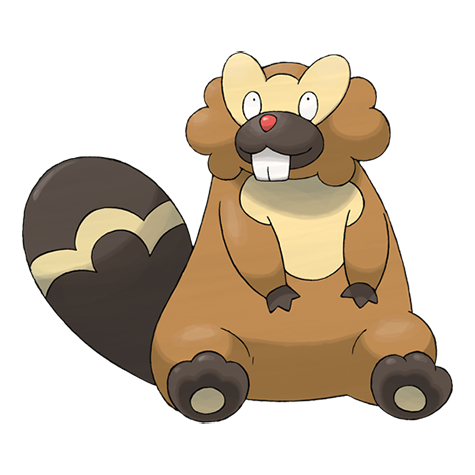 Bibarel Bibarel | DP | 4 | 4% | National Dex plus Pokémon Emerald inserted in the Nintendo DS GBA slot; replaces grass slots 8-9. | ||
| Bibarel | DP | 4 | 4% | National Dex plus Pokémon FireRed inserted in the Nintendo DS GBA slot; replaces grass slots 8-9. | ||
| Bibarel | DP | 4 | 4% | National Dex plus Pokémon LeafGreen inserted in the Nintendo DS GBA slot; replaces grass slots 8-9. | ||
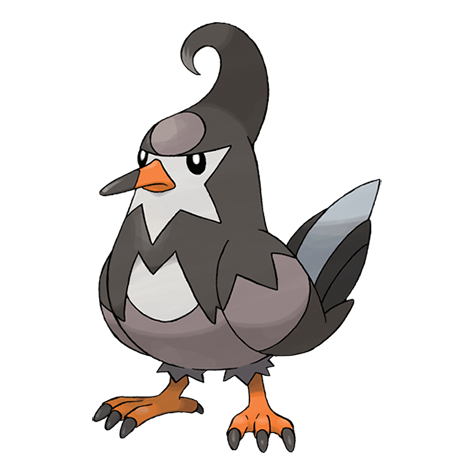 Staravia Staravia | DP | 4 | 4% | National Dex plus Pokémon Emerald inserted in the Nintendo DS GBA slot; replaces grass slots 8-9. | ||
| Staravia | DP | 4 | 4% | National Dex plus Pokémon FireRed inserted in the Nintendo DS GBA slot; replaces grass slots 8-9. | ||
| Staravia | DP | 4 | 4% | National Dex plus Pokémon LeafGreen inserted in the Nintendo DS GBA slot; replaces grass slots 8-9. | ||
| Surfing | ||||||
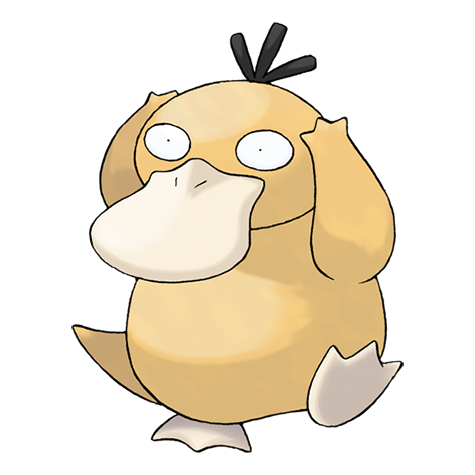 Psyduck Psyduck | DP | 20-40 | 90% | — | ||
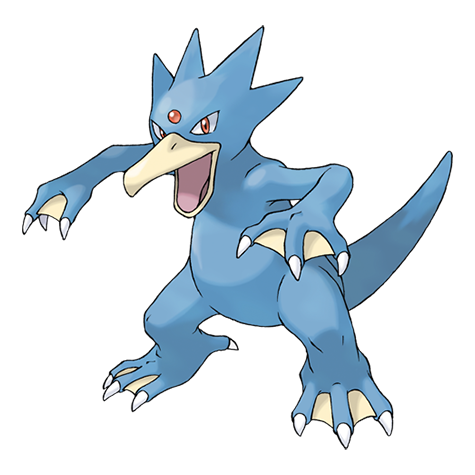 Golduck Golduck | DP | 20-40 | 10% | — | ||
| Fishing — Old Rod | ||||||
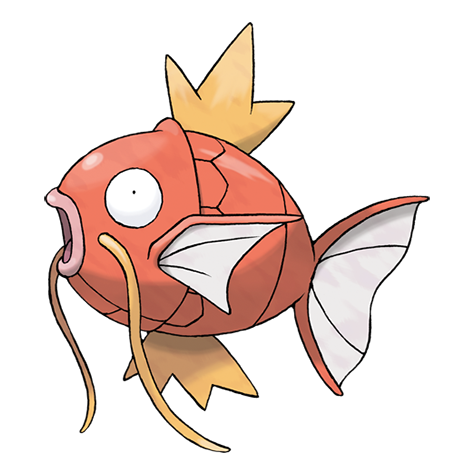 Magikarp Magikarp | DP | 3-10 | 100% | — | ||
| Fishing — Good Rod | ||||||
| Magikarp | DP | 10-25 | 55% | — | ||
 Goldeen Goldeen | DP | 10-25 | 45% | — | ||
| Fishing — Super Rod | ||||||
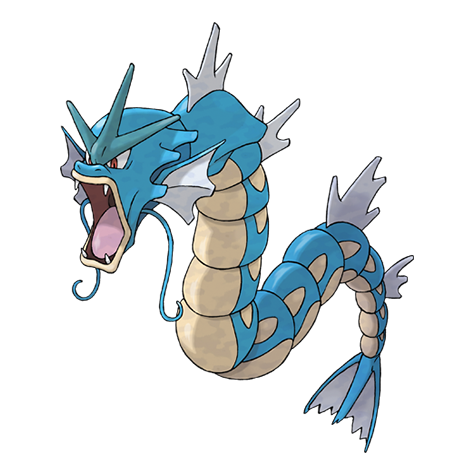 Gyarados Gyarados | DP | 30-55 | 55% | — | ||
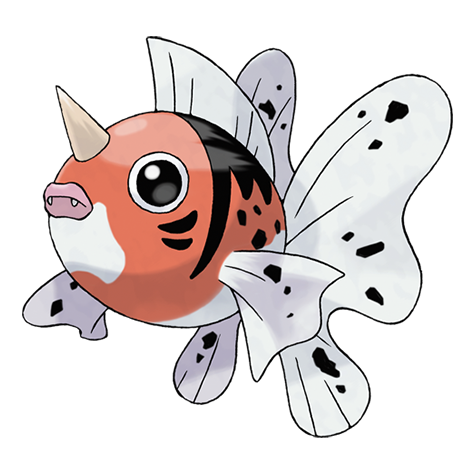 Seaking Seaking | DP | 20-50 | 45% | — | ||
Twinleaf
| Pokémon | Games | Levels | Rate | Requirement / notes | ||
|---|---|---|---|---|---|---|
| Morning | Day | Night | ||||
| Surfing | ||||||
| Psyduck | DP | 20-40 | 90% | — | ||
| Golduck | DP | 20-40 | 10% | — | ||
| Fishing — Old Rod | ||||||
| Magikarp | DP | 3-10 | 100% | — | ||
| Fishing — Good Rod | ||||||
| Magikarp | DP | 10-25 | 55% | — | ||
| Goldeen | DP | 10-25 | 45% | — | ||
| Fishing — Super Rod | ||||||
| Gyarados | DP | 30-55 | 55% | — | ||
| Seaking | DP | 20-50 | 45% | — | ||
Twinleaf Town and Lake Verity
| Pokémon | Games | Levels | Rate | Requirement / notes | ||
|---|---|---|---|---|---|---|
| Morning | Day | Night | ||||
| Starter gift | ||||||
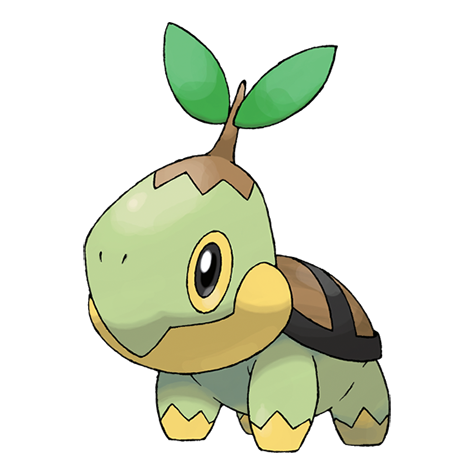 Turtwig Turtwig | DP | 5 | Choose one | Professor Rowan's briefcase at Lake Verity Grass-type starter; the unchosen starters cannot be caught in normal Diamond or Pearl gameplay. | ||
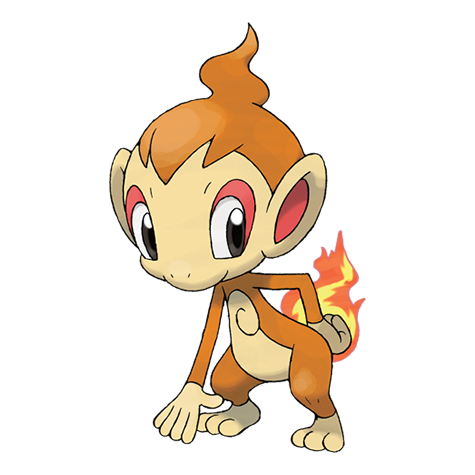 Chimchar Chimchar | DP | 5 | Choose one | Professor Rowan's briefcase at Lake Verity Fire-type starter; the unchosen starters require trading. | ||
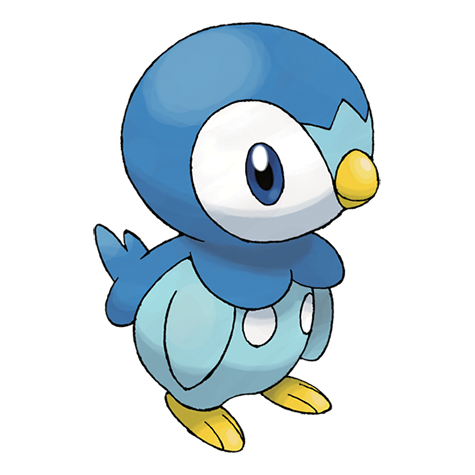 Piplup Piplup | DP | 5 | Choose one | Professor Rowan's briefcase at Lake Verity Water-type starter; the unchosen starters require trading. | ||
Items
| Item | Version | Type | Area / exact direction | Coordinate / script | Requirement | Source |
|---|---|---|---|---|---|---|
| Journal | Diamond / Pearl | NPC / scripted gift | Twinleaf player home 1F: Receive it from Mom when returning home after accepting Rowan's Pokedex assignment. | NPC (7, 8); script 4 | Accept the Pokedex in Sandgem, then speak to Mom in the Twinleaf player home. | script bank 981 |
| Parcel | Diamond / Pearl | NPC / scripted gift | Twinleaf player home 1F: Barry's mother brings it to the player home immediately after Mom gives the Journal. | NPC (7, 8); script 4 | Accept the Pokedex, return home, and complete the Journal conversation; deliver the Parcel to Barry at Jubilife Trainer School. | script bank 981 |
Hidden Items
| Hidden item | Area / plain-English placement | QA coordinate | Requirement | Source |
|---|---|---|---|---|
| Potion | Verity Lakefront: Use the Dowsing Machine in the southeastern part of Verity Lakefront, 5 tiles east and 6 tiles south of the Lake Verity doorway or transition and inspect that exact ground tile. | (86, 849) | Dowsing Machine Pokétch app. Reach this subarea; check the route and puzzle notes for HM, Bicycle, time, or story gates. | event bank 319, script 8160 |
| Odd Keystone | Twinleaf: Use the Dowsing Machine on the southwest bank of Twinleaf's pond after Surfing across the water. | (107, 893) | Dowsing Machine Pokétch app. Relic Badge and Surf. | event bank 389, script 8201 |
Puzzles, Warps, And Switches
- Barry blocks normal Route 201 progress until the lake scene is complete; the opening sequence is linear and has no missable trainer battle.
Completion Checklist
- Complete the currently reachable part of this route plan: Visit Barry's house; follow Route 201 west to Verity Lakefront; enter Lake Verity; choose one starter; return to Twinleaf and receive the Running Shoes; collect the first free Potion from the Pokemart employee on Route 201.
- Review all 29 encounter rows across the per-area tables, including game markers, method band, time-of-day rates, levels, and each conditional requirement; mark conditional rows for their stated revisit.
Route 201 and Sandgem Town
Learn the catching loop, accept Rowan's Pokedex assignment, name the starter, and unlock the first supply run.
Source maps
Route 201, Sandgem, Sandgem Poké Mart, Sandgem Pokémon Center, Sandgem Pokémon Center 2F, Sandgem Rowans Lab, Sandgem Professor Assistant House 1F, Sandgem Professor Assistant House 2F, Sandgem Southwest House, and Sandgem Pokémon Center B1F.
Route Plan
Cross Route 201; enter Rowan's Lab; accept the Pokedex; collect TM27 Return; visit home to tell Mom; deliver the Parcel later in Jubilife after buying Poke Balls and healing.
- Wild encounters begin before the player receives Poke Balls, so the first pass is for experience only.
- The opposite-gender assistant demonstrates catching on Route 202; their starter is the one neither the player nor Barry chose.
Routes and encounters on this page are compiled from 10 pret map headers.
Wild Pokémon
| Pokémon | Games | Levels | Rate | Requirement / notes | ||
|---|---|---|---|---|---|---|
| Morning | Day | Night | ||||
| Grass / cave floor | ||||||
| Bidoof | DP | 2-3 | 50% | 50% | 60% | Rate counts base slots temporarily replaced by the daily swarm, hard-shaking Poké Radar patches, and GBA dual-slot insertions. |
| Starly | DP | 2-3 | 50% | 50% | 40% | Rate counts base slots temporarily replaced by the daily swarm, hard-shaking Poké Radar patches, and GBA dual-slot insertions. |
| Swarm (post-National Dex daily announcement) | ||||||
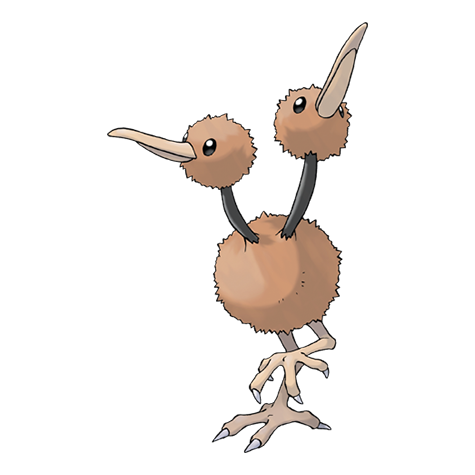 Doduo Doduo | DP | 2 | 40% | Post-National Dex daily swarm; replaces grass slots 0-1. | ||
| Poké Radar (post-National Dex) | ||||||
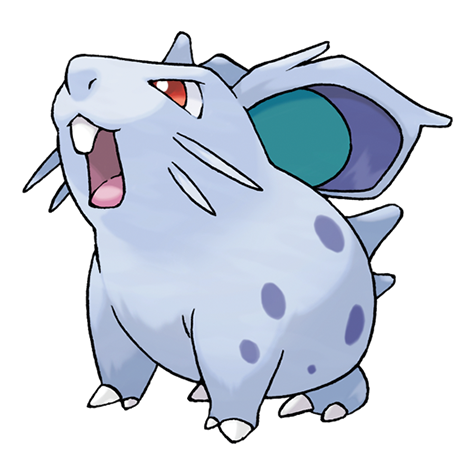 Nidoran F Nidoran F | DP | 3 | 20% | National Dex and Poké Radar required; replacement slot applies only in a hard/vigorous-shaking Radar patch. | ||
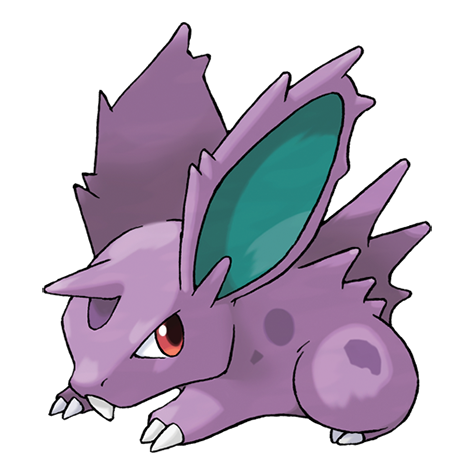 Nidoran M Nidoran M | DP | 3 | 20% | National Dex and Poké Radar required; replacement slot applies only in a hard/vigorous-shaking Radar patch. | ||
| Nidoran F | DP | 2 | 2% | National Dex and Poké Radar required; replacement slot applies only in a hard/vigorous-shaking Radar patch. | ||
| Nidoran M | DP | 2 | 2% | National Dex and Poké Radar required; replacement slot applies only in a hard/vigorous-shaking Radar patch. | ||
| Dual-slot GBA insertion (post-National Dex) | ||||||
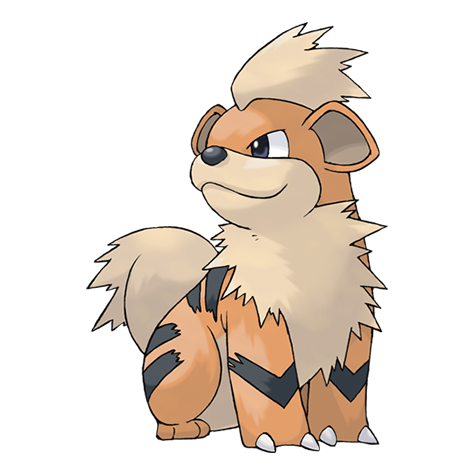 Growlithe Growlithe | DP | 2 | 8% | National Dex plus Pokémon FireRed inserted in the Nintendo DS GBA slot; replaces grass slots 8-9. | ||
| Starly | DP | 2 | 4% | National Dex plus Pokémon Ruby inserted in the Nintendo DS GBA slot; replaces grass slots 8-9. | ||
| Starly | DP | 2 | 4% | National Dex plus Pokémon Sapphire inserted in the Nintendo DS GBA slot; replaces grass slots 8-9. | ||
| Starly | DP | 2 | 4% | National Dex plus Pokémon Emerald inserted in the Nintendo DS GBA slot; replaces grass slots 8-9. | ||
| Starly | DP | 2 | 4% | National Dex plus Pokémon LeafGreen inserted in the Nintendo DS GBA slot; replaces grass slots 8-9. | ||
Items
| Item | Version | Type | Area / exact direction | Coordinate / script | Requirement | Source |
|---|---|---|---|---|---|---|
| Potion | Diamond / Pearl | NPC / scripted gift | Route 201: Speak to the Pokemart employee waiting in the grass on Route 201. | NPC (140, 842); script 10 | First Route 201 crossing; one-time sample item. | script bank 392 |
| Poké Radar | Diamond / Pearl | NPC / scripted gift | Sandgem Rowans Lab: Receive it from Professor Rowan during the National Dex upgrade scene in his lab. | NPC (7, 5); script 3 | Enter the Hall of Fame, see the first 150 Sinnoh Pokedex species, and return to Rowan's lab for the National Dex event. | script bank 990 |
Puzzles, Warps, And Switches
- Return to Twinleaf after the laboratory scene. Mom's conversation supplies the Journal and Barry's mother adds the Parcel objective.
Completion Checklist
- Complete the currently reachable part of this route plan: Cross Route 201; enter Rowan's Lab; accept the Pokedex; collect TM27 Return; visit home to tell Mom; deliver the Parcel later in Jubilife after buying Poke Balls and healing.
- Review all 12 encounter rows across the per-area tables, including game markers, method band, time-of-day rates, levels, and each conditional requirement; mark conditional rows for their stated revisit.
Route 202
Catch an early team, clear the first three trainers, and arrive in Jubilife with enough levels and healing stock.
Source maps
Route 202.
Route Plan
Complete the catching tutorial; catch desired early-route Pokemon; collect field and hidden items; defeat every trainer from south to north; heal before entering Jubilife.
- Shinx does not learn an Electric attack immediately, but Intimidate makes it useful even before Spark.
- Kricketot appears only during morning and night encounter periods; the extracted table must preserve that time condition.
Routes and encounters on this page are compiled from 1 pret map header.
Wild Pokémon
| Pokémon | Games | Levels | Rate | Requirement / notes | ||
|---|---|---|---|---|---|---|
| Morning | Day | Night | ||||
| Grass / cave floor | ||||||
| Starly | DP | 2-4 | 30% | 40% | 20% | Rate counts base slots temporarily replaced by hard-shaking Poké Radar patches and GBA dual-slot insertions. |
| Bidoof | DP | 2-4 | 30% | Rate counts base slots temporarily replaced by the daily swarm, hard-shaking Poké Radar patches, and GBA dual-slot insertions. | ||
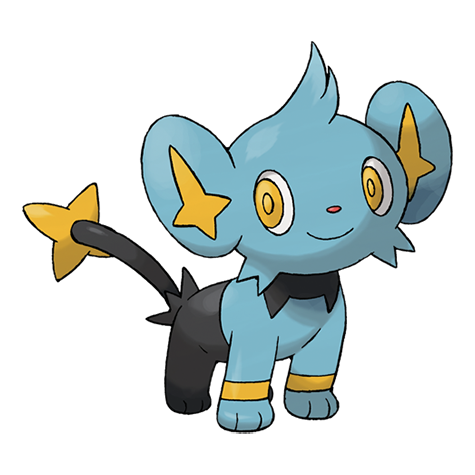 Shinx Shinx | DP | 3-4 | 30% | Rate counts base slots temporarily replaced by the daily swarm and hard-shaking Poké Radar patches. | ||
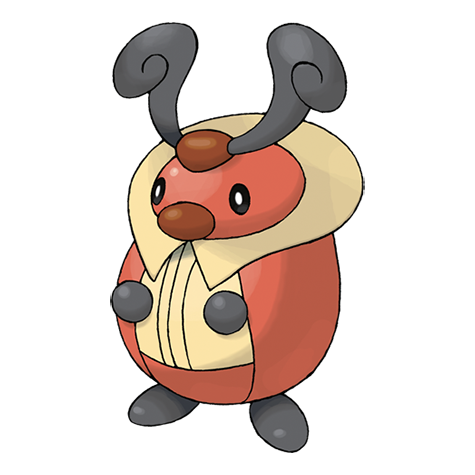 Kricketot Kricketot | DP | 3-4 | 10% | — | 20% | — |
| Swarm (post-National Dex daily announcement) | ||||||
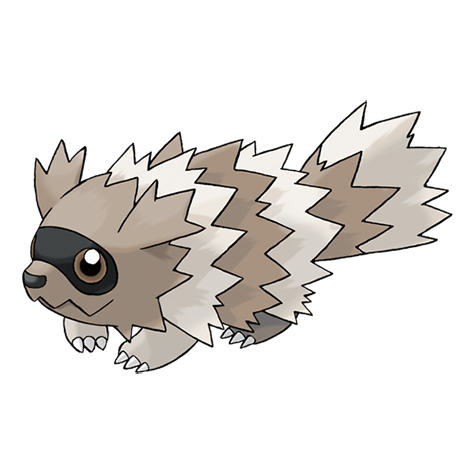 Zigzagoon Zigzagoon | DP | 3 | 40% | Post-National Dex daily swarm; replaces grass slots 0-1. | ||
| Poké Radar (post-National Dex) | ||||||
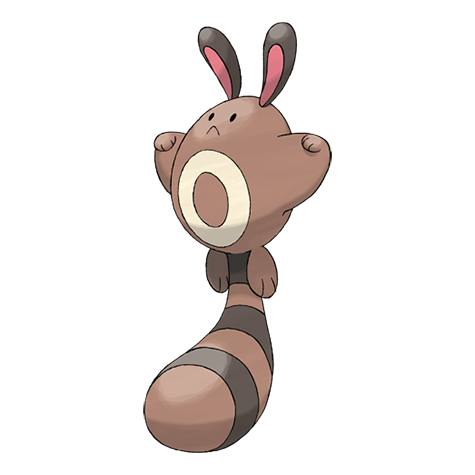 Sentret Sentret | DP | 2-4 | 22% | National Dex and Poké Radar required; replacement slot applies only in a hard/vigorous-shaking Radar patch. | ||
| Dual-slot GBA insertion (post-National Dex) | ||||||
| Growlithe | DP | 2 | 8% | National Dex plus Pokémon FireRed inserted in the Nintendo DS GBA slot; replaces grass slots 8-9. | ||
Trainers
| Trainer | Route order / placement | Full team | Reward | Access requirement | Optional / rematch note |
|---|---|---|---|---|---|
 Youngster TristanYoungster • source ID 1 Youngster TristanYoungster • source ID 1 | Route 202 • field order 1 at (166, 813) | ₽80 | Reach the trainer's named field subarea; line of sight determines whether the battle is avoidable. | Field order 1, tile (166, 813); sightline/path determines whether it can be avoided. Higher-level source variants used by the rematch system: ID 765: Lv. 19; ID 766: Lv. 31; ID 767: Lv. 40. | |
 Lass NatalieLass • source ID 3 Lass NatalieLass • source ID 3 | Route 202 • field order 2 at (181, 818) | ₽48 | Reach the trainer's named field subarea; line of sight determines whether the battle is avoidable. | Field order 2, tile (181, 818); sightline/path determines whether it can be avoided. No higher-level same-trainer rematch variant is defined in trdata. | |
| Youngster LoganYoungster • source ID 2 | Route 202 • field order 3 at (185, 804) | ₽80 | Reach the trainer's named field subarea; line of sight determines whether the battle is avoidable. | Field order 3, tile (185, 804); sightline/path determines whether it can be avoided. No higher-level same-trainer rematch variant is defined in trdata. |
Items
| Item | Version | Type | Area / exact direction | Coordinate / script | Requirement | Source |
|---|---|---|---|---|---|---|
| Potion | Diamond / Pearl | Visible item ball | Route 202: Pick up the item ball in the western part of Route 202, 7 tiles west and 2 tiles north of the nearest visible NPC. | (162, 806) | Reach this subarea; check the route and puzzle notes for HM, Bicycle, time, or story gates. | event bank 328, script 7001 |
| 5× Poké Ball | Diamond / Pearl | NPC / scripted gift | Route 202: Receive five Poke Balls from Lucas or Dawn after the Route 202 catching tutorial. | script 6 | Complete the catching demonstration on the first Route 202 visit. | script bank 393 |
Hidden Items
| Hidden item | Area / plain-English placement | QA coordinate | Requirement | Source |
|---|---|---|---|---|
| Parlyz Heal | Route 202: Use the Dowsing Machine in the northern grass patch immediately south of Jubilife's entrance. | (168, 795) | Dowsing Machine Pokétch app. Revisit after receiving the Dowsing Machine on Route 207. | event bank 328, script 8161 |
Puzzles, Warps, And Switches
- Tall-grass ledges make the route mostly one-way northbound; collect the eastern items before jumping any south-facing ledges.
Completion Checklist
- Complete the currently reachable part of this route plan: Complete the catching tutorial; catch desired early-route Pokemon; collect field and hidden items; defeat every trainer from south to north; heal before entering Jubilife.
- Review all 7 encounter rows across the per-area tables, including game markers, method band, time-of-day rates, levels, and each conditional requirement; mark conditional rows for their stated revisit.
Jubilife City, Trainer School, and Poketch
Deliver the Parcel, clear the Trainer School battles, meet Looker-free Diamond/Pearl story characters, and assemble the Poketch coupons.
Source maps
Jubilife, Jubilife Poké Mart, Jubilife Unused Gym, Jubilife Pokémon Center, Jubilife Pokémon Center 2F, Jubilife Pokétch Company 1F, Jubilife Pokétch Company 2F, Jubilife Pokétch Company 3F, Jubilife TV 1F, Jubilife TV 2F, Jubilife TV 3F, Jubilife TV 4F, Jubilife TV 2F Gallery, Jubilife TV 3F Global Rankings, Jubilife TV 3F Group Rankings, and Jubilife TV Elevator, and 16 more submaps.
Route Plan
Meet the assistant at the entrance; give Barry the Parcel in the Trainer School; defeat both schoolchildren; collect the Town Map; answer all three clown questions yes; trade the coupons for the Poketch; stock up before Route 203.
- Diamond and Pearl do not contain Looker or the Platinum Galactic opening; this section follows the original two-version sequence only.
- The Old Rod becomes available from the Route 218 gate fisherman, but that western water route is optional until Surf.
- Use the app tracker below as a whole-game checklist. Apps 23-25 are not ordinary story pickups: Matchup Checker was a limited Japanese D/P distribution, while Stopwatch and Alarm Clock were never distributed.
Routes and encounters on this page are compiled from 32 pret map headers.
Trainers
| Trainer | Route order / placement | Full team | Reward | Access requirement | Optional / rematch note |
|---|---|---|---|---|---|
 Idol GraceIdol • source ID 371 Idol GraceIdol • source ID 371 | Jubilife TV 1F • scripted | ₽1,080 | Sunday — Idol Grace only, once that day. Coal Badge and the north-Jubilife Team Galactic double battle are required before Jubilife TV opens. | Script-triggered battle; not treated as an ordinary field rematch. | |
 Reporter KinseyReporter • source ID 370 Reporter KinseyReporter • source ID 370 | Jubilife TV 1F • scripted | ₽680 | Monday — Reporter Kinsey only, once that day. Coal Badge and the north-Jubilife Team Galactic double battle are required before Jubilife TV opens. | Script-triggered battle; not treated as an ordinary field rematch. | |
 Cameraman TevinCameraman • source ID 369 Cameraman TevinCameraman • source ID 369 | Jubilife TV 1F • scripted | ₽544 | Tuesday — Cameraman Tevin only, once that day. Coal Badge and the north-Jubilife Team Galactic double battle are required before Jubilife TV opens. | Script-triggered battle; not treated as an ordinary field rematch. | |
 Clown LeeClown • source ID 460 Clown LeeClown • source ID 460 | Jubilife TV 1F • scripted | ₽408 | Wednesday — Clown Lee only, once that day. Coal Badge and the north-Jubilife Team Galactic double battle are required before Jubilife TV opens. | Script-triggered battle; not treated as an ordinary field rematch. | |
 Interviewers Roxy & OliInterviewers • source ID 368 Interviewers Roxy & OliInterviewers • source ID 368 | Jubilife TV 1F • scripted | ₽2,448 | Thursday — Interviewers Roxy & Oli only, once that day. Coal Badge and the north-Jubilife Team Galactic double battle are required before Jubilife TV opens. | Script-triggered battle; not treated as an ordinary field rematch. | |
 Poké Kid ArielPoké Kid • source ID 465 Poké Kid ArielPoké Kid • source ID 465 | Jubilife TV 1F • scripted | ₽120 | Friday — Poké Kid Ariel only, once that day. Coal Badge and the north-Jubilife Team Galactic double battle are required before Jubilife TV opens. | Script-triggered battle; not treated as an ordinary field rematch. | |
 Guitarist ArturoGuitarist • source ID 431 Guitarist ArturoGuitarist • source ID 431 | Jubilife TV 1F • scripted | ₽384 | Saturday — Guitarist Arturo only, once that day. Coal Badge and the north-Jubilife Team Galactic double battle are required before Jubilife TV opens. | Script-triggered battle; not treated as an ordinary field rematch. | |
 School Kid Male HarrisonSchool Kid Male • source ID 342 School Kid Male HarrisonSchool Kid Male • source ID 342 | Jubilife Trainer School • scripted |
| ₽120 | Scripted story trigger; complete the local objective described in the route plan. | Script-triggered battle; not treated as an ordinary field rematch. |
 School Kid Female ChristineSchool Kid Female • source ID 345 School Kid Female ChristineSchool Kid Female • source ID 345 | Jubilife Trainer School • scripted |
| ₽120 | Scripted story trigger; complete the local objective described in the route plan. | Script-triggered battle; not treated as an ordinary field rematch. |




Items
| Item | Version | Type | Area / exact direction | Coordinate / script | Requirement | Source |
|---|---|---|---|---|---|---|
| Fashion Case | Diamond / Pearl | NPC / scripted gift | Jubilife: Receive it from the Jubilife TV producer after the Team Galactic double battle north of the city. | script 4 | Return from Oreburgh, defeat the two Galactic Grunts with Lucas or Dawn, then finish the producer's conversation. | script bank 2 |
| Coupon 1 | Diamond / Pearl | NPC / scripted gift | Jubilife: Answer 'Yes' to the first Poketch campaign clown near the Pokemart. | NPC (183, 769); script 14 | Begin the Poketch coupon campaign with the company president; collect all three coupons. | script bank 2 |
| Coupon 2 | Diamond / Pearl | NPC / scripted gift | Jubilife: Answer 'Yes' to the second Poketch campaign clown outside Jubilife TV. | NPC (143, 754); script 15 | Begin the Poketch coupon campaign with the company president; collect all three coupons. | script bank 2 |
| Coupon 3 | Diamond / Pearl | NPC / scripted gift | Jubilife: Answer 'Yes' to the third Poketch campaign clown near the Poketch Company. | NPC (164, 752); script 16 | Begin the Poketch coupon campaign with the company president; collect all three coupons. | script bank 2 |
| Quick Claw | Diamond / Pearl | NPC / scripted gift | Jubilife Condominiums 1F: Speak to the item-giving NPC in the northwestern part of Jubilife Condominiums 1F, 3 tiles west and 6 tiles north of the Jubilife doorway or transition. | NPC (8, 6); script 4 | Reach Jubilife Condominiums 1F and complete the item-giving NPC's one-time dialogue. | script bank 24 |
| Focus Band | Diamond / Pearl | NPC / scripted gift | Jubilife Condominiums 4F: Speak to the item-giving NPC in the southwestern part of Jubilife Condominiums 4F, 1 tile west and 3 tiles south of the Jubilife Condominiums 3F doorway or transition. | NPC (7, 6); script 1 | Reach Jubilife Condominiums 4F and complete the item-giving NPC's one-time dialogue. | script bank 27 |
| Town Map | Diamond / Pearl | NPC / scripted gift | Jubilife Trainer School: Barry gives the spare Town Map after the player delivers his Parcel inside the Trainer School. | NPC (6, 3); script 1 | Obtain the Parcel in Twinleaf and deliver it to Barry at Jubilife Trainer School. | script bank 29 |
| TM10 | Diamond / Pearl | NPC / scripted gift | Jubilife Trainer School: Receive TM10 Hidden Power from the schoolboy after defeating both Trainer School students. | NPC (12, 4); script 9 | Defeat School Kid Harrison and School Kid Christine, then speak to the student again. | script bank 29 |
| Poketch app 01 — Digital Watch | Diamond / Pearl | Included app | Jubilife City, Trainer School, and Poketch: Included when the Poketch is obtained from the Jubilife company president after the three-clown coupon quiz. | NPC / system | Obtain the Poketch in Jubilife City. | editorial script/system note |
| Poketch app 02 — Calculator | Diamond / Pearl | Included app | Jubilife City, Trainer School, and Poketch: Included with the initial Poketch. | NPC / system | Obtain the Poketch in Jubilife City. | editorial script/system note |
| Poketch app 03 — Memo Pad | Diamond / Pearl | Company upgrade | Jubilife City, Trainer School, and Poketch: Return to the Poketch Company president in Jubilife. | NPC / system | Coal Badge obtained. | editorial script/system note |
| Poketch app 04 — Pedometer | Diamond / Pearl | Included app | Jubilife City, Trainer School, and Poketch: Included with the initial Poketch; useful for Repels, Eggs, Vs. Seeker charging, and Great Marsh steps. | NPC / system | Obtain the Poketch in Jubilife City. | editorial script/system note |
| Poketch app 05 — Pokemon List | Diamond / Pearl | Included app | Jubilife City, Trainer School, and Poketch: Included with the initial Poketch and displays the current party. | NPC / system | Obtain the Poketch in Jubilife City. | editorial script/system note |
| Poketch app 06 — Friendship Checker | Diamond / Pearl | NPC app | Jubilife City, Trainer School, and Poketch: Speak to the woman inside Eterna City's Pokemon Center. | NPC / system | Reach Eterna City. | editorial script/system note |
| Poketch app 07 — Dowsing Machine | Diamond / Pearl | Story app | Jubilife City, Trainer School, and Poketch: Lucas or Dawn gives it on Route 207 near the Route 206 junction. | NPC / system | Reach Route 207 after obtaining the Bicycle. | editorial script/system note |
| Poketch app 08 — Berry Searcher | Diamond / Pearl | NPC app | Jubilife City, Trainer School, and Poketch: Answer yes to the girl in the Berry Master's Route 208 house. | NPC / system | Reach Route 208. | editorial script/system note |
| Poketch app 09 — Day-Care Checker | Diamond / Pearl | NPC app | Jubilife City, Trainer School, and Poketch: Deposit a Pokemon, then speak to the man inside Solaceon Day Care. | NPC / system | Reach Solaceon Town and use the Day Care. | editorial script/system note |
| Poketch app 10 — Pokemon History | Diamond / Pearl | NPC app | Jubilife City, Trainer School, and Poketch: Speak to the app-giving resident in Solaceon Town. | NPC / system | Reach Solaceon Town. | editorial script/system note |
| Poketch app 11 — Counter | Diamond / Pearl | Department Store app | Jubilife City, Trainer School, and Poketch: Speak to the clerk at the counter on Veilstone Department Store 2F. | NPC / system | Reach Veilstone City. | editorial script/system note |
| Poketch app 12 — Analog Watch | Diamond / Pearl | NPC app | Jubilife City, Trainer School, and Poketch: Speak to the app-giving resident in Celestic Town. | NPC / system | Reach Celestic Town. | editorial script/system note |
| Poketch app 13 — Marking Map | Diamond / Pearl | Company upgrade | Jubilife City, Trainer School, and Poketch: Return to the Poketch Company president; tracks roaming Mesprit and Cresselia as well as placed marks. | NPC / system | Three Gym Badges obtained. | editorial script/system note |
| Poketch app 14 — Link Searcher | Diamond / Pearl | Company upgrade | Jubilife City, Trainer School, and Poketch: Return to the Poketch Company president in Jubilife. | NPC / system | Five Gym Badges obtained. | editorial script/system note |
| Poketch app 15 — Coin Toss | Diamond / Pearl | NPC app | Jubilife City, Trainer School, and Poketch: Speak to the guest in the Rock-Climb-accessed Hotel Grand Lake suite at Valor Lakefront. | NPC / system | Icicle Badge and Rock Climb. | editorial script/system note |
| Poketch app 16 — Move Tester | Diamond / Pearl | Company upgrade | Jubilife City, Trainer School, and Poketch: Return to the Poketch Company president in Jubilife. | NPC / system | Icicle Badge obtained. | editorial script/system note |
| Poketch app 17 — Calendar | Diamond / Pearl | Pokemon Rock developer app | Jubilife City, Trainer School, and Poketch: Show the Sunyshore developer a Pokemon with a Serious nature. | NPC / system | Rock Climb access to Pokemon Rock in Sunyshore City. | editorial script/system note |
| Poketch app 18 — Dot Artist | Diamond / Pearl | Pokemon Rock developer app | Jubilife City, Trainer School, and Poketch: Show the Sunyshore developer a Pokemon with a Naive nature. | NPC / system | Rock Climb access to Pokemon Rock in Sunyshore City. | editorial script/system note |
| Poketch app 19 — Roulette | Diamond / Pearl | Pokemon Rock developer app | Jubilife City, Trainer School, and Poketch: Show the Sunyshore developer a Pokemon with a Quirky nature. | NPC / system | Rock Climb access to Pokemon Rock in Sunyshore City. | editorial script/system note |
| Poketch app 20 — Trainer Counter | Diamond / Pearl | Professor Oak app | Jubilife City, Trainer School, and Poketch: Professor Oak gives it when the player enters Pal Park; it records Poke Radar chains. | NPC / system | National Dex and Pal Park access. | editorial script/system note |
| Poketch app 21 — Kitchen Timer | Diamond / Pearl | Pokemon-showing app | Jubilife City, Trainer School, and Poketch: Show Snorlax to the girl in the Pal Park lobby. | NPC / system | National Dex, Pal Park access, and Snorlax in the party. | editorial script/system note |
| Poketch app 22 — Color Changer | Diamond / Pearl | Pokemon-showing app | Jubilife City, Trainer School, and Poketch: After receiving Kitchen Timer, return and show Kecleon to the same Pal Park lobby girl. | NPC / system | Kitchen Timer obtained and Kecleon in the party. | editorial script/system note |
| Poketch app 23 — Matchup Checker | Diamond / Pearl | Limited Japanese event app | Jubilife City, Trainer School, and Poketch: Event-exclusive in Diamond/Pearl; distributed at Japanese Pokemon Center stores from April 28 through May 13, 2007. | NPC / system | Historical distribution only; unavailable through normal current retail progression. | editorial script/system note |
| Poketch app 24 — Stopwatch | Diamond / Pearl | Unreleased app | Jubilife City, Trainer School, and Poketch: Implemented in Diamond/Pearl but never distributed. | NPC / system | Unobtainable through normal legitimate play. | editorial script/system note |
| Poketch app 25 — Alarm Clock | Diamond / Pearl | Unreleased app | Jubilife City, Trainer School, and Poketch: Implemented in Diamond/Pearl but never distributed. | NPC / system | Unobtainable through normal legitimate play. | editorial script/system note |
| Jubilife TV daily lottery reward | Diamond / Pearl | Daily Trainer-ID lottery | Jubilife City, Trainer School, and Poketch: Checks trailing Trainer ID digits across party and PC: 1 digit awards an unowned Contest Backdrop, 2 PP Up, 3 Exp. Share, 4 Max Revive, and 5 Master Ball; no match gives nothing. | NPC / system | Once per day after Jubilife TV opens; traded Pokemon can supply additional Trainer IDs. | editorial script/system note |
| Old Rod | Diamond / Pearl | Key-item gift | Jubilife City, Trainer School, and Poketch: The fisherman in Jubilife's west Route 218 gatehouse gives the Old Rod after the player answers yes to his fishing question. | NPC / system | Reach Jubilife City and enter the west gatehouse; no Badge is required. | editorial script/system note |
Puzzles, Warps, And Switches
- The three clowns stand near the Poketch Company, Jubilife TV, and Pokemart. Every quiz answer is 'Yes.'
- The Trainer School opponents use X items; focus one Pokemon at a time and use the nearby Pokemon Center between fights if needed.
Completion Checklist
- Complete the currently reachable part of this route plan: Meet the assistant at the entrance; give Barry the Parcel in the Trainer School; defeat both schoolchildren; collect the Town Map; answer all three clown questions yes; trade the coupons for the Poketch; stock up before Route 203.
Route 203 and the First Barry Battle
Defeat Barry's first starter-dependent team and sweep the ridge trainers leading to Oreburgh Gate.
Source maps
Route 203.
Route Plan
Heal in Jubilife; save before walking east; defeat Barry; catch Abra or other desired route encounters; clear the upper and lower trainer paths; collect the Repel; enter Oreburgh Gate.
- Barry is named by the player; the source trainer name is a placeholder. His starter is always the type with an advantage over yours.
- Abra usually escapes with Teleport, so lead with a status move or throw a Poke Ball immediately.
Routes and encounters on this page are compiled from 1 pret map header.
Wild Pokémon
| Pokémon | Games | Levels | Rate | Requirement / notes | ||
|---|---|---|---|---|---|---|
| Morning | Day | Night | ||||
| Grass / cave floor | ||||||
| Starly | DP | 4-6 | 35% | 45% | 25% | Rate counts base slots temporarily replaced by the daily swarm, hard-shaking Poké Radar patches, and GBA dual-slot insertions. |
| Shinx | DP | 4-5 | 25% | Rate counts base slots temporarily replaced by the daily swarm. | ||
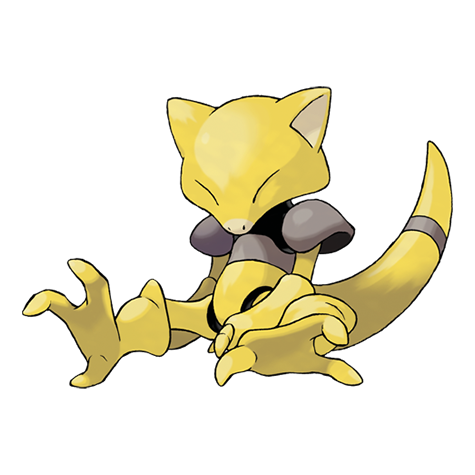 Abra Abra | DP | 4-5 | 15% | Rate counts base slots temporarily replaced by hard-shaking Poké Radar patches. | ||
| Bidoof | DP | 4-6 | 15% | Rate counts base slots temporarily replaced by hard-shaking Poké Radar patches and GBA dual-slot insertions. | ||
| Kricketot | DP | 4 | 10% | — | 10% | — |
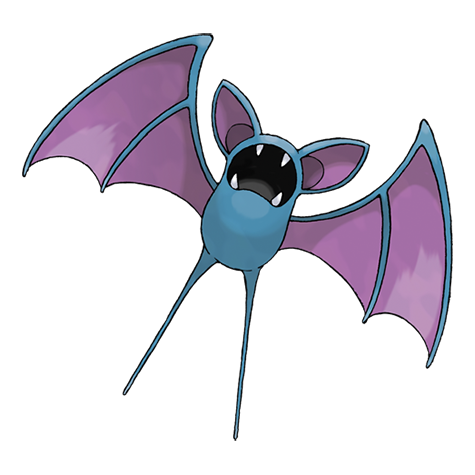 Zubat Zubat | DP | 5 | — | — | 10% | — |
| Swarm (post-National Dex daily announcement) | ||||||
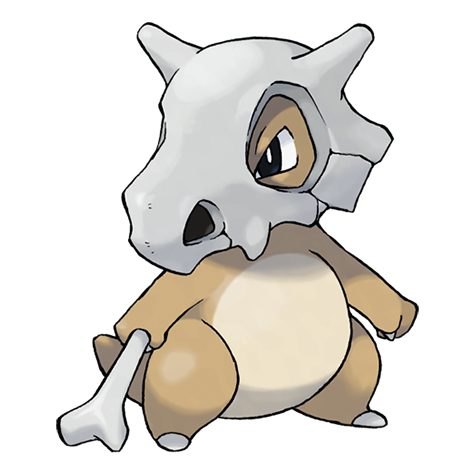 Cubone Cubone | DP | 4 | 40% | Post-National Dex daily swarm; replaces grass slots 0-1. | ||
| Poké Radar (post-National Dex) | ||||||
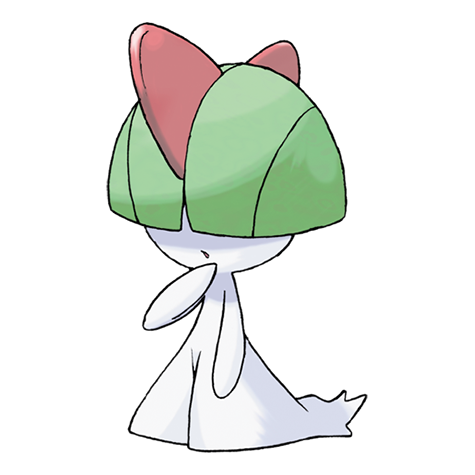 Ralts Ralts | DP | 4-6 | 21% | National Dex and Poké Radar required; replacement slot applies only in a hard/vigorous-shaking Radar patch. | ||
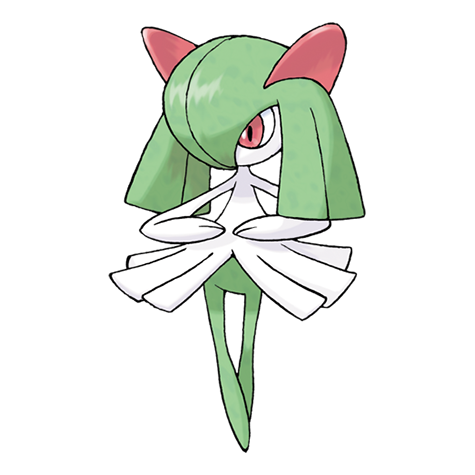 Kirlia Kirlia | DP | 6 | 1% | National Dex and Poké Radar required; replacement slot applies only in a hard/vigorous-shaking Radar patch. | ||
| Dual-slot GBA insertion (post-National Dex) | ||||||
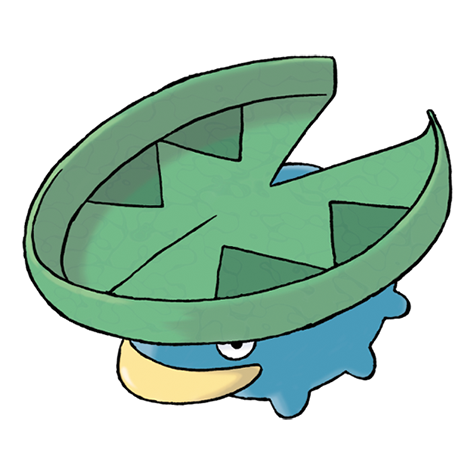 Lotad Lotad | DP | 5 | 8% | National Dex plus Pokémon Sapphire inserted in the Nintendo DS GBA slot; replaces grass slots 8-9. | ||
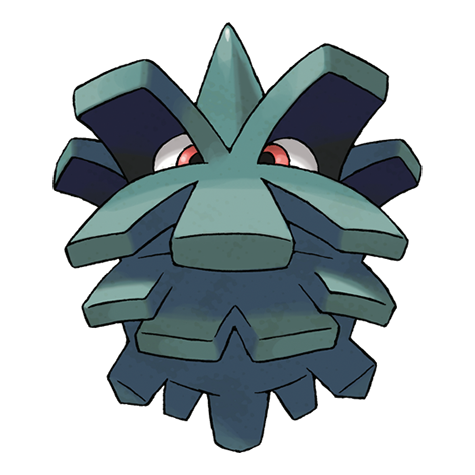 Pineco Pineco | DP | 5 | 8% | National Dex plus Pokémon Emerald inserted in the Nintendo DS GBA slot; replaces grass slots 8-9. | ||
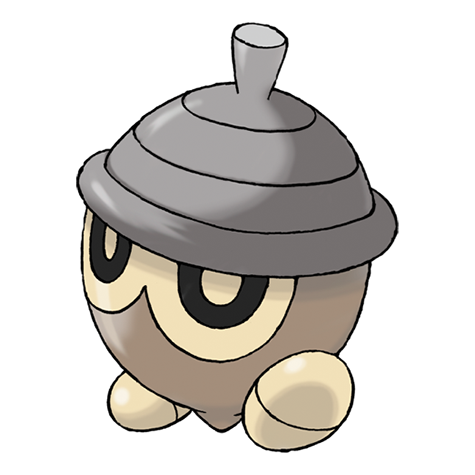 Seedot Seedot | DP | 5 | 8% | National Dex plus Pokémon Ruby inserted in the Nintendo DS GBA slot; replaces grass slots 8-9. | ||
| Surfing | ||||||
| Psyduck | DP | 20-40 | 90% | — | ||
| Golduck | DP | 20-40 | 10% | — | ||
| Fishing — Old Rod | ||||||
| Magikarp | DP | 3-10 | 100% | — | ||
| Fishing — Good Rod | ||||||
| Magikarp | DP | 10-25 | 55% | — | ||
| Goldeen | DP | 10-25 | 45% | — | ||
| Fishing — Super Rod | ||||||
| Gyarados | DP | 30-55 | 55% | — | ||
| Seaking | DP | 20-50 | 45% | — | ||
Trainers
| Trainer | Route order / placement | Full team | Reward | Access requirement | Optional / rematch note |
|---|---|---|---|---|---|
| Youngster SebastianYoungster • source ID 356 | Route 203 • field order 1 at (245, 756) |
| ₽112 | Reach the trainer's named field subarea; line of sight determines whether the battle is avoidable. | Field order 1, tile (245, 756); sightline/path determines whether it can be avoided. No higher-level same-trainer rematch variant is defined in trdata. |
| Youngster MichaelYoungster • source ID 4 | Route 203 • field order 2 at (204, 750) | ₽80 | Reach the trainer's named field subarea; line of sight determines whether the battle is avoidable. | Field order 2, tile (204, 750); sightline/path determines whether it can be avoided. No higher-level same-trainer rematch variant is defined in trdata. | |
| Lass KaitlinLass • source ID 323 | Route 203 • field order 3 at (234, 757) | ₽64 | Reach the trainer's named field subarea; line of sight determines whether the battle is avoidable. | Field order 3, tile (234, 757); sightline/path determines whether it can be avoided. No higher-level same-trainer rematch variant is defined in trdata. | |
| Youngster DallasYoungster • source ID 355 | Route 203 • field order 4 at (222, 756) | ₽112 | Reach the trainer's named field subarea; line of sight determines whether the battle is avoidable. | Field order 4, tile (222, 756); sightline/path determines whether it can be avoided. Higher-level source variants used by the rematch system: ID 768: Lv. 19; ID 769: Lv. 31; ID 770: Lv. 55. | |
| Lass MadelineLass • source ID 322 | Route 203 • field order 5 at (240, 748) | ₽80 | Reach the trainer's named field subarea; line of sight determines whether the battle is avoidable. | Field order 5, tile (240, 748); sightline/path determines whether it can be avoided. Higher-level source variants used by the rematch system: ID 706: Lv. 17/Lv. 17; ID 707: Lv. 29/Lv. 29; ID 708: Lv. 38/Lv. 38. | |
| Pokémon Trainer BarryPokémon Trainer Barry • source ID 247 | Route 203 • scripted | ₽900 | Scripted story trigger; complete the local objective described in the route plan. | Major or story battle; not a VS Seeker rematch row. | |
| Pokémon Trainer BarryPokémon Trainer Barry • source ID 248 | Route 203 • scripted | ₽900 | Scripted story trigger; complete the local objective described in the route plan. | Major or story battle; not a VS Seeker rematch row. | |
| Pokémon Trainer BarryPokémon Trainer Barry • source ID 249 | Route 203 • scripted | ₽900 | Scripted story trigger; complete the local objective described in the route plan. | Major or story battle; not a VS Seeker rematch row. |
Items
| Item | Version | Type | Area / exact direction | Coordinate / script | Requirement | Source |
|---|---|---|---|---|---|---|
| Repel | Diamond / Pearl | Visible item ball | Route 203: Pick up the item ball in the northern part of Route 203, 24 tiles west and 4 tiles north of the Oreburgh Gate 1F doorway or transition. | (222, 745) | Reach this subarea; check the route and puzzle notes for HM, Bicycle, time, or story gates. | event bank 329, script 7003 |
| Poké Ball | Diamond / Pearl | Visible item ball | Route 203: Pick up the item ball in the central part of Route 203, 35 tiles west and 1 tile south of the Oreburgh Gate 1F doorway or transition. | (211, 750) | Reach this subarea; check the route and puzzle notes for HM, Bicycle, time, or story gates. | event bank 329, script 7004 |
Puzzles, Warps, And Switches
- The northern ledge route and southern grass route reconnect before the cave. Sweep both branches before jumping the final ledge if completing every trainer and item.
Completion Checklist
- Complete the currently reachable part of this route plan: Heal in Jubilife; save before walking east; defeat Barry; catch Abra or other desired route encounters; clear the upper and lower trainer paths; collect the Repel; enter Oreburgh Gate.
- Review all 19 encounter rows across the per-area tables, including game markers, method band, time-of-day rates, levels, and each conditional requirement; mark conditional rows for their stated revisit.
Oreburgh Gate
Receive HM06 Rock Smash, cross the entrance floor, and mark the basement's Bicycle, Surf, and late-HM obstacles for cleanup.
Source maps
Oreburgh Gate 1F and Oreburgh Gate B1F.
Route Plan
Talk to the Hiker for HM06; defeat both mandatory trainers; collect reachable items; continue east to Oreburgh; return after the Coal Badge to use Rock Smash and revisit again with the Bicycle and Surf.
- Receiving Rock Smash is not enough: the Coal Badge is required before the field move works.
- The basement deliberately contains rewards gated by multiple later abilities; the page should label each item by its earliest access point.
Routes and encounters on this page are compiled from 2 pret map headers.
Oreburgh Gate 1F
| Pokémon | Games | Levels | Rate | Requirement / notes | ||
|---|---|---|---|---|---|---|
| Morning | Day | Night | ||||
| Grass / cave floor | ||||||
| Geodude | DP | 4-8 | 80% | — | ||
| Zubat | DP | 6 | 20% | — | ||
Oreburgh Gate B1F
| Pokémon | Games | Levels | Rate | Requirement / notes | ||
|---|---|---|---|---|---|---|
| Morning | Day | Night | ||||
| Grass / cave floor | ||||||
| Zubat | DP | 8-10 | 60% | — | ||
| Psyduck | DP | 8-10 | 30% | — | ||
| Geodude | DP | 9 | 10% | — | ||
| Surfing | ||||||
| Zubat | DP | 20-30 | 60% | — | ||
| Psyduck | DP | 20-30 | 30% | — | ||
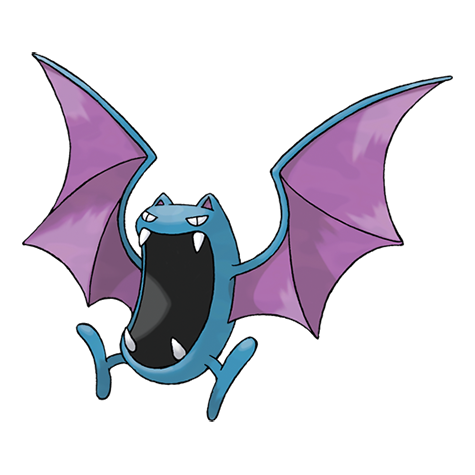 Golbat Golbat | DP | 20-40 | 5% | — | ||
| Golduck | DP | 20-40 | 5% | — | ||
| Fishing — Old Rod | ||||||
| Magikarp | DP | 3-10 | 100% | — | ||
| Fishing — Good Rod | ||||||
| Magikarp | DP | 10-25 | 55% | — | ||
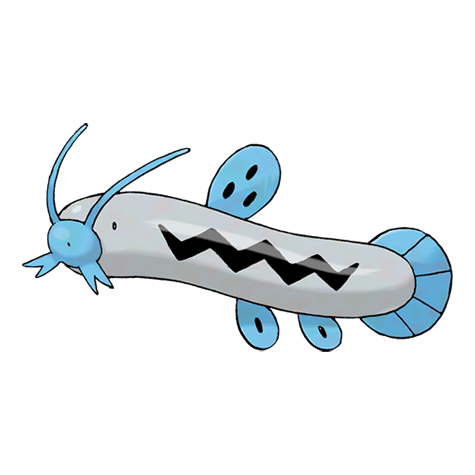 Barboach Barboach | DP | 10-25 | 45% | — | ||
| Fishing — Super Rod | ||||||
| Gyarados | DP | 30-55 | 55% | — | ||
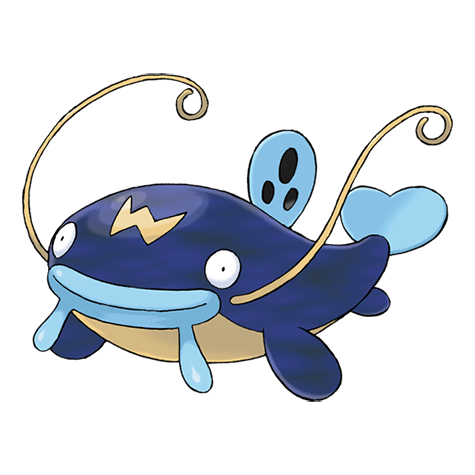 Whiscash Whiscash | DP | 20-50 | 45% | — | ||
Trainers
| Trainer | Route order / placement | Full team | Reward | Access requirement | Optional / rematch note |
|---|---|---|---|---|---|
 Picnicker DianaPicnicker • source ID 329 Picnicker DianaPicnicker • source ID 329 | Oreburgh Gate 1F • field order 1 at (24, 21) | ₽80 | Reach the trainer's named field subarea; line of sight determines whether the battle is avoidable. | Field order 1, tile (24, 21); sightline/path determines whether it can be avoided. No higher-level same-trainer rematch variant is defined in trdata. | |
 Camper CurtisCamper • source ID 265 Camper CurtisCamper • source ID 265 | Oreburgh Gate 1F • field order 2 at (17, 25) | ₽112 | Reach the trainer's named field subarea; line of sight determines whether the battle is avoidable. | Field order 2, tile (17, 25); sightline/path determines whether it can be avoided. No higher-level same-trainer rematch variant is defined in trdata. | |
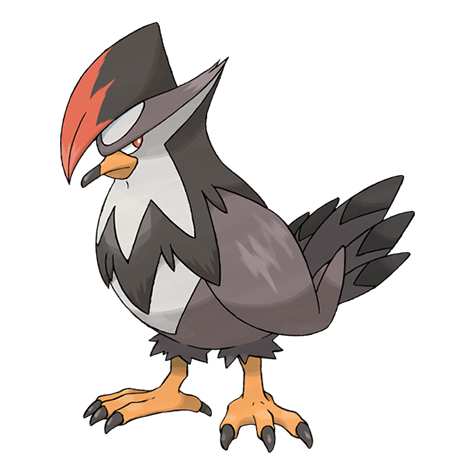
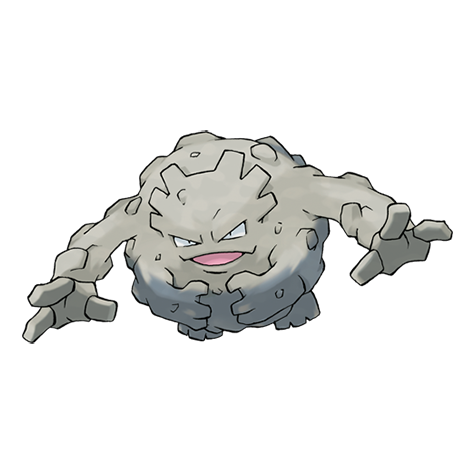
 Veteran GrantVeteran • source ID 240 Veteran GrantVeteran • source ID 240 | Oreburgh Gate B1F • field order 1 at (13, 17) | ₽2,800 | Relic Badge and Surf are required to cross Oreburgh Gate B1F's water and reach Veteran Grant. | Field order 1, tile (13, 17); sightline/path determines whether it can be avoided. No higher-level same-trainer rematch variant is defined in trdata. |
Items
| Item | Version | Type | Area / exact direction | Coordinate / script | Requirement | Source |
|---|---|---|---|---|---|---|
| TM01 | Diamond / Pearl | Visible item ball | Oreburgh Gate B1F: At the far-left end of the basement beyond Veteran Grant's water-side area. | (8, 9) | Coal Badge, Rock Smash, Relic Badge and Surf, then Mine Badge and Strength. | event bank 251, script 7005 |
| Earth Plate | Diamond / Pearl | Visible item ball | Oreburgh Gate B1F: At the far-left end of the basement, beyond the water and Strength boulder route. | (7, 21) | Coal Badge, Rock Smash, Relic Badge and Surf, then Mine Badge and Strength. | event bank 251, script 7008 |
| TM31 | Diamond / Pearl | Visible item ball | Oreburgh Gate B1F: Left of the basement jump ramps. | (23, 10) | Coal Badge and Rock Smash, plus either the Bicycle ramp route or Surf. | event bank 251, script 7006 |
| TM70 | Diamond / Pearl | Visible item ball | Oreburgh Gate B1F: On the right side of the basement floor beyond the first breakable-rock route. | (57, 12) | Coal Badge and Rock Smash. | event bank 251, script 7007 |
| Stardust | Diamond / Pearl | Visible item ball | Oreburgh Gate B1F: On the ledge north of the Bicycle ramp closest to the basement entrance. | (41, 11) | Coal Badge and Rock Smash. | event bank 251, script 7009 |
| HM06 Rock Smash | Diamond / Pearl | Gift | Oreburgh Gate: Given by the Hiker near the western entrance; field use unlocks with the Coal Badge. | NPC / system | See the route plan. | editorial script/system note |
Puzzles, Warps, And Switches
- On the first visit, ignore blocked rocks and the bicycle slope. After Roark, smash the nearest rocks for the first basement pocket without treating the whole basement as complete.
Completion Checklist
- Complete the currently reachable part of this route plan: Talk to the Hiker for HM06; defeat both mandatory trainers; collect reachable items; continue east to Oreburgh; return after the Coal Badge to use Rock Smash and revisit again with the Bicycle and Surf.
- Review all 14 encounter rows across the per-area tables, including game markers, method band, time-of-day rates, levels, and each conditional requirement; mark conditional rows for their stated revisit.
Oreburgh City and Oreburgh Mine
Tour the mining city, find Roark underground, collect mine items, and prepare a team for Cranidos.
Source maps
Oreburgh, Oreburgh Poké Mart, Oreburgh Pokémon Center, Oreburgh Pokémon Center 2F, Oreburgh Northwest House 1F, Oreburgh Northwest House 2F, Oreburgh Northwest House 3F, Oreburgh Northwest House 4F, Oreburgh North House 1F, Oreburgh North House 2F, Oreburgh North House 3F, Oreburgh North House 4F, Oreburgh Middle House, Oreburgh Mining Museum, Oreburgh West House, and Oreburgh East House 1F, and 7 more submaps.
Route Plan
Visit the Pokemon Center and Mart; collect city gifts; follow the worker south into Oreburgh Mine; clear both floors; speak to Roark at the breakable rock; return to the Gym after his demonstration.
- The Mining Museum revives fossils later; it cannot provide a fossil Pokemon until the Underground is unlocked and a fossil is excavated.
- Machop on Route 207 and the player's Grass- or Water-type starter are straightforward Roark answers.
Routes and encounters on this page are compiled from 23 pret map headers.
Oreburgh Mine B1F
| Pokémon | Games | Levels | Rate | Requirement / notes | ||
|---|---|---|---|---|---|---|
| Morning | Day | Night | ||||
| Grass / cave floor | ||||||
| Geodude | DP | 5-7 or 9 | 70% | — | ||
| Zubat | DP | 7 | 20% | — | ||
| Onix | DP | 8 | 10% | — | ||
Oreburgh Mine B2F
| Pokémon | Games | Levels | Rate | Requirement / notes | ||
|---|---|---|---|---|---|---|
| Morning | Day | Night | ||||
| Grass / cave floor | ||||||
| Geodude | DP | 6-8 or 10 | 70% | — | ||
| Zubat | DP | 8 | 20% | — | ||
| Onix | DP | 9 | 10% | — | ||
Oreburgh North House 1F
| Pokémon | Games | Levels | Rate | Requirement / notes | ||
|---|---|---|---|---|---|---|
| Morning | Day | Night | ||||
| In-game trade | ||||||
| Abra | DP | Matches traded Pokémon | Guaranteed trade | Trade Machop to the local NPC to receive Abra; trade ID 0. Its nickname is Kazza and its original Trainer is Hilary. It arrives holding Oran Berry. Fixed IVs: hp 15, attack 15, defense 15, speed 20, special attack 25, special defense 25. OT language flag: Japanese. | ||
Trainers
| Trainer | Route order / placement | Full team | Reward | Access requirement | Optional / rematch note |
|---|---|---|---|---|---|
 Worker ColinWorker • source ID 195 Worker ColinWorker • source ID 195 | Oreburgh Mine B2F • field order 1 at (8, 28) | ₽280 | Reach the trainer's named field subarea; line of sight determines whether the battle is avoidable. | Field order 1, tile (8, 28); sightline/path determines whether it can be avoided. No higher-level same-trainer rematch variant is defined in trdata. | |
| Worker MasonWorker • source ID 196 | Oreburgh Mine B2F • field order 2 at (26, 20) |
| ₽360 | Reach the trainer's named field subarea; line of sight determines whether the battle is avoidable. | Field order 2, tile (26, 20); sightline/path determines whether it can be avoided. No higher-level same-trainer rematch variant is defined in trdata. |
Items
| Item | Version | Type | Area / exact direction | Coordinate / script | Requirement | Source |
|---|---|---|---|---|---|---|
| X Defense | Diamond / Pearl | Visible item ball | Oreburgh Mine B1F: Pick up the item ball in the northeastern part of Oreburgh Mine B1F, 6 tiles east and 3 tiles south of the Oreburgh doorway or transition. | (19, 4) | Reach this subarea; check the route and puzzle notes for HM, Bicycle, time, or story gates. | event bank 196, script 7011 |
| Escape Rope | Diamond / Pearl | Visible item ball | Oreburgh Mine B2F: Pick up the item ball in the southwestern part of Oreburgh Mine B2F, 11 tiles west and 27 tiles south of the Oreburgh Mine B1F doorway or transition. | (4, 28) | Reach this subarea; check the route and puzzle notes for HM, Bicycle, time, or story gates. | event bank 197, script 7012 |
| Potion | Diamond / Pearl | Visible item ball | Oreburgh Mine B2F: Pick up the item ball in the southeastern part of Oreburgh Mine B2F, 11 tiles east and 23 tiles south of the Oreburgh Mine B1F doorway or transition. | (26, 24) | Reach this subarea; check the route and puzzle notes for HM, Bicycle, time, or story gates. | event bank 197, script 7013 |
| Super Potion | Diamond / Pearl | NPC / scripted gift | Oreburgh: Speak to the item-giving NPC in the southeastern part of Oreburgh, 8 tiles east and 2 tiles north of the Oreburgh Mine B1F doorway or transition. | NPC (312, 793); script 7 | Reach Oreburgh and complete the item-giving NPC's one-time dialogue. | script bank 48 |
| Dusk Ball | Diamond / Pearl | NPC / scripted gift | Oreburgh Northwest House 2F: Speak to the item-giving NPC in the central part of Oreburgh Northwest House 2F, 3 tiles west and 2 tiles south of the Oreburgh Northwest House 1F doorway or transition. | NPC (5, 5); script 3 | Reach Oreburgh Northwest House 2F and complete the item-giving NPC's one-time dialogue. | script bank 55 |
| Hard Stone | Diamond / Pearl | NPC / scripted gift | Oreburgh Northwest House 3F: Speak to the item-giving NPC in the southwestern part of Oreburgh Northwest House 3F, 4 tiles west and 9 tiles south of the Oreburgh Northwest House 2F doorway or transition. | NPC (4, 12); script 1 | Reach Oreburgh Northwest House 3F and complete the item-giving NPC's one-time dialogue. | script bank 56 |
| Heal Ball | Diamond / Pearl | NPC / scripted gift | Oreburgh North House 2F: Show the man on Oreburgh North House 2F a Zubat to receive the Heal Ball. | NPC (14, 5); script 3 | Bring Zubat in the party; the Geodude request belongs to Platinum and does not apply to Diamond/Pearl. | script bank 59 |
| Great Ball | Diamond / Pearl | NPC / scripted gift | Oreburgh East House 2F: Speak to the item-giving NPC in the southwestern part of Oreburgh East House 2F, 3 tiles west and 5 tiles south of the Oreburgh East House 1F doorway or transition. | NPC (5, 8); script 2 | Reach Oreburgh East House 2F and complete the item-giving NPC's one-time dialogue. | script bank 66 |
| Pal Pad | Diamond / Pearl | Key-item gift | Oreburgh City and Oreburgh Mine: Teala gives it on the first eligible visit to a Pokemon Center basement; Oreburgh is the first basement opened in normal progression. | NPC / system | Reach Oreburgh and enter Pokemon Center B1F for the first time. | editorial script/system note |
Hidden Items
| Hidden item | Area / plain-English placement | QA coordinate | Requirement | Source |
|---|---|---|---|---|
| Stardust | Oreburgh: Use the Dowsing Machine in the central part of Oreburgh, 16 tiles west of the Oreburgh South House doorway or transition and inspect that exact ground tile. | (291, 772) | Dowsing Machine Pokétch app. Reach this subarea; check the route and puzzle notes for HM, Bicycle, time, or story gates. | event bank 44, script 8087 |
Puzzles, Warps, And Switches
- Take the mine's outer loop on B2F to reach Roark, then finish the inner trainers and items before leaving so no one-way ledge creates a second trip.
Completion Checklist
- Complete the currently reachable part of this route plan: Visit the Pokemon Center and Mart; collect city gifts; follow the worker south into Oreburgh Mine; clear both floors; speak to Roark at the breakable rock; return to the Gym after his demonstration.
- Review all 7 encounter rows across the per-area tables, including game markers, method band, time-of-day rates, levels, and each conditional requirement; mark conditional rows for their stated revisit.
Oreburgh Gym and Roark
Clear the raised walkway or fight both Gym trainers, then defeat Roark for the Coal Badge.
Source maps
Oreburgh Gym.
Route Plan
Train the main team near Lv. 12-14; fight both Gym trainers for experience; lead with a reliable Geodude and Onix answer; keep a healthy Water, Grass, Fighting, or Ground attacker for Cranidos.
- Cranidos hits far harder than the first two Pokemon and can punish slow setup; preserve the strongest super-effective attacker for it.
- Roark's Badge enables Rock Smash in the field and opens the westbound return through Oreburgh Gate.
Routes and encounters on this page are compiled from 1 pret map header.
Trainers
| Trainer | Route order / placement | Full team | Reward | Access requirement | Optional / rematch note |
|---|---|---|---|---|---|
| Youngster JonathonYoungster • source ID 244 | Oreburgh Gym • field order 1 at (4, 18) |
| ₽160 | Reach the trainer's named field subarea; line of sight determines whether the battle is avoidable. | Field order 1, tile (4, 18); sightline/path determines whether it can be avoided. No higher-level same-trainer rematch variant is defined in trdata. |
| Youngster DariusYoungster • source ID 245 | Oreburgh Gym • field order 2 at (7, 11) | ₽128 | Reach the trainer's named field subarea; line of sight determines whether the battle is avoidable. | Field order 2, tile (7, 11); sightline/path determines whether it can be avoided. No higher-level same-trainer rematch variant is defined in trdata. | |
| Leader RoarkLeader Roark • source ID 246 | Oreburgh Gym • scripted | ₽1,680 | Scripted story trigger; complete the local objective described in the route plan. | Major or story battle; not a VS Seeker rematch row. |
Items
| Item | Version | Type | Area / exact direction | Coordinate / script | Requirement | Source |
|---|---|---|---|---|---|---|
| TM76 | Diamond / Pearl | NPC / scripted gift | Oreburgh Gym: Receive this TM from the Gym Leader immediately after the badge victory. | NPC (5, 3); script 1 | Defeat the Gym Leader; this is part of the one-time badge reward. | script bank 50 |
Puzzles, Warps, And Switches
- The upper conveyor walkway bypasses the two Gym trainers, but a completion route should descend and battle both before taking the center stairs to Roark.
Completion Checklist
- Complete the currently reachable part of this route plan: Train the main team near Lv. 12-14; fight both Gym trainers for experience; lead with a reliable Geodude and Onix answer; keep a healthy Water, Grass, Fighting, or Ground attacker for Cranidos.
Dex quick links