
Phase 2 of 11


Pokemon Diamond and Pearl Phase 2: Forest Badge Walkthrough
 Forest Badge
 Return through Jubilife, break Team Galactic's Windworks operation, cross Eterna Forest, and challenge Gardenia. 8 detailed sections with Diamond/Pearl encounters, trainers, items, puzzles, boss teams, and checklists.
Phase 2 Forest Badge Route 204, Floaroma, Valley Windworks, Eterna Forest, Eterna City, and Gardenia. 02 / 11 
Phase Snapshot
Phase 2: Forest Badge
Return through Jubilife, break Team Galactic's Windworks operation, cross Eterna Forest, and challenge Gardenia.
Data rows
Phase Sections
Major Battles And Partners
 Galactic GruntGalactic • source ID 414
Full team
 ZubatLeech Life / Astonish
Danger notes
Review the explicit team, levels, held items, and moves below before triggering the battle.
Practical counters
Bring healthy answers to the team's shared weaknesses and avoid entering with unresolved status or depleted PP.
Galactic GruntGalactic • source ID 415Full team
Danger notes
Review the explicit team, levels, held items, and moves below before triggering the battle.
Practical counters
Bring healthy answers to the team's shared weaknesses and avoid entering with unresolved status or depleted PP.
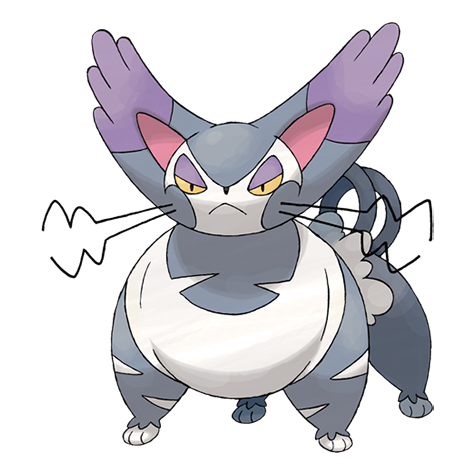
 Commander MarsCommander Mars • source ID 295
Full team
Danger notes
Purugly is unusually fast and powerful for this point and can snowball after the easier Zubat.
Practical counters
Fighting damage is ideal. Use Intimidate, status, or a sturdy Rock/Steel pivot if the direct knockout is unavailable.
 Leader GardeniaLeader Gardenia • source ID 315
Full team
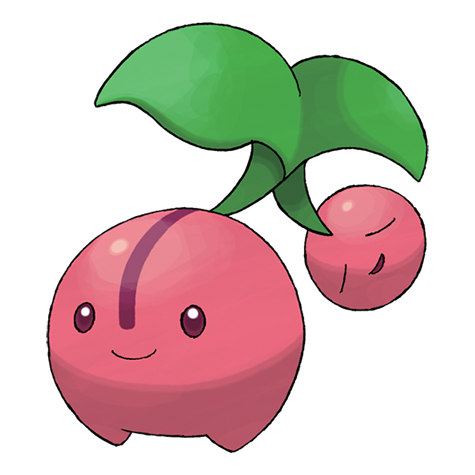 CherubiGrass Knot / Leech Seed / Growth / Safeguard
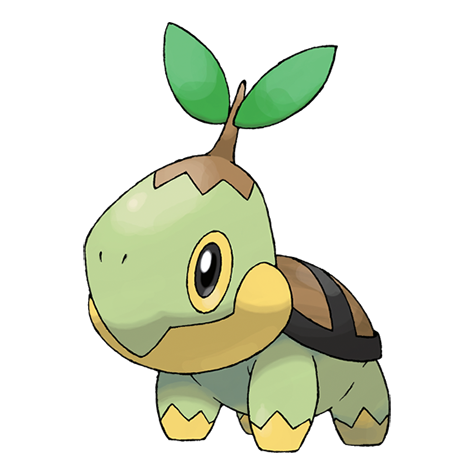 TurtwigGrass Knot / Razor Leaf / Withdraw / Reflect
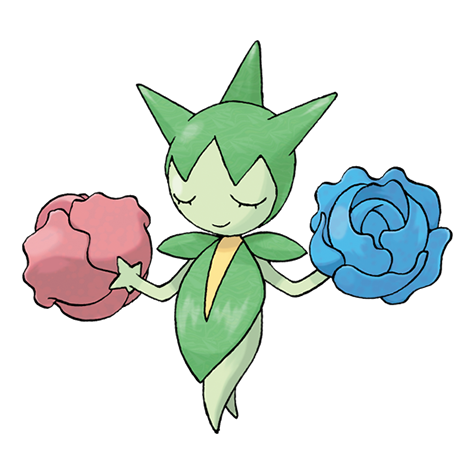
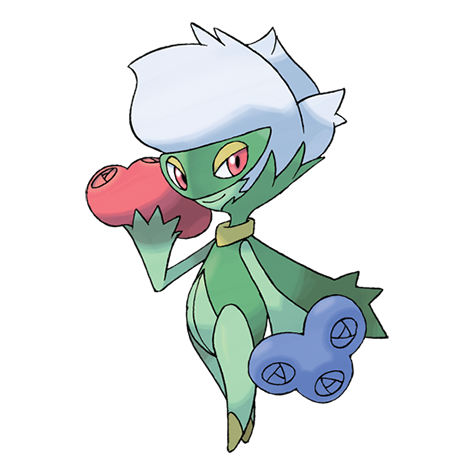 Roseradeholds Sitrus Berry • Grass Knot / Magical Leaf / Poison Sting / Stun Spore
Danger notes
Roserade is much faster and stronger than the two setup members and can punish neutral targets.
Practical counters
Flying, Fire, Ice, Bug, or Poison pressure works. Staravia, Monferno, Ponyta, and Golbat are practical answers.
 Pokémon Trainer LucasPokémon Trainer Lucas • source ID 613
Partner team
- TurtwigAbsorb / Tackle
Partner role
Lucas joins the player for this scripted Galactic double battle; the displayed team branch depends on the player character and starter allocation. Only one of the listed partner branches applies to a save.
How to use the partner
Focus both allied attacks on one Grunt to cut the opposing action count. This is a one-scene ally battle, not a repeatable trainer fight or healing escort.
Pokémon Trainer LucasPokémon Trainer Lucas • source ID 614Partner team
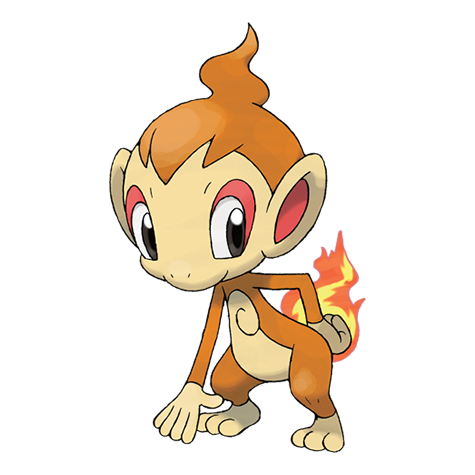 ChimcharEmber / Scratch
Partner role
Lucas joins the player for this scripted Galactic double battle; the displayed team branch depends on the player character and starter allocation. Only one of the listed partner branches applies to a save.
How to use the partner
Focus both allied attacks on one Grunt to cut the opposing action count. This is a one-scene ally battle, not a repeatable trainer fight or healing escort.
Pokémon Trainer LucasPokémon Trainer Lucas • source ID 615Partner team
 PiplupBubble / Pound
Partner role
Lucas joins the player for this scripted Galactic double battle; the displayed team branch depends on the player character and starter allocation. Only one of the listed partner branches applies to a save.
How to use the partner
Focus both allied attacks on one Grunt to cut the opposing action count. This is a one-scene ally battle, not a repeatable trainer fight or healing escort.
 Pokémon Trainer DawnPokémon Trainer Dawn • source ID 616
Partner team
- TurtwigAbsorb / Tackle
Partner role
Dawn joins the player for this scripted Galactic double battle; the displayed team branch depends on the player character and starter allocation. Only one of the listed partner branches applies to a save.
How to use the partner
Focus both allied attacks on one Grunt to cut the opposing action count. This is a one-scene ally battle, not a repeatable trainer fight or healing escort.
Pokémon Trainer DawnPokémon Trainer Dawn • source ID 617Partner team
- ChimcharEmber / Scratch
Partner role
Dawn joins the player for this scripted Galactic double battle; the displayed team branch depends on the player character and starter allocation. Only one of the listed partner branches applies to a save.
How to use the partner
Focus both allied attacks on one Grunt to cut the opposing action count. This is a one-scene ally battle, not a repeatable trainer fight or healing escort.
Pokémon Trainer DawnPokémon Trainer Dawn • source ID 618Partner team
- PiplupBubble / Pound
Partner role
Dawn joins the player for this scripted Galactic double battle; the displayed team branch depends on the player character and starter allocation. Only one of the listed partner branches applies to a save.
How to use the partner
Focus both allied attacks on one Grunt to cut the opposing action count. This is a one-scene ally battle, not a repeatable trainer fight or healing escort.
 Pokémon Trainer CherylPokémon Trainer Cheryl • source ID 608
Partner team
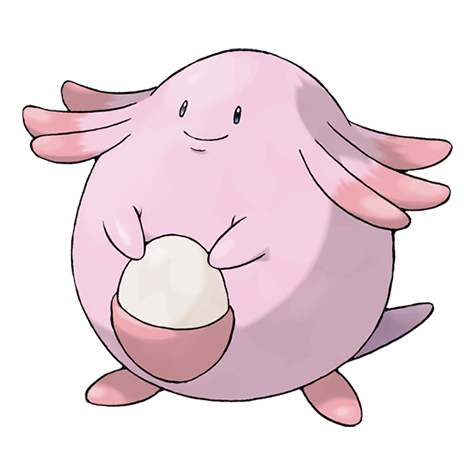 ChanseyEgg Bomb / Soft Boiled / Refresh
Partner role
This stat trainer travels beside the player, turns eligible fights into doubles, and heals the party after each battle during the escort.
How to use the partner
Focus one opposing Pokémon to reduce incoming actions. In wild doubles, leave only the intended catch on the field before throwing a Ball.
Data Coverage
This phase owns 37 Diamond/Pearl source maps and publishes 138 encounter rows, 38 trainer rows, 54 visible/scripted items, and 16 hidden-item rows. Counts include explicit starter/rival branches and curated systems but never substitute Platinum encounters or story maps.
Route 204 and Ravaged Path
Win the Jubilife double battle, use Rock Smash through Ravaged Path, and clear both halves of Route 204.
Source maps
Ravaged Path, Route 204 South, and Route 204 North.
Route Plan
Return to Jubilife; defeat the Galactic Grunts with Lucas or Dawn; receive the Fashion Case; clear Route 204 south; smash through Ravaged Path; sweep Route 204 north; enter Floaroma.
- The assistant's trainer branch depends on player gender and starter allocation; list all six source IDs but render only the matching partner team as applicable.
- Ravaged Path's Surf-only western pocket is late cleanup and must be marked, not implied accessible now.
Routes and encounters on this page are compiled from 3 pret map headers.
Ravaged Path
| Pokémon | Games | Levels | Rate | Requirement / notes | ||
|---|---|---|---|---|---|---|
| Morning | Day | Night | ||||
| Grass / cave floor | ||||||
| Zubat | DP | 4-6 | 78% | — | ||
 Geodude Geodude | DP | 5 | 20% | — | ||
 Psyduck Psyduck | DP | 5 | 2% | — | ||
| Surfing | ||||||
| Zubat | DP | 20-30 | 60% | — | ||
| Psyduck | DP | 20-30 | 30% | — | ||
 Golbat Golbat | DP | 20-40 | 5% | — | ||
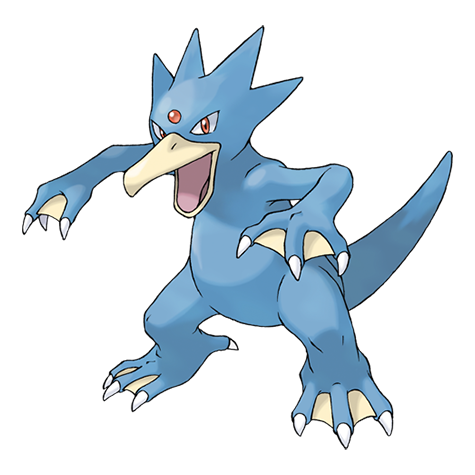 Golduck Golduck | DP | 20-40 | 5% | — | ||
| Fishing — Old Rod | ||||||
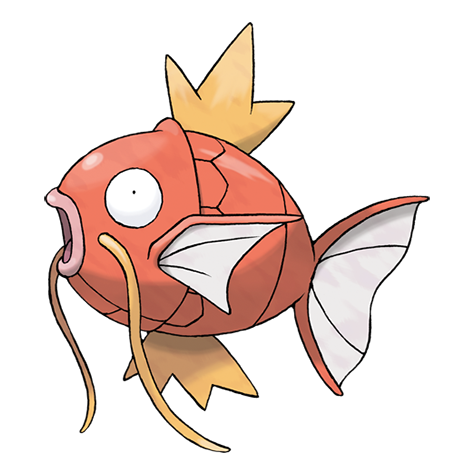 Magikarp Magikarp | DP | 3-10 | 100% | — | ||
| Fishing — Good Rod | ||||||
| Magikarp | DP | 10-25 | 55% | — | ||
 Barboach Barboach | DP | 10-25 | 45% | — | ||
| Fishing — Super Rod | ||||||
 Gyarados Gyarados | DP | 30-55 | 55% | — | ||
 Whiscash Whiscash | DP | 20-50 | 45% | — | ||
Route 204 North
| Pokémon | Games | Levels | Rate | Requirement / notes | ||
|---|---|---|---|---|---|---|
| Morning | Day | Night | ||||
| Grass / cave floor | ||||||
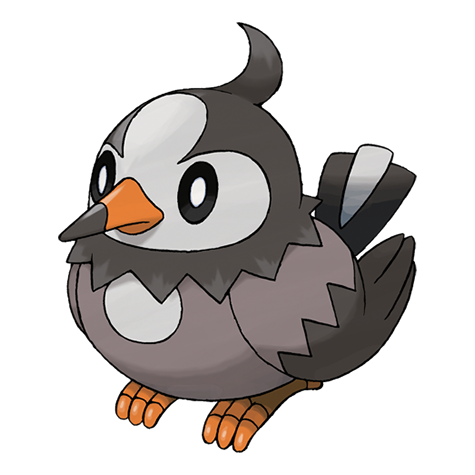 Starly Starly | DP | 6 or 8 | 25% | 35% | 25% | Rate counts base slots temporarily replaced by hard-shaking Poké Radar patches and GBA dual-slot insertions. |
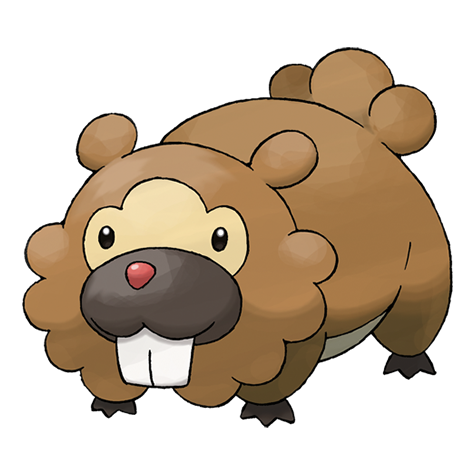 Bidoof Bidoof | DP | 6 or 8 | 25% | Rate counts base slots temporarily replaced by hard-shaking Poké Radar patches and GBA dual-slot insertions. | ||
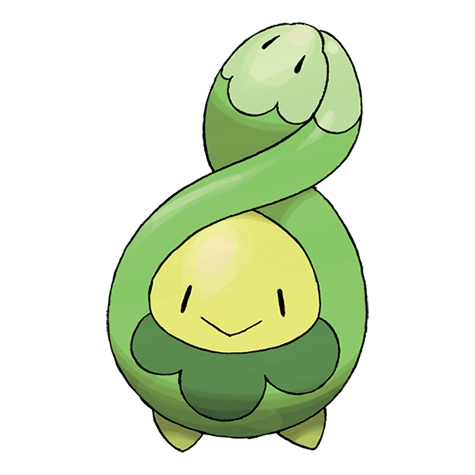 Budew Budew | DP | 6-7 | 25% | 25% | 15% | Rate counts base slots temporarily replaced by hard-shaking Poké Radar patches. |
 Shinx Shinx | DP | 6-7 | 15% | Rate counts base slots temporarily replaced by hard-shaking Poké Radar patches. | ||
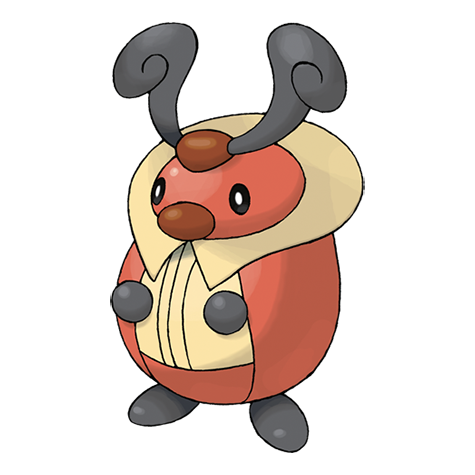 Kricketot Kricketot | DP | 6 | 10% | — | 10% | — |
| Zubat | DP | 6 | — | — | 10% | — |
| Poké Radar (post-National Dex) | ||||||
 Sunkern Sunkern | DP | 6 or 8 | 22% | National Dex and Poké Radar required; replacement slot applies only in a hard/vigorous-shaking Radar patch. | ||
| Dual-slot GBA insertion (post-National Dex) | ||||||
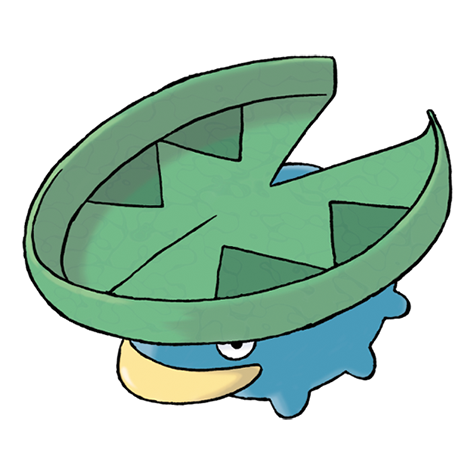 Lotad Lotad | DP | 8 | 8% | National Dex plus Pokémon Sapphire inserted in the Nintendo DS GBA slot; replaces grass slots 8-9. | ||
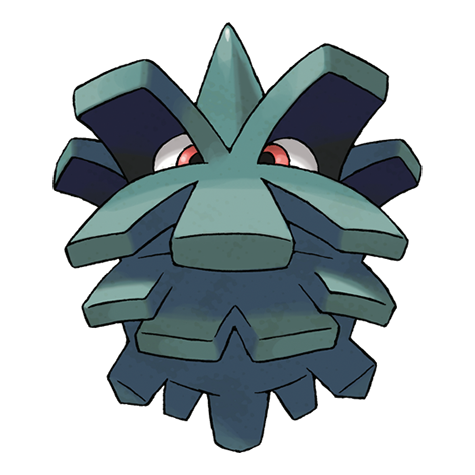 Pineco Pineco | DP | 8 | 8% | National Dex plus Pokémon Emerald inserted in the Nintendo DS GBA slot; replaces grass slots 8-9. | ||
 Seedot Seedot | DP | 8 | 8% | National Dex plus Pokémon Ruby inserted in the Nintendo DS GBA slot; replaces grass slots 8-9. | ||
| Surfing | ||||||
| Psyduck | DP | 20-40 | 90% | — | ||
| Golduck | DP | 20-40 | 10% | — | ||
| Fishing — Old Rod | ||||||
| Magikarp | DP | 3-10 | 100% | — | ||
| Fishing — Good Rod | ||||||
| Magikarp | DP | 10-25 | 55% | — | ||
 Goldeen Goldeen | DP | 10-25 | 45% | — | ||
| Fishing — Super Rod | ||||||
| Gyarados | DP | 30-55 | 55% | — | ||
 Seaking Seaking | DP | 20-50 | 45% | — | ||
Route 204 South
| Pokémon | Games | Levels | Rate | Requirement / notes | ||
|---|---|---|---|---|---|---|
| Morning | Day | Night | ||||
| Grass / cave floor | ||||||
| Starly | DP | 4 or 6 | 25% | 35% | 25% | Rate counts base slots temporarily replaced by hard-shaking Poké Radar patches and GBA dual-slot insertions. |
| Bidoof | DP | 4 or 6 | 25% | Rate counts base slots temporarily replaced by hard-shaking Poké Radar patches and GBA dual-slot insertions. | ||
| Budew | DP | 4-5 | 25% | 25% | 15% | Rate counts base slots temporarily replaced by hard-shaking Poké Radar patches. |
| Shinx | DP | 4-5 | 15% | Rate counts base slots temporarily replaced by hard-shaking Poké Radar patches. | ||
| Kricketot | DP | 4 | 10% | — | 10% | — |
| Zubat | DP | 4 | — | — | 10% | — |
| Poké Radar (post-National Dex) | ||||||
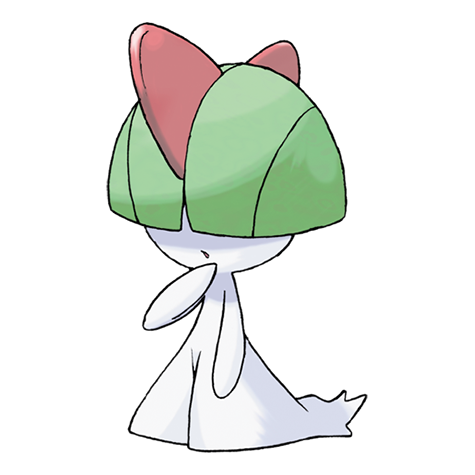 Ralts Ralts | DP | 4 or 6 | 21% | National Dex and Poké Radar required; replacement slot applies only in a hard/vigorous-shaking Radar patch. | ||
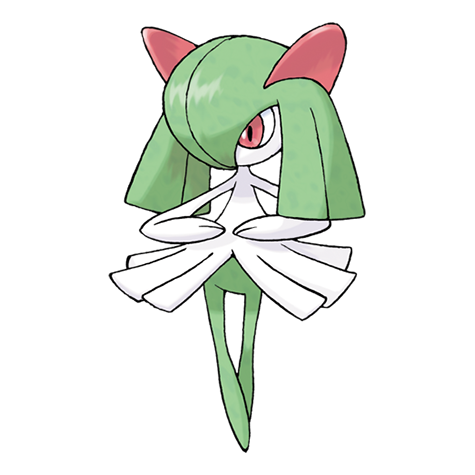 Kirlia Kirlia | DP | 6 | 1% | National Dex and Poké Radar required; replacement slot applies only in a hard/vigorous-shaking Radar patch. | ||
| Dual-slot GBA insertion (post-National Dex) | ||||||
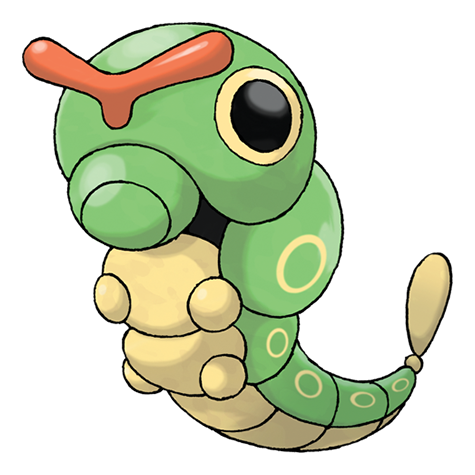 Caterpie Caterpie | DP | 6 | 8% | National Dex plus Pokémon FireRed inserted in the Nintendo DS GBA slot; replaces grass slots 8-9. | ||
| Lotad | DP | 6 | 8% | National Dex plus Pokémon Sapphire inserted in the Nintendo DS GBA slot; replaces grass slots 8-9. | ||
| Pineco | DP | 6 | 8% | National Dex plus Pokémon Emerald inserted in the Nintendo DS GBA slot; replaces grass slots 8-9. | ||
| Seedot | DP | 6 | 8% | National Dex plus Pokémon Ruby inserted in the Nintendo DS GBA slot; replaces grass slots 8-9. | ||
 Weedle Weedle | DP | 6 | 8% | National Dex plus Pokémon LeafGreen inserted in the Nintendo DS GBA slot; replaces grass slots 8-9. | ||
| Surfing | ||||||
| Psyduck | DP | 20-40 | 90% | — | ||
| Golduck | DP | 20-40 | 10% | — | ||
| Fishing — Old Rod | ||||||
| Magikarp | DP | 3-10 | 100% | — | ||
| Fishing — Good Rod | ||||||
| Magikarp | DP | 10-25 | 55% | — | ||
| Goldeen | DP | 10-25 | 45% | — | ||
| Fishing — Super Rod | ||||||
| Gyarados | DP | 30-55 | 55% | — | ||
| Seaking | DP | 20-50 | 45% | — | ||
Trainers
| Trainer | Route order / placement | Full team | Reward | Access requirement | Optional / rematch note |
|---|---|---|---|---|---|
 Lass SarahLass • source ID 12 Lass SarahLass • source ID 12 | Route 204 South • field order 1 at (172, 725) | ₽112 | Reach the trainer's named field subarea; line of sight determines whether the battle is avoidable. | Field order 1, tile (172, 725); sightline/path determines whether it can be avoided. No higher-level same-trainer rematch variant is defined in trdata. | |
| Lass SamanthaLass • source ID 11 | Route 204 South • field order 2 at (171, 712) | ₽112 | Reach the trainer's named field subarea; line of sight determines whether the battle is avoidable. | Field order 2, tile (171, 712); sightline/path determines whether it can be avoided. Higher-level source variants used by the rematch system: ID 703: Lv. 19; ID 704: Lv. 31; ID 705: Lv. 55. | |
 Youngster TylerYoungster • source ID 10 Youngster TylerYoungster • source ID 10 | Route 204 South • field order 3 at (167, 722) | ₽80 | Reach the trainer's named field subarea; line of sight determines whether the battle is avoidable. | Field order 3, tile (167, 722); sightline/path determines whether it can be avoided. No higher-level same-trainer rematch variant is defined in trdata. | |
 Bug Catcher BrandonBug Catcher • source ID 13 Bug Catcher BrandonBug Catcher • source ID 13 | Route 204 North • field order 1 at (182, 685) | ₽112 | Reach the trainer's named field subarea; line of sight determines whether the battle is avoidable. | Field order 1, tile (182, 685); sightline/path determines whether it can be avoided. Higher-level source variants used by the rematch system: ID 712: Lv. 17/Lv. 17; ID 713: Lv. 29/Lv. 29; ID 714: Lv. 53/Lv. 53. | |
 Aroma Lady TaylorAroma Lady • source ID 14 Aroma Lady TaylorAroma Lady • source ID 14 | Route 204 North • field order 2 at (177, 692) | ₽224 | Reach the trainer's named field subarea; line of sight determines whether the battle is avoidable. | Field order 2, tile (177, 692); sightline/path determines whether it can be avoided. No higher-level same-trainer rematch variant is defined in trdata. | |
 Twins Liv & LizTwins • source ID 15 Twins Liv & LizTwins • source ID 15 | Route 204 North • field order 3 at (175, 679) + field order 4 at (176, 679) | ₽288 | Reach the trainer's named field subarea; line of sight determines whether the battle is avoidable. | Field order 3, tile (175, 679); Field order 4, tile (176, 679); sightline/path determines whether it can be avoided. No higher-level same-trainer rematch variant is defined in trdata. | |
| Galactic GruntGalactic • source ID 414 | Route 204 and Ravaged Path • boss |
| ₽360 | Story battle assigned to this section; save and prepare before the trigger described in the route plan. | Major or story battle; not a VS Seeker rematch row. |
| Galactic GruntGalactic • source ID 415 | Route 204 and Ravaged Path • boss | ₽360 | Story battle assigned to this section; save and prepare before the trigger described in the route plan. | Major or story battle; not a VS Seeker rematch row. |
Items
| Item | Version | Type | Area / exact direction | Coordinate / script | Requirement | Source |
|---|---|---|---|---|---|---|
| TM39 | Diamond / Pearl | Visible item ball | Ravaged Path: Among the rocks northwest of the stairs, before the water. | (7, 38) | Coal Badge and Rock Smash. | event bank 246, script 7017 |
| Luck Incense | Diamond / Pearl | Visible item ball | Ravaged Path: At the north end of the cave after landing on the far side of the water. | (17, 11) | Coal Badge and Rock Smash, plus Relic Badge and Surf. | event bank 246, script 7018 |
| TM03 | Diamond / Pearl | Visible item ball | Ravaged Path: In the cave's northeast water pocket. | (28, 5) | Coal Badge and Rock Smash, plus Relic Badge and Surf. | event bank 246, script 7019 |
| Antidote | Diamond / Pearl | Visible item ball | Ravaged Path: Just northeast of the stairs between the two cave exits. | (22, 44) | Reachable during the first Rock Smash crossing after the Coal Badge. | event bank 246, script 7020 |
| Sea Incense | Diamond / Pearl | Visible item ball | Route 204 South: Across the western Route 204 South pond, on the isolated strip of land beside the water. | (162, 732) | Relic Badge and Surf. | event bank 330, script 7015 |
| HP Up | Diamond / Pearl | Visible item ball | Route 204 South: Across Route 204 South's eastern pond, on the far bank near the Jubilife-side path. | (189, 716) | Relic Badge and Surf. | event bank 330, script 7016 |
| Parlyz Heal | Diamond / Pearl | Visible item ball | Route 204 South: Pick up the item ball in the southern part of Route 204 South, 6 tiles east and 17 tiles south of the Ravaged Path doorway or transition. | (177, 722) | Reach this subarea; check the route and puzzle notes for HM, Bicycle, time, or story gates. | event bank 330, script 7014 |
| TM09 | Diamond / Pearl | Visible item ball | Route 204 North: Pick up the item ball in the northwestern part of Route 204 North, 18 tiles west and 16 tiles north of the Ravaged Path doorway or transition. | (162, 682) | Reach this subarea; check the route and puzzle notes for HM, Bicycle, time, or story gates. | event bank 331, script 7021 |
| Awakening | Diamond / Pearl | Visible item ball | Route 204 North: Pick up the item ball in the central part of Route 204 North, 3 tiles north of the Ravaged Path doorway or transition. | (180, 695) | Reach this subarea; check the route and puzzle notes for HM, Bicycle, time, or story gates. | event bank 331, script 7022 |
| TM78 | Diamond / Pearl | NPC / scripted gift | Route 204 North: Speak to the item-giving NPC in the northeastern part of Route 204 North, 11 tiles east and 22 tiles north of the Ravaged Path doorway or transition. | NPC (191, 676); script 2 | Reach Route 204 North and complete the item-giving NPC's one-time dialogue. | script bank 396 |
Puzzles, Warps, And Switches
- Break only the central rocks needed to pass north on the first trip. Revisit the side channels with Surf for the final item and encounter coverage.
Completion Checklist
- Complete the currently reachable part of this route plan: Return to Jubilife; defeat the Galactic Grunts with Lucas or Dawn; receive the Fashion Case; clear Route 204 south; smash through Ravaged Path; sweep Route 204 north; enter Floaroma.
- Review all 49 encounter rows across the per-area tables, including game markers, method band, time-of-day rates, levels, and each conditional requirement; mark conditional rows for their stated revisit.
Floaroma Town and Floaroma Meadow
Collect berry supplies, rescue the flower-shop worker, obtain the Works Key, and unlock Honey Tree encounters.
Source maps
Floaroma Meadow Unused, Floaroma Meadow, Floaroma Meadow House, Floaroma, Floaroma Poké Mart, Floaroma Pokémon Center, Floaroma Pokémon Center 2F, Floaroma Flower Shop, Floaroma Southeast House, Floaroma Middle House, and Floaroma Pokémon Center B1F.
Route Plan
Visit the flower shop; check the Valley Windworks entrance; follow the fleeing Grunt to the Meadow; defeat both Grunts; receive the Works Key and Honey; slather a tree if pursuing tree-only species.
- Honey Trees take about six real-time hours to shake and stop holding an encounter after roughly a day; changing the DS clock can delay time-based events.
- Only four save-derived tree candidates can produce Munchlax. The game takes the four bytes of the full 32-bit Trainer ID (public ID plus Secret ID), reduces each modulo 21, then applies its earlier-index collision-adjustment pass. Do not derive the trees from the visible public ID alone.
- The source tree index order is: Route 205 South, Route 205 North, Route 206, Route 207, Route 208, Route 209, Route 210 South, Route 210 North, Route 211 East, Route 212 North, Route 212 South, Route 213, Route 214, Route 215, Route 218, Route 221, Route 222, Valley Windworks, Eterna Forest, Fuego Ironworks, and Floaroma Meadow.
- Regular trees roll 10% no encounter, 70% common table, and 20% rare table; an eligible tree rolls 9% no encounter, 20% common, 70% rare, and 1% Munchlax. Levels are uniformly selected from 5 through 15.
- When the same tree is slathered again consecutively, the game has a 90% rule that keeps the previous encounter group; this is not a 90% guarantee of the same exact species.
Routes and encounters on this page are compiled from 11 pret map headers.
Wild Pokémon
| Pokémon | Games | Levels | Rate | Requirement / notes | ||
|---|---|---|---|---|---|---|
| Morning | Day | Night | ||||
| Honey Tree — regular tree | ||||||
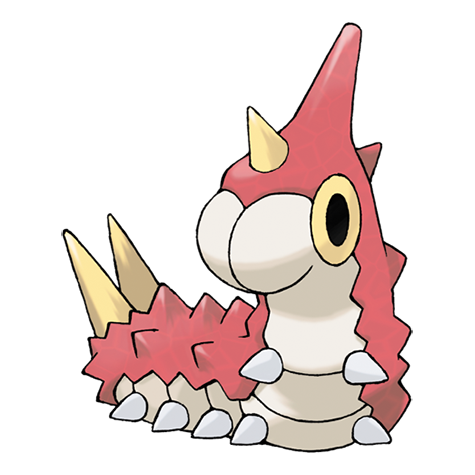 Wurmple Wurmple | DP | 5-15 | 29% | Slather Honey and return after about 6 hours Aggregate of its common- and rare-table slots; there is also a 10% no-encounter result. | ||
 Silcoon Silcoon | DP | 5-15 | 14% | Slather Honey and return after about 6 hours Pearl substitutes Cascoon in this version slot. | ||
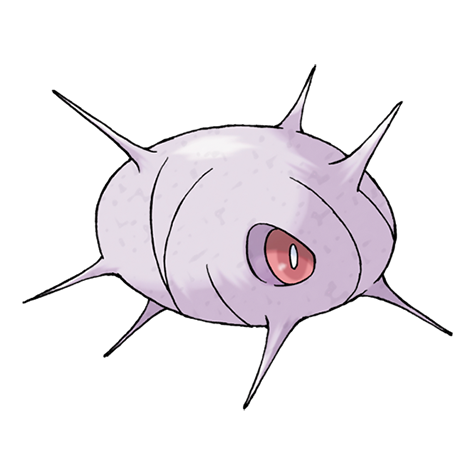 Cascoon Cascoon | DP | 5-15 | 14% | Slather Honey and return after about 6 hours Diamond substitutes Silcoon in this version slot. | ||
 Combee Combee | DP | 5-15 | 22% | Slather Honey and return after about 6 hours Aggregate of common and rare table slots. | ||
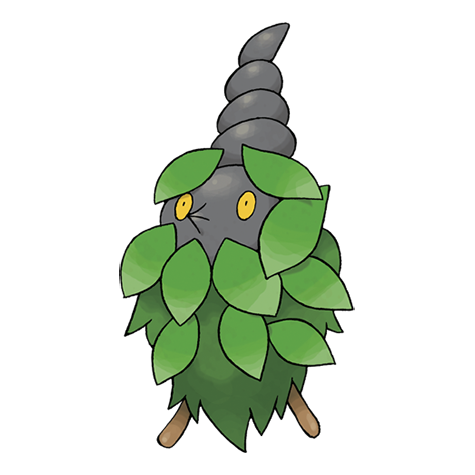 Burmy Burmy | DP | 5-15 | 11% | Slather Honey and return after about 6 hours Aggregate of common and rare table slots. | ||
| Cherubi | DP | 5-15 | 7.5% | Slather Honey and return after about 6 hours Aggregate of common and rare table slots. | ||
 Aipom Aipom | DP | 5-15 | 5.5% | Slather Honey and return after about 6 hours Aggregate of common and rare table slots. | ||
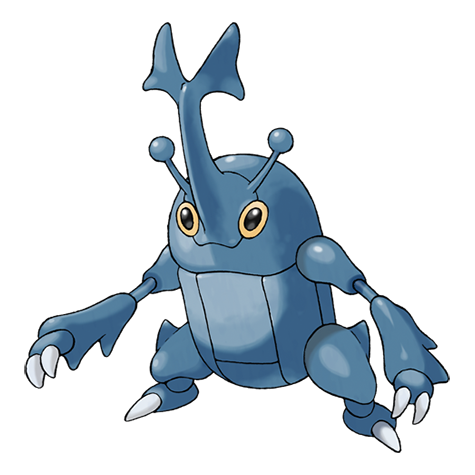 Heracross Heracross | DP | 5-15 | 1% | Slather Honey and return after about 6 hours Rare table only. | ||
| Honey Tree — eligible Munchlax tree | ||||||
| Wurmple | DP | 5-15 | 11.5% | Use one of the save's four Trainer-ID-derived eligible trees Eligible-tree aggregate; there is a separate 9% no-encounter result. | ||
| Silcoon | DP | 5-15 | 4% | Use one of the save's four eligible trees Pearl substitutes Cascoon in this version slot. | ||
| Cascoon | DP | 5-15 | 4% | Use one of the save's four eligible trees Diamond substitutes Silcoon in this version slot. | ||
| Combee | DP | 5-15 | 32% | Use one of the save's four eligible trees Aggregate of common and rare table slots. | ||
| Burmy | DP | 5-15 | 16% | Use one of the save's four eligible trees Aggregate of common and rare table slots. | ||
| Cherubi | DP | 5-15 | 15% | Use one of the save's four eligible trees Aggregate of common and rare table slots. | ||
| Aipom | DP | 5-15 | 8% | Use one of the save's four eligible trees Aggregate of common and rare table slots. | ||
| Heracross | DP | 5-15 | 3.5% | Use one of the save's four eligible trees Rare table only. | ||
 Munchlax Munchlax | DP | 5-15 | 1% | Only four trees derived from the save's Trainer ID are eligible The four locations are save-specific; do not use a fixed online tree list without first deriving the save's eligible indices. | ||
Trainers
| Trainer | Route order / placement | Full team | Reward | Access requirement | Optional / rematch note |
|---|---|---|---|---|---|
| Galactic GruntGalactic • source ID 296 | Floaroma Meadow • scripted | ₽360 | Scripted story trigger; complete the local objective described in the route plan. | Script-triggered battle; not treated as an ordinary field rematch. | |
| Galactic GruntGalactic • source ID 297 | Floaroma Meadow • scripted |
| ₽440 | Scripted story trigger; complete the local objective described in the route plan. | Script-triggered battle; not treated as an ordinary field rematch. |
Items
| Item | Version | Type | Area / exact direction | Coordinate / script | Requirement | Source |
|---|---|---|---|---|---|---|
| Miracle Seed | Diamond / Pearl | Visible item ball | Floaroma Meadow: Pick up the item ball in the northwestern part of Floaroma Meadow, 1 tile east and 39 tiles north of the Floaroma doorway or transition. | (14, 15) | Reach this subarea; check the route and puzzle notes for HM, Bicycle, time, or story gates. | event bank 248, script 7157 |
| Leaf Stone | Diamond / Pearl | Visible item ball | Floaroma Meadow: Pick up the item ball in the eastern part of Floaroma Meadow, 4 tiles west and 19 tiles south of the Floaroma doorway or transition. | (46, 28) | Reach this subarea; check the route and puzzle notes for HM, Bicycle, time, or story gates. | event bank 248, script 7158 |
| Oran Berry | Diamond / Pearl | Berry tree | Floaroma: Harvest berry patch 0 in the southern part of Floaroma, 2 tiles west of the Floaroma Flower Shop doorway or transition. The plot can be replanted after the initial harvest. | (178, 651) | Reach the outdoor patch on the named route or town; harvest its initial berries before planting a replacement. | berry table ov52_021D76F8, patch 0 |
| Cheri Berry | Diamond / Pearl | Berry tree | Floaroma: Harvest berry patch 1 in the southeastern part of Floaroma, 2 tiles east of the Floaroma Flower Shop doorway or transition. The plot can be replanted after the initial harvest. | (182, 651) | Reach the outdoor patch on the named route or town; harvest its initial berries before planting a replacement. | berry table ov52_021D76F8, patch 1 |
| Sprayduck | Diamond / Pearl | NPC / scripted gift | Floaroma Flower Shop: Speak to the item-giving NPC in the western part of Floaroma Flower Shop, 4 tiles west and 4 tiles north of the Floaroma doorway or transition. | NPC (4, 7); script 2 | Reach Floaroma Flower Shop and complete the item-giving NPC's one-time dialogue. | script bank 999 |
| TM88 | Diamond / Pearl | NPC / scripted gift | Floaroma Middle House: Speak to the item-giving NPC in the northwestern part of Floaroma Middle House, 2 tiles west and 5 tiles north of the Floaroma doorway or transition. | NPC (2, 3); script 2 | Reach Floaroma Middle House and complete the item-giving NPC's one-time dialogue. | script bank 1001 |
| Works Key | Diamond / Pearl | Story gift | Floaroma Town and Floaroma Meadow: Received after defeating the two Floaroma Meadow Grunts. | NPC / system | See the route plan. | editorial script/system note |
| 10× Honey | Diamond / Pearl | Gift / repeat purchase | Floaroma Town and Floaroma Meadow: First supplied by the rescued worker; more can be purchased in the Meadow. | NPC / system | See the route plan. | editorial script/system note |
| Daily Floaroma Berry (Cheri / Chesto / Pecha / Rawst / Aspear) | Diamond / Pearl | Daily random gift | Floaroma Town and Floaroma Meadow: The Floaroma flower-shop NPC randomly gives one of the five listed status-curing Berries. | NPC / system | Once per day; return on later dates for more rolls. | editorial script/system note |
Hidden Items
| Hidden item | Area / plain-English placement | QA coordinate | Requirement | Source |
|---|---|---|---|---|
| Honey | Floaroma Meadow: Use the Dowsing Machine in the eastern part of Floaroma Meadow, 1 tile east and 22 tiles south of the Floaroma doorway or transition and inspect that exact ground tile. | (52, 31) | Dowsing Machine Pokétch app. Reach this subarea; check the route and puzzle notes for HM, Bicycle, time, or story gates. | event bank 248, script 8058 |
| Honey | Floaroma Meadow: Use the Dowsing Machine in the western part of Floaroma Meadow, 7 tiles east and 27 tiles north of the Floaroma doorway or transition and inspect that exact ground tile. | (20, 27) | Dowsing Machine Pokétch app. Reach this subarea; check the route and puzzle notes for HM, Bicycle, time, or story gates. | event bank 248, script 8059 |
| Full Heal | Floaroma Meadow: Use the Dowsing Machine in the northwestern part of Floaroma Meadow, 4 tiles east and 36 tiles north of the Floaroma doorway or transition and inspect that exact ground tile. | (17, 18) | Dowsing Machine Pokétch app. Reach this subarea; check the route and puzzle notes for HM, Bicycle, time, or story gates. | event bank 248, script 8220 |
| Revive | Floaroma Meadow: Use the Dowsing Machine in the northeastern part of Floaroma Meadow, 6 tiles west and 11 tiles south of the Floaroma doorway or transition and inspect that exact ground tile. | (44, 20) | Dowsing Machine Pokétch app. Reach this subarea; check the route and puzzle notes for HM, Bicycle, time, or story gates. | event bank 248, script 8227 |
| Max Potion | Floaroma Meadow: Use the Dowsing Machine in the northeastern part of Floaroma Meadow, 22 tiles north of the Floaroma Meadow House doorway or transition and inspect that exact ground tile. | (39, 23) | Dowsing Machine Pokétch app. Reach this subarea; check the route and puzzle notes for HM, Bicycle, time, or story gates. | event bank 248, script 8226 |
| Hyper Potion | Floaroma Meadow: Use the Dowsing Machine in the western part of Floaroma Meadow, 1 tile west and 19 tiles north of the Floaroma doorway or transition and inspect that exact ground tile. | (11, 35) | Dowsing Machine Pokétch app. Reach this subarea; check the route and puzzle notes for HM, Bicycle, time, or story gates. | event bank 248, script 8219 |
| Antidote | Floaroma Meadow: Use the Dowsing Machine in the central part of Floaroma Meadow, 11 tiles west and 20 tiles north of the Floaroma Meadow House doorway or transition and inspect that exact ground tile. | (28, 25) | Dowsing Machine Pokétch app. Reach this subarea; check the route and puzzle notes for HM, Bicycle, time, or story gates. | event bank 248, script 8222 |
| Super Potion | Floaroma Meadow: Use the Dowsing Machine in the central part of Floaroma Meadow, 7 tiles west and 8 tiles north of the Floaroma Meadow House doorway or transition and inspect that exact ground tile. | (32, 37) | Dowsing Machine Pokétch app. Reach this subarea; check the route and puzzle notes for HM, Bicycle, time, or story gates. | event bank 248, script 8223 |
| Parlyz Heal | Floaroma Meadow: Use the Dowsing Machine in the central part of Floaroma Meadow, 4 tiles west and 13 tiles north of the Floaroma Meadow House doorway or transition and inspect that exact ground tile. | (35, 32) | Dowsing Machine Pokétch app. Reach this subarea; check the route and puzzle notes for HM, Bicycle, time, or story gates. | event bank 248, script 8224 |
| Potion | Floaroma Meadow: Use the Dowsing Machine in the northern part of Floaroma Meadow, 14 tiles west and 8 tiles south of the Floaroma doorway or transition and inspect that exact ground tile. | (36, 17) | Dowsing Machine Pokétch app. Reach this subarea; check the route and puzzle notes for HM, Bicycle, time, or story gates. | event bank 248, script 8225 |
| Revive | Floaroma Meadow: Use the Dowsing Machine in the western part of Floaroma Meadow, 15 tiles west and 15 tiles north of the Floaroma Meadow House doorway or transition and inspect that exact ground tile. | (24, 30) | Dowsing Machine Pokétch app. Reach this subarea; check the route and puzzle notes for HM, Bicycle, time, or story gates. | event bank 248, script 8221 |
Puzzles, Warps, And Switches
- The Meadow is entered from Floaroma's northwest only after the Windworks Grunt retreats. Defeat both Grunts in sequence to receive the key automatically.
Completion Checklist
- Complete the currently reachable part of this route plan: Visit the flower shop; check the Valley Windworks entrance; follow the fleeing Grunt to the Meadow; defeat both Grunts; receive the Works Key and Honey; slather a tree if pursuing tree-only species.
- Review all 17 encounter rows across the per-area tables, including game markers, method band, time-of-day rates, levels, and each conditional requirement; mark conditional rows for their stated revisit.
Valley Windworks and Commander Mars
Unlock the Windworks, defeat every Galactic trainer, rescue the scientist, and start the Friday Drifloon event.
Source maps
Valley Windworks Exterior and Valley Windworks Interior.
Route Plan
Use the Works Key at the front door; clear each interior Grunt; heal before Mars; defeat Zubat and Purugly; speak to the reunited family; return on a later Friday for Drifloon.
- Mars's Purugly is an early-game difficulty spike because of its Speed and damage; carry status, Intimidate, or a Fighting move rather than relying on level alone.
- If the Windworks is cleared on Friday, Drifloon normally waits until the following Friday instead of appearing immediately.
Routes and encounters on this page are compiled from 2 pret map headers.
Valley Windworks Exterior
| Pokémon | Games | Levels | Rate | Requirement / notes | ||
|---|---|---|---|---|---|---|
| Morning | Day | Night | ||||
| Grass / cave floor | ||||||
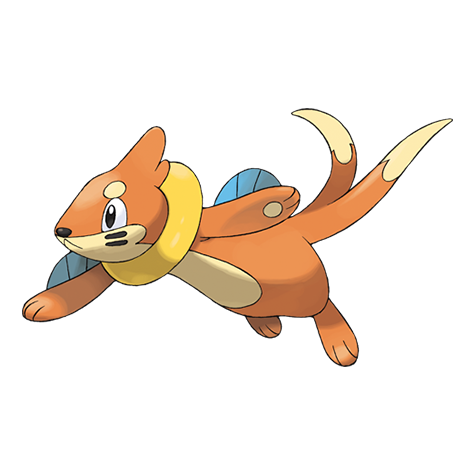 Buizel Buizel | DP | 7-9 | 35% | Rate counts base slots temporarily replaced by the daily swarm, hard-shaking Poké Radar patches, and GBA dual-slot insertions. | ||
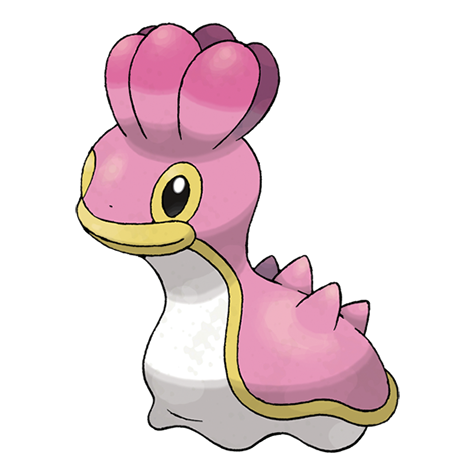 Shellos Shellos | DP | 7-9 | 30% | Rate counts base slots temporarily replaced by hard-shaking Poké Radar patches and GBA dual-slot insertions. | ||
 Pachirisu Pachirisu | DP | 7-8 | 25% | Rate counts base slots temporarily replaced by the daily swarm. | ||
| Bidoof | DP | 8 | 10% | Rate counts base slots temporarily replaced by hard-shaking Poké Radar patches. | ||
| Swarm (post-National Dex daily announcement) | ||||||
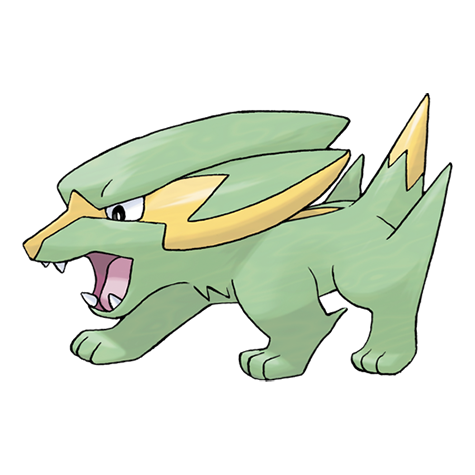 Electrike Electrike | DP | 7 | 40% | Post-National Dex daily swarm; replaces grass slots 0-1. | ||
| Poké Radar (post-National Dex) | ||||||
 Mareep Mareep | DP | 7-9 | 22% | National Dex and Poké Radar required; replacement slot applies only in a hard/vigorous-shaking Radar patch. | ||
| Dual-slot GBA insertion (post-National Dex) | ||||||
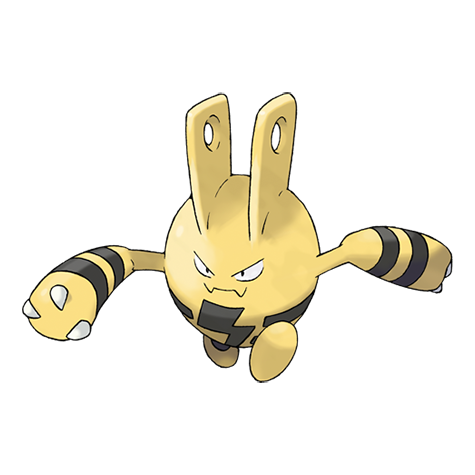 Elekid Elekid | DP | 9 | 8% | National Dex plus Pokémon FireRed inserted in the Nintendo DS GBA slot; replaces grass slots 8-9. | ||
| Surfing | ||||||
 Tentacool Tentacool | DP | 20-30 | 60% | — | ||
 Wingull Wingull | DP | 20-30 | 30% | — | ||
 Pelipper Pelipper | DP | 20-40 | 5% | — | ||
 Tentacruel Tentacruel | DP | 20-40 | 5% | — | ||
| Fishing — Old Rod | ||||||
| Magikarp | DP | 3-10 | 100% | — | ||
| Fishing — Good Rod | ||||||
| Magikarp | DP | 10-25 | 55% | — | ||
 Finneon Finneon | DP | 10-25 | 45% | — | ||
| Fishing — Super Rod | ||||||
 Lumineon Lumineon | DP | 30-50 | 45% | — | ||
| Gyarados | DP | 30-40 | 40% | — | ||
 Shellder Shellder | DP | 20-40 | 15% | — | ||
Valley Windworks and Commander Mars
| Pokémon | Games | Levels | Rate | Requirement / notes | ||
|---|---|---|---|---|---|---|
| Morning | Day | Night | ||||
| Overworld static encounter | ||||||
 Drifloon Drifloon | DP | 22 | One per Friday | Friday after Team Galactic leaves Valley Windworks Appears outside the building; catch or defeat it, then wait until a later Friday for another opportunity. | ||
Trainers
| Trainer | Route order / placement | Full team | Reward | Access requirement | Optional / rematch note |
|---|---|---|---|---|---|
| Galactic GruntGalactic • source ID 298 | Valley Windworks Interior • field order 1 at (3, 8) |
| ₽440 | Reach the trainer's named field subarea; line of sight determines whether the battle is avoidable. | Field order 1, tile (3, 8); sightline/path determines whether it can be avoided. No higher-level same-trainer rematch variant is defined in trdata. |
| Galactic GruntGalactic • source ID 299 | Valley Windworks Interior • field order 2 at (12, 3) | ₽400 | Reach the trainer's named field subarea; line of sight determines whether the battle is avoidable. | Field order 2, tile (12, 3); sightline/path determines whether it can be avoided. No higher-level same-trainer rematch variant is defined in trdata. | |
| Galactic GruntGalactic • source ID 843 | Valley Windworks Exterior • scripted | ₽440 | Scripted story trigger; complete the local objective described in the route plan. | Script-triggered battle; not treated as an ordinary field rematch. | |
| Commander MarsCommander Mars • source ID 295 | Valley Windworks Interior • scripted | ₽1,280 | Scripted story trigger; complete the local objective described in the route plan. | Major or story battle; not a VS Seeker rematch row. |

Items
| Item | Version | Type | Area / exact direction | Coordinate / script | Requirement | Source |
|---|---|---|---|---|---|---|
| TM24 | Diamond / Pearl | Visible item ball | Valley Windworks Exterior: Pick up the item ball in the northeastern part of Valley Windworks Exterior, 1 tile west and 10 tiles north of the Valley Windworks Interior doorway or transition. | (242, 644) | Reach this subarea; check the route and puzzle notes for HM, Bicycle, time, or story gates. | event bank 198, script 7023 |
| Potion | Diamond / Pearl | Visible item ball | Valley Windworks Exterior: Pick up the item ball in the southeastern part of Valley Windworks Exterior, 3 tiles east and 6 tiles south of the Valley Windworks Interior doorway or transition. | (246, 660) | Reach this subarea; check the route and puzzle notes for HM, Bicycle, time, or story gates. | event bank 198, script 7024 |
Hidden Items
| Hidden item | Area / plain-English placement | QA coordinate | Requirement | Source |
|---|---|---|---|---|
| Max Elixir | Valley Windworks Exterior: Use the Dowsing Machine in the central part of Valley Windworks Exterior, 8 tiles west and 4 tiles north of the Valley Windworks Interior doorway or transition and inspect that exact ground tile. | (235, 650) | Dowsing Machine Pokétch app. Reach this subarea; check the route and puzzle notes for HM, Bicycle, time, or story gates. | event bank 198, script 8000 |
Puzzles, Warps, And Switches
- The interior has no switch maze: follow the only open aisle, fight each Grunt, and save before entering Mars's rear room.
Completion Checklist
- Complete the currently reachable part of this route plan: Use the Works Key at the front door; clear each interior Grunt; heal before Mars; defeat Zubat and Purugly; speak to the reunited family; return on a later Friday for Drifloon.
- Review all 18 encounter rows across the per-area tables, including game markers, method band, time-of-day rates, levels, and each conditional requirement; mark conditional rows for their stated revisit.
Route 205 South
Cross the river valley, use the rest house, clear trainers and items, and reach Eterna Forest's southern gate.
Source maps
Route 205 South and Route 205 House.
Route Plan
Clear both banks reachable without Surf; use the rest house for a free heal; fight every trainer; pick berries; enter the forest only after stocking Antidotes or Pecha Berries.
- The water splits visible rewards from first-visit rewards. Label Surf-locked items for the Phase 5 cleanup rather than folding them into the initial checklist.
Routes and encounters on this page are compiled from 2 pret map headers.
Wild Pokémon
| Pokémon | Games | Levels | Rate | Requirement / notes | ||
|---|---|---|---|---|---|---|
| Morning | Day | Night | ||||
| Grass / cave floor | ||||||
| Shellos | DP | 8-10 | 45% | Rate counts base slots temporarily replaced by hard-shaking Poké Radar patches and GBA dual-slot insertions. | ||
| Buizel | DP | 8-10 | 35% | Rate counts base slots temporarily replaced by hard-shaking Poké Radar patches and GBA dual-slot insertions. | ||
| Bidoof | DP | 9 | 10% | Rate counts base slots temporarily replaced by hard-shaking Poké Radar patches. | ||
| Pachirisu | DP | 9 | 10% | — | ||
| Poké Radar (post-National Dex) | ||||||
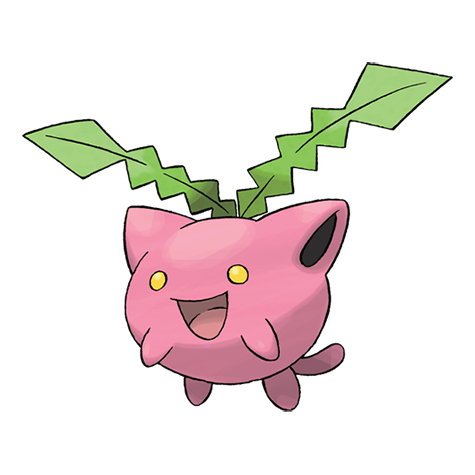 Hoppip Hoppip | DP | 9-10 | 22% | National Dex and Poké Radar required; replacement slot applies only in a hard/vigorous-shaking Radar patch. | ||
| Dual-slot GBA insertion (post-National Dex) | ||||||
| Elekid | DP | 10 | 8% | National Dex plus Pokémon FireRed inserted in the Nintendo DS GBA slot; replaces grass slots 8-9. | ||
| Surfing | ||||||
| Tentacool | DP | 20-30 | 60% | — | ||
| Wingull | DP | 20-30 | 30% | — | ||
| Pelipper | DP | 20-40 | 5% | — | ||
| Tentacruel | DP | 20-40 | 5% | — | ||
| Fishing — Old Rod | ||||||
| Magikarp | DP | 3-10 | 100% | — | ||
| Fishing — Good Rod | ||||||
| Magikarp | DP | 10-25 | 55% | — | ||
| Finneon | DP | 10-25 | 45% | — | ||
| Fishing — Super Rod | ||||||
| Lumineon | DP | 20-50 | 45% | — | ||
| Gyarados | DP | 30-40 | 40% | — | ||
| Shellder | DP | 20-40 | 15% | — | ||
Trainers
| Trainer | Route order / placement | Full team | Reward | Access requirement | Optional / rematch note |
|---|---|---|---|---|---|
 Hiker DanielHiker • source ID 18 Hiker DanielHiker • source ID 18 | Route 205 South • field order 1 at (210, 637) | ₽352 | Reach the trainer's named field subarea; line of sight determines whether the battle is avoidable. | Field order 1, tile (210, 637); sightline/path determines whether it can be avoided. No higher-level same-trainer rematch variant is defined in trdata. | |
| Aroma Lady ElizabethAroma Lady • source ID 21 | Route 205 South • field order 2 at (215, 633) | ₽448 | Reach the trainer's named field subarea; line of sight determines whether the battle is avoidable. | Field order 2, tile (215, 633); sightline/path determines whether it can be avoided. Higher-level source variants used by the rematch system: ID 627: Lv. 19; ID 628: Lv. 31; ID 629: Lv. 55. | |
 Camper JacobCamper • source ID 16 Camper JacobCamper • source ID 16 | Route 205 South • field order 3 at (215, 646) |
| ₽224 | Reach the trainer's named field subarea; line of sight determines whether the battle is avoidable. | Field order 3, tile (215, 646); sightline/path determines whether it can be avoided. No higher-level same-trainer rematch variant is defined in trdata. |
 Picnicker SienaPicnicker • source ID 17 Picnicker SienaPicnicker • source ID 17 | Route 205 South • field order 4 at (215, 619) | ₽192 | Reach the trainer's named field subarea; line of sight determines whether the battle is avoidable. | Field order 4, tile (215, 619); sightline/path determines whether it can be avoided. No higher-level same-trainer rematch variant is defined in trdata. | |
| Hiker NicholasHiker • source ID 19 | Route 205 South • field order 5 at (208, 610) | ₽448 | Reach the trainer's named field subarea; line of sight determines whether the battle is avoidable. | Field order 5, tile (208, 610); sightline/path determines whether it can be avoided. No higher-level same-trainer rematch variant is defined in trdata. | |
 Battle Girl KelseyBattle Girl • source ID 20 Battle Girl KelseyBattle Girl • source ID 20 | Route 205 South • field order 6 at (207, 598) | ₽240 | Reach the trainer's named field subarea; line of sight determines whether the battle is avoidable. | Field order 6, tile (207, 598); sightline/path determines whether it can be avoided. No higher-level same-trainer rematch variant is defined in trdata. | |
| Picnicker KarinaPicnicker • source ID 456 | Route 205 South • field order 7 at (208, 595) |
| ₽224 | Reach the trainer's named field subarea; line of sight determines whether the battle is avoidable. | Field order 7, tile (208, 595); sightline/path determines whether it can be avoided. Higher-level source variants used by the rematch system: ID 718: Lv. 19; ID 719: Lv. 31; ID 720: Lv. 55. |
| Camper ZackaryCamper • source ID 377 | Route 205 South • field order 8 at (206, 625) |
| ₽224 | Reach the trainer's named field subarea; line of sight determines whether the battle is avoidable. | Field order 8, tile (206, 625); sightline/path determines whether it can be avoided. Higher-level source variants used by the rematch system: ID 645: Lv. 19; ID 646: Lv. 31; ID 647: Lv. 55. |


Items
| Item | Version | Type | Area / exact direction | Coordinate / script | Requirement | Source |
|---|---|---|---|---|---|---|
| Poké Ball | Diamond / Pearl | Visible item ball | Route 205 South: Pick up the item ball in the central part of Route 205 South, 10 tiles west and 24 tiles south of the Route 205 House doorway or transition. | (204, 618) | Reach this subarea; check the route and puzzle notes for HM, Bicycle, time, or story gates. | event bank 332, script 7025 |
| X Attack | Diamond / Pearl | Visible item ball | Route 205 South: Pick up the item ball in the southeastern part of Route 205 South, 1 tile west and 46 tiles south of the Route 205 House doorway or transition. | (213, 640) | Reach this subarea; check the route and puzzle notes for HM, Bicycle, time, or story gates. | event bank 332, script 7026 |
| Super Potion | Diamond / Pearl | Visible item ball | Route 205 South: Pick up the item ball in the northeastern part of Route 205 South, 5 tiles east and 14 tiles south of the Route 205 House doorway or transition. | (219, 608) | Reach this subarea; check the route and puzzle notes for HM, Bicycle, time, or story gates. | event bank 332, script 7028 |
| Repel | Diamond / Pearl | Visible item ball | Route 205 South: Pick up the item ball in the northern part of Route 205 South, 11 tiles west and 9 tiles south of the Route 205 House doorway or transition. | (203, 603) | Reach this subarea; check the route and puzzle notes for HM, Bicycle, time, or story gates. | event bank 332, script 7027 |
| Chesto Berry | Diamond / Pearl | Berry tree | Route 205 South: Harvest berry patch 2 in the southern part of Route 205 South, 12 tiles west and 64 tiles south of the Route 205 House doorway or transition. The plot can be replanted after the initial harvest. | (202, 658) | Reach the outdoor patch on the named route or town; harvest its initial berries before planting a replacement. | berry table ov52_021D76F8, patch 2 |
| Pecha Berry | Diamond / Pearl | Berry tree | Route 205 South: Harvest berry patch 3 in the southern part of Route 205 South, 11 tiles west and 64 tiles south of the Route 205 House doorway or transition. The plot can be replanted after the initial harvest. | (203, 658) | Reach the outdoor patch on the named route or town; harvest its initial berries before planting a replacement. | berry table ov52_021D76F8, patch 3 |
| Oran Berry | Diamond / Pearl | Berry tree | Route 205 South: Harvest berry patch 4 in the eastern part of Route 205 South, 3 tiles west and 20 tiles south of the Route 205 House doorway or transition. The plot can be replanted after the initial harvest. | (211, 614) | Reach the outdoor patch on the named route or town; harvest its initial berries before planting a replacement. | berry table ov52_021D76F8, patch 4 |
| Pecha Berry | Diamond / Pearl | Berry tree | Route 205 South: Harvest berry patch 5 in the eastern part of Route 205 South, 2 tiles west and 20 tiles south of the Route 205 House doorway or transition. The plot can be replanted after the initial harvest. | (212, 614) | Reach the outdoor patch on the named route or town; harvest its initial berries before planting a replacement. | berry table ov52_021D76F8, patch 5 |
Hidden Items
| Hidden item | Area / plain-English placement | QA coordinate | Requirement | Source |
|---|---|---|---|---|
| Antidote | Route 205 South: Use the Dowsing Machine in the eastern part of Route 205 South, 2 tiles west and 33 tiles south of the Route 205 House doorway or transition and inspect that exact ground tile. | (212, 627) | Dowsing Machine Pokétch app. Reach this subarea; check the route and puzzle notes for HM, Bicycle, time, or story gates. | event bank 332, script 8217 |
Puzzles, Warps, And Switches
- Follow the east bank north, cross where the terrain permits, and clear each short side spur before entering the forest gate.
Completion Checklist
- Complete the currently reachable part of this route plan: Clear both banks reachable without Surf; use the rest house for a free heal; fight every trainer; pick berries; enter the forest only after stocking Antidotes or Pecha Berries.
- Review all 16 encounter rows across the per-area tables, including game markers, method band, time-of-day rates, levels, and each conditional requirement; mark conditional rows for their stated revisit.
Eterna Forest with Cheryl
Escort Cheryl through double wild battles, clear paired trainers, reach the north exit, and mark the Old Chateau for later.
Source maps
Eterna Forest Exterior and Eterna Forest Interior.
Route Plan
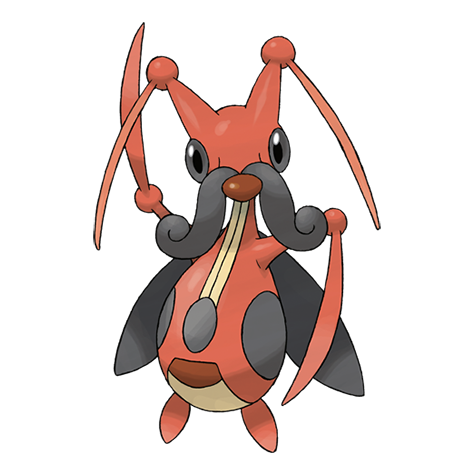
Accept Cheryl as partner; use her Chansey's after-battle healing to train; sweep every trainer pair and item loop; exit at the northeast gate; return alone later for encounters that are awkward in doubles.
- Cheryl heals the party after every battle, but all wild fights become doubles and a Poke Ball cannot be thrown until only one wild Pokemon remains.
- The Old Chateau requires Cut and Rotom additionally requires the National Dex and nighttime, so neither belongs in the first forest checklist.
Routes and encounters on this page are compiled from 2 pret map headers.
Wild Pokémon
| Pokémon | Games | Levels | Rate | Requirement / notes | ||
|---|---|---|---|---|---|---|
| Morning | Day | Night | ||||
| Grass / cave floor | ||||||
| Wurmple | DP | 10-11 | 30% | 30% | 20% | Rate counts base slots temporarily replaced by the daily swarm. |
| Budew | DP | 10-12 | 29% | 29% | 19% | Rate counts base slots temporarily replaced by hard-shaking Poké Radar patches and GBA dual-slot insertions. |
| Cascoon | DP | 10 | 20% | Rate counts base slots temporarily replaced by the daily swarm. | ||
| Silcoon | DP | 10 | 20% | Rate counts base slots temporarily replaced by the daily swarm. | ||
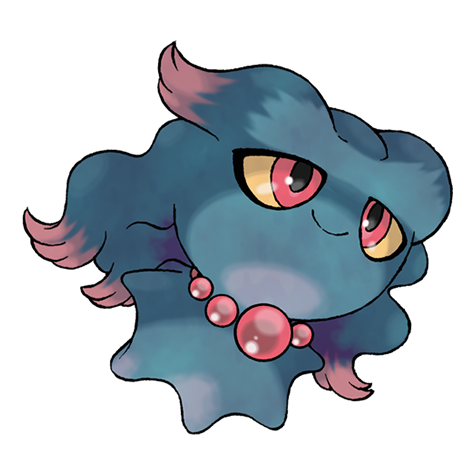 Misdreavus Misdreavus | DP | 10-11 | — | — | 20% | — |
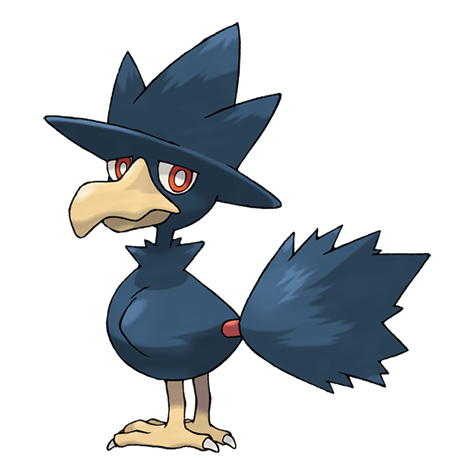 Murkrow Murkrow | DP | 10-11 | — | — | 20% | — |
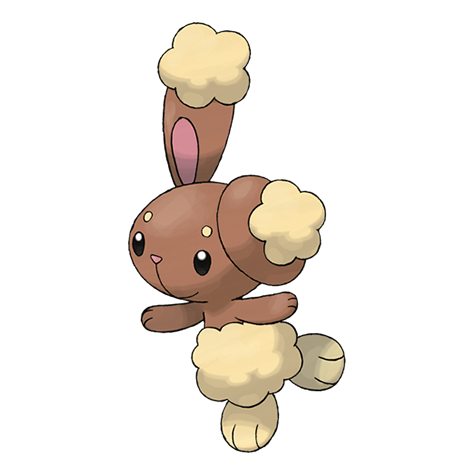 Buneary Buneary | DP | 10-12 | 19% | Rate counts base slots temporarily replaced by hard-shaking Poké Radar patches and GBA dual-slot insertions. | ||
 Beautifly Beautifly | DP | 12 | 2% | Rate counts base slots temporarily replaced by hard-shaking Poké Radar patches. | ||
 Dustox Dustox | DP | 12 | 2% | Rate counts base slots temporarily replaced by hard-shaking Poké Radar patches. | ||
| Swarm (post-National Dex daily announcement) | ||||||
 Slakoth Slakoth | DP | 10 | 40% | Post-National Dex daily swarm; replaces grass slots 0-1. | ||
| Poké Radar (post-National Dex) | ||||||
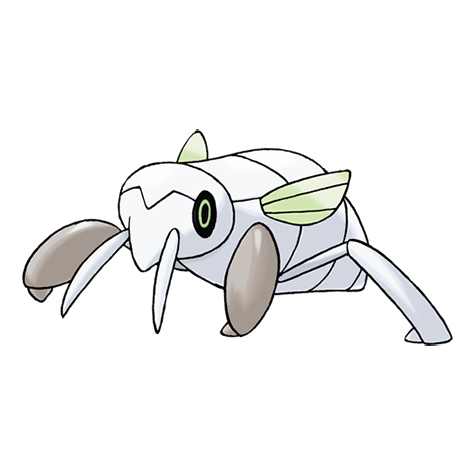 Nincada Nincada | DP | 10-12 | 22% | National Dex and Poké Radar required; replacement slot applies only in a hard/vigorous-shaking Radar patch. | ||
| Dual-slot GBA insertion (post-National Dex) | ||||||
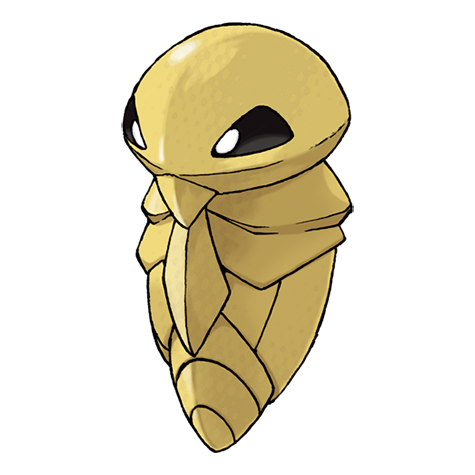 Kakuna Kakuna | DP | 12 | 8% | National Dex plus Pokémon LeafGreen inserted in the Nintendo DS GBA slot; replaces grass slots 8-9. | ||
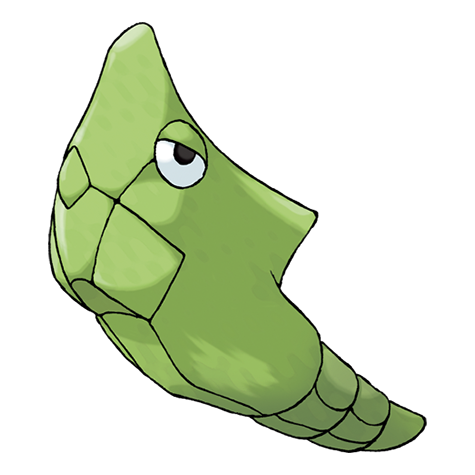 Metapod Metapod | DP | 12 | 8% | National Dex plus Pokémon FireRed inserted in the Nintendo DS GBA slot; replaces grass slots 8-9. | ||
| Pineco | DP | 12 | 8% | National Dex plus Pokémon Emerald inserted in the Nintendo DS GBA slot; replaces grass slots 8-9. | ||
| Seedot | DP | 12 | 8% | National Dex plus Pokémon Ruby inserted in the Nintendo DS GBA slot; replaces grass slots 8-9. | ||
Trainers
| Trainer | Route order / placement | Full team | Reward | Access requirement | Optional / rematch note |
|---|---|---|---|---|---|
| Bug Catcher JackBug Catcher • source ID 201 | Eterna Forest Interior • field order 1 at (37, 67) | ₽208 | Reach the trainer's named field subarea; line of sight determines whether the battle is avoidable. | Field order 1, tile (37, 67); sightline/path determines whether it can be avoided. No higher-level same-trainer rematch variant is defined in trdata. | |
| Bug Catcher PhillipBug Catcher • source ID 202 | Eterna Forest Interior • field order 2 at (65, 87) | ₽208 | Reach the trainer's named field subarea; line of sight determines whether the battle is avoidable. | Field order 2, tile (65, 87); sightline/path determines whether it can be avoided. No higher-level same-trainer rematch variant is defined in trdata. | |
 Psychic Male KodyPsychic Male • source ID 395 Psychic Male KodyPsychic Male • source ID 395 | Eterna Forest Interior • field order 3 at (74, 67) | ₽480 | Reach the trainer's named field subarea; line of sight determines whether the battle is avoidable. | Field order 3, tile (74, 67); sightline/path determines whether it can be avoided. No higher-level same-trainer rematch variant is defined in trdata. | |
 Psychic Female LindseyPsychic Female • source ID 206 Psychic Female LindseyPsychic Female • source ID 206 | Eterna Forest Interior • field order 4 at (50, 67) |
| ₽480 | Reach the trainer's named field subarea; line of sight determines whether the battle is avoidable. | Field order 4, tile (50, 67); sightline/path determines whether it can be avoided. No higher-level same-trainer rematch variant is defined in trdata. |
| Lass BrianaLass • source ID 204 | Eterna Forest Interior • field order 5 at (40, 67) | ₽224 | Reach the trainer's named field subarea; line of sight determines whether the battle is avoidable. | Field order 5, tile (40, 67); sightline/path determines whether it can be avoided. No higher-level same-trainer rematch variant is defined in trdata. | |
| Bug Catcher DonaldBug Catcher • source ID 203 | Eterna Forest Interior • field order 6 at (65, 83) | ₽192 | Reach the trainer's named field subarea; line of sight determines whether the battle is avoidable. | Field order 6, tile (65, 83); sightline/path determines whether it can be avoided. No higher-level same-trainer rematch variant is defined in trdata. | |
| Psychic Male ElijahPsychic Male • source ID 205 | Eterna Forest Interior • field order 7 at (55, 67) |
| ₽480 | Reach the trainer's named field subarea; line of sight determines whether the battle is avoidable. | Field order 7, tile (55, 67); sightline/path determines whether it can be avoided. No higher-level same-trainer rematch variant is defined in trdata. |
| Psychic Female RachaelPsychic Female • source ID 398 | Eterna Forest Interior • field order 8 at (77, 67) |
| ₽480 | Reach the trainer's named field subarea; line of sight determines whether the battle is avoidable. | Field order 8, tile (77, 67); sightline/path determines whether it can be avoided. No higher-level same-trainer rematch variant is defined in trdata. |

Items
| Item | Version | Type | Area / exact direction | Coordinate / script | Requirement | Source |
|---|---|---|---|---|---|---|
| TM82 | Diamond / Pearl | Visible item ball | Eterna Forest Exterior: Pick up the item ball in the southeastern part of Eterna Forest Exterior, 11 tiles east and 9 tiles south of the nearest visible NPC. | (243, 569) | Reach this subarea; check the route and puzzle notes for HM, Bicycle, time, or story gates. | event bank 200, script 7043 |
| Silverpowder | Diamond / Pearl | Visible item ball | Eterna Forest Exterior: Pick up the item ball in the southern part of Eterna Forest Exterior, 4 tiles west and 11 tiles south of the nearest visible NPC. | (228, 571) | Reach this subarea; check the route and puzzle notes for HM, Bicycle, time, or story gates. | event bank 200, script 7044 |
| Antidote | Diamond / Pearl | Visible item ball | Eterna Forest Interior: Pick up the item ball in the southwestern part of Eterna Forest Interior, 13 tiles west and 5 tiles north of the Route 205 South doorway or transition. | (15, 81) | Reach this subarea; check the route and puzzle notes for HM, Bicycle, time, or story gates. | event bank 201, script 7029 |
| Parlyz Heal | Diamond / Pearl | Visible item ball | Eterna Forest Interior: Pick up the item ball in the central part of Eterna Forest Interior, 12 tiles east and 27 tiles north of the Route 205 South doorway or transition. | (41, 59) | Reach this subarea; check the route and puzzle notes for HM, Bicycle, time, or story gates. | event bank 201, script 7030 |
| Great Ball | Diamond / Pearl | Visible item ball | Eterna Forest Interior: Pick up the item ball in the southern part of Eterna Forest Interior, 21 tiles east and 1 tile north of the Route 205 South doorway or transition. | (50, 85) | Reach this subarea; check the route and puzzle notes for HM, Bicycle, time, or story gates. | event bank 201, script 7031 |
| Honey | Diamond / Pearl | Visible item ball | Eterna Forest Interior: Pick up the item ball in the eastern part of Eterna Forest Interior, 20 tiles west and 5 tiles south of the Route 205 North doorway or transition. | (66, 42) | Reach this subarea; check the route and puzzle notes for HM, Bicycle, time, or story gates. | event bank 201, script 7032 |
| Ether | Diamond / Pearl | Visible item ball | Eterna Forest Interior: Pick up the item ball in the northeastern part of Eterna Forest Interior, 7 tiles east and 3 tiles north of the Old Chateau Entrance doorway or transition. | (81, 12) | Reach this subarea; check the route and puzzle notes for HM, Bicycle, time, or story gates. | event bank 201, script 7033 |
| Potion | Diamond / Pearl | Visible item ball | Eterna Forest Interior: Pick up the item ball in the southeastern part of Eterna Forest Interior, 2 tiles west and 45 tiles south of the Route 205 North doorway or transition. | (84, 82) | Reach this subarea; check the route and puzzle notes for HM, Bicycle, time, or story gates. | event bank 201, script 7034 |
| 2× Bluk Berry | Diamond / Pearl | Berry tree | Eterna Forest Exterior: Harvest berry patch 7 in the central part of Eterna Forest Exterior, beside the nearest visible NPC. The plot can be replanted after the initial harvest. | (231, 554) | Reach the outdoor patch on the named route or town; harvest its initial berries before planting a replacement. | berry table ov52_021D76F8, patch 7 |
| 2× Razz Berry | Diamond / Pearl | Berry tree | Eterna Forest Exterior: Harvest berry patch 6 in the central part of Eterna Forest Exterior, beside the nearest visible NPC. The plot can be replanted after the initial harvest. | (230, 554) | Reach the outdoor patch on the named route or town; harvest its initial berries before planting a replacement. | berry table ov52_021D76F8, patch 6 |
| Cheri Berry | Diamond / Pearl | Berry tree | Eterna Forest Exterior: Harvest berry patch 8 in the central part of Eterna Forest Exterior, beside the nearest visible NPC. The plot can be replanted after the initial harvest. | (232, 554) | Reach the outdoor patch on the named route or town; harvest its initial berries before planting a replacement. | berry table ov52_021D76F8, patch 8 |
| 2× Oran Berry | Diamond / Pearl | Berry tree | Eterna Forest Exterior: Harvest berry patch 9 in the central part of Eterna Forest Exterior, beside the nearest visible NPC. The plot can be replanted after the initial harvest. | (233, 554) | Reach the outdoor patch on the named route or town; harvest its initial berries before planting a replacement. | berry table ov52_021D76F8, patch 9 |
Hidden Items
| Hidden item | Area / plain-English placement | QA coordinate | Requirement | Source |
|---|---|---|---|---|
| Insect Plate | Eterna Forest Interior: Use the Dowsing Machine in the northeastern part of Eterna Forest Interior, 6 tiles east and 6 tiles north of the Old Chateau Entrance doorway or transition and inspect that exact ground tile. | (80, 9) | Dowsing Machine Pokétch app. Reach this subarea; check the route and puzzle notes for HM, Bicycle, time, or story gates. | event bank 201, script 8001 |
Puzzles, Warps, And Switches
- At each fork, clear the western and southern item pockets before advancing northeast. Cheryl leaves permanently at the north gate, ending free healing.
Boss Strategy And Partners
Pokémon Trainer CherylPokémon Trainer Cheryl • source ID 608Partner team
- ChanseyEgg Bomb / Soft Boiled / Refresh
Partner role
This stat trainer travels beside the player, turns eligible fights into doubles, and heals the party after each battle during the escort.
How to use the partner
Focus one opposing Pokémon to reduce incoming actions. In wild doubles, leave only the intended catch on the field before throwing a Ball.
Completion Checklist
- Complete the currently reachable part of this route plan: Accept Cheryl as partner; use her Chansey's after-battle healing to train; sweep every trainer pair and item loop; exit at the northeast gate; return alone later for encounters that are awkward in doubles.
- Review all 15 encounter rows across the per-area tables, including game markers, method band, time-of-day rates, levels, and each conditional requirement; mark conditional rows for their stated revisit.
Route 205 North and Eterna Approach
Finish the northern riverbank, collect berries and bridge items, and enter Eterna City from the west.
Source maps
Route 205 North.
Route Plan
Sweep the northern grass and bridge trainers; collect all non-Surf items; fish if desired; cross the final bridge; heal immediately in Eterna.
- This map has separate encounter and item ownership from Route 205 South; do not merge their wild tables simply because the route number matches.
Routes and encounters on this page are compiled from 1 pret map header.
Wild Pokémon
| Pokémon | Games | Levels | Rate | Requirement / notes | ||
|---|---|---|---|---|---|---|
| Morning | Day | Night | ||||
| Grass / cave floor | ||||||
| Bidoof | DP | 10-12 | 45% | Rate counts base slots temporarily replaced by hard-shaking Poké Radar patches and GBA dual-slot insertions. | ||
| Buizel | DP | 10-12 | 35% | Rate counts base slots temporarily replaced by hard-shaking Poké Radar patches and GBA dual-slot insertions. | ||
| Pachirisu | DP | 11 | 10% | — | ||
| Shellos | DP | 11 | 10% | Rate counts base slots temporarily replaced by hard-shaking Poké Radar patches. | ||
| Poké Radar (post-National Dex) | ||||||
 Slowpoke Slowpoke | DP | 11-12 | 22% | National Dex and Poké Radar required; replacement slot applies only in a hard/vigorous-shaking Radar patch. | ||
| Hoppip | DP | 11 | 20% | National Dex and Poké Radar required; replacement slot applies only in a hard/vigorous-shaking Radar patch. | ||
 Skiploom Skiploom | DP | 12 | 2% | National Dex and Poké Radar required; replacement slot applies only in a hard/vigorous-shaking Radar patch. | ||
| Dual-slot GBA insertion (post-National Dex) | ||||||
| Lotad | DP | 12 | 8% | National Dex plus Pokémon Sapphire inserted in the Nintendo DS GBA slot; replaces grass slots 8-9. | ||
| Surfing | ||||||
| Psyduck | DP | 20-40 | 90% | — | ||
| Golduck | DP | 20-40 | 10% | — | ||
| Fishing — Old Rod | ||||||
| Magikarp | DP | 3-10 | 100% | — | ||
| Fishing — Good Rod | ||||||
| Magikarp | DP | 10-25 | 55% | — | ||
| Barboach | DP | 10-25 | 45% | — | ||
| Fishing — Super Rod | ||||||
| Gyarados | DP | 30-55 | 55% | — | ||
| Whiscash | DP | 20-50 | 45% | — | ||
Trainers
| Trainer | Route order / placement | Full team | Reward | Access requirement | Optional / rematch note |
|---|---|---|---|---|---|
 Fisherman AndrewFisherman • source ID 22 Fisherman AndrewFisherman • source ID 22 | Route 205 North • field order 1 at (274, 531) | ₽320 | Reach the trainer's named field subarea; line of sight determines whether the battle is avoidable. | Field order 1, tile (274, 531); sightline/path determines whether it can be avoided. No higher-level same-trainer rematch variant is defined in trdata. | |
| Fisherman JosephFisherman • source ID 23 | Route 205 North • field order 2 at (270, 532) | ₽448 | Reach the trainer's named field subarea; line of sight determines whether the battle is avoidable. | Field order 2, tile (270, 532); sightline/path determines whether it can be avoided. Higher-level source variants used by the rematch system: ID 683: Lv. 31; ID 684: Lv. 55. | |
| Fisherman ZacharyFisherman • source ID 24 | Route 205 North • field order 3 at (277, 535) | ₽320 | Reach the trainer's named field subarea; line of sight determines whether the battle is avoidable. | Field order 3, tile (277, 535); sightline/path determines whether it can be avoided. No higher-level same-trainer rematch variant is defined in trdata. |
Items
| Item | Version | Type | Area / exact direction | Coordinate / script | Requirement | Source |
|---|---|---|---|---|---|---|
| Potion | Diamond / Pearl | Visible item ball | Route 205 North: Pick up the item ball in the southern part of Route 205 North, 15 tiles east and 16 tiles south of the Eterna Forest Interior doorway or transition. | (274, 541) | Reach this subarea; check the route and puzzle notes for HM, Bicycle, time, or story gates. | event bank 334, script 7038 |
| Cheri Berry | Diamond / Pearl | Berry tree | Route 205 North: Harvest berry patch 14 in the northern part of Route 205 North, 18 tiles east and 5 tiles north of the Eterna Forest Interior doorway or transition. The plot can be replanted after the initial harvest. | (277, 519) | Reach the outdoor patch on the named route or town; harvest its initial berries before planting a replacement. | berry table ov52_021D76F8, patch 14 |
| Pecha Berry | Diamond / Pearl | Berry tree | Route 205 North: Harvest berry patch 15 in the northern part of Route 205 North, 19 tiles east and 5 tiles north of the Eterna Forest Interior doorway or transition. The plot can be replanted after the initial harvest. | (278, 519) | Reach the outdoor patch on the named route or town; harvest its initial berries before planting a replacement. | berry table ov52_021D76F8, patch 15 |
| Oran Berry | Diamond / Pearl | Berry tree | Route 205 North: Harvest berry patch 16 in the northern part of Route 205 North, 20 tiles east and 5 tiles north of the Eterna Forest Interior doorway or transition. The plot can be replanted after the initial harvest. | (279, 519) | Reach the outdoor patch on the named route or town; harvest its initial berries before planting a replacement. | berry table ov52_021D76F8, patch 16 |
| Oran Berry | Diamond / Pearl | Berry tree | Route 205 North: Harvest berry patch 17 in the northern part of Route 205 North, 21 tiles east and 5 tiles north of the Eterna Forest Interior doorway or transition. The plot can be replanted after the initial harvest. | (280, 519) | Reach the outdoor patch on the named route or town; harvest its initial berries before planting a replacement. | berry table ov52_021D76F8, patch 17 |
Hidden Items
| Hidden item | Area / plain-English placement | QA coordinate | Requirement | Source |
|---|---|---|---|---|
| Honey | Route 205 North: Use the Dowsing Machine in the northeastern part of Route 205 North, 26 tiles east and 4 tiles north of the Eterna Forest Interior doorway or transition and inspect that exact ground tile. | (285, 520) | Dowsing Machine Pokétch app. Reach this subarea; check the route and puzzle notes for HM, Bicycle, time, or story gates. | event bank 334, script 8150 |
Puzzles, Warps, And Switches
- The short dead ends around the bridge conceal items and trainer sightlines; finish them before taking the east exit.
Completion Checklist
- Complete the currently reachable part of this route plan: Sweep the northern grass and bridge trainers; collect all non-Surf items; fish if desired; cross the final bridge; heal immediately in Eterna.
- Review all 15 encounter rows across the per-area tables, including game markers, method band, time-of-day rates, levels, and each conditional requirement; mark conditional rows for their stated revisit.
Eterna City Orientation
Meet Cynthia, receive HM01 Cut, unlock the Underground Kit, and prepare for Eterna Gym without entering Galactic HQ yet.
Source maps
Eterna, Eterna Poké Mart, Eterna Pokémon Center, Eterna Pokémon Center 2F, Eterna Condominiums 1F, Eterna Condominiums 2F, Eterna Condominiums 3F, Eterna Condominiums 4F, Eterna Herb Shop, Eterna Oak House, Eterna East House, Eterna Underground Man House, Eterna Unused House, and Eterna Pokémon Center B1F.
Route Plan
Heal and shop; talk to the Underground Man for the Explorer Kit; meet Cynthia near the statue for HM01; visit the Name Rater and herb shop as needed; inspect the Gym entrance; save Galactic HQ for after Gardenia.
- Cynthia gives Cut before the badge, but Gardenia's Forest Badge is required to use it outside battle.
- The Bicycle Shop owner remains captive until the Galactic building is cleared in the next phase.
- Professor Oak's Up-Grade gift in Eterna requires the National Dex; it is a postgame revisit, not a first-arrival reward.
Routes and encounters on this page are compiled from 14 pret map headers.
Eterna
| Pokémon | Games | Levels | Rate | Requirement / notes | ||
|---|---|---|---|---|---|---|
| Morning | Day | Night | ||||
| Surfing | ||||||
| Psyduck | DP | 20-40 | 90% | — | ||
| Golduck | DP | 20-40 | 10% | — | ||
| Fishing — Old Rod | ||||||
| Magikarp | DP | 3-10 | 100% | — | ||
| Fishing — Good Rod | ||||||
| Magikarp | DP | 10-25 | 55% | — | ||
| Barboach | DP | 10-25 | 45% | — | ||
| Fishing — Super Rod | ||||||
| Gyarados | DP | 30-55 | 55% | — | ||
| Whiscash | DP | 20-50 | 45% | — | ||
Eterna Condominiums 1F
| Pokémon | Games | Levels | Rate | Requirement / notes | ||
|---|---|---|---|---|---|---|
| Morning | Day | Night | ||||
| In-game trade | ||||||
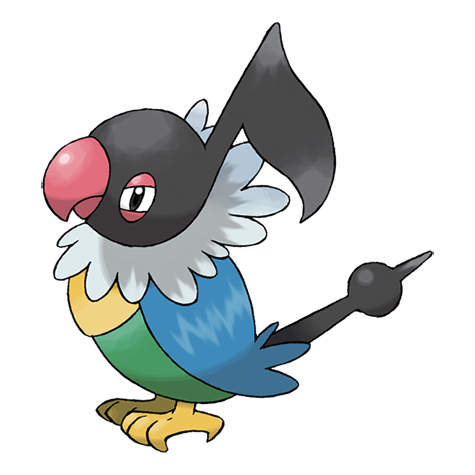 Chatot Chatot | DP | Matches traded Pokémon | Guaranteed trade | Trade Buizel to the local NPC to receive Chatot; trade ID 1. Its nickname is Charap and its original Trainer is Norton. It arrives holding Leppa Berry. Fixed IVs: hp 15, attack 20, defense 15, speed 25, special attack 25, special defense 15. OT language flag: Japanese. | ||
Items
| Item | Version | Type | Area / exact direction | Coordinate / script | Requirement | Source |
|---|---|---|---|---|---|---|
| TM46 | Diamond / Pearl | Visible item ball | Eterna: Pick up the item ball in the northern part of Eterna, 11 tiles east and 5 tiles north of the Eterna Herb Shop doorway or transition. | (327, 516) | Reach this subarea; check the route and puzzle notes for HM, Bicycle, time, or story gates. | event bank 64, script 7039 |
| Super Potion | Diamond / Pearl | Visible item ball | Eterna: Pick up the item ball in the southern part of Eterna, 5 tiles east and 4 tiles north of the Eterna Gym Entrance doorway or transition. | (317, 558) | Reach this subarea; check the route and puzzle notes for HM, Bicycle, time, or story gates. | event bank 64, script 7041 |
| HM01 | Diamond / Pearl | NPC / scripted gift | Eterna: Cynthia gives HM01 Cut beside Eterna's statue. | script 1 | Meet Cynthia at the statue during the first Eterna City visit; the Forest Badge is required to use Cut outside battle. | script bank 69 |
| TM67 | Diamond / Pearl | NPC / scripted gift | Eterna Condominiums 2F: Speak to the item-giving NPC in the southeastern part of Eterna Condominiums 2F, 2 tiles east and 8 tiles south of the Eterna Condominiums 3F doorway or transition. | NPC (17, 11); script 1 | Reach Eterna Condominiums 2F and complete the item-giving NPC's one-time dialogue. | script bank 82 |
| TM04 | Diamond / Pearl | NPC / scripted gift | Eterna Condominiums 4F: Speak to the item-giving NPC in the southeastern part of Eterna Condominiums 4F, 10 tiles east and 5 tiles south of the Eterna Condominiums 3F doorway or transition. | NPC (18, 8); script 1 | Reach Eterna Condominiums 4F and complete the item-giving NPC's one-time dialogue. | script bank 84 |
| Explorer Kit | Diamond / Pearl | NPC / scripted gift | Eterna Underground Man House: Receive it from the Underground Man in his Eterna City house, then follow his Underground tutorial assignments. | NPC (6, 5); script 1 | Reach Eterna City and speak to the Underground Man. | script bank 89 |
| Up-Grade | Diamond / Pearl | Post-National-Dex NPC gift | Eterna City Orientation: Professor Oak gives it during his Eterna visit after the National Dex upgrade. | NPC / system | National Dex; return to Professor Oak in Eterna. | editorial script/system note |
Hidden Items
| Hidden item | Area / plain-English placement | QA coordinate | Requirement | Source |
|---|---|---|---|---|
| Draco Plate | Eterna: Use the Dowsing Machine in the northern part of Eterna, 11 tiles east of the Eterna Herb Shop doorway or transition and inspect that exact ground tile. | (327, 521) | Dowsing Machine Pokétch app. Reach this subarea; check the route and puzzle notes for HM, Bicycle, time, or story gates. | event bank 64, script 8002 |
Puzzles, Warps, And Switches
- Gardenia waits in the Gym only after the player speaks with her outside. The Gym itself is split into an entrance map and the main forest room.
Completion Checklist
- Complete the currently reachable part of this route plan: Heal and shop; talk to the Underground Man for the Explorer Kit; meet Cynthia near the statue for HM01; visit the Name Rater and herb shop as needed; inspect the Gym entrance; save Galactic HQ for after Gardenia.
- Review all 8 encounter rows across the per-area tables, including game markers, method band, time-of-day rates, levels, and each conditional requirement; mark conditional rows for their stated revisit.
Eterna Gym and Gardenia
Find four hidden Gym trainers in order, then defeat Gardenia's Cherubi, Turtwig, and Roserade.
Source maps
Eterna Gym Entrance and Eterna Gym.
Route Plan
Bring Flying, Fire, Bug, Ice, or Poison coverage; locate and defeat all four trainers in their forced sequence; heal if needed; save before Gardenia; preserve the fastest strong attacker for Roserade.
- Gardenia's Roserade is much faster and stronger than her opening pair; status and Flying-type attacks keep it from sweeping.
- The Forest Badge enables Cut, immediately opening Eterna Galactic Building, Old Chateau access, Cycling Road side paths, and many regional shortcuts.
Routes and encounters on this page are compiled from 2 pret map headers.
Trainers
| Trainer | Route order / placement | Full team | Reward | Access requirement | Optional / rematch note |
|---|---|---|---|---|---|
| Leader GardeniaLeader Gardenia • source ID 315 | Eterna Gym • scripted | ₽2,640 | Scripted story trigger; complete the local objective described in the route plan. | Major or story battle; not a VS Seeker rematch row. | |
| Lass CarolineLass • source ID 324 | Eterna Gym • scripted | ₽240 | Scripted story trigger; complete the local objective described in the route plan. | Script-triggered battle; not treated as an ordinary field rematch. | |
| Aroma Lady JennaAroma Lady • source ID 259 | Eterna Gym • scripted | ₽480 | Scripted story trigger; complete the local objective described in the route plan. | Script-triggered battle; not treated as an ordinary field rematch. | |
| Aroma Lady AngelaAroma Lady • source ID 260 | Eterna Gym • scripted |
| ₽544 | Scripted story trigger; complete the local objective described in the route plan. | Script-triggered battle; not treated as an ordinary field rematch. |
 Beauty LindsayBeauty • source ID 348 Beauty LindsayBeauty • source ID 348 | Eterna Gym • scripted |
| ₽952 | Scripted story trigger; complete the local objective described in the route plan. | Script-triggered battle; not treated as an ordinary field rematch. |
Items
| Item | Version | Type | Area / exact direction | Coordinate / script | Requirement | Source |
|---|---|---|---|---|---|---|
| TM86 | Diamond / Pearl | NPC / scripted gift | Eterna Gym: Receive this TM from the Gym Leader immediately after the badge victory. | NPC (15, 3); script 3 | Defeat the Gym Leader; this is part of the one-time badge reward. | script bank 72 |
Puzzles, Warps, And Switches
- Each defeated trainer gives a clue and causes the next trainer to appear. Search the northwest gap, southwest rocks, central trees, and northeast corner in the order the clues indicate.
Completion Checklist
- Complete the currently reachable part of this route plan: Bring Flying, Fire, Bug, Ice, or Poison coverage; locate and defeat all four trainers in their forced sequence; heal if needed; save before Gardenia; preserve the fastest strong attacker for Roserade.
Dex quick links