Phase 3 of 11


Pokemon Diamond and Pearl Phase 3: Cobble Badge Walkthrough
 Cobble Badge
 Clear Eterna's Galactic building, gain the Bicycle and Explorer Kit systems, then travel through Hearthome and Solaceon to Maylene. 10 detailed sections with Diamond/Pearl encounters, trainers, items, puzzles, boss teams, and checklists.
Phase 3 Cobble Badge Galactic Eterna Building, Cycling Road, Hearthome, Solaceon, Veilstone City, and Maylene. 03 / 11 
Phase Snapshot
Phase 3: Cobble Badge
Clear Eterna's Galactic building, gain the Bicycle and Explorer Kit systems, then travel through Hearthome and Solaceon to Maylene.
Data rows
Phase Sections
Major Battles And Partners
 Commander JupiterCommander Jupiter • source ID 406
Full team
 ZubatGiga Drain / Wing Attack / Bite
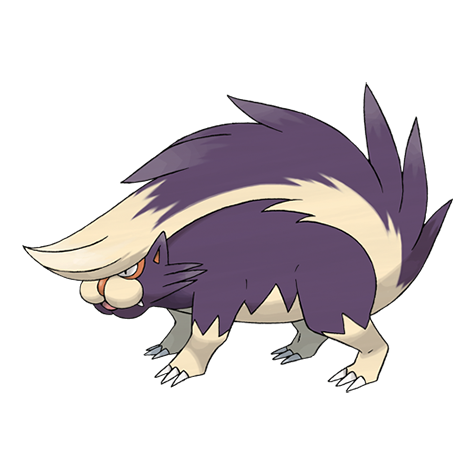 Skuntankholds Sitrus Berry • Night Slash / Poison Gas / Screech / Smokescreen
Danger notes
Skuntank's Night Slash and limited weaknesses make it much more dangerous than the opening Zubat.
Practical counters
Ground is the direct weakness. Otherwise use a bulky neutral attacker and avoid Psychic moves into its Dark typing.
 Pokémon Trainer BarryPokémon Trainer Barry • source ID 470
Full team
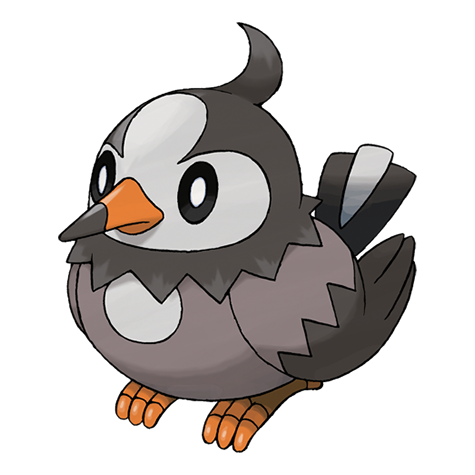 StarlyWing Attack / Quick Attack / Endeavor / Double Team
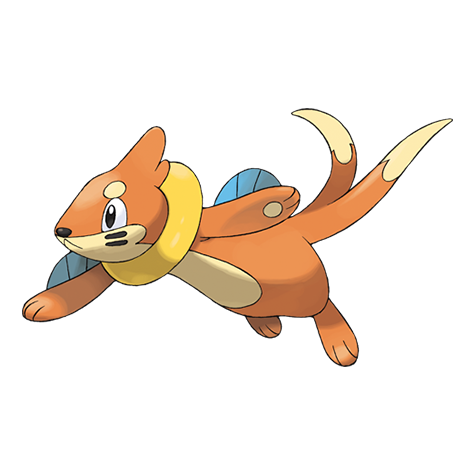 BuizelWater Gun / Quick Attack / Pursuit / Growl
 PonytaEmber / Tackle / Tail Whip / Growl
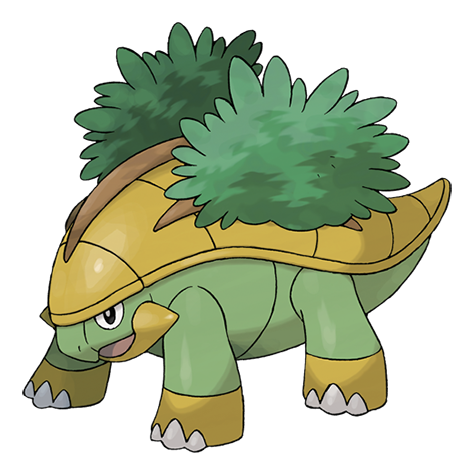 GrotleRazor Leaf / Tackle / Absorb / Withdraw
Practical counters
Pokémon Trainer BarryPokémon Trainer Barry • source ID 471Full team
- StarlyWing Attack / Quick Attack / Endeavor / Double Team
- BuizelWater Gun / Quick Attack / Pursuit / Growl
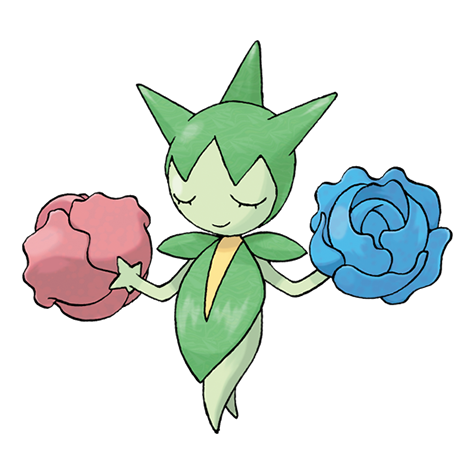 RoseliaMega Drain / Poison Sting / Leech Seed / Stun Spore
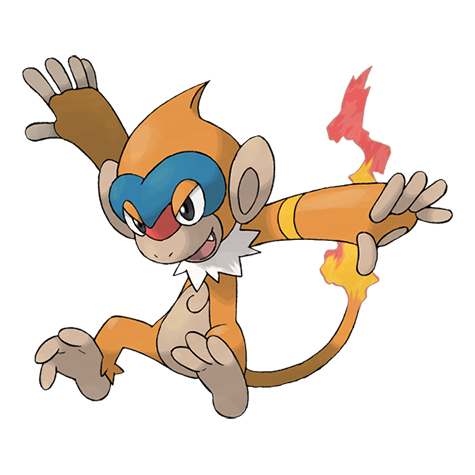 MonfernoFlame Wheel / Mach Punch / Fury Swipes / Leer
Practical counters
Pokémon Trainer BarryPokémon Trainer Barry • source ID 472Full team
- StarlyWing Attack / Quick Attack / Endeavor / Double Team
- RoseliaMega Drain / Poison Sting / Leech Seed / Stun Spore
- PonytaEmber / Tackle / Tail Whip / Growl
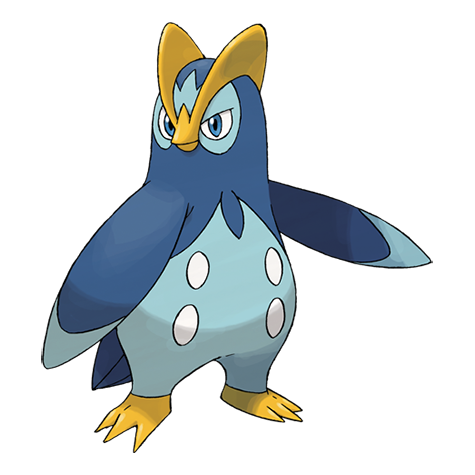 PrinplupBubble / Peck / Metal Claw / Growl
Practical counters
 Leader MayleneLeader Maylene • source ID 317
Full team
 MedititeDrain Punch / Confusion / Meditate / Detect
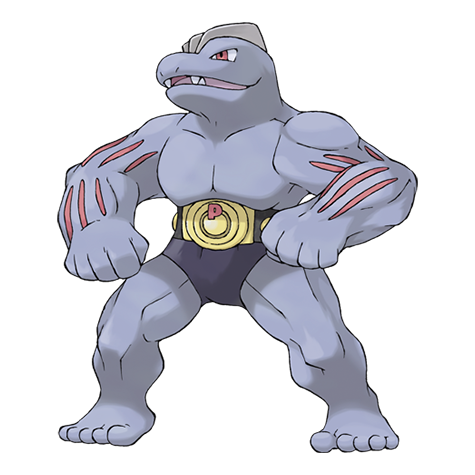 MachokeBrick Break / Rock Tomb / Leer / Foresight
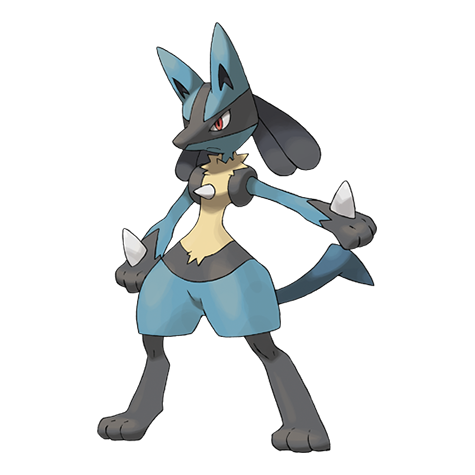 Lucarioholds Sitrus Berry • Drain Punch / Force Palm / Metal Claw / Bone Rush
Danger notes
Lucario is not weak to Flying or Psychic because Steel changes the matchup, and Drain Punch can recover health.
Practical counters
Use Fire, Fighting, or Ground for Lucario; Flying or Psychic remains excellent into Meditite and Machoke.
 Pokémon Trainer MiraPokémon Trainer Mira • source ID 612
Partner team
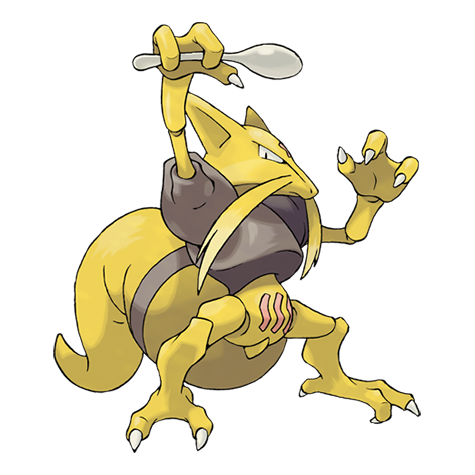 KadabraConfusion / Shock Wave / Flash / Kinesis
Partner role
This stat trainer travels beside the player, turns eligible fights into doubles, and heals the party after each battle during the escort.
How to use the partner
Focus one opposing Pokémon to reduce incoming actions. In wild doubles, leave only the intended catch on the field before throwing a Ball.
Data Coverage
This phase owns 98 Diamond/Pearl source maps and publishes 148 encounter rows, 82 trainer rows, 138 visible/scripted items, and 38 hidden-item rows. Counts include explicit starter/rival branches and curated systems but never substitute Platinum encounters or story maps.
Eterna Galactic Building and Commander Jupiter
Cut through Team Galactic's first headquarters, identify the correct stair routes, rescue the Bicycle Shop owner, and defeat Jupiter.
Source maps
Eterna Galactic Building 1F, Eterna Galactic Building 2F, Eterna Galactic Building 3F, and Eterna Galactic Building 4F.
Route Plan
Use Cut at the building entrance; clear both stair choices on each floor for trainers and items; read the sign clues; heal before 4F; defeat Jupiter; speak to the rescued owner; leave for the Bicycle Shop.
- Jupiter's Skuntank has no exploitable Psychic weakness because of its Dark typing; Ground moves, Intimidate, and steady neutral damage are safer.
- The source contains decoy stair branches with optional Grunts and items, so a complete route should intentionally clear both paths.
Routes and encounters on this page are compiled from 4 pret map headers.
Trainers
| Trainer | Route order / placement | Full team | Reward | Access requirement | Optional / rematch note |
|---|---|---|---|---|---|
 Galactic GruntGalactic • source ID 410 Galactic GruntGalactic • source ID 410 | Eterna Galactic Building 1F • field order 1 at (18, 5) | ₽520 | Forest Badge and Cut are required to enter the Galactic building. | Field order 1, tile (18, 5); sightline/path determines whether it can be avoided. No higher-level same-trainer rematch variant is defined in trdata. | |
 Galactic Female GruntGalactic Female • source ID 421 Galactic Female GruntGalactic Female • source ID 421 | Eterna Galactic Building 1F • field order 2 at (14, 5) | ₽560 | Forest Badge and Cut are required to enter the Galactic building. | Field order 2, tile (14, 5); sightline/path determines whether it can be avoided. No higher-level same-trainer rematch variant is defined in trdata. | |
| Galactic Female GruntGalactic Female • source ID 422 | Eterna Galactic Building 2F • field order 1 at (12, 8) |
| ₽600 | Forest Badge and Cut are required to enter the Galactic building. | Field order 1, tile (12, 8); sightline/path determines whether it can be avoided. No higher-level same-trainer rematch variant is defined in trdata. |
| Galactic GruntGalactic • source ID 412 | Eterna Galactic Building 2F • field order 2 at (4, 11) | ₽520 | Forest Badge and Cut are required to enter the Galactic building. | Field order 2, tile (4, 11); sightline/path determines whether it can be avoided. No higher-level same-trainer rematch variant is defined in trdata. | |
| Galactic Female GruntGalactic Female • source ID 423 | Eterna Galactic Building 3F • field order 1 at (10, 8) | ₽480 | Forest Badge and Cut are required to enter the Galactic building. | Field order 1, tile (10, 8); sightline/path determines whether it can be avoided. No higher-level same-trainer rematch variant is defined in trdata. | |
 Scientist TravonScientist • source ID 831 Scientist TravonScientist • source ID 831 | Eterna Galactic Building 3F • field order 2 at (18, 5) |
| ₽720 | Forest Badge and Cut are required to enter the Galactic building. | Field order 2, tile (18, 5); sightline/path determines whether it can be avoided. No higher-level same-trainer rematch variant is defined in trdata. |
| Commander JupiterCommander Jupiter • source ID 406 | Eterna Galactic Building 4F • scripted | ₽1,600 | Forest Badge and Cut are required to enter the Galactic building. | Major or story battle; not a VS Seeker rematch row. |

Puzzles, Warps, And Switches
- Signs beside the stair pairs hint at the productive route. Take the wrong stairs first for optional battles and loot, return, then use the hinted stairs to continue upward.
Completion Checklist
- Complete the currently reachable part of this route plan: Use Cut at the building entrance; clear both stair choices on each floor for trainers and items; read the sign clues; heal before 4F; defeat Jupiter; speak to the rescued owner; leave for the Bicycle Shop.
Explorer Kit, Fossils, Bicycle, and Route 206
Complete the Underground tutorial, receive the Bicycle, descend Cycling Road, and understand Diamond/Pearl fossil exclusives.
Source maps
Underground, Eterna Bike Shop, Eterna Route 206 Gatehouse, Route 206, Route 206 Cycling Road Gatehouse, and Route 206 Eterna Gatehouse.
Route Plan
Finish the Underground Man's first tutorial; collect the Bicycle; choose either gear as needed; enter Cycling Road from Eterna; fight every cyclist while moving south; use Cut below the road for hidden Route 206 grass and items.
- Skull Fossils occur in Diamond and revive into Cranidos; Armor Fossils occur in Pearl and revive into Shieldon.
- After obtaining the National Dex, Old Amber and the Helix, Dome, Root, and Claw Fossils can also be mined. All fossils are revived at the Oreburgh Mining Museum.
- Mining spots are the yellow sparkles on the Underground radar. Face the matching wall, press A, and fully expose each target with the pick and hammer before the crack meter fills and the wall collapses.
- Spheres stay in the Underground and function as currency; Bag-compatible treasures must be moved from the Underground PC into the Bag before returning to the surface.
- Every weight below is ordered Diamond before National Dex / Pearl before National Dex / Diamond after National Dex / Pearl after National Dex. These are source selection weights, not final wall percentages: a normal wall selects 2-4 targets, the first mining wall is forced to three, placement can fail, and duplicate or already-owned Plates are rejected and rerolled.
- After the version orb has been collected, Diamond adds 66 Small Prism and 33 Large Prism weight; Pearl adds 66 Small Pale and 33 Large Pale weight.
Routes and encounters on this page are compiled from 6 pret map headers.
Route 206
| Pokémon | Games | Levels | Rate | Requirement / notes | ||
|---|---|---|---|---|---|---|
| Morning | Day | Night | ||||
| Grass / cave floor | ||||||
| Ponyta | DP | 14-16 | 35% | 45% | 25% | Rate counts base slots temporarily replaced by the daily swarm, hard-shaking Poké Radar patches, and GBA dual-slot insertions. |
 Geodude Geodude | DP | 14-16 | 35% | Rate counts base slots temporarily replaced by the daily swarm, hard-shaking Poké Radar patches, and GBA dual-slot insertions. | ||
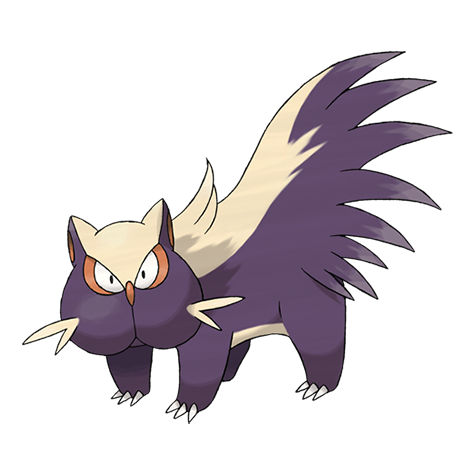 Stunky Stunky | DP | 14-16 | 25% | Rate counts base slots temporarily replaced by the daily swarm, hard-shaking Poké Radar patches, and GBA dual-slot insertions. | ||
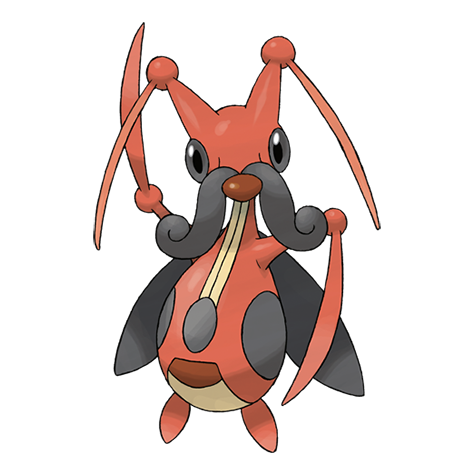 Kricketune Kricketune | DP | 14-15 | 10% | 10% | 20% | Rate counts base slots temporarily replaced by hard-shaking Poké Radar patches. |
 Bronzor Bronzor | DP | 15 | 10% | — | ||
| Geodude | DP | 14 | 10% | Rate counts base slots temporarily replaced by hard-shaking Poké Radar patches. | ||
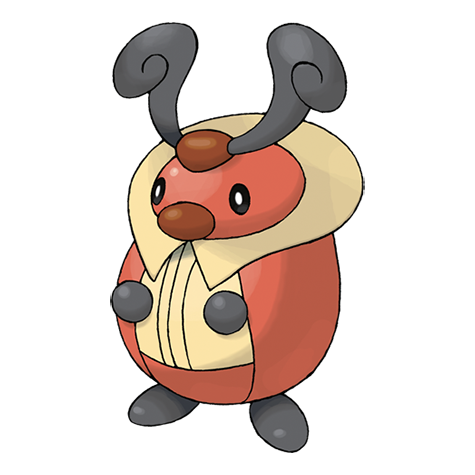 Kricketot Kricketot | DP | 14 | 10% | — | — | — |
| Zubat | DP | 15 | — | — | 10% | — |
| Swarm (post-National Dex daily announcement) | ||||||
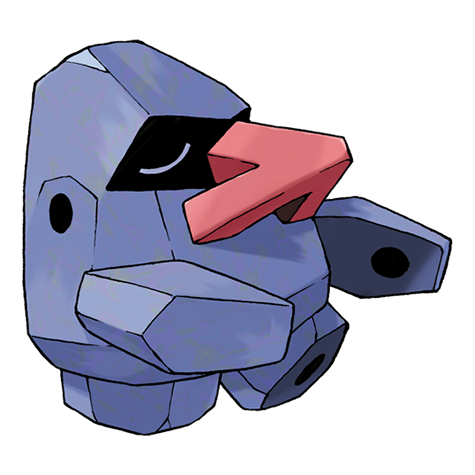 Nosepass Nosepass | DP | 14 | 40% | Post-National Dex daily swarm; replaces grass slots 0-1. | ||
| Poké Radar (post-National Dex) | ||||||
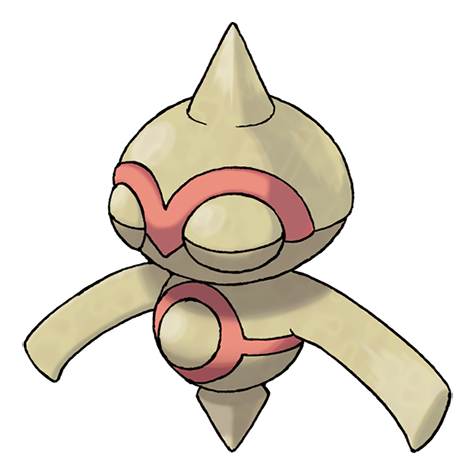 Baltoy Baltoy | DP | 14-16 | 22% | National Dex and Poké Radar required; replacement slot applies only in a hard/vigorous-shaking Radar patch. | ||
| Dual-slot GBA insertion (post-National Dex) | ||||||
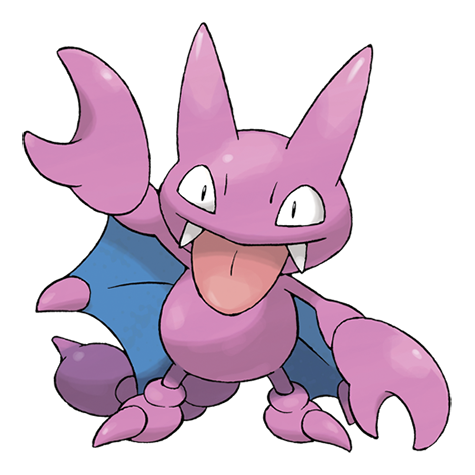 Gligar Gligar | DP | 15 | 8% | National Dex plus Pokémon Emerald inserted in the Nintendo DS GBA slot; replaces grass slots 8-9. | ||
Explorer Kit, Fossils, Bicycle, and Route 206
| Pokémon | Games | Levels | Rate | Requirement / notes | ||
|---|---|---|---|---|---|---|
| Morning | Day | Night | ||||
| Fossil revival | ||||||
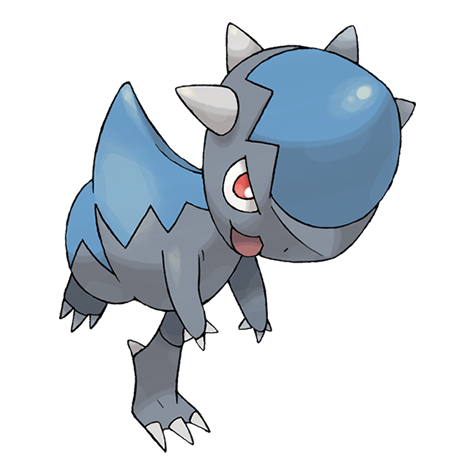 Cranidos Cranidos | DP | 20 | Skull Fossil excavation | Mine a Skull Fossil underground, then revive it at Oreburgh Museum Diamond's native fossil; trade is required in Pearl without another game. | ||
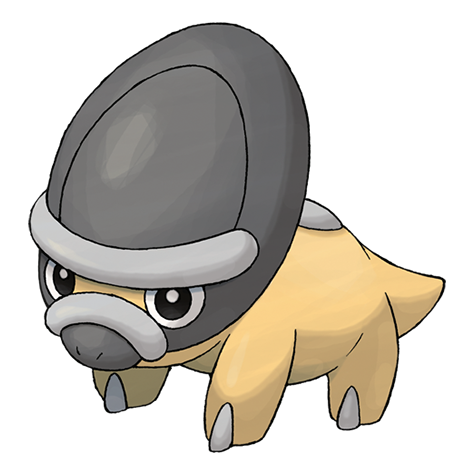 Shieldon Shieldon | DP | 20 | Armor Fossil excavation | Mine an Armor Fossil underground, then revive it at Oreburgh Museum Pearl's native fossil; trade is required in Diamond without another game. | ||
| Aerodactyl, Omanyte, Kabuto, Lileep, or Anorith | DP | 20 | Rare Underground fossil | National Dex required before their fossils can be excavated Revive Old Amber, Helix, Dome, Root, or Claw Fossil at Oreburgh Museum. | ||
Trainers
| Trainer | Route order / placement | Full team | Reward | Access requirement | Optional / rematch note |
|---|---|---|---|---|---|
 Cyclist Male AxelCyclist Male • source ID 25 Cyclist Male AxelCyclist Male • source ID 25 | Route 206 • field order 1 at (302, 601) | ₽544 | Forest Badge and Cut reach the lower route; the Bicycle and its gear changes are required for Cycling Road and ramp pockets. | Field order 1, tile (302, 601); sightline/path determines whether it can be avoided. No higher-level same-trainer rematch variant is defined in trdata. | |
 Cyclist Female MeganCyclist Female • source ID 29 Cyclist Female MeganCyclist Female • source ID 29 | Route 206 • field order 2 at (299, 611) | ₽544 | Forest Badge and Cut reach the lower route; the Bicycle and its gear changes are required for Cycling Road and ramp pockets. | Field order 2, tile (299, 611); sightline/path determines whether it can be avoided. No higher-level same-trainer rematch variant is defined in trdata. | |
| Cyclist Male JamesCyclist Male • source ID 26 | Route 206 • field order 3 at (304, 622) | ₽544 | Forest Badge and Cut reach the lower route; the Bicycle and its gear changes are required for Cycling Road and ramp pockets. | Field order 3, tile (304, 622); sightline/path determines whether it can be avoided. No higher-level same-trainer rematch variant is defined in trdata. | |
| Cyclist Female NicoleCyclist Female • source ID 30 | Route 206 • field order 4 at (299, 631) | ₽480 | Forest Badge and Cut reach the lower route; the Bicycle and its gear changes are required for Cycling Road and ramp pockets. | Field order 4, tile (299, 631); sightline/path determines whether it can be avoided. No higher-level same-trainer rematch variant is defined in trdata. | |
| Cyclist Male JohnCyclist Male • source ID 27 | Route 206 • field order 5 at (303, 644) | ₽480 | Forest Badge and Cut reach the lower route; the Bicycle and its gear changes are required for Cycling Road and ramp pockets. | Field order 5, tile (303, 644); sightline/path determines whether it can be avoided. Higher-level source variants used by the rematch system: ID 653: Lv. 28/Lv. 30; ID 654: Lv. 37/Lv. 39; ID 655: Lv. 58/Lv. 58. | |
| Cyclist Female KaylaCyclist Female • source ID 31 | Route 206 • field order 6 at (306, 675) | ₽544 | Forest Badge and Cut reach the lower route; the Bicycle and its gear changes are required for Cycling Road and ramp pockets. | Field order 6, tile (306, 675); sightline/path determines whether it can be avoided. Higher-level source variants used by the rematch system: ID 656: Lv. 31; ID 657: Lv. 40; ID 658: Lv. 60. | |
| Cyclist Male RyanCyclist Male • source ID 28 | Route 206 • field order 7 at (300, 660) | ₽544 | Forest Badge and Cut reach the lower route; the Bicycle and its gear changes are required for Cycling Road and ramp pockets. | Field order 7, tile (300, 660); sightline/path determines whether it can be avoided. No higher-level same-trainer rematch variant is defined in trdata. | |
| Cyclist Female RachelCyclist Female • source ID 32 | Route 206 • field order 8 at (299, 669) | ₽480 | Forest Badge and Cut reach the lower route; the Bicycle and its gear changes are required for Cycling Road and ramp pockets. | Field order 8, tile (299, 669); sightline/path determines whether it can be avoided. No higher-level same-trainer rematch variant is defined in trdata. | |
 Hiker TheodoreHiker • source ID 451 Hiker TheodoreHiker • source ID 451 | Route 206 • field order 9 at (311, 622) | ₽480 | Forest Badge and Cut reach the lower route; the Bicycle and its gear changes are required for Cycling Road and ramp pockets. | Field order 9, tile (311, 622); sightline/path determines whether it can be avoided. Higher-level source variants used by the rematch system: ID 709: Lv. 29/Lv. 29; ID 710: Lv. 37/Lv. 39; ID 711: Lv. 57/Lv. 59. |
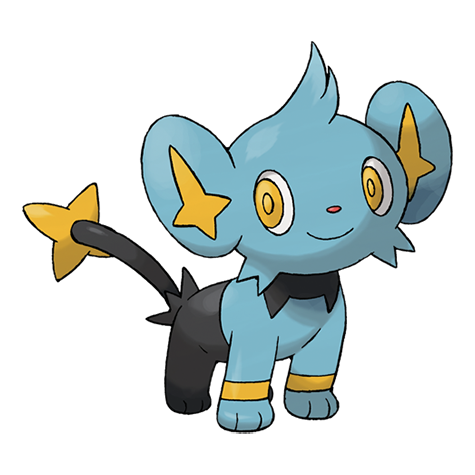

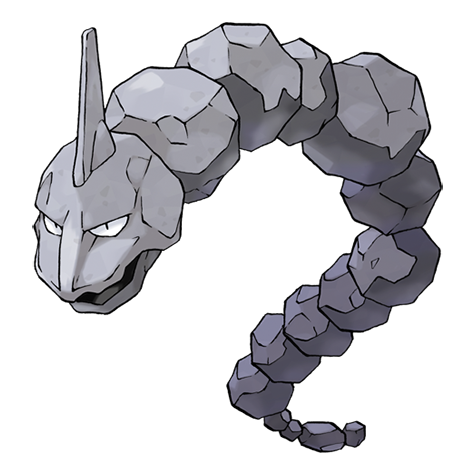
Items
| Item | Version | Type | Area / exact direction | Coordinate / script | Requirement | Source |
|---|---|---|---|---|---|---|
| Poison Barb | Diamond / Pearl | Visible item ball | Route 206: Pick up the item ball in the western part of Route 206, 7 tiles west and 12 tiles south of the Wayward Cave 1F doorway or transition. | (292, 623) | Forest Badge and Cut reach the lower route; the Bicycle and its gear changes are required for Cycling Road and ramp pockets. | event bank 335, script 7045 |
| Full Heal | Diamond / Pearl | Visible item ball | Route 206: Pick up the item ball in the southeastern part of Route 206, 8 tiles east and 2 tiles north of the Route 206 Cycling Road Gatehouse doorway or transition. | (313, 679) | Forest Badge and Cut reach the lower route; the Bicycle and its gear changes are required for Cycling Road and ramp pockets. | event bank 335, script 7046 |
| Burn Heal | Diamond / Pearl | Visible item ball | Route 206: Pick up the item ball in the central part of Route 206, 29 tiles north of the Route 206 Cycling Road Gatehouse doorway or transition. | (302, 652) | Forest Badge and Cut reach the lower route; the Bicycle and its gear changes are required for Cycling Road and ramp pockets. | event bank 335, script 7048 |
| Super Repel | Diamond / Pearl | Visible item ball | Route 206: Pick up the item ball in the eastern part of Route 206, 4 tiles east and 24 tiles south of the Wayward Cave 1F doorway or transition. | (314, 631) | Forest Badge and Cut reach the lower route; the Bicycle and its gear changes are required for Cycling Road and ramp pockets. | event bank 335, script 7047 |
| Rawst Berry | Diamond / Pearl | Berry tree | Route 206: Harvest berry patch 18 in the western part of Route 206, 6 tiles west and 16 tiles south of the Wayward Cave 1F doorway or transition. The plot can be replanted after the initial harvest. | (293, 627) | Forest Badge and Cut reach the lower route; the Bicycle and its gear changes are required for Cycling Road and ramp pockets. | berry table ov52_021D76F8, patch 18 |
| Rawst Berry | Diamond / Pearl | Berry tree | Route 206: Harvest berry patch 19 in the western part of Route 206, 5 tiles west and 16 tiles south of the Wayward Cave 1F doorway or transition. The plot can be replanted after the initial harvest. | (294, 627) | Forest Badge and Cut reach the lower route; the Bicycle and its gear changes are required for Cycling Road and ramp pockets. | berry table ov52_021D76F8, patch 19 |
| Razz Berry | Diamond / Pearl | Berry tree | Route 206: Harvest berry patch 20 in the southwestern part of Route 206, 6 tiles west and 3 tiles south of the Route 206 Cycling Road Gatehouse doorway or transition. The plot can be replanted after the initial harvest. | (295, 691) | Forest Badge and Cut reach the lower route; the Bicycle and its gear changes are required for Cycling Road and ramp pockets. | berry table ov52_021D76F8, patch 20 |
| Razz Berry | Diamond / Pearl | Berry tree | Route 206: Harvest berry patch 21 in the southwestern part of Route 206, 5 tiles west and 3 tiles south of the Route 206 Cycling Road Gatehouse doorway or transition. The plot can be replanted after the initial harvest. | (296, 691) | Forest Badge and Cut reach the lower route; the Bicycle and its gear changes are required for Cycling Road and ramp pockets. | berry table ov52_021D76F8, patch 21 |
| Bicycle | Diamond / Pearl | NPC / scripted gift | Eterna Bike Shop: The Bicycle Shop owner gives it at his Eterna shop after being rescued from Team Galactic. | NPC (3, 5); script 1 | Earn the Forest Badge, clear Eterna Galactic Building, and rescue the shop owner. | script bank 76 |
| Exp Share | Diamond / Pearl | NPC / scripted gift | Eterna Route 206 Gatehouse: Professor Rowan's aide gives it in the Eterna-side Route 206 gatehouse after checking the Pokedex. | NPC (4, 4); script 4 | Record at least 35 seen species in the Sinnoh Pokedex, then speak to Rowan's aide in the gatehouse. | script bank 85 |
| Small Prism / Pale / Red / Blue / Green Spheres | Diamond / Pearl | Underground mining currency | Explorer Kit, Fossils, Bicycle, and Route 206: Selection weights: Prism 30/22/27/20; Pale 22/30/20/27; Red 166/192/122/150; Blue 192/166/150/122; Green 150/150/106/106. Fully uncover or grow buried Spheres, then trade them to Underground vendors. | NPC / system | Explorer Kit; Spheres remain in the Underground rather than entering the surface Bag. | editorial script/system note |
| Large Prism / Pale / Red / Blue / Green Spheres | Diamond / Pearl | Underground mining currency | Explorer Kit, Fossils, Bicycle, and Route 206: Selection weights: Prism 15/13/13/10; Pale 13/15/10/13; Red 83/96/61/75; Blue 96/83/75/61; Green 75/75/53/53. | NPC / system | Explorer Kit; rarer large Sphere targets must be completely exposed before the wall collapses. | editorial script/system note |
| Red / Blue / Yellow / Green Shards | Diamond / Pearl | Underground mining treasure | Explorer Kit, Fossils, Bicycle, and Route 206: Selection weights: Red 10/15/12/22; Blue 15/10/25/15; Yellow 15/10/22/12; Green 10/15/12/22. | NPC / system | Explorer Kit; fully expose the shard before the wall collapses. | editorial script/system note |
| Draco / Dread / Earth / Fist / Flame / Icicle / Insect / Iron Plates | Diamond / Pearl | Underground mining treasure | Explorer Kit, Fossils, Bicycle, and Route 206: Each Plate has weight 1/1/1/1. The game rerolls a Plate already owned or duplicated in the same wall. | NPC / system | Explorer Kit; uncommon mining-wall treasure. | editorial script/system note |
| Meadow / Mind / Sky / Splash / Spooky / Stone / Toxic / Zap Plates | Diamond / Pearl | Underground mining treasure | Explorer Kit, Fossils, Bicycle, and Route 206: Each Plate has weight 1/1/1/1. The game rerolls a Plate already owned or duplicated in the same wall. | NPC / system | Explorer Kit; uncommon mining-wall treasure. | editorial script/system note |
| Fire / Thunder / Sun Stones | Diamond / Pearl | Underground mining treasure | Explorer Kit, Fossils, Bicycle, and Route 206: Selection weights: Fire 4/1/30/5; Thunder 4/1/30/5; Sun 4/1/15/3. These three are more common in Diamond. | NPC / system | Explorer Kit; fully expose the stone before the wall collapses. | editorial script/system note |
| Water / Leaf / Moon Stones | Diamond / Pearl | Underground mining treasure | Explorer Kit, Fossils, Bicycle, and Route 206: Selection weights: Water 1/4/5/30; Leaf 2/4/5/30; Moon 2/4/3/15. These three are more common in Pearl. | NPC / system | Explorer Kit; fully expose the stone before the wall collapses. | editorial script/system note |
| Damp Rock / Smooth Rock | Diamond / Pearl | Underground mining treasure | Explorer Kit, Fossils, Bicycle, and Route 206: Selection weights: Damp 1/2/5/11; Smooth 1/2/5/11. Both are more common in Pearl. | NPC / system | Explorer Kit; fully expose the treasure before the wall collapses. | editorial script/system note |
| Heat Rock / Icy Rock | Diamond / Pearl | Underground mining treasure | Explorer Kit, Fossils, Bicycle, and Route 206: Selection weights: Heat 2/1/11/5; Icy 2/1/11/5. Both are more common in Diamond. | NPC / system | Explorer Kit; fully expose the treasure before the wall collapses. | editorial script/system note |
| Light Clay / Iron Ball / Hard Stone / Everstone / Heart Scale | Diamond / Pearl | Underground mining treasure | Explorer Kit, Fossils, Bicycle, and Route 206: Selection weights: Light Clay 1/1/5/2; Iron Ball 1/1/2/5; Hard Stone 4/4/20/20; Everstone 4/4/20/20; Heart Scale 33/33/30/30. | NPC / system | Explorer Kit; move the recovered treasure into the Bag before leaving the Underground. | editorial script/system note |
| Revive / Max Revive / Rare Bone / Star Piece | Diamond / Pearl | Underground mining treasure | Explorer Kit, Fossils, Bicycle, and Route 206: Selection weights: Revive 10/10/10/10; Max Revive 1/1/2/2; Rare Bone 2/2/10/10; Star Piece 2/2/10/10. | NPC / system | Explorer Kit; fully expose the treasure before the wall collapses. | editorial script/system note |
| Odd Keystone | Diamond / Pearl | Post-National-Dex Underground treasure | Explorer Kit, Fossils, Bicycle, and Route 206: Selection weight 0/0/2/2, so additional copies become mineable only after the National Dex. The Route 208 gift and Twinleaf hidden copy can be inserted at Route 209's Hallowed Tower and used to complete the Spiritomb ritual earlier. | NPC / system | National Dex and Explorer Kit for mining this additional copy; the Hallowed Tower ritual itself has no National Dex requirement. | editorial script/system note |
| Skull Fossil | Diamond | Underground mining fossil | Explorer Kit, Fossils, Bicycle, and Route 206: Selection weight 25/0/12/0. Take it to Oreburgh Mining Museum to revive Cranidos at Lv. 20. | NPC / system | Explorer Kit; Diamond version. | editorial script/system note |
| Armor Fossil | Pearl | Underground mining fossil | Explorer Kit, Fossils, Bicycle, and Route 206: Selection weight 0/25/0/12. Take it to Oreburgh Mining Museum to revive Shieldon at Lv. 20. | NPC / system | Explorer Kit; Pearl version. | editorial script/system note |
| Helix / Claw Fossils and Old Amber | Diamond / Pearl | Post-National-Dex Underground fossils | Explorer Kit, Fossils, Bicycle, and Route 206: Selection weights after the National Dex: Helix 12/4, Claw 12/4, Old Amber 5/5 (Diamond/Pearl). Helix and Claw are more common in Diamond. | NPC / system | National Dex and Explorer Kit; revive at Oreburgh Mining Museum. | editorial script/system note |
| Dome / Root Fossils | Diamond / Pearl | Post-National-Dex Underground fossils | Explorer Kit, Fossils, Bicycle, and Route 206: Selection weights after the National Dex: Dome 1/13 and Root 4/12 (Diamond/Pearl). Both are more common in Pearl. | NPC / system | National Dex and Explorer Kit; revive at Oreburgh Mining Museum. | editorial script/system note |
Hidden Items
| Hidden item | Area / plain-English placement | QA coordinate | Requirement | Source |
|---|---|---|---|---|
| Elixir | Route 206: Use the Dowsing Machine in the eastern part of Route 206, 8 tiles east and 34 tiles north of the Route 206 Cycling Road Gatehouse doorway or transition and inspect that exact ground tile. | (313, 647) | Dowsing Machine Pokétch app. Forest Badge and Cut reach the lower route; the Bicycle and its gear changes are required for Cycling Road and ramp pockets. | event bank 335, script 8004 |
| Potion | Route 206: Use the Dowsing Machine in the western part of Route 206, 4 tiles west and 24 tiles south of the Wayward Cave 1F doorway or transition and inspect that exact ground tile. | (295, 635) | Dowsing Machine Pokétch app. Forest Badge and Cut reach the lower route; the Bicycle and its gear changes are required for Cycling Road and ramp pockets. | event bank 335, script 8005 |
Puzzles, Warps, And Switches
- Cycling Road automatically pushes the Bicycle downhill. Brake with the directional controls to engage every cyclist and stop at item-side alignments before leaving the gate.
Completion Checklist
- Complete the currently reachable part of this route plan: Finish the Underground Man's first tutorial; collect the Bicycle; choose either gear as needed; enter Cycling Road from Eterna; fight every cyclist while moving south; use Cut below the road for hidden Route 206 grass and items.
- Review all 14 encounter rows across the per-area tables, including game markers, method band, time-of-day rates, levels, and each conditional requirement; mark conditional rows for their stated revisit.
Wayward Cave and Mira
Clear Mira's main-cave escort, locate the hidden Cycling Road entrance, and mark Diamond/Pearl's Strength-gated Gible basement for a post-Byron return.
Source maps
Wayward Cave 1F and Wayward Cave B1F.
Route Plan
Cut into Route 206's lower area; clear the visible entrance and find Mira in the main cave; escort her to the exit; locate the separate hidden entrance beneath Cycling Road; in original Diamond/Pearl, stop at the Strength boulder; return after the Mine Badge with Strength and the Bicycle to clear B1F and catch Gible.
- The hidden entrance is concealed by Cycling Road's bridge tiles and cannot be seen directly; move against the rock wall beneath the road until the transition triggers.
- Mira heals after battles but forces double wild encounters in the main cave, so isolate one target before attempting a catch.
- Original Diamond/Pearl places a Strength boulder before the hidden B1F route. Gible is therefore a post-Mine-Badge catch here; Platinum's earlier, boulder-free access must not be applied.
Routes and encounters on this page are compiled from 2 pret map headers.
Wayward Cave 1F
| Pokémon | Games | Levels | Rate | Requirement / notes | ||
|---|---|---|---|---|---|---|
| Morning | Day | Night | ||||
| Grass / cave floor | ||||||
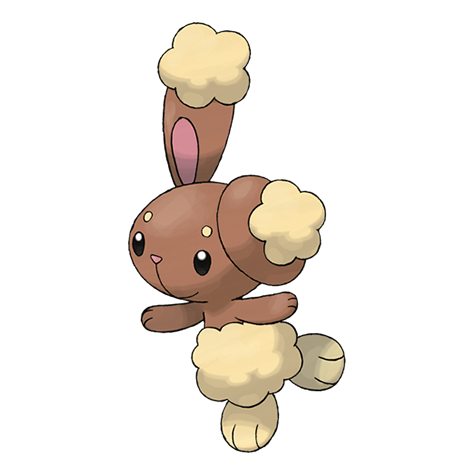
| Zubat | DP | 14-16 | 45% | Rate counts base slots temporarily replaced by GBA dual-slot insertions. | ||
| Bronzor | DP | 14-16 | 40% | — | ||
| Geodude | DP | 15-16 | 15% | Rate counts base slots temporarily replaced by GBA dual-slot insertions. | ||
| Dual-slot GBA insertion (post-National Dex) | ||||||
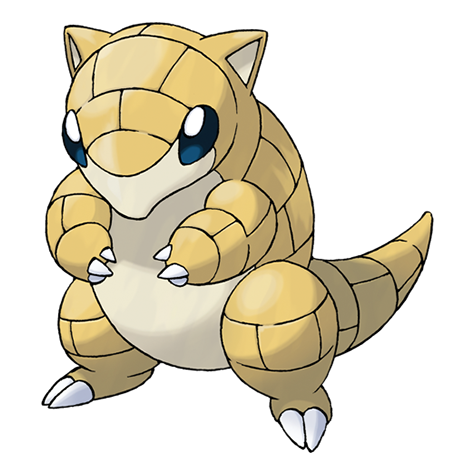 Sandshrew Sandshrew | DP | 16 | 8% | National Dex plus Pokémon LeafGreen inserted in the Nintendo DS GBA slot; replaces grass slots 8-9. | ||
Wayward Cave B1F
| Pokémon | Games | Levels | Rate | Requirement / notes | ||
|---|---|---|---|---|---|---|
| Morning | Day | Night | ||||
| Grass / cave floor | ||||||
| Bronzor | DP | 15-17 | 40% | — | ||
| Zubat | DP | 15-17 | 35% | Rate counts base slots temporarily replaced by GBA dual-slot insertions. | ||
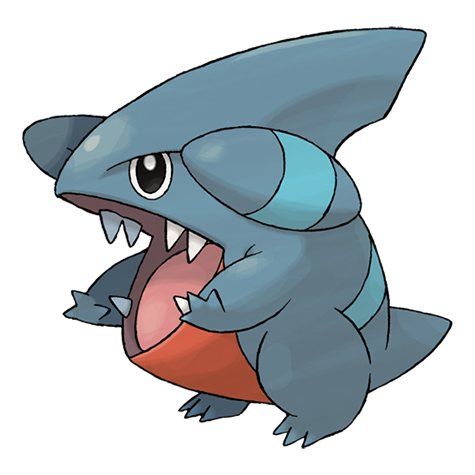 Gible Gible | DP | 15-17 | 15% | Rate counts base slots temporarily replaced by GBA dual-slot insertions. | ||
| Geodude | DP | 16 | 10% | — | ||
| Dual-slot GBA insertion (post-National Dex) | ||||||
| Sandshrew | DP | 16-17 | 8% | National Dex plus Pokémon LeafGreen inserted in the Nintendo DS GBA slot; replaces grass slots 8-9. | ||
Trainers
| Trainer | Route order / placement | Full team | Reward | Access requirement | Optional / rematch note |
|---|---|---|---|---|---|
 Camper DiegoCamper • source ID 379 Camper DiegoCamper • source ID 379 | Wayward Cave 1F • field order 1 at (2, 14) | ₽272 | Forest Badge and Cut reach the cave approach; the main-floor Mira escort is separate from the later Strength-gated basement. | Field order 1, tile (2, 14); sightline/path determines whether it can be avoided. No higher-level same-trainer rematch variant is defined in trdata. | |
 Picnicker ToriPicnicker • source ID 458 Picnicker ToriPicnicker • source ID 458 | Wayward Cave 1F • field order 2 at (5, 14) | ₽240 | Forest Badge and Cut reach the cave approach; the main-floor Mira escort is separate from the later Strength-gated basement. | Field order 2, tile (5, 14); sightline/path determines whether it can be avoided. No higher-level same-trainer rematch variant is defined in trdata. | |
 Lass CassidyLass • source ID 450 Lass CassidyLass • source ID 450 | Wayward Cave 1F • field order 3 at (2, 42) | ₽272 | Forest Badge and Cut reach the cave approach; the main-floor Mira escort is separate from the later Strength-gated basement. | Field order 3, tile (2, 42); sightline/path determines whether it can be avoided. No higher-level same-trainer rematch variant is defined in trdata. | |
 Youngster WayneYoungster • source ID 496 Youngster WayneYoungster • source ID 496 | Wayward Cave 1F • field order 4 at (5, 42) | ₽240 | Forest Badge and Cut reach the cave approach; the main-floor Mira escort is separate from the later Strength-gated basement. | Field order 4, tile (5, 42); sightline/path determines whether it can be avoided. No higher-level same-trainer rematch variant is defined in trdata. | |
| Hiker ReginaldHiker • source ID 454 | Wayward Cave 1F • field order 5 at (17, 38) | ₽480 | Forest Badge and Cut reach the cave approach; the main-floor Mira escort is separate from the later Strength-gated basement. | Field order 5, tile (17, 38); sightline/path determines whether it can be avoided. No higher-level same-trainer rematch variant is defined in trdata. | |
 Collector TerryCollector • source ID 383 Collector TerryCollector • source ID 383 | Wayward Cave 1F • field order 6 at (91, 48) | ₽1,088 | Forest Badge and Cut reach the cave approach; the main-floor Mira escort is separate from the later Strength-gated basement. | Field order 6, tile (91, 48); sightline/path determines whether it can be avoided. No higher-level same-trainer rematch variant is defined in trdata. | |
| Picnicker AnaPicnicker • source ID 459 | Wayward Cave 1F • field order 7 at (73, 30) |
| ₽272 | Forest Badge and Cut reach the cave approach; the main-floor Mira escort is separate from the later Strength-gated basement. | Field order 7, tile (73, 30); sightline/path determines whether it can be avoided. No higher-level same-trainer rematch variant is defined in trdata. |
| Camper ParkerCamper • source ID 380 | Wayward Cave 1F • field order 8 at (77, 30) | ₽240 | Forest Badge and Cut reach the cave approach; the main-floor Mira escort is separate from the later Strength-gated basement. | Field order 8, tile (77, 30); sightline/path determines whether it can be avoided. No higher-level same-trainer rematch variant is defined in trdata. | |
 Ruin Maniac GeraldRuin Maniac • source ID 443 Ruin Maniac GeraldRuin Maniac • source ID 443 | Wayward Cave 1F • field order 9 at (93, 48) | ₽816 | Forest Badge and Cut reach the cave approach; the main-floor Mira escort is separate from the later Strength-gated basement. | Field order 9, tile (93, 48); sightline/path determines whether it can be avoided. No higher-level same-trainer rematch variant is defined in trdata. | |
| Hiker LorenzoHiker • source ID 455 | Wayward Cave 1F • field order 10 at (20, 38) | ₽544 | Forest Badge and Cut reach the cave approach; the main-floor Mira escort is separate from the later Strength-gated basement. | Field order 10, tile (20, 38); sightline/path determines whether it can be avoided. No higher-level same-trainer rematch variant is defined in trdata. |



Items
| Item | Version | Type | Area / exact direction | Coordinate / script | Requirement | Source |
|---|---|---|---|---|---|---|
| TM26 | Diamond / Pearl | Visible item ball | Wayward Cave 1F: Pick up the item ball in the southern part of Wayward Cave 1F, 1 tile east and 1 tile south of the Wayward Cave B1F doorway or transition. | (56, 55) | Forest Badge and Cut reach the cave approach; the main-floor Mira escort is separate from the later Strength-gated basement. | event bank 272, script 7052 |
| TM32 | Diamond / Pearl | Visible item ball | Wayward Cave 1F: Pick up the item ball in the southwestern part of Wayward Cave 1F, 20 tiles west and 10 tiles north of the Wayward Cave B1F doorway or transition. | (8, 44) | Forest Badge and Cut reach the cave approach; the main-floor Mira escort is separate from the later Strength-gated basement. | event bank 272, script 7049 |
| Rare Candy | Diamond / Pearl | Visible item ball | Wayward Cave 1F: Pick up the item ball in the northwestern part of Wayward Cave 1F, 21 tiles west and 39 tiles north of the Wayward Cave B1F doorway or transition. | (7, 15) | Forest Badge and Cut reach the cave approach; the main-floor Mira escort is separate from the later Strength-gated basement. | event bank 272, script 7050 |
| Escape Rope | Diamond / Pearl | Visible item ball | Wayward Cave 1F: Pick up the item ball in the northern part of Wayward Cave 1F, 3 tiles east and 38 tiles north of the Route 206 doorway or transition. | (44, 15) | Forest Badge and Cut reach the cave approach; the main-floor Mira escort is separate from the later Strength-gated basement. | event bank 272, script 7051 |
| Grip Claw | Diamond / Pearl | Visible item ball | Wayward Cave B1F: Pick up the item ball in the northern part of Wayward Cave B1F, 6 tiles east and 31 tiles north of the Wayward Cave 1F doorway or transition. | (22, 9) | Diamond/Pearl requires the Mine Badge, Strength, and the Bicycle to clear the hidden-entrance basement; Platinum's earlier access does not apply. | event bank 273, script 7055 |
| Max Ether | Diamond / Pearl | Visible item ball | Wayward Cave B1F: Pick up the item ball in the northeastern part of Wayward Cave B1F, 12 tiles west and 22 tiles north of the Wayward Cave 1F doorway or transition. | (31, 16) | Diamond/Pearl requires the Mine Badge, Strength, and the Bicycle to clear the hidden-entrance basement; Platinum's earlier access does not apply. | event bank 273, script 7053 |
| Revive | Diamond / Pearl | Visible item ball | Wayward Cave B1F: Pick up the item ball in the northeastern part of Wayward Cave B1F, 10 tiles west and 30 tiles north of the Wayward Cave 1F doorway or transition. | (33, 8) | Diamond/Pearl requires the Mine Badge, Strength, and the Bicycle to clear the hidden-entrance basement; Platinum's earlier access does not apply. | event bank 273, script 7054 |
Hidden Items
| Hidden item | Area / plain-English placement | QA coordinate | Requirement | Source |
|---|---|---|---|---|
| Nugget | Wayward Cave 1F: Use the Dowsing Machine in the northeastern part of Wayward Cave 1F, 17 tiles east and 39 tiles north of the Wayward Cave B1F doorway or transition and inspect that exact ground tile. | (72, 15) | Dowsing Machine Pokétch app. Forest Badge and Cut reach the cave approach; the main-floor Mira escort is separate from the later Strength-gated basement. | event bank 272, script 8006 |
| Burn Heal | Wayward Cave 1F: Use the Dowsing Machine in the eastern part of Wayward Cave 1F, 19 tiles east and 20 tiles north of the Wayward Cave B1F doorway or transition and inspect that exact ground tile. | (74, 34) | Dowsing Machine Pokétch app. Forest Badge and Cut reach the cave approach; the main-floor Mira escort is separate from the later Strength-gated basement. | event bank 272, script 8009 |
| Super Potion | Wayward Cave 1F: Use the Dowsing Machine on the main cave floor during the early Wayward Cave visit. This pickup shares its one-time flag with the later Route 207 Super Potion, so only one can be claimed per save. | (17, 43) | Dowsing Machine Pokétch app. Forest Badge and Cut to reach Wayward Cave; recommended before the mutually exclusive Route 207 cliff copy. | event bank 272, script 8008 |
| Potion | Wayward Cave 1F: Use the Dowsing Machine in the central part of Wayward Cave 1F, 2 tiles east and 24 tiles north of the Route 206 doorway or transition and inspect that exact ground tile. | (43, 29) | Dowsing Machine Pokétch app. Forest Badge and Cut reach the cave approach; the main-floor Mira escort is separate from the later Strength-gated basement. | event bank 272, script 8162 |
| Potion | Wayward Cave 1F: Use the Dowsing Machine in the southern part of Wayward Cave 1F, 13 tiles north of the Wayward Cave B1F doorway or transition and inspect that exact ground tile. | (55, 41) | Dowsing Machine Pokétch app. Forest Badge and Cut reach the cave approach; the main-floor Mira escort is separate from the later Strength-gated basement. | event bank 272, script 8208 |
| Tinymushroom | Wayward Cave 1F: Use the Dowsing Machine in the southeastern part of Wayward Cave 1F, 37 tiles east and 3 tiles north of the Wayward Cave B1F doorway or transition and inspect that exact ground tile. | (92, 51) | Dowsing Machine Pokétch app. Forest Badge and Cut reach the cave approach; the main-floor Mira escort is separate from the later Strength-gated basement. | event bank 272, script 8209 |
| Revive | Wayward Cave B1F: Use the Dowsing Machine in the northwestern part of Wayward Cave B1F, 13 tiles west and 30 tiles north of the Wayward Cave 1F doorway or transition and inspect that exact ground tile. | (3, 10) | Dowsing Machine Pokétch app. Diamond/Pearl requires the Mine Badge, Strength, and the Bicycle to clear the hidden-entrance basement; Platinum's earlier access does not apply. | event bank 273, script 8011 |
| Stardust | Wayward Cave B1F: Use the Dowsing Machine in the southwestern part of Wayward Cave B1F, 12 tiles west and 1 tile north of the Wayward Cave 1F doorway or transition and inspect that exact ground tile. | (4, 39) | Dowsing Machine Pokétch app. Diamond/Pearl requires the Mine Badge, Strength, and the Bicycle to clear the hidden-entrance basement; Platinum's earlier access does not apply. | event bank 273, script 8010 |
Puzzles, Warps, And Switches
- After finding Mira in the main cave, retrace the entrance path; her escort route is separate from the hidden basement.
- On the later B1F revisit, use Strength at the entrance boulder, the Bicycle's slower gear for positioning, and faster gear to gain distance over jump ramps. Rock Smash opens optional alcoves.
Completion Checklist
- Complete the currently reachable part of this route plan: Cut into Route 206's lower area; clear the visible entrance and find Mira in the main cave; escort her to the exit; locate the separate hidden entrance beneath Cycling Road; in original Diamond/Pearl, stop at the Strength boulder; return after the Mine Badge with Strength and the Bicycle to clear B1F and catch Gible.
- Review all 9 encounter rows across the per-area tables, including game markers, method band, time-of-day rates, levels, and each conditional requirement; mark conditional rows for their stated revisit.
Route 207 and Mt. Coronet South
Climb Route 207, meet Lucas or Dawn, encounter Cyrus in Mt. Coronet, and exit toward Route 208.
Source maps
Mount Coronet South 1F and Route 207.
Route Plan
Use the Bicycle slope from Oreburgh; collect the Vs. Seeker and Dowsing Machine; sweep Route 207 trainers; enter Mt. Coronet; follow the ground-level east passage; watch the Cyrus scene; exit to Route 208.
- The Dowsing Machine Poketch app is central to the walkthrough's hidden-item directions; activate it when entering each new map.
- Most visible Mt. Coronet branches remain gated by Surf, Strength, Rock Climb, or Waterfall and must be labeled for later phases.
Routes and encounters on this page are compiled from 2 pret map headers.
Mount Coronet South 1F
| Pokémon | Games | Levels | Rate | Requirement / notes | ||
|---|---|---|---|---|---|---|
| Morning | Day | Night | ||||
| Grass / cave floor | ||||||
| Geodude | DP | 14-15 | 20% | 30% | 30% | — |
 Cleffa Cleffa | DP | 14 | 25% | 5% | 5% | — |
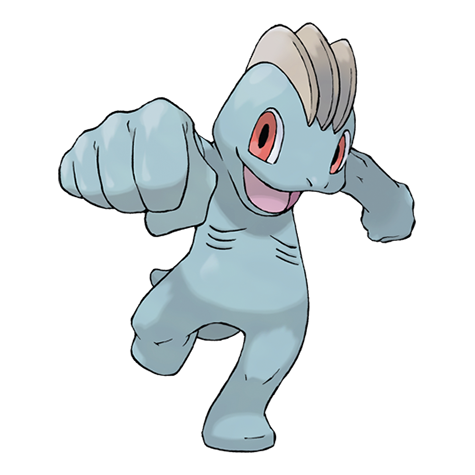 Machop Machop | DP | 15-16 | 25% | — | ||
| Zubat | DP | 14-15 | 10% | 20% | 20% | — |
 Chingling Chingling | DP | 15 | 10% | — | ||
| Meditite | DP | 15 | 10% | — | ||
| Surfing | ||||||
| Zubat | DP | 20-40 | 90% | — | ||
 Golbat Golbat | DP | 20-40 | 10% | — | ||
| Fishing — Old Rod | ||||||
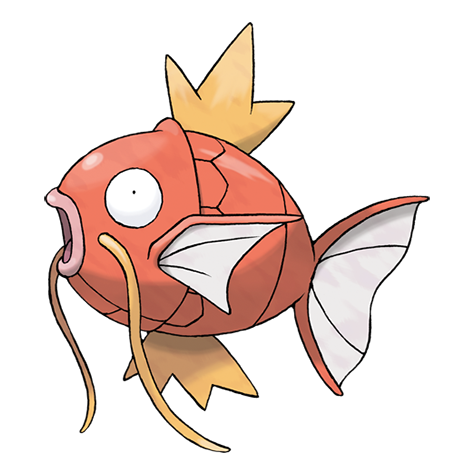 Magikarp Magikarp | DP | 3-10 | 100% | — | ||
| Fishing — Good Rod | ||||||
| Magikarp | DP | 10-25 | 55% | — | ||
 Barboach Barboach | DP | 10-25 | 45% | — | ||
| Fishing — Super Rod | ||||||
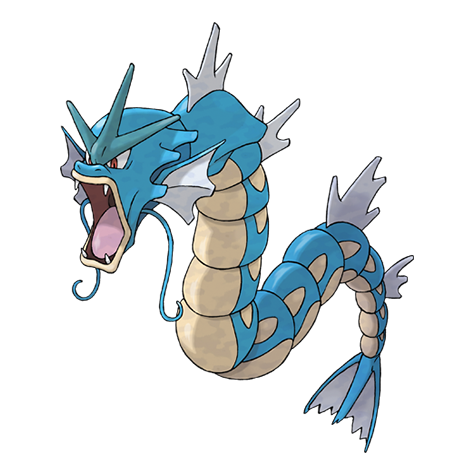 Gyarados Gyarados | DP | 30-55 | 55% | — | ||
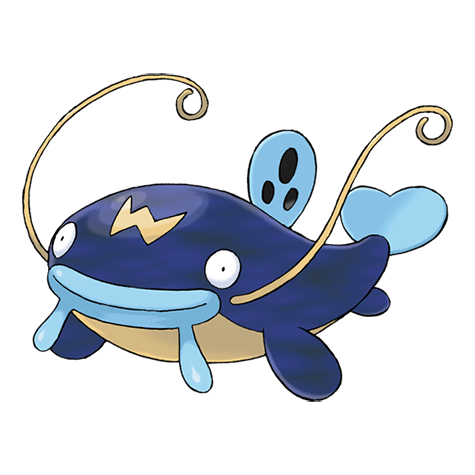 Whiscash Whiscash | DP | 20-50 | 45% | — | ||
Route 207
| Pokémon | Games | Levels | Rate | Requirement / notes | ||
|---|---|---|---|---|---|---|
| Morning | Day | Night | ||||
| Grass / cave floor | ||||||
| Geodude | DP | 5-7 | 55% | Rate counts base slots temporarily replaced by the daily swarm, hard-shaking Poké Radar patches, and GBA dual-slot insertions. | ||
| Machop | DP | 5-7 | 35% | 45% | 25% | Rate counts base slots temporarily replaced by the daily swarm, hard-shaking Poké Radar patches, and GBA dual-slot insertions. |
| Kricketot | DP | 6 | 10% | — | 10% | — |
| Zubat | DP | 6 | — | — | 10% | — |
| Swarm (post-National Dex daily announcement) | ||||||
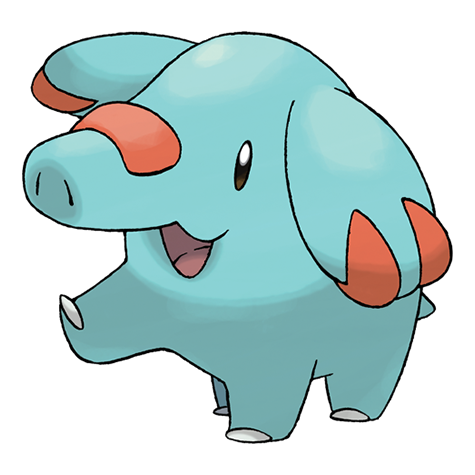 Phanpy Phanpy | DP | 5 | 40% | Post-National Dex daily swarm; replaces grass slots 0-1. | ||
| Poké Radar (post-National Dex) | ||||||
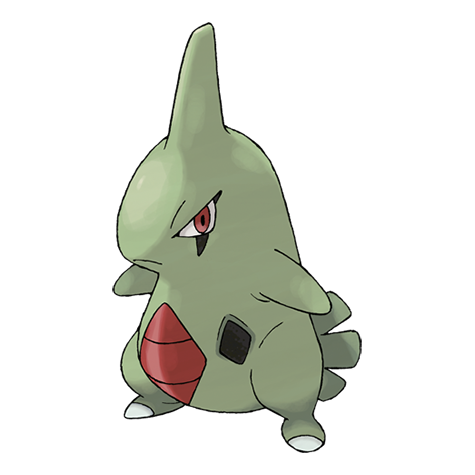 Larvitar Larvitar | DP | 6-7 | 22% | National Dex and Poké Radar required; replacement slot applies only in a hard/vigorous-shaking Radar patch. | ||
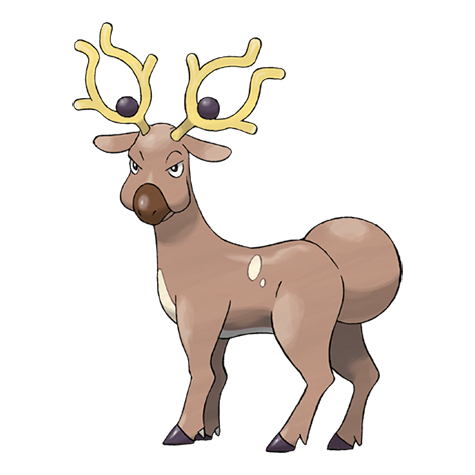 Stantler Stantler | DP | 6-7 | 22% | National Dex and Poké Radar required; replacement slot applies only in a hard/vigorous-shaking Radar patch. | ||
| Dual-slot GBA insertion (post-National Dex) | ||||||
| Gligar | DP | 7 | 8% | National Dex plus Pokémon Emerald inserted in the Nintendo DS GBA slot; replaces grass slots 8-9. | ||
Trainers
| Trainer | Route order / placement | Full team | Reward | Access requirement | Optional / rematch note |
|---|---|---|---|---|---|
| Camper AnthonyCamper • source ID 34 | Route 207 • field order 1 at (320, 716) |
| ₽304 | Reach the trainer's named field subarea; line of sight determines whether the battle is avoidable. | Field order 1, tile (320, 716); sightline/path determines whether it can be avoided. No higher-level same-trainer rematch variant is defined in trdata. |
| Picnicker LaurenPicnicker • source ID 35 | Route 207 • field order 2 at (320, 710) |
| ₽304 | Reach the trainer's named field subarea; line of sight determines whether the battle is avoidable. | Field order 2, tile (320, 710); sightline/path determines whether it can be avoided. No higher-level same-trainer rematch variant is defined in trdata. |
| Youngster AustinYoungster • source ID 33 | Route 207 • field order 3 at (325, 725) | ₽288 | Reach the trainer's named field subarea; line of sight determines whether the battle is avoidable. | Field order 3, tile (325, 725); sightline/path determines whether it can be avoided. No higher-level same-trainer rematch variant is defined in trdata. | |
| Hiker JustinHiker • source ID 37 | Route 207 • field order 4 at (335, 715) | ₽576 | Reach the trainer's named field subarea; line of sight determines whether the battle is avoidable. | Field order 4, tile (335, 715); sightline/path determines whether it can be avoided. No higher-level same-trainer rematch variant is defined in trdata. | |
| Hiker KevinHiker • source ID 36 | Route 207 • field order 5 at (319, 721) | ₽512 | Reach the trainer's named field subarea; line of sight determines whether the battle is avoidable. | Field order 5, tile (319, 721); sightline/path determines whether it can be avoided. No higher-level same-trainer rematch variant is defined in trdata. | |
 Battle Girl HelenBattle Girl • source ID 38 Battle Girl HelenBattle Girl • source ID 38 | Route 207 • field order 6 at (336, 722) | ₽288 | Reach the trainer's named field subarea; line of sight determines whether the battle is avoidable. | Field order 6, tile (336, 722); sightline/path determines whether it can be avoided. Higher-level source variants used by the rematch system: ID 633: Lv. 31/Lv. 33; ID 634: Lv. 38/Lv. 40; ID 635: Lv. 58/Lv. 60. |

Items
| Item | Version | Type | Area / exact direction | Coordinate / script | Requirement | Source |
|---|---|---|---|---|---|---|
| Protein | Diamond / Pearl | Visible item ball | Mount Coronet South 1F: Across the water in Mt. Coronet South 1F's west-side Surf pocket. | (13, 9) | Relic Badge and Surf. | event bank 204, script 7059 |
| Dawn Stone | Diamond / Pearl | Visible item ball | Mount Coronet South 1F: Across the water in Mt. Coronet South 1F's northeast Surf pocket. | (28, 28) | Relic Badge and Surf. | event bank 204, script 7060 |
| Poké Ball | Diamond / Pearl | Visible item ball | Route 207: Pick up the item ball in the northwestern part of Route 207, 50 tiles west and 1 tile north of the Mount Coronet South 1F doorway or transition. | (291, 711) | Reach this subarea; check the route and puzzle notes for HM, Bicycle, time, or story gates. | event bank 338, script 7010 |
| Dire Hit | Diamond / Pearl | Visible item ball | Route 207: Pick up the item ball in the southern part of Route 207, 18 tiles west and 18 tiles south of the Mount Coronet South 1F doorway or transition. | (323, 730) | Reach this subarea; check the route and puzzle notes for HM, Bicycle, time, or story gates. | event bank 338, script 7056 |
| Iron | Diamond / Pearl | Visible item ball | Route 207: On Route 207's southeast cliff, approached through Mt. Coronet and reached by the cliff wall. | (335, 725) | Relic Badge and Surf through Mt. Coronet, then Icicle Badge and Rock Climb. | event bank 338, script 7057 |
| Super Potion | Diamond / Pearl | Visible item ball | Route 207: Pick up the item ball in the central part of Route 207, 14 tiles west and 3 tiles south of the Mount Coronet South 1F doorway or transition. | (327, 715) | Reach this subarea; check the route and puzzle notes for HM, Bicycle, time, or story gates. | event bank 338, script 7058 |
| Oran Berry | Diamond / Pearl | Berry tree | Route 207: Harvest berry patch 23 in the northwestern part of Route 207, 51 tiles west and 6 tiles north of the Mount Coronet South 1F doorway or transition. The plot can be replanted after the initial harvest. | (290, 706) | Reach the outdoor patch on the named route or town; harvest its initial berries before planting a replacement. | berry table ov52_021D76F8, patch 23 |
| Cheri Berry | Diamond / Pearl | Berry tree | Route 207: Harvest berry patch 22 in the northwestern part of Route 207, 50 tiles west and 6 tiles north of the Mount Coronet South 1F doorway or transition. The plot can be replanted after the initial harvest. | (291, 706) | Reach the outdoor patch on the named route or town; harvest its initial berries before planting a replacement. | berry table ov52_021D76F8, patch 22 |
| Bluk Berry | Diamond / Pearl | Berry tree | Route 207: Harvest berry patch 25 in the northwestern part of Route 207, 49 tiles west and 6 tiles north of the Mount Coronet South 1F doorway or transition. The plot can be replanted after the initial harvest. | (292, 706) | Reach the outdoor patch on the named route or town; harvest its initial berries before planting a replacement. | berry table ov52_021D76F8, patch 25 |
| Oran Berry | Diamond / Pearl | Berry tree | Route 207: Harvest berry patch 24 in the northwestern part of Route 207, 48 tiles west and 6 tiles north of the Mount Coronet South 1F doorway or transition. The plot can be replanted after the initial harvest. | (293, 706) | Reach the outdoor patch on the named route or town; harvest its initial berries before planting a replacement. | berry table ov52_021D76F8, patch 24 |
| VS Seeker | Diamond / Pearl | NPC / scripted gift | Route 207: Lucas or Dawn gives it at the Route 207 junction together with the Dowsing Machine Poketch app. | script 2 | Obtain the Bicycle and approach Route 207 from Cycling Road's lower exit. | script bank 403 |
Hidden Items
| Hidden item | Area / plain-English placement | QA coordinate | Requirement | Source |
|---|---|---|---|---|
| Ether | Mount Coronet South 1F: Use the Dowsing Machine in the central part of Mount Coronet South 1F, 14 tiles west and 2 tiles north of the Route 208 doorway or transition and inspect that exact ground tile. | (13, 18) | Dowsing Machine Pokétch app. Reach this subarea; check the route and puzzle notes for HM, Bicycle, time, or story gates. | event bank 204, script 8013 |
| Rare Candy | Route 207: Use the Dowsing Machine in the central part of Route 207, 28 tiles west and 7 tiles south of the Mount Coronet South 1F doorway or transition and inspect that exact ground tile. | (313, 719) | Dowsing Machine Pokétch app. Reach this subarea; check the route and puzzle notes for HM, Bicycle, time, or story gates. | event bank 338, script 8012 |
| Super Potion | Route 207: Use the Dowsing Machine on Route 207's late Rock Climb cliff. This pickup shares its one-time flag with the Wayward Cave Super Potion, so it is gone if that earlier copy was claimed. | (349, 725) | Dowsing Machine Pokétch app. Icicle Badge and Rock Climb; mutually exclusive with the Wayward Cave hidden Super Potion. | event bank 338, script 8008 |
| Poké Ball | Route 207: Use the Dowsing Machine in the northwestern part of Route 207, 42 tiles west and 1 tile north of the Mount Coronet South 1F doorway or transition and inspect that exact ground tile. | (299, 711) | Dowsing Machine Pokétch app. Reach this subarea; check the route and puzzle notes for HM, Bicycle, time, or story gates. | event bank 338, script 8091 |
| Revive | Route 207: Use the Dowsing Machine in the northwestern part of Route 207, 34 tiles west and 2 tiles north of the Mount Coronet South 1F doorway or transition and inspect that exact ground tile. | (307, 710) | Dowsing Machine Pokétch app. Reach this subarea; check the route and puzzle notes for HM, Bicycle, time, or story gates. | event bank 338, script 8151 |
Puzzles, Warps, And Switches
- On the first crossing, stay on the lowest eastbound cave path. Do not treat visible upper ledges or water as missed content; they form later ascent routes.
Completion Checklist
- Complete the currently reachable part of this route plan: Use the Bicycle slope from Oreburgh; collect the Vs. Seeker and Dowsing Machine; sweep Route 207 trainers; enter Mt. Coronet; follow the ground-level east passage; watch the Cyrus scene; exit to Route 208.
- Review all 21 encounter rows across the per-area tables, including game markers, method band, time-of-day rates, levels, and each conditional requirement; mark conditional rows for their stated revisit.
Route 208, Hearthome City, and Amity Square
Collect the Berry Searcher, reach Hearthome, unlock Poffins and Contests, explore Amity Square, and trigger Barry's second battle on departure.
Source maps
Hearthome, Hearthome Poké Mart, Hearthome Pokémon Center, Hearthome Pokémon Center 2F, Hearthome Southeast House 1F, Hearthome Southeast House 2F, Hearthome Southeast House Elevator, Hearthome Pokémon Fan Club, Hearthome Amity Square West Gatehouse, Hearthome Amity Square East Gatehouse, Hearthome Route 208 Gatehouse, Hearthome Route 209 Gatehouse, Hearthome Route 212 Gatehouse, Hearthome Northeast House 1F, Hearthome Northeast House 2F, and Hearthome Northeast House Elevator, and 11 more submaps.
Route Plan
Clear Route 208's first-visit paths and visit the Berry Master's house; mark Fisherman Cody for Surf and Hiker Alexander for Rock Climb; rescue Buneary at Hearthome's entrance; visit the Contest Hall; receive the Poffin Case; tour Amity Square; prepare at the southeast gate; defeat Barry before Route 209.
- Fantina refuses a Gym challenge in Diamond and Pearl until four badges have been earned; Platinum's earlier Gym order must not be imported.
- Bebe's Lv. 5 Eevee gift requires the National Dex in original Diamond/Pearl. Platinum makes it available on the first Hearthome visit; that earlier timing does not apply here.
- Amity Square permits only its approved 'cute' species and hides accessories/items at warp points behind scenery.
- Route 208 is a multi-visit trainer map: Fisherman Cody waits across Surf-only water, and Hiker Alexander stands on a Rock Climb-only upper ledge.
Routes and encounters on this page are compiled from 27 pret map headers.
Route 208
| Pokémon | Games | Levels | Rate | Requirement / notes | ||
|---|---|---|---|---|---|---|
| Morning | Day | Night | ||||
| Grass / cave floor | ||||||
 Psyduck Psyduck | DP | 16-18 | 30% | Rate counts base slots temporarily replaced by the daily swarm, hard-shaking Poké Radar patches, and GBA dual-slot insertions. | ||
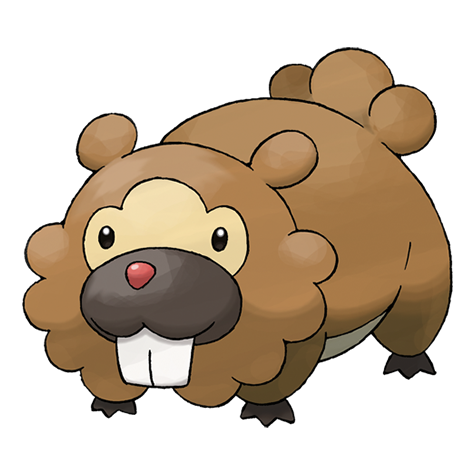 Bidoof Bidoof | DP | 16 | 20% | Rate counts base slots temporarily replaced by the daily swarm. | ||
| Machop | DP | 16-17 | 20% | 20% | 10% | Rate counts base slots temporarily replaced by hard-shaking Poké Radar patches. |
| Meditite | DP | 16-17 | 20% | 20% | 10% | Rate counts base slots temporarily replaced by hard-shaking Poké Radar patches. |
| Zubat | DP | 16 | — | — | 20% | — |
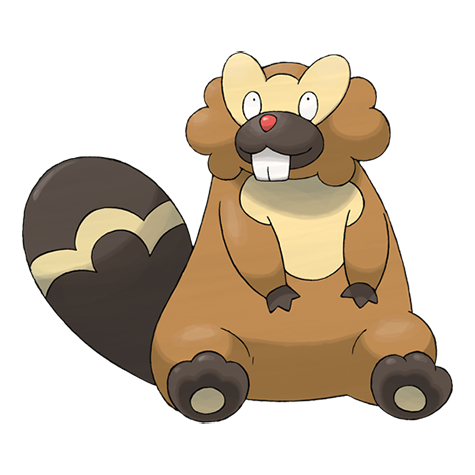 Bibarel Bibarel | DP | 17-18 | 10% | Rate counts base slots temporarily replaced by hard-shaking Poké Radar patches and GBA dual-slot insertions. | ||
| Swarm (post-National Dex daily announcement) | ||||||
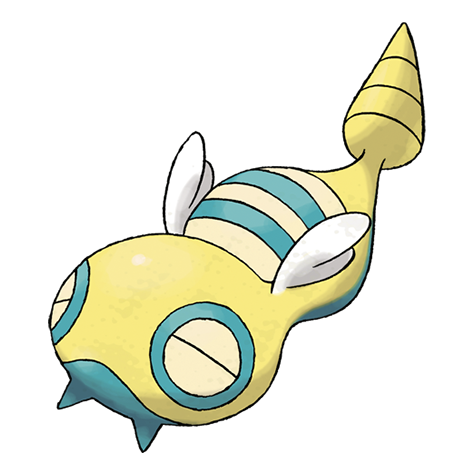 Dunsparce Dunsparce | DP | 16 | 40% | Post-National Dex daily swarm; replaces grass slots 0-1. | ||
| Poké Radar (post-National Dex) | ||||||
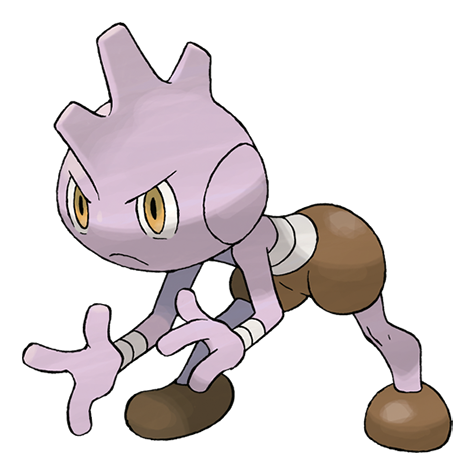 Tyrogue Tyrogue | DP | 17-18 | 22% | National Dex and Poké Radar required; replacement slot applies only in a hard/vigorous-shaking Radar patch. | ||
| Dual-slot GBA insertion (post-National Dex) | ||||||
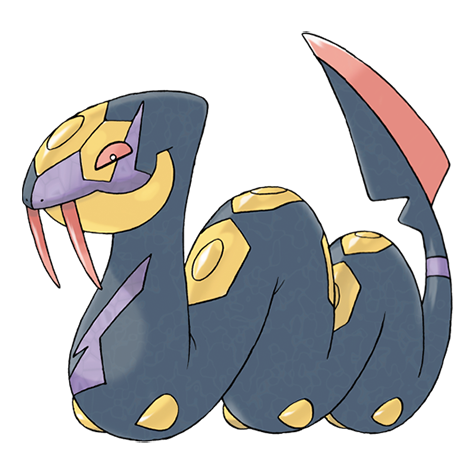 Seviper Seviper | DP | 18 | 8% | National Dex plus Pokémon Sapphire inserted in the Nintendo DS GBA slot; replaces grass slots 8-9. | ||
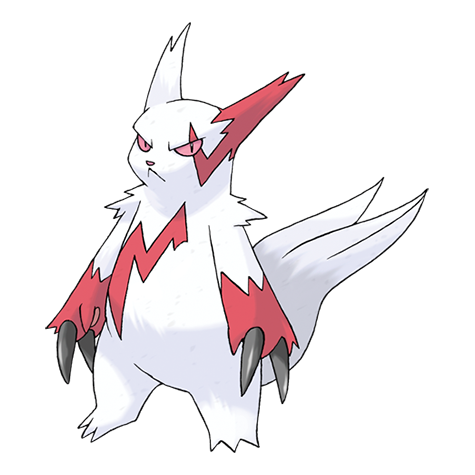 Zangoose Zangoose | DP | 18 | 8% | National Dex plus Pokémon Ruby inserted in the Nintendo DS GBA slot; replaces grass slots 8-9. | ||
| Surfing | ||||||
| Psyduck | DP | 20-40 | 90% | — | ||
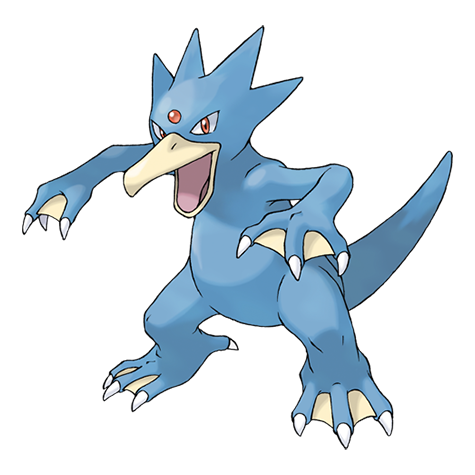 Golduck Golduck | DP | 20-40 | 10% | — | ||
| Fishing — Old Rod | ||||||
| Magikarp | DP | 3-10 | 100% | — | ||
| Fishing — Good Rod | ||||||
| Magikarp | DP | 10-25 | 55% | — | ||
| Barboach | DP | 10-25 | 45% | — | ||
| Fishing — Super Rod | ||||||
| Gyarados | DP | 30-55 | 55% | — | ||
| Whiscash | DP | 20-50 | 45% | — | ||
Route 208, Hearthome City, and Amity Square
| Pokémon | Games | Levels | Rate | Requirement / notes | ||
|---|---|---|---|---|---|---|
| Morning | Day | Night | ||||
| Gift Pokemon | ||||||
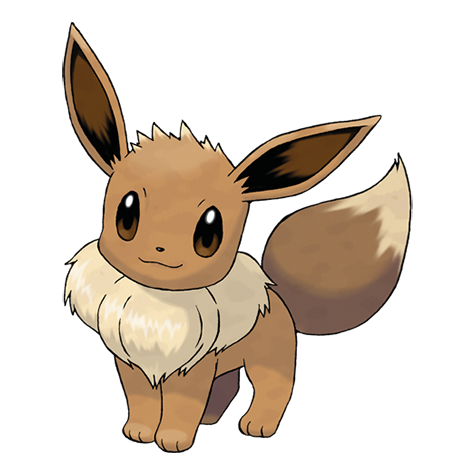 Eevee Eevee | DP | 5 | One gift | National Dex; speak to Bebe in her Hearthome house Unavailable on the first visit in original D/P. Keep a party slot open; Platinum's pre-National-Dex gift timing is excluded. | ||
| Egg gift | ||||||
 Happiny Happiny | DP | 1 when hatched | One Egg | Speak to the Hiker by Hearthome's southeast gate with one open party slot The Egg is refused while the party is full; it is not sent directly to the PC. | ||
Trainers
| Trainer | Route order / placement | Full team | Reward | Access requirement | Optional / rematch note |
|---|---|---|---|---|---|
| Hiker RobertHiker • source ID 39 | Route 208 • field order 1 at (408, 723) | ₽544 | Reach the trainer's named field subarea; line of sight determines whether the battle is avoidable. | Field order 1, tile (408, 723); sightline/path determines whether it can be avoided. No higher-level same-trainer rematch variant is defined in trdata. | |
| Hiker AlexanderHiker • source ID 40 | Route 208 • field order 2 at (390, 719) | ₽1,120 | Icicle Badge and Rock Climb are required to reach Hiker Alexander on Route 208's upper ledge. | Field order 2, tile (390, 719); sightline/path determines whether it can be avoided. No higher-level same-trainer rematch variant is defined in trdata. | |
| Hiker JonathanHiker • source ID 41 | Route 208 • field order 3 at (420, 722) | ₽608 | Reach the trainer's named field subarea; line of sight determines whether the battle is avoidable. | Field order 3, tile (420, 722); sightline/path determines whether it can be avoided. No higher-level same-trainer rematch variant is defined in trdata. | |
 Black Belt KyleBlack Belt • source ID 42 Black Belt KyleBlack Belt • source ID 42 | Route 208 • field order 4 at (405, 714) | ₽456 | Reach the trainer's named field subarea; line of sight determines whether the battle is avoidable. | Field order 4, tile (405, 714); sightline/path determines whether it can be avoided. No higher-level same-trainer rematch variant is defined in trdata. | |
 Fisherman CodyFisherman • source ID 43 Fisherman CodyFisherman • source ID 43 | Route 208 • field order 5 at (413, 727) | ₽992 | Relic Badge and Surf are required to reach Fisherman Cody across Route 208's water. | Field order 5, tile (413, 727); sightline/path determines whether it can be avoided. No higher-level same-trainer rematch variant is defined in trdata. | |
 Aroma Lady HannahAroma Lady • source ID 44 Aroma Lady HannahAroma Lady • source ID 44 | Route 208 • field order 6 at (433, 720) | ₽576 | Reach the trainer's named field subarea; line of sight determines whether the battle is avoidable. | Field order 6, tile (433, 720); sightline/path determines whether it can be avoided. No higher-level same-trainer rematch variant is defined in trdata. | |
 Artist WilliamArtist • source ID 45 Artist WilliamArtist • source ID 45 | Route 208 • field order 7 at (439, 724) | ₽816 | Reach the trainer's named field subarea; line of sight determines whether the battle is avoidable. | Field order 7, tile (439, 724); sightline/path determines whether it can be avoided. No higher-level same-trainer rematch variant is defined in trdata. | |
| Pokémon Trainer BarryPokémon Trainer Barry • source ID 470 | Hearthome • scripted | ₽2,100 | Scripted story trigger; complete the local objective described in the route plan. | Major or story battle; not a VS Seeker rematch row. | |
| Pokémon Trainer BarryPokémon Trainer Barry • source ID 471 | Hearthome • scripted | ₽2,100 | Scripted story trigger; complete the local objective described in the route plan. | Major or story battle; not a VS Seeker rematch row. | |
| Pokémon Trainer BarryPokémon Trainer Barry • source ID 472 | Hearthome • scripted | ₽2,100 | Scripted story trigger; complete the local objective described in the route plan. | Major or story battle; not a VS Seeker rematch row. |

Items
| Item | Version | Type | Area / exact direction | Coordinate / script | Requirement | Source |
|---|---|---|---|---|---|---|
| TM45 | Diamond / Pearl | Visible item ball | Amity Square: Pick up the item ball in the northern part of Amity Square, 20 tiles west and 33 tiles north of the Hearthome Amity Square East Gatehouse doorway or transition. | (32, 18) | Reach this subarea; check the route and puzzle notes for HM, Bicycle, time, or story gates. | event bank 245, script 7064 |
| TM43 | Diamond / Pearl | Visible item ball | Amity Square: Pick up the item ball in the southern part of Amity Square, 14 tiles east and 6 tiles north of the Hearthome Amity Square West Gatehouse doorway or transition. | (25, 45) | Reach this subarea; check the route and puzzle notes for HM, Bicycle, time, or story gates. | event bank 245, script 7065 |
| Spooky Plate | Diamond / Pearl | Visible item ball | Amity Square: Pick up the item ball in the northeastern part of Amity Square, 42 tiles north of the Hearthome Amity Square East Gatehouse doorway or transition. | (53, 9) | Reach this subarea; check the route and puzzle notes for HM, Bicycle, time, or story gates. | event bank 245, script 7066 |
| Amulet Coin | Diamond / Pearl | Visible item ball | Amity Square: Pick up the item ball in the northeastern part of Amity Square, 11 tiles west and 42 tiles north of the Hearthome Amity Square East Gatehouse doorway or transition. | (41, 9) | Reach this subarea; check the route and puzzle notes for HM, Bicycle, time, or story gates. | event bank 245, script 7067 |
| Poké Ball | Diamond / Pearl | Visible item ball | Route 208: Pick up the item ball in the northern part of Route 208, 25 tiles west and 2 tiles north of the Route 208 Berry Master House doorway or transition. | (416, 714) | Reach this subarea; check the route and puzzle notes for HM, Bicycle, time, or story gates. | event bank 339, script 7063 |
| Carbos | Diamond / Pearl | Visible item ball | Route 208: On the north shore above Route 208's waterfall. | (401, 705) | Relic Badge and Surf plus Beacon Badge and Waterfall. | event bank 339, script 7061 |
| X Speed | Diamond / Pearl | Visible item ball | Route 208: Pick up the item ball in the western part of Route 208, 7 tiles east and 4 tiles north of the Mount Coronet South 1F doorway or transition. | (399, 720) | Reach this subarea; check the route and puzzle notes for HM, Bicycle, time, or story gates. | event bank 339, script 7062 |
| 2× Nanab Berry | Diamond / Pearl | Berry tree | Route 208: Harvest berry patch 26 in the northeastern part of Route 208, 6 tiles west and 2 tiles north of the Route 208 Berry Master House doorway or transition. The plot can be replanted after the initial harvest. | (435, 714) | Reach the outdoor patch on the named route or town; harvest its initial berries before planting a replacement. | berry table ov52_021D76F8, patch 26 |
| 2× Razz Berry | Diamond / Pearl | Berry tree | Route 208: Harvest berry patch 27 in the northeastern part of Route 208, 5 tiles west and 2 tiles north of the Route 208 Berry Master House doorway or transition. The plot can be replanted after the initial harvest. | (436, 714) | Reach the outdoor patch on the named route or town; harvest its initial berries before planting a replacement. | berry table ov52_021D76F8, patch 27 |
| 2× Bluk Berry | Diamond / Pearl | Berry tree | Route 208: Harvest berry patch 28 in the northeastern part of Route 208, 4 tiles west and 2 tiles north of the Route 208 Berry Master House doorway or transition. The plot can be replanted after the initial harvest. | (437, 714) | Reach the outdoor patch on the named route or town; harvest its initial berries before planting a replacement. | berry table ov52_021D76F8, patch 28 |
| 2× Pinap Berry | Diamond / Pearl | Berry tree | Route 208: Harvest berry patch 29 in the northeastern part of Route 208, 3 tiles west and 2 tiles north of the Route 208 Berry Master House doorway or transition. The plot can be replanted after the initial harvest. | (438, 714) | Reach the outdoor patch on the named route or town; harvest its initial berries before planting a replacement. | berry table ov52_021D76F8, patch 29 |
| Shell Bell | Diamond / Pearl | NPC / scripted gift | Hearthome Southeast House 2F: Speak to the item-giving NPC in the southwestern part of Hearthome Southeast House 2F, 7 tiles west and 6 tiles south of the Hearthome Southeast House Elevator doorway or transition. | NPC (11, 8); script 1 | Reach Hearthome Southeast House 2F and complete the item-giving NPC's one-time dialogue. | script bank 101 |
| Poffin Case | Diamond / Pearl | NPC / scripted gift | Hearthome Pokémon Fan Club: Speak to the item-giving NPC in the northern part of Hearthome Pokémon Fan Club, 10 tiles north of the Hearthome doorway or transition. | NPC (6, 7); script 1 | Reach Hearthome Pokémon Fan Club and complete the item-giving NPC's one-time dialogue. | script bank 103 |
| Odd Keystone | Diamond / Pearl | NPC / scripted gift | Route 208: Speak to the item-giving NPC in the southeastern part of Route 208, 10 tiles west and 6 tiles south of the Hearthome Route 208 Gatehouse doorway or transition. | NPC (437, 733); script 4 | Reach Route 208 and complete the item-giving NPC's one-time dialogue. | script bank 404 |
| Daily Berry Master gift (Cheri through Tamato pool) | Diamond / Pearl | Daily random gift | Route 208, Hearthome City, and Amity Square: The Route 208 Berry Master randomly selects one of the 26 Berries from Cheri through Tamato. | NPC / system | Once per day; speak to the Berry Master in his Route 208 house. | editorial script/system note |
| Growth / Damp / Stable / Gooey Mulch | Diamond / Pearl | Berry Master house purchase | Route 208, Hearthome City, and Amity Square: The Route 208 mulch seller stocks all four mulch types for berry-growing adjustments. | NPC / system | Pay ₽200 per bag. | editorial script/system note |
Hidden Items
| Hidden item | Area / plain-English placement | QA coordinate | Requirement | Source |
|---|---|---|---|---|
| Tinymushroom | Hearthome: Use the Dowsing Machine in the northwestern part of Hearthome, 11 tiles east and 2 tiles north of the Hearthome Amity Square West Gatehouse doorway or transition and inspect that exact ground tile. | (470, 681) | Dowsing Machine Pokétch app. Reach this subarea; check the route and puzzle notes for HM, Bicycle, time, or story gates. | event bank 85, script 8016 |
| Iron | Route 208: Use the Dowsing Machine on the northwest upper ledge near Hiker Alexander. | (389, 717) | Dowsing Machine Pokétch app. Coal Badge and Rock Smash plus Icicle Badge and Rock Climb. | event bank 339, script 8014 |
| Honey | Route 208: Use the Dowsing Machine in the southeastern part of Route 208, 19 tiles west and 4 tiles south of the Hearthome Route 208 Gatehouse doorway or transition and inspect that exact ground tile. | (428, 731) | Dowsing Machine Pokétch app. Reach this subarea; check the route and puzzle notes for HM, Bicycle, time, or story gates. | event bank 339, script 8015 |
Puzzles, Warps, And Switches
- Amity Square's stone huts teleport between fixed points. Enter each hut from both sides and check behind structures with the Dowsing Machine to complete its item loop.
- Barry approaches when the player uses Hearthome's southeast exit; heal before crossing the gate threshold.
Completion Checklist
- Complete the currently reachable part of this route plan: Clear Route 208's first-visit paths and visit the Berry Master's house; mark Fisherman Cody for Surf and Hiker Alexander for Rock Climb; rescue Buneary at Hearthome's entrance; visit the Contest Hall; receive the Poffin Case; tour Amity Square; prepare at the southeast gate; defeat Barry before Route 209.
- Review all 19 encounter rows across the per-area tables, including game markers, method band, time-of-day rates, levels, and each conditional requirement; mark conditional rows for their stated revisit.
Route 209, Hallowed Tower, and Lost Tower
Cross the long eastern route, obtain the Good Rod, activate Hallowed Tower, and climb Lost Tower for HM04 Strength.
Source maps
Route 209, Route 209 Lost Tower 1F, Route 209 Lost Tower 2F, Route 209 Lost Tower 3F, Route 209 Lost Tower 4F, and Route 209 Lost Tower 5F.
Route Plan
Collect the Good Rod at the west end; clear every trainer and bridge branch; place the Odd Keystone in the ruined tower; enter Lost Tower; climb all five floors; receive Cleanse Tag and HM04 Strength; continue to Solaceon.
- Spiritomb requires an Odd Keystone in Hallowed Tower and 32 qualifying Underground player interactions; vendor NPCs do not count. The same other player can count again after resetting the interaction by leaving and re-entering the Underground.
- Strength is received now but cannot be used in the field until Byron's Mine Badge.
Routes and encounters on this page are compiled from 6 pret map headers.
Route 209
| Pokémon | Games | Levels | Rate | Requirement / notes | ||
|---|---|---|---|---|---|---|
| Morning | Day | Night | ||||
| Grass / cave floor | ||||||
| Bibarel | DP | 16-18 | 35% | 45% | 35% | Rate counts base slots temporarily replaced by the daily swarm and hard-shaking Poké Radar patches. |
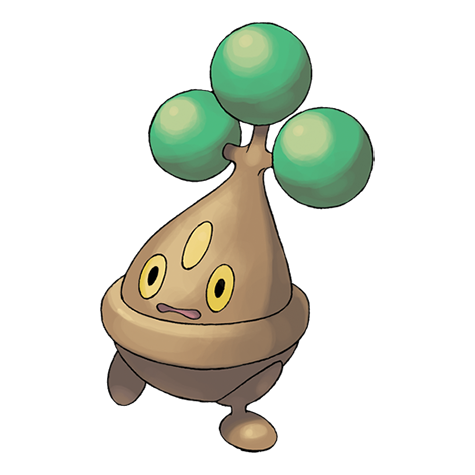 Bonsly Bonsly | DP | 16 | 25% | 5% | 5% | Rate counts base slots temporarily replaced by hard-shaking Poké Radar patches and GBA dual-slot insertions. |
 Mime Jr Mime Jr | DP | 16 | 25% | 5% | 5% | Rate counts base slots temporarily replaced by hard-shaking Poké Radar patches and GBA dual-slot insertions. |
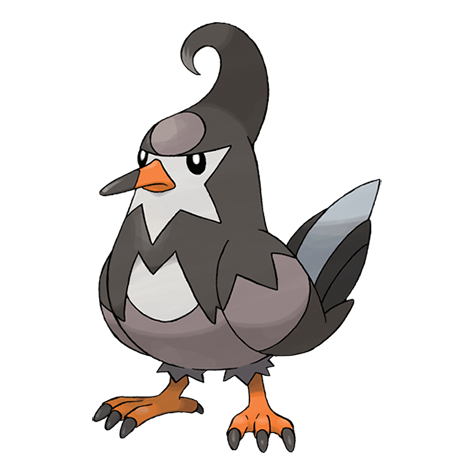 Staravia Staravia | DP | 16-18 | 15% | 25% | 15% | Rate counts base slots temporarily replaced by hard-shaking Poké Radar patches. |
| Starly | DP | 16 | 20% | Rate counts base slots temporarily replaced by the daily swarm. | ||
 Gastly Gastly | DP | 16 | — | — | 10% | — |
| Zubat | DP | 16 | — | — | 10% | — |
 Chansey Chansey | DP | 16 | 5% | Rate counts base slots temporarily replaced by hard-shaking Poké Radar patches and GBA dual-slot insertions. | ||
| Swarm (post-National Dex daily announcement) | ||||||
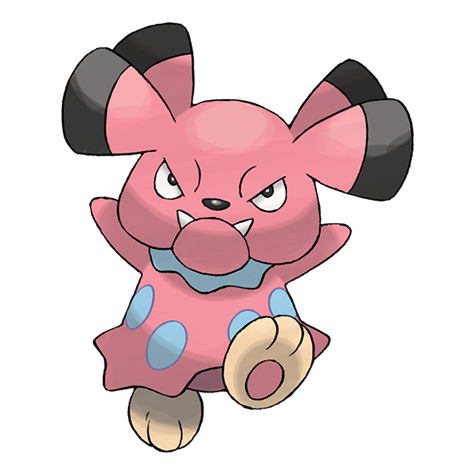 Snubbull Snubbull | DP | 16 | 40% | Post-National Dex daily swarm; replaces grass slots 0-1. | ||
| Poké Radar (post-National Dex) | ||||||
 Miltank Miltank | DP | 17 | 20% | National Dex and Poké Radar required; replacement slot applies only in a hard/vigorous-shaking Radar patch. | ||
 Tauros Tauros | DP | 17 | 20% | National Dex and Poké Radar required; replacement slot applies only in a hard/vigorous-shaking Radar patch. | ||
| Miltank | DP | 16 | 2% | National Dex and Poké Radar required; replacement slot applies only in a hard/vigorous-shaking Radar patch. | ||
| Tauros | DP | 16 | 2% | National Dex and Poké Radar required; replacement slot applies only in a hard/vigorous-shaking Radar patch. | ||
| Dual-slot GBA insertion (post-National Dex) | ||||||
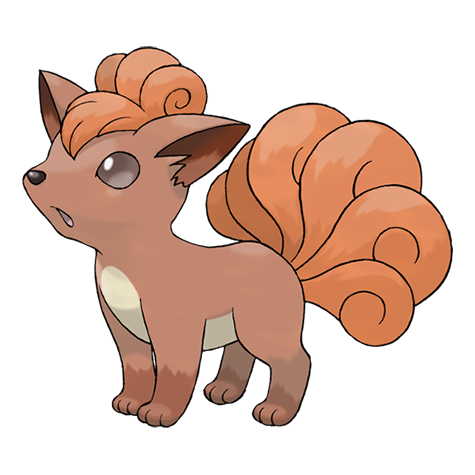 Vulpix Vulpix | DP | 16 | 8% | National Dex plus Pokémon LeafGreen inserted in the Nintendo DS GBA slot; replaces grass slots 8-9. | ||
| Surfing | ||||||
| Psyduck | DP | 20-40 | 90% | — | ||
| Golduck | DP | 20-40 | 10% | — | ||
| Fishing — Old Rod | ||||||
| Magikarp | DP | 3-10 | 100% | — | ||
| Fishing — Good Rod | ||||||
| Magikarp | DP | 10-25 | 55% | — | ||
 Goldeen Goldeen | DP | 10-25 | 45% | — | ||
| Fishing — Super Rod | ||||||
| Gyarados | DP | 30-55 | 55% | — | ||
 Seaking Seaking | DP | 20-50 | 45% | — | ||
Route 209 Lost Tower 1F
| Pokémon | Games | Levels | Rate | Requirement / notes | ||
|---|---|---|---|---|---|---|
| Morning | Day | Night | ||||
| Grass / cave floor | ||||||
| Gastly | DP | 16-18 | 50% | 50% | 40% | — |
| Zubat | DP | 16-18 | 50% | 50% | 40% | — |
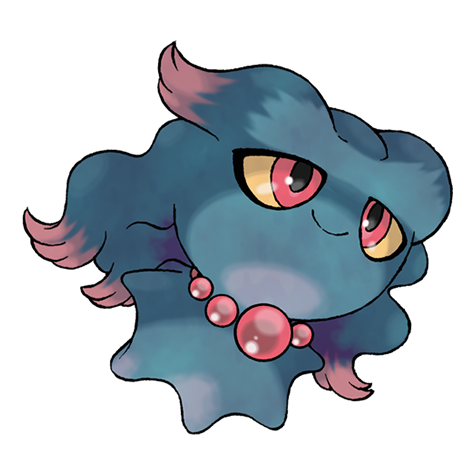 Misdreavus Misdreavus | DP | 17 | — | — | 20% | — |
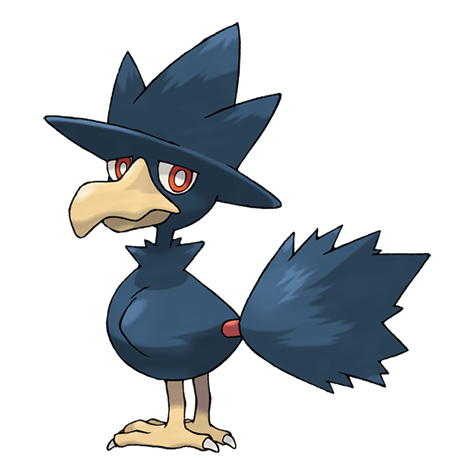 Murkrow Murkrow | DP | 17 | — | — | 20% | — |
Route 209 Lost Tower 2F
| Pokémon | Games | Levels | Rate | Requirement / notes | ||
|---|---|---|---|---|---|---|
| Morning | Day | Night | ||||
| Grass / cave floor | ||||||
| Gastly | DP | 17-19 | 50% | 50% | 40% | — |
| Zubat | DP | 17-19 | 50% | 50% | 40% | — |
| Misdreavus | DP | 18 | — | — | 20% | — |
| Murkrow | DP | 18 | — | — | 20% | — |
Route 209 Lost Tower 3F
| Pokémon | Games | Levels | Rate | Requirement / notes | ||
|---|---|---|---|---|---|---|
| Morning | Day | Night | ||||
| Grass / cave floor | ||||||
| Gastly | DP | 18-20 | 50% | 50% | 40% | — |
| Zubat | DP | 18-20 | 49% | 49% | 39% | — |
| Misdreavus | DP | 19 | — | — | 20% | — |
| Murkrow | DP | 19 | — | — | 20% | — |
| Golbat | DP | 19 | 1% | — | ||
Route 209 Lost Tower 4F
| Pokémon | Games | Levels | Rate | Requirement / notes | ||
|---|---|---|---|---|---|---|
| Morning | Day | Night | ||||
| Grass / cave floor | ||||||
| Gastly | DP | 19-21 | 50% | 50% | 40% | — |
| Zubat | DP | 19-21 | 45% | 45% | 35% | — |
| Misdreavus | DP | 20 | — | — | 20% | — |
| Murkrow | DP | 20 | — | — | 20% | — |
| Golbat | DP | 20-21 | 5% | — | ||
Route 209 Lost Tower 5F
| Pokémon | Games | Levels | Rate | Requirement / notes | ||
|---|---|---|---|---|---|---|
| Morning | Day | Night | ||||
| Grass / cave floor | ||||||
| Gastly | DP | 20-22 | 50% | 50% | 40% | — |
| Zubat | DP | 20-21 | 40% | 40% | 30% | — |
| Misdreavus | DP | 21 | — | — | 20% | — |
| Murkrow | DP | 21 | — | — | 20% | — |
| Golbat | DP | 21-23 | 10% | — | ||
Route 209, Hallowed Tower, and Lost Tower
| Pokémon | Games | Levels | Rate | Requirement / notes | ||
|---|---|---|---|---|---|---|
| Morning | Day | Night | ||||
| Overworld static encounter | ||||||
 Spiritomb Spiritomb | DP | 25 | One per completed keystone ritual | Insert Odd Keystone, complete 32 qualifying Underground player interactions, then inspect Hallowed Tower The interactions need not be 32 distinct people; NPC vendors do not count. Additional Spiritomb require another Odd Keystone and another qualifying interaction cycle. | ||
Trainers
| Trainer | Route order / placement | Full team | Reward | Access requirement | Optional / rematch note |
|---|---|---|---|---|---|
 Pokémon Breeder Male AlbertPokémon Breeder Male • source ID 46 Pokémon Breeder Male AlbertPokémon Breeder Male • source ID 46 | Route 209 • field order 1 at (522, 725) | ₽816 | Reach the trainer's named field subarea; line of sight determines whether the battle is avoidable. | Field order 1, tile (522, 725); sightline/path determines whether it can be avoided. Higher-level source variants used by the rematch system: ID 639: Lv. 27/Lv. 29/Lv. 28; ID 640: Lv. 37/Lv. 38/Lv. 36; ID 641: Lv. 52/Lv. 51/Lv. 53. | |
 Pokémon Breeder Female JenniferPokémon Breeder Female • source ID 47 Pokémon Breeder Female JenniferPokémon Breeder Female • source ID 47 | Route 209 • field order 2 at (554, 711) | ₽816 | Reach the trainer's named field subarea; line of sight determines whether the battle is avoidable. | Field order 2, tile (554, 711); sightline/path determines whether it can be avoided. Higher-level source variants used by the rematch system: ID 642: Lv. 28/Lv. 27/Lv. 29; ID 643: Lv. 37/Lv. 36/Lv. 38; ID 644: Lv. 52/Lv. 51/Lv. 53. | |
 Cowgirl ShelleyCowgirl • source ID 48 Cowgirl ShelleyCowgirl • source ID 48 | Route 209 • field order 3 at (560, 690) | ₽240 | Reach the trainer's named field subarea; line of sight determines whether the battle is avoidable. | Field order 3, tile (560, 690); sightline/path determines whether it can be avoided. No higher-level same-trainer rematch variant is defined in trdata. | |
 Jogger RichardJogger • source ID 49 Jogger RichardJogger • source ID 49 | Route 209 • field order 4 at (540, 716) | ₽608 | Battle is available only in the morning, 04:00-09:59. Reach the trainer's named field subarea; line of sight determines whether the battle is avoidable. | Field order 4, tile (540, 716); sightline/path determines whether it can be avoided. No higher-level same-trainer rematch variant is defined in trdata. | |
| Jogger RaulJogger • source ID 308 | Route 209 • field order 5 at (561, 715) | ₽608 | Battle is available only in the morning, 04:00-09:59. Reach the trainer's named field subarea; line of sight determines whether the battle is avoidable. | Field order 5, tile (561, 715); sightline/path determines whether it can be avoided. No higher-level same-trainer rematch variant is defined in trdata. | |
 Poké Kid DaniellePoké Kid • source ID 53 Poké Kid DaniellePoké Kid • source ID 53 | Route 209 • field order 6 at (552, 722) | ₽152 | Reach the trainer's named field subarea; line of sight determines whether the battle is avoidable. | Field order 6, tile (552, 722); sightline/path determines whether it can be avoided. Higher-level source variants used by the rematch system: ID 721: Lv. 31; ID 722: Lv. 40; ID 723: Lv. 55. | |
 Twins Emma & LilTwins • source ID 294 Twins Emma & LilTwins • source ID 294 | Route 209 • field order 7 at (544, 720) + field order 10 at (545, 720) | ₽608 | Reach the trainer's named field subarea; line of sight determines whether the battle is avoidable. | Field order 7, tile (544, 720); Field order 10, tile (545, 720); sightline/path determines whether it can be avoided. No higher-level same-trainer rematch variant is defined in trdata. | |
 Young Couple Ty & SueYoung Couple • source ID 55 Young Couple Ty & SueYoung Couple • source ID 55 | Route 209 • field order 8 at (561, 685) + field order 9 at (561, 684) | ₽2,432 | Reach the trainer's named field subarea; line of sight determines whether the battle is avoidable. | Field order 8, tile (561, 685); Field order 9, tile (561, 684); sightline/path determines whether it can be avoided. No higher-level same-trainer rematch variant is defined in trdata. | |
| Youngster OliverYoungster • source ID 532 | Route 209 Lost Tower 2F • field order 1 at (8, 10) | ₽256 | Reach the trainer's named field subarea; line of sight determines whether the battle is avoidable. | Field order 1, tile (8, 10); sightline/path determines whether it can be avoided. No higher-level same-trainer rematch variant is defined in trdata. | |
 Pokefan Male LeonardPokefan Male • source ID 530 Pokefan Male LeonardPokefan Male • source ID 530 | Route 209 Lost Tower 3F • field order 1 at (7, 6) | ₽1,152 | Reach the trainer's named field subarea; line of sight determines whether the battle is avoidable. | Field order 1, tile (7, 6); sightline/path determines whether it can be avoided. No higher-level same-trainer rematch variant is defined in trdata. | |
 Roughneck KirbyRoughneck • source ID 529 Roughneck KirbyRoughneck • source ID 529 | Route 209 Lost Tower 3F • field order 2 at (5, 14) | ₽456 | Reach the trainer's named field subarea; line of sight determines whether the battle is avoidable. | Field order 2, tile (5, 14); sightline/path determines whether it can be avoided. No higher-level same-trainer rematch variant is defined in trdata. | |
 Pokefan Female RebekahPokefan Female • source ID 531 Pokefan Female RebekahPokefan Female • source ID 531 | Route 209 Lost Tower 4F • field order 1 at (9, 11) | ₽1,216 | Reach the trainer's named field subarea; line of sight determines whether the battle is avoidable. | Field order 1, tile (9, 11); sightline/path determines whether it can be avoided. No higher-level same-trainer rematch variant is defined in trdata. | |
| Young Couple Mike & NatYoung Couple • source ID 534 | Route 209 Lost Tower 4F • field order 2 at (4, 9) + field order 3 at (5, 9) | ₽2,432 | Reach the trainer's named field subarea; line of sight determines whether the battle is avoidable. | Field order 2, tile (4, 9); Field order 3, tile (5, 9); sightline/path determines whether it can be avoided. No higher-level same-trainer rematch variant is defined in trdata. | |
 Belle & Pa Beth & BobBelle & Pa • source ID 533 Belle & Pa Beth & BobBelle & Pa • source ID 533 | Route 209 Lost Tower 4F • field order 4 at (13, 13) + field order 5 at (13, 14) | ₽2,128 | Reach the trainer's named field subarea; line of sight determines whether the battle is avoidable. | Field order 4, tile (13, 13); Field order 5, tile (13, 14); sightline/path determines whether it can be avoided. No higher-level same-trainer rematch variant is defined in trdata. |
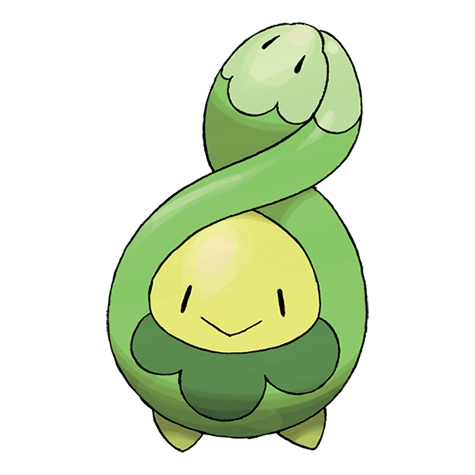

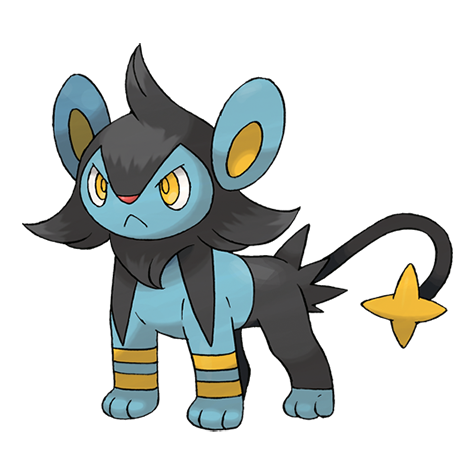
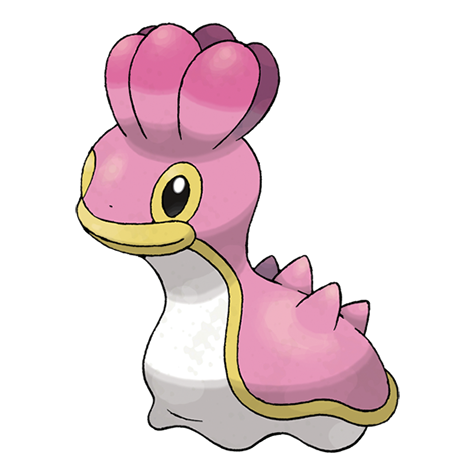
Items
| Item | Version | Type | Area / exact direction | Coordinate / script | Requirement | Source |
|---|---|---|---|---|---|---|
| Honey | Diamond / Pearl | Visible item ball | Route 209: Pick up the item ball in the southwestern part of Route 209, 15 tiles east and 18 tiles north of the Hearthome Route 209 Gatehouse doorway or transition. | (527, 708) | Reach this subarea; check the route and puzzle notes for HM, Bicycle, time, or story gates. | event bank 341, script 7098 |
| X Accuracy | Diamond / Pearl | Visible item ball | Route 209: Pick up the item ball in the southeastern part of Route 209, 45 tiles east and 6 tiles north of the Hearthome Route 209 Gatehouse doorway or transition. | (557, 720) | Reach this subarea; check the route and puzzle notes for HM, Bicycle, time, or story gates. | event bank 341, script 7099 |
| TM47 | Diamond / Pearl | Visible item ball | Route 209: Behind the cuttable tree on the raised path below Lost Tower. | (572, 692) | Forest Badge and Cut. | event bank 341, script 7101 |
| Calcium | Diamond / Pearl | Visible item ball | Route 209: Pick up the item ball in the northern part of Route 209, 20 tiles west and 6 tiles north of the Route 209 Lost Tower 1F doorway or transition. | (548, 674) | Reach this subarea; check the route and puzzle notes for HM, Bicycle, time, or story gates. | event bank 341, script 7100 |
| TM19 | Diamond / Pearl | Visible item ball | Route 209: On the small Surf-only island south of Hallowed Tower. | (568, 726) | Relic Badge and Surf. | event bank 341, script 7102 |
| Oval Stone | Diamond / Pearl | Visible item ball | Route 209 Lost Tower 2F: Pick up the item ball in the central part of Route 209 Lost Tower 2F, 3 tiles west and 4 tiles south of the Route 209 Lost Tower 1F doorway or transition. | (8, 7) | Reach this subarea; check the route and puzzle notes for HM, Bicycle, time, or story gates. | event bank 343, script 7103 |
| Revive | Diamond / Pearl | Visible item ball | Route 209 Lost Tower 3F: Pick up the item ball in the southwestern part of Route 209 Lost Tower 3F, 3 tiles west and 10 tiles south of the Route 209 Lost Tower 4F doorway or transition. | (1, 13) | Reach this subarea; check the route and puzzle notes for HM, Bicycle, time, or story gates. | event bank 344, script 7104 |
| TM27 | Diamond / Pearl | Visible item ball | Route 209 Lost Tower 4F: Pick up the item ball in the southwestern part of Route 209 Lost Tower 4F, 2 tiles east and 9 tiles south of the Route 209 Lost Tower 5F doorway or transition. | (6, 12) | Reach this subarea; check the route and puzzle notes for HM, Bicycle, time, or story gates. | event bank 345, script 7105 |
| Leppa Berry | Diamond / Pearl | Berry tree | Route 209: Harvest berry patch 30 in the southwestern part of Route 209, 18 tiles east and 14 tiles north of the Hearthome Route 209 Gatehouse doorway or transition. The plot can be replanted after the initial harvest. | (530, 712) | Reach the outdoor patch on the named route or town; harvest its initial berries before planting a replacement. | berry table ov52_021D76F8, patch 30 |
| Chesto Berry | Diamond / Pearl | Berry tree | Route 209: Harvest berry patch 31 in the southwestern part of Route 209, 19 tiles east and 14 tiles north of the Hearthome Route 209 Gatehouse doorway or transition. The plot can be replanted after the initial harvest. | (531, 712) | Reach the outdoor patch on the named route or town; harvest its initial berries before planting a replacement. | berry table ov52_021D76F8, patch 31 |
| Razz Berry | Diamond / Pearl | Berry tree | Route 209: Harvest berry patch 32 in the eastern part of Route 209, 2 tiles west and 17 tiles south of the Route 209 Lost Tower 1F doorway or transition. The plot can be replanted after the initial harvest. | (566, 697) | Reach the outdoor patch on the named route or town; harvest its initial berries before planting a replacement. | berry table ov52_021D76F8, patch 32 |
| Razz Berry | Diamond / Pearl | Berry tree | Route 209: Harvest berry patch 33 in the eastern part of Route 209, 1 tile west and 17 tiles south of the Route 209 Lost Tower 1F doorway or transition. The plot can be replanted after the initial harvest. | (567, 697) | Reach the outdoor patch on the named route or town; harvest its initial berries before planting a replacement. | berry table ov52_021D76F8, patch 33 |
| Cleanse Tag | Diamond / Pearl | NPC / scripted gift | Route 209 Lost Tower 5F: Speak to the item-giving NPC in the southwestern part of Route 209 Lost Tower 5F, 3 tiles west and 6 tiles south of the Route 209 Lost Tower 4F doorway or transition. | NPC (8, 9); script 2 | Reach Route 209 Lost Tower 5F and complete the item-giving NPC's one-time dialogue. | script bank 411 |
| Odd Keystone | Diamond / Pearl | Key encounter item | Route 209, Hallowed Tower, and Lost Tower: A Route 208 Black Belt gives one; another is hidden in Twinleaf's pond after Surf, and extras can be mined underground. | NPC / system | See the route plan. | editorial script/system note |
| HM04 Strength | Diamond / Pearl | Gift | Route 209, Hallowed Tower, and Lost Tower: Given by an elder on Lost Tower 5F; field use requires the Mine Badge. | NPC / system | See the route plan. | editorial script/system note |
| Good Rod | Diamond / Pearl | Key-item gift | Route 209, Hallowed Tower, and Lost Tower: The fisherman at Route 209's Hearthome-side west end gives the Good Rod after the player answers yes to his fishing question. | NPC / system | Reach Route 209; no Badge is required to receive or use the rod. | editorial script/system note |
Hidden Items
| Hidden item | Area / plain-English placement | QA coordinate | Requirement | Source |
|---|---|---|---|---|
| Tinymushroom | Route 209: Use the Dowsing Machine in the eastern part of Route 209, 13 tiles west and 23 tiles south of the Route 209 Lost Tower 1F doorway or transition and inspect that exact ground tile. | (555, 703) | Dowsing Machine Pokétch app. Reach this subarea; check the route and puzzle notes for HM, Bicycle, time, or story gates. | event bank 341, script 8033 |
| Awakening | Route 209: Use the Dowsing Machine in the eastern part of Route 209, 3 tiles west and 14 tiles south of the Route 209 Lost Tower 1F doorway or transition and inspect that exact ground tile. | (565, 694) | Dowsing Machine Pokétch app. Reach this subarea; check the route and puzzle notes for HM, Bicycle, time, or story gates. | event bank 341, script 8032 |
| Super Potion | Route 209: Use the Dowsing Machine in the southeastern part of Route 209, 14 tiles west and 30 tiles south of the Route 209 Lost Tower 1F doorway or transition and inspect that exact ground tile. | (554, 710) | Dowsing Machine Pokétch app. Reach this subarea; check the route and puzzle notes for HM, Bicycle, time, or story gates. | event bank 341, script 8035 |
| Revive | Route 209: Use the Dowsing Machine in the southern part of Route 209, 35 tiles east and 9 tiles north of the Hearthome Route 209 Gatehouse doorway or transition and inspect that exact ground tile. | (547, 717) | Dowsing Machine Pokétch app. Reach this subarea; check the route and puzzle notes for HM, Bicycle, time, or story gates. | event bank 341, script 8153 |
| Stardust | Route 209 Lost Tower 2F: Use the Dowsing Machine in the southeastern part of Route 209 Lost Tower 2F, 1 tile east and 11 tiles south of the Route 209 Lost Tower 1F doorway or transition and inspect that exact ground tile. | (12, 14) | Dowsing Machine Pokétch app. Reach this subarea; check the route and puzzle notes for HM, Bicycle, time, or story gates. | event bank 343, script 8187 |
| Great Ball | Route 209 Lost Tower 4F: Use the Dowsing Machine in the central part of Route 209 Lost Tower 4F, 3 tiles west and 5 tiles south of the Route 209 Lost Tower 3F doorway or transition and inspect that exact ground tile. | (8, 8) | Dowsing Machine Pokétch app. Reach this subarea; check the route and puzzle notes for HM, Bicycle, time, or story gates. | event bank 345, script 8188 |
Puzzles, Warps, And Switches
- Lost Tower becomes foggier on upper floors, lowering accuracy. Defog is not yet available, so use reliable moves or return later for a cleaner sweep.
- Hallowed Tower has milestone messages at interaction counts; use them to audit progress before expecting Spiritomb.
Completion Checklist
- Complete the currently reachable part of this route plan: Collect the Good Rod at the west end; clear every trainer and bridge branch; place the Odd Keystone in the ruined tower; enter Lost Tower; climb all five floors; receive Cleanse Tag and HM04 Strength; continue to Solaceon.
- Review all 45 encounter rows across the per-area tables, including game markers, method band, time-of-day rates, levels, and each conditional requirement; mark conditional rows for their stated revisit.
Solaceon Town and Solaceon Ruins
Unlock Day Care services, explore every Unown chamber, read the direction inscription, and collect the ruin's treasure room rewards.
Source maps
Solaceon Ruins Unused, Solaceon Ruins 2F, Solaceon Ruins 1F Main Room, Solaceon Ruins B1F Room 1, Solaceon Ruins 1F Room 1, Solaceon Ruins B1F Main Room, Solaceon Ruins 1F Room 2, Solaceon Ruins B2F Main Room, Solaceon Ruins B1F Room 2, Solaceon Ruins B3F Room 1, Solaceon Ruins B4F Room 1, Solaceon Ruins B2F Room 1, Solaceon Ruins B2F Room 2, Solaceon Ruins B3F Main Room 1, Solaceon Ruins B3F Main Room 2, and Solaceon Ruins B4F Main Room, and 14 more submaps.
Route Plan
Visit Day Care and the News Press; enter the eastern ledges; follow the main inscription path to the bottom treasure room; backtrack through all dead-end chambers for Unown letters and items; exit toward Route 210.
- The Ruin Maniac tunnel on Route 214 expands as more distinct Unown forms are caught, eventually linking to the ! and ? chamber.
- Day Care breeding becomes a major completion tool; the Poketch Day-Care Checker is obtained after depositing Pokemon and speaking to the attendant.
- The Pokemon News Press asks for a random seen species each day. Show it before the deadline to receive three of one uniformly selected Ball type from the 12-branch pool below.
Routes and encounters on this page are compiled from 30 pret map headers.
Solaceon Ruins 1F Room 1
| Pokémon | Games | Levels | Rate | Requirement / notes | ||
|---|---|---|---|---|---|---|
| Morning | Day | Night | ||||
| Grass / cave floor | ||||||
 Unown Unown | DP | 14-25 | 100% | — | ||
Solaceon Ruins 1F Room 2
| Pokémon | Games | Levels | Rate | Requirement / notes | ||
|---|---|---|---|---|---|---|
| Morning | Day | Night | ||||
| Grass / cave floor | ||||||
| Unown | DP | 14-25 | 100% | — | ||
Solaceon Ruins 2F
| Pokémon | Games | Levels | Rate | Requirement / notes | ||
|---|---|---|---|---|---|---|
| Morning | Day | Night | ||||
| Grass / cave floor | ||||||
| Unown | DP | 14-25 | 100% | — | ||
Solaceon Ruins B1F Main Room
| Pokémon | Games | Levels | Rate | Requirement / notes | ||
|---|---|---|---|---|---|---|
| Morning | Day | Night | ||||
| Grass / cave floor | ||||||
| Unown | DP | 14-25 | 100% | — | ||
Solaceon Ruins B1F Room 1
| Pokémon | Games | Levels | Rate | Requirement / notes | ||
|---|---|---|---|---|---|---|
| Morning | Day | Night | ||||
| Grass / cave floor | ||||||
| Unown | DP | 14-25 | 100% | — | ||
Solaceon Ruins B1F Room 2
| Pokémon | Games | Levels | Rate | Requirement / notes | ||
|---|---|---|---|---|---|---|
| Morning | Day | Night | ||||
| Grass / cave floor | ||||||
| Unown | DP | 14-25 | 100% | — | ||
Solaceon Ruins B2F Main Room
| Pokémon | Games | Levels | Rate | Requirement / notes | ||
|---|---|---|---|---|---|---|
| Morning | Day | Night | ||||
| Grass / cave floor | ||||||
| Unown | DP | 14-25 | 100% | — | ||
Solaceon Ruins B2F Room 1
| Pokémon | Games | Levels | Rate | Requirement / notes | ||
|---|---|---|---|---|---|---|
| Morning | Day | Night | ||||
| Grass / cave floor | ||||||
| Unown | DP | 14-25 | 100% | — | ||
Solaceon Ruins B2F Room 2
| Pokémon | Games | Levels | Rate | Requirement / notes | ||
|---|---|---|---|---|---|---|
| Morning | Day | Night | ||||
| Grass / cave floor | ||||||
| Unown | DP | 14-25 | 100% | — | ||
Solaceon Ruins B3F Main Room 1
| Pokémon | Games | Levels | Rate | Requirement / notes | ||
|---|---|---|---|---|---|---|
| Morning | Day | Night | ||||
| Grass / cave floor | ||||||
| Unown | DP | 14-25 | 100% | — | ||
Solaceon Ruins B3F Main Room 2
| Pokémon | Games | Levels | Rate | Requirement / notes | ||
|---|---|---|---|---|---|---|
| Morning | Day | Night | ||||
| Grass / cave floor | ||||||
| Unown | DP | 14-25 | 100% | — | ||
Solaceon Ruins B3F Room 1
| Pokémon | Games | Levels | Rate | Requirement / notes | ||
|---|---|---|---|---|---|---|
| Morning | Day | Night | ||||
| Grass / cave floor | ||||||
| Unown | DP | 14-25 | 100% | — | ||
Solaceon Ruins B3F Room 2
| Pokémon | Games | Levels | Rate | Requirement / notes | ||
|---|---|---|---|---|---|---|
| Morning | Day | Night | ||||
| Grass / cave floor | ||||||
| Unown | DP | 14-25 | 100% | — | ||
Solaceon Ruins B3F Room 3
| Pokémon | Games | Levels | Rate | Requirement / notes | ||
|---|---|---|---|---|---|---|
| Morning | Day | Night | ||||
| Grass / cave floor | ||||||
| Unown | DP | 14-25 | 100% | — | ||
Solaceon Ruins B4F Main Room
| Pokémon | Games | Levels | Rate | Requirement / notes | ||
|---|---|---|---|---|---|---|
| Morning | Day | Night | ||||
| Grass / cave floor | ||||||
| Unown | DP | 14-25 | 100% | — | ||
Solaceon Ruins B4F Room 1
| Pokémon | Games | Levels | Rate | Requirement / notes | ||
|---|---|---|---|---|---|---|
| Morning | Day | Night | ||||
| Grass / cave floor | ||||||
| Unown | DP | 14-25 | 100% | — | ||
Solaceon Ruins B4F Room 2
| Pokémon | Games | Levels | Rate | Requirement / notes | ||
|---|---|---|---|---|---|---|
| Morning | Day | Night | ||||
| Grass / cave floor | ||||||
| Unown | DP | 14-25 | 100% | — | ||
Solaceon Ruins B4F Room 3
| Pokémon | Games | Levels | Rate | Requirement / notes | ||
|---|---|---|---|---|---|---|
| Morning | Day | Night | ||||
| Grass / cave floor | ||||||
| Unown | DP | 14-25 | 100% | — | ||
Trainers
| Trainer | Route order / placement | Full team | Reward | Access requirement | Optional / rematch note |
|---|---|---|---|---|---|
| Ruin Maniac KarlRuin Maniac • source ID 553 | Solaceon Ruins B2F Main Room • field order 1 at (5, 6) | ₽864 | Reach the trainer's named field subarea; line of sight determines whether the battle is avoidable. | Field order 1, tile (5, 6); sightline/path determines whether it can be avoided. No higher-level same-trainer rematch variant is defined in trdata. |
Items
| Item | Version | Type | Area / exact direction | Coordinate / script | Requirement | Source |
|---|---|---|---|---|---|---|
| Mind Plate | Diamond / Pearl | Visible item ball | Solaceon Ruins B4F Room 2: Pick up the item ball in the southwestern part of Solaceon Ruins B4F Room 2, 4 tiles west and 6 tiles south of the Solaceon Ruins B3F Main Room 2 doorway or transition. | (4, 9) | Reach this subarea; check the route and puzzle notes for HM, Bicycle, time, or story gates. | event bank 234, script 7106 |
| Odd Incense | Diamond / Pearl | Visible item ball | Solaceon Ruins B4F Room 2: Pick up the item ball in the southern part of Solaceon Ruins B4F Room 2, 2 tiles west and 6 tiles south of the Solaceon Ruins B3F Main Room 2 doorway or transition. | (6, 9) | Reach this subarea; check the route and puzzle notes for HM, Bicycle, time, or story gates. | event bank 234, script 7107 |
| Nugget | Diamond / Pearl | Visible item ball | Solaceon Ruins B4F Room 2: Pick up the item ball in the southwestern part of Solaceon Ruins B4F Room 2, 4 tiles west and 4 tiles south of the Solaceon Ruins B3F Main Room 2 doorway or transition. | (4, 7) | Reach this subarea; check the route and puzzle notes for HM, Bicycle, time, or story gates. | event bank 234, script 7108 |
| Rare Candy | Diamond / Pearl | Visible item ball | Solaceon Ruins B4F Room 2: Pick up the item ball in the southern part of Solaceon Ruins B4F Room 2, 2 tiles west and 4 tiles south of the Solaceon Ruins B3F Main Room 2 doorway or transition. | (6, 7) | Reach this subarea; check the route and puzzle notes for HM, Bicycle, time, or story gates. | event bank 234, script 7109 |
| Persim Berry | Diamond / Pearl | Berry tree | Solaceon: Harvest berry patch 34 in the western part of Solaceon, 1 tile west and 7 tiles south of the Solaceon Pokémon Center doorway or transition. The plot can be replanted after the initial harvest. | (565, 663) | Reach the outdoor patch on the named route or town; harvest its initial berries before planting a replacement. | berry table ov52_021D76F8, patch 34 |
| Nanab Berry | Diamond / Pearl | Berry tree | Solaceon: Harvest berry patch 35 in the central part of Solaceon, 7 tiles south of the Solaceon Pokémon Center doorway or transition. The plot can be replanted after the initial harvest. | (566, 663) | Reach the outdoor patch on the named route or town; harvest its initial berries before planting a replacement. | berry table ov52_021D76F8, patch 35 |
| Nanab Berry | Diamond / Pearl | Berry tree | Solaceon: Harvest berry patch 36 in the central part of Solaceon, 4 tiles west and 2 tiles north of the Solaceon Poké Mart doorway or transition. The plot can be replanted after the initial harvest. | (567, 663) | Reach the outdoor patch on the named route or town; harvest its initial berries before planting a replacement. | berry table ov52_021D76F8, patch 36 |
| Figy Berry | Diamond / Pearl | Berry tree | Solaceon: Harvest berry patch 37 in the central part of Solaceon, 3 tiles west and 2 tiles north of the Solaceon Poké Mart doorway or transition. The plot can be replanted after the initial harvest. | (568, 663) | Reach the outdoor patch on the named route or town; harvest its initial berries before planting a replacement. | berry table ov52_021D76F8, patch 37 |
| Seal Case | Diamond / Pearl | NPC / scripted gift | Solaceon Seal House: The mother in Solaceon's Seal House gives the Seal Case once. | NPC (2, 5); script 2 | Reach Solaceon Town and speak to the mother before collecting letter Seals from the boy. | script bank 1011 |
| 3× Ultra Ball | Diamond / Pearl | Pokemon News Press daily reward — 1-in-12 branch | Solaceon Town and Solaceon Ruins: One daily reward branch gives 3 Ultra Balls; exactly one of the 12 listed Ball types is selected. | NPC / system | Show the requested seen Pokemon to the News Press before the daily request expires. | editorial script/system note |
| 3× Great Ball | Diamond / Pearl | Pokemon News Press daily reward — 1-in-12 branch | Solaceon Town and Solaceon Ruins: One daily reward branch gives 3 Great Balls; exactly one of the 12 listed Ball types is selected. | NPC / system | Show the requested seen Pokemon to the News Press before the daily request expires. | editorial script/system note |
| 3× Poke Ball | Diamond / Pearl | Pokemon News Press daily reward — 1-in-12 branch | Solaceon Town and Solaceon Ruins: One daily reward branch gives 3 Poke Balls; exactly one of the 12 listed Ball types is selected. | NPC / system | Show the requested seen Pokemon to the News Press before the daily request expires. | editorial script/system note |
| 3× Net Ball | Diamond / Pearl | Pokemon News Press daily reward — 1-in-12 branch | Solaceon Town and Solaceon Ruins: One daily reward branch gives 3 Net Balls; exactly one of the 12 listed Ball types is selected. | NPC / system | Show the requested seen Pokemon to the News Press before the daily request expires. | editorial script/system note |
| 3× Dive Ball | Diamond / Pearl | Pokemon News Press daily reward — 1-in-12 branch | Solaceon Town and Solaceon Ruins: One daily reward branch gives 3 Dive Balls; exactly one of the 12 listed Ball types is selected. | NPC / system | Show the requested seen Pokemon to the News Press before the daily request expires. | editorial script/system note |
| 3× Nest Ball | Diamond / Pearl | Pokemon News Press daily reward — 1-in-12 branch | Solaceon Town and Solaceon Ruins: One daily reward branch gives 3 Nest Balls; exactly one of the 12 listed Ball types is selected. | NPC / system | Show the requested seen Pokemon to the News Press before the daily request expires. | editorial script/system note |
| 3× Repeat Ball | Diamond / Pearl | Pokemon News Press daily reward — 1-in-12 branch | Solaceon Town and Solaceon Ruins: One daily reward branch gives 3 Repeat Balls; exactly one of the 12 listed Ball types is selected. | NPC / system | Show the requested seen Pokemon to the News Press before the daily request expires. | editorial script/system note |
| 3× Timer Ball | Diamond / Pearl | Pokemon News Press daily reward — 1-in-12 branch | Solaceon Town and Solaceon Ruins: One daily reward branch gives 3 Timer Balls; exactly one of the 12 listed Ball types is selected. | NPC / system | Show the requested seen Pokemon to the News Press before the daily request expires. | editorial script/system note |
| 3× Luxury Ball | Diamond / Pearl | Pokemon News Press daily reward — 1-in-12 branch | Solaceon Town and Solaceon Ruins: One daily reward branch gives 3 Luxury Balls; exactly one of the 12 listed Ball types is selected. | NPC / system | Show the requested seen Pokemon to the News Press before the daily request expires. | editorial script/system note |
| 3× Dusk Ball | Diamond / Pearl | Pokemon News Press daily reward — 1-in-12 branch | Solaceon Town and Solaceon Ruins: One daily reward branch gives 3 Dusk Balls; exactly one of the 12 listed Ball types is selected. | NPC / system | Show the requested seen Pokemon to the News Press before the daily request expires. | editorial script/system note |
| 3× Heal Ball | Diamond / Pearl | Pokemon News Press daily reward — 1-in-12 branch | Solaceon Town and Solaceon Ruins: One daily reward branch gives 3 Heal Balls; exactly one of the 12 listed Ball types is selected. | NPC / system | Show the requested seen Pokemon to the News Press before the daily request expires. | editorial script/system note |
| 3× Quick Ball | Diamond / Pearl | Pokemon News Press daily reward — 1-in-12 branch | Solaceon Town and Solaceon Ruins: One daily reward branch gives 3 Quick Balls; exactly one of the 12 listed Ball types is selected. | NPC / system | Show the requested seen Pokemon to the News Press before the daily request expires. | editorial script/system note |
| Letter Seals matching Unown form | Diamond / Pearl | Repeatable Seal House gift | Solaceon Town and Solaceon Ruins: The boy gives letter Seals that match the first party Pokemon's Unown form, up to the inventory cap of 99; he refuses the same form as the previous claim. | NPC / system | Obtain the Seal Case from his mother, then lead with a different Unown form from the last one shown. | editorial script/system note |
Hidden Items
| Hidden item | Area / plain-English placement | QA coordinate | Requirement | Source |
|---|---|---|---|---|
| Repel | Solaceon Ruins 1F Room 1: Use the Dowsing Machine on the northwest floor tile of 1F Room 1, beside the room wall. | (3, 3) | Dowsing Machine Pokétch app. Reach 1F Room 1 from the Solaceon Ruins entrance. | event bank 222, script 8036 |
| Escape Rope | Solaceon Ruins B2F Room 2: Use the Dowsing Machine along the north wall of B2F Room 2, one tile east of the northwest corner. | (3, 3) | Dowsing Machine Pokétch app. Follow the ruins stairs to B2F Room 2. | event bank 230, script 8037 |
| Honey | Solaceon: Use the Dowsing Machine in the northeastern part of Solaceon, 3 tiles west and 12 tiles north of the Solaceon Ruins 2F doorway or transition and inspect that exact ground tile. | (594, 640) | Dowsing Machine Pokétch app. Reach this subarea; check the route and puzzle notes for HM, Bicycle, time, or story gates. | event bank 411, script 8034 |
| Big Mushroom | Solaceon Ruins B4F Room 3: Use the Dowsing Machine along the north wall of B4F Room 3, one tile east of the northwest corner. | (4, 3) | Dowsing Machine Pokétch app. Follow the ruins stairs to B4F Room 3. | event bank 490, script 8038 |
Puzzles, Warps, And Switches
- The entrance inscription's sequence is: top right, lower left, top right, top left, top left, lower left. Those stairs lead to the treasure chamber.
- Wrong turns are intentional side rooms, each associated with additional Unown letters; a completion pass should explore them before leaving.
Completion Checklist
- Complete the currently reachable part of this route plan: Visit Day Care and the News Press; enter the eastern ledges; follow the main inscription path to the bottom treasure room; backtrack through all dead-end chambers for Unown letters and items; exit toward Route 210.
- Review all 18 encounter rows across the per-area tables, including game markers, method band, time-of-day rates, levels, and each conditional requirement; mark conditional rows for their stated revisit.
Route 210 South and Cafe Cabin
Train among tall grass, battle Cafe Cabin customers, inspect blocked Psyduck, and prepare for Route 215's rain.
Source maps
Route 210 South and Route 210 Cafe.
Route Plan
Clear both tall-grass lanes; visit Cafe Cabin and fight all available customers; collect berries and hidden items; inspect the Psyduck blockade; turn east because the northern road remains closed.
- Cafe Cabin sells Moomoo Milk and hosts optional trainer battles; it is an efficient healing-stock stop before Veilstone.
- The Psyduck move only after Cynthia supplies the SecretPotion following the Pastoria Galactic chase.
Routes and encounters on this page are compiled from 2 pret map headers.
Wild Pokémon
| Pokémon | Games | Levels | Rate | Requirement / notes | ||
|---|---|---|---|---|---|---|
| Morning | Day | Night | ||||
| Grass / cave floor | ||||||
| Ponyta | DP | 18-20 | 30% | 50% | 30% | — |
| Geodude | DP | 19 | 30% | Rate counts base slots temporarily replaced by hard-shaking Poké Radar patches. | ||
| Kricketune | DP | 18-19 | 10% | 10% | 30% | Rate counts base slots temporarily replaced by hard-shaking Poké Radar patches. |
| Bonsly | DP | 18 or 20 | 25% | 5% | 5% | Rate counts base slots temporarily replaced by hard-shaking Poké Radar patches and GBA dual-slot insertions. |
| Mime Jr | DP | 18 or 20 | 25% | 5% | 5% | Rate counts base slots temporarily replaced by hard-shaking Poké Radar patches and GBA dual-slot insertions. |
| Chansey | DP | 18 or 20 | 5% | Rate counts base slots temporarily replaced by hard-shaking Poké Radar patches and GBA dual-slot insertions. | ||
| Poké Radar (post-National Dex) | ||||||
| Miltank | DP | 19 | 20% | National Dex and Poké Radar required; replacement slot applies only in a hard/vigorous-shaking Radar patch. | ||
| Tauros | DP | 19 | 20% | National Dex and Poké Radar required; replacement slot applies only in a hard/vigorous-shaking Radar patch. | ||
| Miltank | DP | 20 | 2% | National Dex and Poké Radar required; replacement slot applies only in a hard/vigorous-shaking Radar patch. | ||
| Tauros | DP | 20 | 2% | National Dex and Poké Radar required; replacement slot applies only in a hard/vigorous-shaking Radar patch. | ||
| Dual-slot GBA insertion (post-National Dex) | ||||||
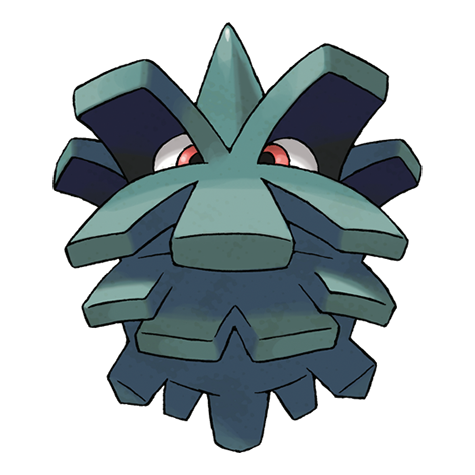 Pineco Pineco | DP | 18 or 20 | 8% | National Dex plus Pokémon Emerald inserted in the Nintendo DS GBA slot; replaces grass slots 8-9. | ||
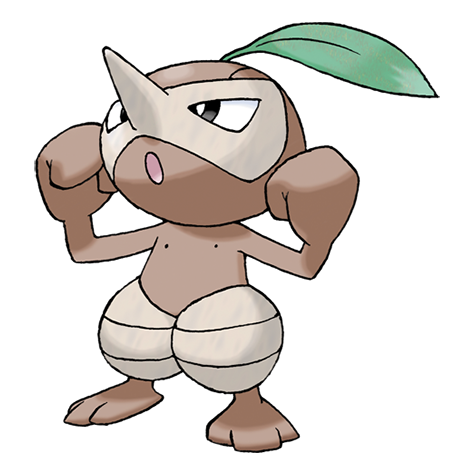 Nuzleaf Nuzleaf | DP | 20 | 4% | National Dex plus Pokémon Ruby inserted in the Nintendo DS GBA slot; replaces grass slots 8-9. | ||
 Seedot Seedot | DP | 18 | 4% | National Dex plus Pokémon Ruby inserted in the Nintendo DS GBA slot; replaces grass slots 8-9. | ||
Trainers
| Trainer | Route order / placement | Full team | Reward | Access requirement | Optional / rematch note |
|---|---|---|---|---|---|
 Ninja Boy FabianNinja Boy • source ID 488 Ninja Boy FabianNinja Boy • source ID 488 | Route 210 South • field order 1 at (562, 570) | ₽208 | Reach the trainer's named field subarea; line of sight determines whether the battle is avoidable. | Field order 1, tile (562, 570); sightline/path determines whether it can be avoided. No higher-level same-trainer rematch variant is defined in trdata. | |
| Ninja Boy BrennanNinja Boy • source ID 489 | Route 210 South • field order 2 at (550, 571) | ₽200 | Reach the trainer's named field subarea; line of sight determines whether the battle is avoidable. | Field order 2, tile (550, 571); sightline/path determines whether it can be avoided. No higher-level same-trainer rematch variant is defined in trdata. | |
| Twins Teri & TiaTwins • source ID 65 | Route 210 South • field order 3 at (558, 609) + field order 4 at (557, 609) | ₽672 | Reach the trainer's named field subarea; line of sight determines whether the battle is avoidable. | Field order 3, tile (558, 609); Field order 4, tile (557, 609); sightline/path determines whether it can be avoided. Higher-level source variants used by the rematch system: ID 687: Lv. 40/Lv. 40; ID 688: Lv. 60/Lv. 60. | |
| Ninja Boy BruceNinja Boy • source ID 490 | Route 210 South • field order 5 at (572, 562) | ₽216 | Reach the trainer's named field subarea; line of sight determines whether the battle is avoidable. | Field order 5, tile (572, 562); sightline/path determines whether it can be avoided. No higher-level same-trainer rematch variant is defined in trdata. | |
| Jogger WyattJogger • source ID 306 | Route 210 South • field order 6 at (571, 624) | ₽672 | Battle is available only in the morning, 04:00-09:59. Reach the trainer's named field subarea; line of sight determines whether the battle is avoidable. | Field order 6, tile (571, 624); sightline/path determines whether it can be avoided. No higher-level same-trainer rematch variant is defined in trdata. | |
| Pokémon Breeder Male KahlilPokémon Breeder Male • source ID 56 | Route 210 South • field order 7 at (554, 604) | ₽816 | Reach the trainer's named field subarea; line of sight determines whether the battle is avoidable. | Field order 7, tile (554, 604); sightline/path determines whether it can be avoided. No higher-level same-trainer rematch variant is defined in trdata. | |
| Pokémon Breeder Female AmberPokémon Breeder Female • source ID 57 | Route 210 South • field order 8 at (563, 601) | ₽864 | Reach the trainer's named field subarea; line of sight determines whether the battle is avoidable. | Field order 8, tile (563, 601); sightline/path determines whether it can be avoided. No higher-level same-trainer rematch variant is defined in trdata. | |
| Belle & Pa Ava & MattBelle & Pa • source ID 290 | Route 210 South • field order 9 at (563, 616) + field order 10 at (563, 615) | ₽2,352 | Reach the trainer's named field subarea; line of sight determines whether the battle is avoidable. | Field order 9, tile (563, 616); Field order 10, tile (563, 615); sightline/path determines whether it can be avoided. No higher-level same-trainer rematch variant is defined in trdata. | |
 Rancher MarcoRancher • source ID 292 Rancher MarcoRancher • source ID 292 | Route 210 South • field order 11 at (555, 627) | ₽680 | Reach the trainer's named field subarea; line of sight determines whether the battle is avoidable. | Field order 11, tile (555, 627); sightline/path determines whether it can be avoided. Higher-level source variants used by the rematch system: ID 681: Lv. 36/Lv. 37/Lv. 38; ID 682: Lv. 57/Lv. 58/Lv. 56. | |
| Collector FernandoCollector • source ID 275 | Route 210 Cafe • field order 1 at (1, 4) | ₽1,280 | Reach the trainer's named field subarea; line of sight determines whether the battle is avoidable. | Field order 1, tile (1, 4); sightline/path determines whether it can be avoided. No higher-level same-trainer rematch variant is defined in trdata. | |
| Collector EdwinCollector • source ID 276 | Route 210 Cafe • field order 2 at (3, 4) | ₽1,216 | Reach the trainer's named field subarea; line of sight determines whether the battle is avoidable. | Field order 2, tile (3, 4); sightline/path determines whether it can be avoided. No higher-level same-trainer rematch variant is defined in trdata. | |
 Waitress KatiWaitress • source ID 366 Waitress KatiWaitress • source ID 366 | Route 210 Cafe • field order 3 at (5, 3) | ₽704 | Reach the trainer's named field subarea; line of sight determines whether the battle is avoidable. | Field order 3, tile (5, 3); sightline/path determines whether it can be avoided. No higher-level same-trainer rematch variant is defined in trdata. |


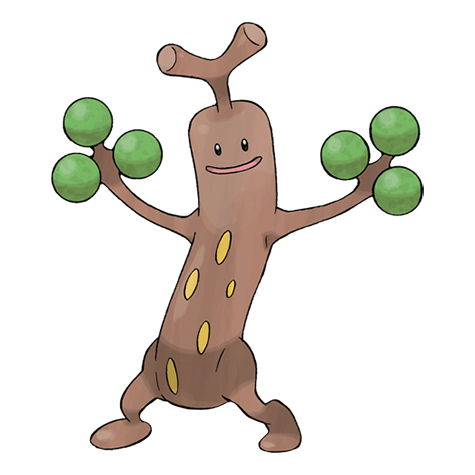
Items
| Item | Version | Type | Area / exact direction | Coordinate / script | Requirement | Source |
|---|---|---|---|---|---|---|
| Super Repel | Diamond / Pearl | Visible item ball | Route 210 South: Pick up the item ball in the western part of Route 210 South, 20 tiles west and 13 tiles north of the Route 210 Cafe doorway or transition. | (546, 578) | Reach this subarea; check the route and puzzle notes for HM, Bicycle, time, or story gates. | event bank 347, script 7111 |
| Great Ball | Diamond / Pearl | Visible item ball | Route 210 South: Pick up the item ball in the western part of Route 210 South, 12 tiles west and 7 tiles south of the Route 210 Cafe doorway or transition. | (554, 598) | Reach this subarea; check the route and puzzle notes for HM, Bicycle, time, or story gates. | event bank 347, script 7110 |
| Ultra Ball | Diamond / Pearl | Visible item ball | Route 210 South: Pick up the item ball in the northeastern part of Route 210 South, 9 tiles east and 45 tiles north of the Route 210 Cafe doorway or transition. | (575, 546) | Reach this subarea; check the route and puzzle notes for HM, Bicycle, time, or story gates. | event bank 347, script 7112 |
| Hyper Potion | Diamond / Pearl | Visible item ball | Route 210 South: Pick up the item ball in the northern part of Route 210 South, 4 tiles west and 26 tiles north of the Route 210 Cafe doorway or transition. | (562, 565) | Reach this subarea; check the route and puzzle notes for HM, Bicycle, time, or story gates. | event bank 347, script 7113 |
| Aspear Berry | Diamond / Pearl | Berry tree | Route 210 South: Harvest berry patch 38 in the southeastern part of Route 210 South, 4 tiles east and 36 tiles south of the Route 210 Cafe doorway or transition. The plot can be replanted after the initial harvest. | (570, 627) | Reach the outdoor patch on the named route or town; harvest its initial berries before planting a replacement. | berry table ov52_021D76F8, patch 38 |
| Aspear Berry | Diamond / Pearl | Berry tree | Route 210 South: Harvest berry patch 39 in the southeastern part of Route 210 South, 5 tiles east and 36 tiles south of the Route 210 Cafe doorway or transition. The plot can be replanted after the initial harvest. | (571, 627) | Reach the outdoor patch on the named route or town; harvest its initial berries before planting a replacement. | berry table ov52_021D76F8, patch 39 |
| Razz Berry | Diamond / Pearl | Berry tree | Route 210 South: Harvest berry patch 40 in the southeastern part of Route 210 South, 6 tiles east and 36 tiles south of the Route 210 Cafe doorway or transition. The plot can be replanted after the initial harvest. | (572, 627) | Reach the outdoor patch on the named route or town; harvest its initial berries before planting a replacement. | berry table ov52_021D76F8, patch 40 |
| Pinap Berry | Diamond / Pearl | Berry tree | Route 210 South: Harvest berry patch 41 in the southeastern part of Route 210 South, 7 tiles east and 36 tiles south of the Route 210 Cafe doorway or transition. The plot can be replanted after the initial harvest. | (573, 627) | Reach the outdoor patch on the named route or town; harvest its initial berries before planting a replacement. | berry table ov52_021D76F8, patch 41 |
| Old Charm | Diamond / Pearl | NPC / scripted gift | Route 210 South: Cynthia gives it beside the Psyduck blockade after the Pastoria Galactic Grunt chase. | NPC (561, 587); script 1 | Earn the Fen Badge, finish the grunt chase to Valor Lakefront, and receive the SecretPotion before returning to Route 210. | script bank 412 |
| TM51 | Diamond / Pearl | NPC / scripted gift | Route 210 South: Speak to the item-giving NPC in the southern part of Route 210 South, 21 tiles south of the Route 210 Cafe doorway or transition. | NPC (566, 612); script 3 | Reach Route 210 South and complete the item-giving NPC's one-time dialogue. | script bank 412 |
| Moomoo Milk | Diamond / Pearl | Repeatable purchase | Route 210 South and Cafe Cabin: Buy one bottle from the Route 210 Cafe Cabin counter. | NPC / system | Pay ₽500 per bottle. | editorial script/system note |
Hidden Items
| Hidden item | Area / plain-English placement | QA coordinate | Requirement | Source |
|---|---|---|---|---|
| Ether | Route 210 South: Use the Dowsing Machine in the western part of Route 210 South, 17 tiles west and 18 tiles north of the Route 210 Cafe doorway or transition and inspect that exact ground tile. | (549, 573) | Dowsing Machine Pokétch app. Reach this subarea; check the route and puzzle notes for HM, Bicycle, time, or story gates. | event bank 347, script 8039 |
| Full Heal | Route 210 South: Use the Dowsing Machine in the northwestern part of Route 210 South, 11 tiles west and 29 tiles north of the Route 210 Cafe doorway or transition and inspect that exact ground tile. | (555, 562) | Dowsing Machine Pokétch app. Reach this subarea; check the route and puzzle notes for HM, Bicycle, time, or story gates. | event bank 347, script 8149 |
| Great Ball | Route 210 South: Use the Dowsing Machine in the central part of Route 210 South, 1 tile west and 16 tiles south of the Route 210 Cafe doorway or transition and inspect that exact ground tile. | (565, 607) | Dowsing Machine Pokétch app. Reach this subarea; check the route and puzzle notes for HM, Bicycle, time, or story gates. | event bank 347, script 8154 |
| Hyper Potion | Route 210 South: Use the Dowsing Machine in the northern part of Route 210 South, 20 tiles north of the Route 210 Cafe doorway or transition and inspect that exact ground tile. | (566, 571) | Dowsing Machine Pokétch app. Reach this subarea; check the route and puzzle notes for HM, Bicycle, time, or story gates. | event bank 347, script 8189 |
| Burn Heal | Route 210 South: Use the Dowsing Machine in the northeastern part of Route 210 South, 6 tiles east and 30 tiles north of the Route 210 Cafe doorway or transition and inspect that exact ground tile. | (572, 561) | Dowsing Machine Pokétch app. Reach this subarea; check the route and puzzle notes for HM, Bicycle, time, or story gates. | event bank 347, script 8202 |
Puzzles, Warps, And Switches
- Bicycle-only narrow rails and tall grass divide the item loops. Finish the southern field before crossing east to Route 215.
Completion Checklist
- Complete the currently reachable part of this route plan: Clear both tall-grass lanes; visit Cafe Cabin and fight all available customers; collect berries and hidden items; inspect the Psyduck blockade; turn east because the northern road remains closed.
- Review all 13 encounter rows across the per-area tables, including game markers, method band, time-of-day rates, levels, and each conditional requirement; mark conditional rows for their stated revisit.
Route 215 and Veilstone City
Cross the rain route, claim useful TMs, then tour Veilstone's Department Store, Game Corner, massage house, and Galactic warehouse exterior.
Source maps
Veilstone, Veilstone Pokémon Center, Veilstone Pokémon Center 2F, Veilstone Game Corner, Veilstone Department Store 1F, Veilstone Department Store 2F, Veilstone Department Store 3F, Veilstone Department Store 4F, Veilstone Department Store 5F, Veilstone Department Store Elevator, Veilstone Prize Exchange, Veilstone South House, Veilstone North House, Veilstone Northeast House, Veilstone Massage Girl House, and Veilstone Route 215 Gatehouse, and 2 more submaps.
Route Plan
Clear every Route 215 bridge and Cut alcove; collect TM66 Payback from the Black Belt; enter Veilstone; heal and shop; obtain the Coin Case; inspect but do not yet raid Galactic facilities. Obtain Porygon later from the post-National-Dex Trophy Garden rotation, not from a Veilstone gift.
- Veilstone's gift Porygon is Platinum-only. Original Diamond/Pearl obtains Porygon through Trophy Garden's daily visitor system or trading.
- Veilstone's Game Corner and slot-machine presentation are the original Diamond/Pearl implementation; regional releases may alter or remove interactive gambling.
- The Department Store is the best pre-Gym source for battle items, TMs, and drinks.
Routes and encounters on this page are compiled from 18 pret map headers.
Wild Pokémon
| Pokémon | Games | Levels | Rate | Requirement / notes | ||
|---|---|---|---|---|---|---|
| Morning | Day | Night | ||||
| Grass / cave floor | ||||||
| Ponyta | DP | 21-22 | 30% | 40% | 20% | Rate counts base slots temporarily replaced by the daily swarm. |
| Geodude | DP | 20-22 | 35% | 25% | 25% | Rate counts base slots temporarily replaced by the daily swarm, hard-shaking Poké Radar patches, and GBA dual-slot insertions. |
| Kricketune | DP | 20-22 | 10% | 10% | 30% | Rate counts base slots temporarily replaced by hard-shaking Poké Radar patches. |
| Kadabra | DP | 20-22 | 15% | Rate counts base slots temporarily replaced by hard-shaking Poké Radar patches and GBA dual-slot insertions. | ||
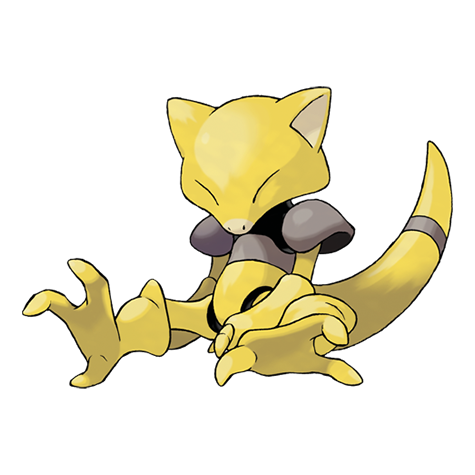 Abra Abra | DP | 20 | 10% | Rate counts base slots temporarily replaced by hard-shaking Poké Radar patches. | ||
| Swarm (post-National Dex daily announcement) | ||||||
 Drowzee Drowzee | DP | 20-21 | 40% | Post-National Dex daily swarm; replaces grass slots 0-1. | ||
| Poké Radar (post-National Dex) | ||||||
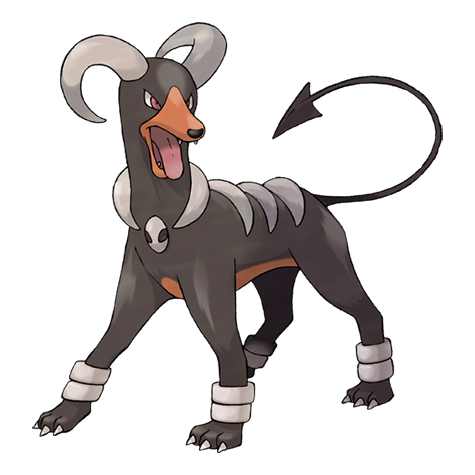 Houndoom Houndoom | DP | 20 or 22 | 22% | National Dex and Poké Radar required; replacement slot applies only in a hard/vigorous-shaking Radar patch. | ||
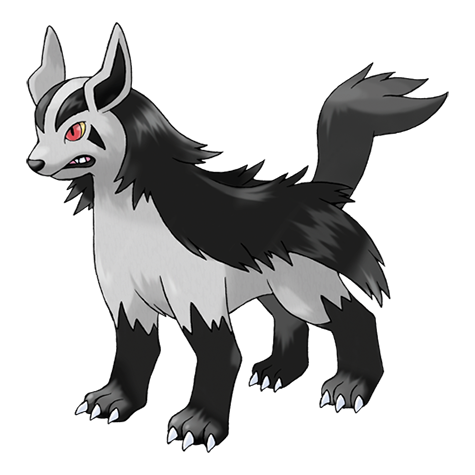 Mightyena Mightyena | DP | 20 or 22 | 22% | National Dex and Poké Radar required; replacement slot applies only in a hard/vigorous-shaking Radar patch. | ||
| Dual-slot GBA insertion (post-National Dex) | ||||||
| Gligar | DP | 22 | 8% | National Dex plus Pokémon Emerald inserted in the Nintendo DS GBA slot; replaces grass slots 8-9. | ||
Trainers
| Trainer | Route order / placement | Full team | Reward | Access requirement | Optional / rematch note |
|---|---|---|---|---|---|
| Black Belt DerekBlack Belt • source ID 128 | Route 215 • field order 1 at (607, 584) | ₽600 | Reach the trainer's named field subarea; line of sight determines whether the battle is avoidable. | Field order 1, tile (607, 584); sightline/path determines whether it can be avoided. No higher-level same-trainer rematch variant is defined in trdata. | |
| Black Belt GregoryBlack Belt • source ID 127 | Route 215 • field order 2 at (621, 578) | ₽504 | Reach the trainer's named field subarea; line of sight determines whether the battle is avoidable. | Field order 2, tile (621, 578); sightline/path determines whether it can be avoided. No higher-level same-trainer rematch variant is defined in trdata. | |
| Black Belt NathanielBlack Belt • source ID 129 | Route 215 • field order 3 at (643, 582) | ₽528 | Reach the trainer's named field subarea; line of sight determines whether the battle is avoidable. | Field order 3, tile (643, 582); sightline/path determines whether it can be avoided. No higher-level same-trainer rematch variant is defined in trdata. | |
| Jogger ScottJogger • source ID 130 | Route 215 • field order 4 at (654, 589) | ₽736 | Battle is available only in the morning, 04:00-09:59. Reach the trainer's named field subarea; line of sight determines whether the battle is avoidable. | Field order 4, tile (654, 589); sightline/path determines whether it can be avoided. No higher-level same-trainer rematch variant is defined in trdata. | |
| Ruin Maniac CalvinRuin Maniac • source ID 304 | Route 215 • field order 5 at (589, 590) | ₽1,104 | Reach the trainer's named field subarea; line of sight determines whether the battle is avoidable. | Field order 5, tile (589, 590); sightline/path determines whether it can be avoided. No higher-level same-trainer rematch variant is defined in trdata. | |
 Ace Trainer Male DennisAce Trainer Male • source ID 278 Ace Trainer Male DennisAce Trainer Male • source ID 278 | Route 215 • field order 6 at (648, 599) | ₽1,380 | Reach the trainer's named field subarea; line of sight determines whether the battle is avoidable. | Field order 6, tile (648, 599); sightline/path determines whether it can be avoided. Higher-level source variants used by the rematch system: ID 664: Lv. 39/Lv. 39/Lv. 39; ID 665: Lv. 59/Lv. 59/Lv. 59. | |
 Ace Trainer Female MayaAce Trainer Female • source ID 287 Ace Trainer Female MayaAce Trainer Female • source ID 287 | Route 215 • field order 7 at (648, 596) | ₽1,380 | Reach the trainer's named field subarea; line of sight determines whether the battle is avoidable. | Field order 7, tile (648, 596); sightline/path determines whether it can be avoided. Higher-level source variants used by the rematch system: ID 669: Lv. 40/Lv. 40; ID 670: Lv. 60/Lv. 60. | |
| Jogger CraigJogger • source ID 307 | Route 215 • field order 8 at (603, 593) | ₽640 | Battle is available only in the morning, 04:00-09:59. Reach the trainer's named field subarea; line of sight determines whether the battle is avoidable. | Field order 8, tile (603, 593); sightline/path determines whether it can be avoided. Higher-level source variants used by the rematch system: ID 697: Lv. 36/Lv. 36/Lv. 39; ID 698: Lv. 56/Lv. 57/Lv. 58. |
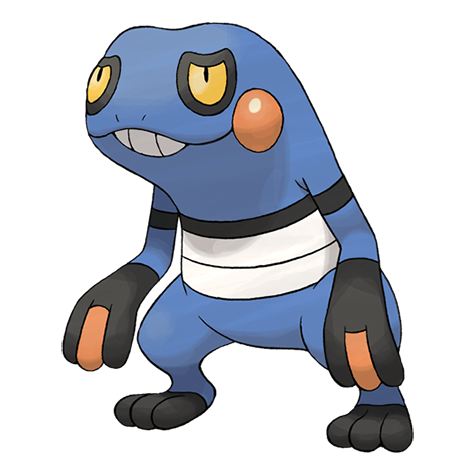
Items
| Item | Version | Type | Area / exact direction | Coordinate / script | Requirement | Source |
|---|---|---|---|---|---|---|
| Full Incense | Diamond / Pearl | Visible item ball | Veilstone: Pick up the item ball in the western part of Veilstone, 6 tiles east and 2 tiles south of the Veilstone Gym doorway or transition. | (690, 613) | Reach this subarea; check the route and puzzle notes for HM, Bicycle, time, or story gates. | event bank 131, script 7119 |
| PP Up | Diamond / Pearl | Visible item ball | Veilstone: Pick up the item ball in the northern part of Veilstone, 4 tiles west and 5 tiles north of the Veilstone Galactic Headquarters 1F doorway or transition. | (710, 584) | Reach this subarea; check the route and puzzle notes for HM, Bicycle, time, or story gates. | event bank 131, script 7120 |
| Storage Key | Diamond / Pearl | Visible item ball | Veilstone: Pick up the key dropped by the Galactic Grunt outside Galactic HQ during the late-game raid setup. | (721, 594) | Complete the Lake Acuity scene, then return to Veilstone for the phase-8 Galactic HQ raid; unavailable on the first city visit. | event bank 131, script 7121 |
| Guard Spec | Diamond / Pearl | Visible item ball | Route 215: Pick up the item ball in the southern part of Route 215, 45 tiles west of the Veilstone Route 215 Gatehouse doorway or transition. | (626, 599) | Reach this subarea; check the route and puzzle notes for HM, Bicycle, time, or story gates. | event bank 367, script 7115 |
| Full Heal | Diamond / Pearl | Visible item ball | Route 215: Pick up the item ball in the southern part of Route 215, 34 tiles west and 2 tiles north of the Veilstone Route 215 Gatehouse doorway or transition. | (637, 596) | Reach this subarea; check the route and puzzle notes for HM, Bicycle, time, or story gates. | event bank 367, script 7117 |
| Ether | Diamond / Pearl | Visible item ball | Route 215: Pick up the item ball in the western part of Route 215, 71 tiles west and 7 tiles north of the Veilstone Route 215 Gatehouse doorway or transition. | (600, 591) | Reach this subarea; check the route and puzzle notes for HM, Bicycle, time, or story gates. | event bank 367, script 7116 |
| TM34 | Diamond / Pearl | Visible item ball | Route 215: In the fenced Route 215 alcove behind a cuttable tree. | (661, 587) | Forest Badge and Cut. | event bank 367, script 7118 |
| Fist Plate | Diamond / Pearl | Visible item ball | Route 215: Behind a cuttable tree in Route 215's eastern side path. | (620, 580) | Forest Badge and Cut. | event bank 367, script 7114 |
| 2× Pecha Berry | Diamond / Pearl | Berry tree | Route 215: Harvest berry patch 70 in the southern part of Route 215, 43 tiles west and 6 tiles north of the Veilstone Route 215 Gatehouse doorway or transition. The plot can be replanted after the initial harvest. | (628, 592) | Reach the outdoor patch on the named route or town; harvest its initial berries before planting a replacement. | berry table ov52_021D76F8, patch 70 |
| 2× Bluk Berry | Diamond / Pearl | Berry tree | Route 215: Harvest berry patch 71 in the southern part of Route 215, 42 tiles west and 6 tiles north of the Veilstone Route 215 Gatehouse doorway or transition. The plot can be replanted after the initial harvest. | (629, 592) | Reach the outdoor patch on the named route or town; harvest its initial berries before planting a replacement. | berry table ov52_021D76F8, patch 71 |
| Wiki Berry | Diamond / Pearl | Berry tree | Route 215: Harvest berry patch 72 in the southeastern part of Route 215, 11 tiles west and 5 tiles north of the Veilstone Route 215 Gatehouse doorway or transition. The plot can be replanted after the initial harvest. | (660, 593) | Reach the outdoor patch on the named route or town; harvest its initial berries before planting a replacement. | berry table ov52_021D76F8, patch 72 |
| Mago Berry | Diamond / Pearl | Berry tree | Route 215: Harvest berry patch 73 in the southeastern part of Route 215, 10 tiles west and 5 tiles north of the Veilstone Route 215 Gatehouse doorway or transition. The plot can be replanted after the initial harvest. | (661, 593) | Reach the outdoor patch on the named route or town; harvest its initial berries before planting a replacement. | berry table ov52_021D76F8, patch 73 |
| TM63 | Diamond / Pearl | NPC / scripted gift | Veilstone: Speak to the item-giving NPC in the southwestern part of Veilstone, 3 tiles west and 1 tile south of the Veilstone Massage Girl House doorway or transition. | NPC (687, 624); script 8 | Reach Veilstone and complete the item-giving NPC's one-time dialogue. | script bank 131 |
| Sticky Barb | Diamond / Pearl | NPC / scripted gift | Veilstone Department Store 5F: Speak to the item-giving NPC in the southern part of Veilstone Department Store 5F, 3 tiles east and 3 tiles south of the Veilstone Department Store 4F doorway or transition. | NPC (10, 11); script 3 | Reach Veilstone Department Store 5F and complete the item-giving NPC's one-time dialogue. | script bank 141 |
| Coin Case | Diamond / Pearl | NPC / scripted gift | Veilstone South House: Speak to the item-giving NPC in the eastern part of Veilstone South House, 2 tiles east and 2 tiles north of the Veilstone doorway or transition. | NPC (6, 6); script 1 | Reach Veilstone South House and complete the item-giving NPC's one-time dialogue. | script bank 145 |
| TM66 | Diamond / Pearl | NPC / scripted gift | Route 215: Speak to the item-giving NPC in the southern part of Route 215, 60 tiles west of the Veilstone Route 215 Gatehouse doorway or transition. | NPC (611, 598); script 2 | Reach Route 215 and complete the item-giving NPC's one-time dialogue. | script bank 433 |
| Daily Veilstone massage and accessory | Diamond / Pearl | Once-daily service | Route 215 and Veilstone City: The Massage Girl lets you choose a non-Egg party Pokemon, raises that Pokemon's friendship by 3, and finds one accessory during the service. | NPC / system | Once per day in the Veilstone Massage Girl house; choose the intended non-Egg friendship target on the party-selection screen. | editorial script/system note |
| TM83 Natural Gift / TM17 Protect / TM54 False Swipe / TM20 Safeguard / TM33 Reflect / TM16 Light Screen | Diamond / Pearl | Veilstone Department Store TM counter | Route 215 and Veilstone City: Each listed TM costs ₽2,000 at the Department Store's TM counter. | NPC / system | Reach Veilstone City; this inventory is available for repeat purchases. | editorial script/system note |
| TM70 Flash | Diamond / Pearl | Veilstone Department Store TM counter | Route 215 and Veilstone City: TM70 costs ₽1,000 at the Department Store's TM counter. | NPC / system | Reach Veilstone City; this inventory is available for repeat purchases. | editorial script/system note |
| Silk Scarf / Wide Lens / Zoom Lens / Metronome | Diamond / Pearl | Game Corner Prize Exchange | Route 215 and Veilstone City: Each held item costs 1,000 Coins at the Veilstone Prize Exchange. | NPC / system | Obtain the Coin Case and enough Game Corner Coins; playable slot machines depend on the original regional release. | editorial script/system note |
| TM90 Substitute / TM58 Endure | Diamond / Pearl | Game Corner Prize Exchange | Route 215 and Veilstone City: Each TM costs 2,000 Coins. | NPC / system | Obtain the Coin Case and exchange the listed Coin cost. | editorial script/system note |
| TM75 Swords Dance / TM32 Double Team | Diamond / Pearl | Game Corner Prize Exchange | Route 215 and Veilstone City: Each TM costs 4,000 Coins. | NPC / system | Obtain the Coin Case and exchange the listed Coin cost. | editorial script/system note |
| TM44 Rest / TM89 U-turn / TM10 Hidden Power | Diamond / Pearl | Game Corner Prize Exchange | Route 215 and Veilstone City: Each TM costs 6,000 Coins. | NPC / system | Obtain the Coin Case and exchange the listed Coin cost. | editorial script/system note |
| TM27 Return / TM21 Frustration | Diamond / Pearl | Game Corner Prize Exchange | Route 215 and Veilstone City: Each TM costs 8,000 Coins. | NPC / system | Obtain the Coin Case and exchange the listed Coin cost. | editorial script/system note |
| TM35 Flamethrower / TM24 Thunderbolt / TM13 Ice Beam / TM29 Psychic | Diamond / Pearl | Game Corner Prize Exchange | Route 215 and Veilstone City: Each TM costs 10,000 Coins. | NPC / system | Obtain the Coin Case and exchange the listed Coin cost. | editorial script/system note |
| TM74 Gyro Ball | Diamond / Pearl | Game Corner Prize Exchange | Route 215 and Veilstone City: Costs 15,000 Coins. | NPC / system | Obtain the Coin Case and exchange the listed Coin cost. | editorial script/system note |
| TM68 Giga Impact | Diamond / Pearl | Game Corner Prize Exchange | Route 215 and Veilstone City: Costs 20,000 Coins. | NPC / system | Obtain the Coin Case and exchange the listed Coin cost. | editorial script/system note |
| TM64 Explosion | Diamond / Pearl | Game Corner bonus-round gift | Route 215 and Veilstone City: The Game Corner cashier awards TM64 after a slot session reaches at least ten consecutive Clefairy Bonus rounds. | NPC / system | Eligible original regional release with playable Veilstone slots; complete the ten-round Clefairy Bonus streak and speak to the cashier. | editorial script/system note |
Hidden Items
| Hidden item | Area / plain-English placement | QA coordinate | Requirement | Source |
|---|---|---|---|---|
| Tinymushroom | Veilstone: Use the Dowsing Machine in the northwestern part of Veilstone, 7 tiles west and 3 tiles north of the Veilstone Galactic Warehouse Entrance doorway or transition and inspect that exact ground tile. | (694, 588) | Dowsing Machine Pokétch app. Reach this subarea; check the route and puzzle notes for HM, Bicycle, time, or story gates. | event bank 131, script 8041 |
| Revive | Veilstone: Use the Dowsing Machine in the northern part of Veilstone, 4 tiles west and 4 tiles north of the Veilstone Department Store 1F doorway or transition and inspect that exact ground tile. | (697, 599) | Dowsing Machine Pokétch app. Reach this subarea; check the route and puzzle notes for HM, Bicycle, time, or story gates. | event bank 131, script 8040 |
| Honey | Route 215: Use the Dowsing Machine in the northern part of Route 215, 56 tiles west and 17 tiles north of the Veilstone Route 215 Gatehouse doorway or transition and inspect that exact ground tile. | (615, 581) | Dowsing Machine Pokétch app. Reach this subarea; check the route and puzzle notes for HM, Bicycle, time, or story gates. | event bank 367, script 8181 |
| Hyper Potion | Route 215: Use the Dowsing Machine in the northern part of Route 215, 37 tiles west and 21 tiles north of the Veilstone Route 215 Gatehouse doorway or transition and inspect that exact ground tile. | (634, 577) | Dowsing Machine Pokétch app. Reach this subarea; check the route and puzzle notes for HM, Bicycle, time, or story gates. | event bank 367, script 8182 |
| Zinc | Route 215: Use the Dowsing Machine in the northeastern part of Route 215, 8 tiles west and 19 tiles north of the Veilstone Route 215 Gatehouse doorway or transition and inspect that exact ground tile. | (663, 579) | Dowsing Machine Pokétch app. Reach this subarea; check the route and puzzle notes for HM, Bicycle, time, or story gates. | event bank 367, script 8183 |
Puzzles, Warps, And Switches
- Route 215's bridges cross above lower grass lanes. Use Cut at each visible tree before advancing east so the rain does not obscure a missed item branch.
Completion Checklist
- Complete the currently reachable part of this route plan: Clear every Route 215 bridge and Cut alcove; collect TM66 Payback from the Black Belt; enter Veilstone; heal and shop; obtain the Coin Case; inspect but do not yet raid Galactic facilities. Obtain Porygon later from the post-National-Dex Trophy Garden rotation, not from a Veilstone gift.
- Review all 9 encounter rows across the per-area tables, including game markers, method band, time-of-day rates, levels, and each conditional requirement; mark conditional rows for their stated revisit.
Veilstone Gym and Maylene
Slide the Gym's wall panels to open three lanes, defeat every Black Belt, and beat Maylene's Lucario for the Cobble Badge.
Source maps
Veilstone Gym.
Route Plan
Bring Flying- and Psychic-type damage; push wall panels from both sides to align door gaps; clear the left, right, and center trainers; heal; save before Maylene; answer Lucario with Ground, Fire, or Fighting damage if Flying/Psychic coverage is unsafe.
- Maylene's Meditite and Machoke set up the stronger Lucario finish; avoid spending the Lucario answer too early.
- The Cobble Badge permits Fly outside battle, but HM02 is collected from the Galactic warehouse immediately after the Gym.
Routes and encounters on this page are compiled from 1 pret map header.
Trainers
| Trainer | Route order / placement | Full team | Reward | Access requirement | Optional / rematch note |
|---|---|---|---|---|---|
| Black Belt ColbyBlack Belt • source ID 309 | Veilstone Gym • field order 1 at (12, 13) | ₽600 | Reach the trainer's named field subarea; line of sight determines whether the battle is avoidable. | Field order 1, tile (12, 13); sightline/path determines whether it can be avoided. No higher-level same-trainer rematch variant is defined in trdata. | |
| Black Belt DarrenBlack Belt • source ID 310 | Veilstone Gym • field order 2 at (5, 19) | ₽600 | Reach the trainer's named field subarea; line of sight determines whether the battle is avoidable. | Field order 2, tile (5, 19); sightline/path determines whether it can be avoided. No higher-level same-trainer rematch variant is defined in trdata. | |
| Black Belt JefferyBlack Belt • source ID 312 | Veilstone Gym • field order 3 at (12, 19) | ₽624 | Reach the trainer's named field subarea; line of sight determines whether the battle is avoidable. | Field order 3, tile (12, 19); sightline/path determines whether it can be avoided. No higher-level same-trainer rematch variant is defined in trdata. | |
| Black Belt RafaelBlack Belt • source ID 311 | Veilstone Gym • field order 4 at (19, 18) |
| ₽672 | Reach the trainer's named field subarea; line of sight determines whether the battle is avoidable. | Field order 4, tile (19, 18); sightline/path determines whether it can be avoided. No higher-level same-trainer rematch variant is defined in trdata. |
| Leader MayleneLeader Maylene • source ID 317 | Veilstone Gym • scripted | ₽3,600 | Scripted story trigger; complete the local objective described in the route plan. | Major or story battle; not a VS Seeker rematch row. |
Items
| Item | Version | Type | Area / exact direction | Coordinate / script | Requirement | Source |
|---|---|---|---|---|---|---|
| TM60 | Diamond / Pearl | NPC / scripted gift | Veilstone Gym: Receive this TM from the Gym Leader immediately after the badge victory. | NPC (12, 4); script 2 | Defeat the Gym Leader; this is part of the one-time badge reward. | script bank 132 |
Puzzles, Warps, And Switches
- Push each horizontal panel until its opening aligns with the vertical aisle. Some panels must be approached from behind through an adjacent lane, so clear outer lanes before the center.
Completion Checklist
- Complete the currently reachable part of this route plan: Bring Flying- and Psychic-type damage; push wall panels from both sides to align door gaps; clear the left, right, and center trainers; heal; save before Maylene; answer Lucario with Ground, Fire, or Fighting damage if Flying/Psychic coverage is unsafe.
Dex quick links