
Phase 8 of 11


Pokemon Diamond and Pearl Phase 8: Beacon Badge Walkthrough
 Beacon Badge
 Raid Galactic HQ, climb Mt. Coronet, stop Cyrus at Spear Pillar, catch the version mascot, and restore Sunyshore's Gym. 8 detailed sections with Diamond/Pearl encounters, trainers, items, puzzles, boss teams, and checklists.
Phase 8 Beacon Badge Galactic HQ, Mt. Coronet, Spear Pillar, Dialga or Palkia, Sunyshore City, and Volkner. 08 / 11 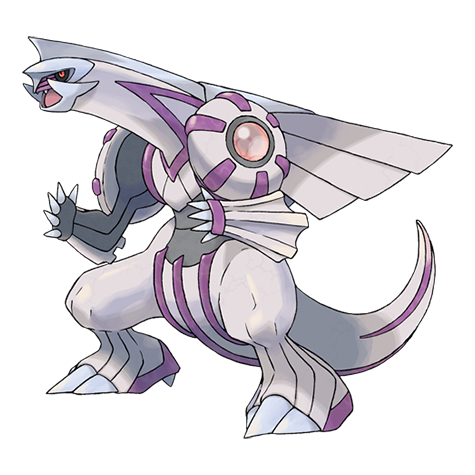
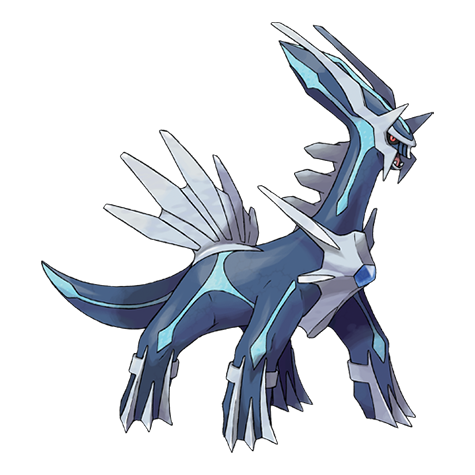
Phase Snapshot
Phase 8: Beacon Badge
Raid Galactic HQ, climb Mt. Coronet, stop Cyrus at Spear Pillar, catch the version mascot, and restore Sunyshore's Gym.
Data rows
Phase Sections
Major Battles And Partners
 Galactic Boss CyrusGalactic Boss • source ID 403
Full team
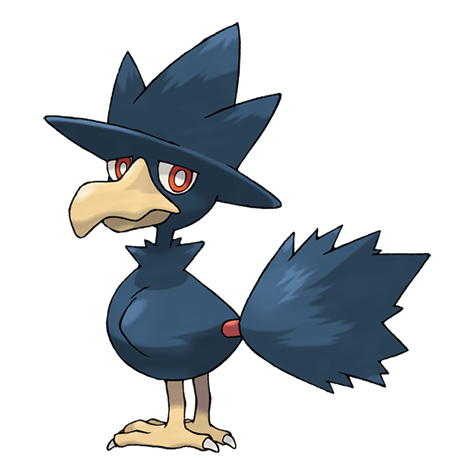 MurkrowDrill Peck / Night Shade / Astonish / Embargo
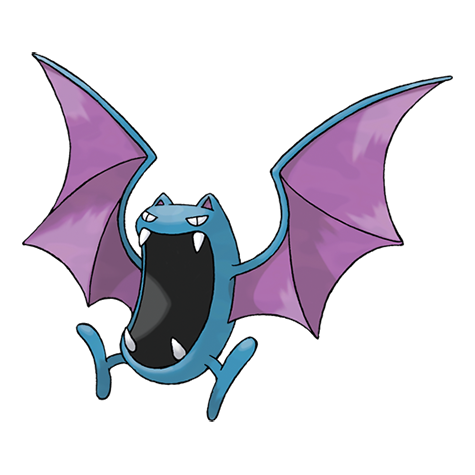 GolbatPoison Fang / Air Cutter / Bite / Supersonic
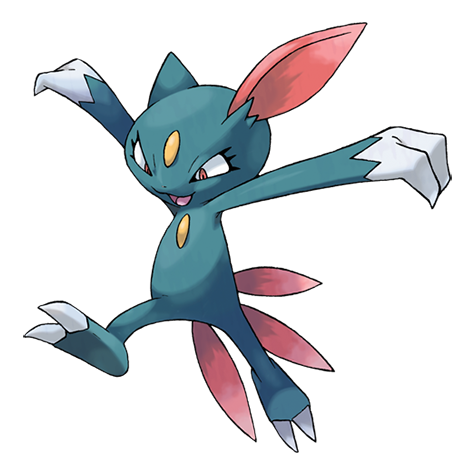 Sneaselholds Sitrus Berry • Slash / Ice Punch / Quick Attack / Screech
Danger notes
Cyrus's Sneasel is the strongest immediate threat, backed by fast Murkrow and Golbat.
Practical counters
Rock and Electric cover both fliers; Fighting or Fire handles Sneasel. Avoid slow setup because his team is built around speed.
 Commander SaturnCommander Saturn • source ID 409
Full team
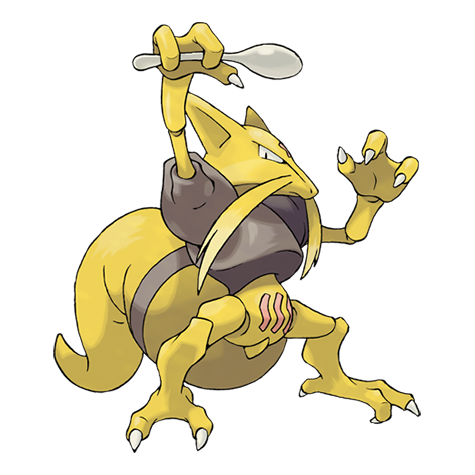 KadabraPsychic / Shock Wave / Recover / Embargo
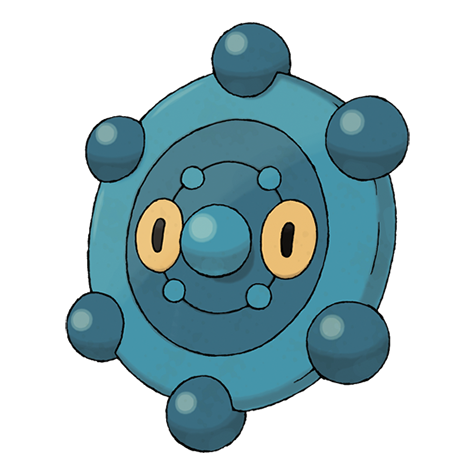 BronzorGyro Ball / Extrasensory / Shadow Ball / Confuse Ray
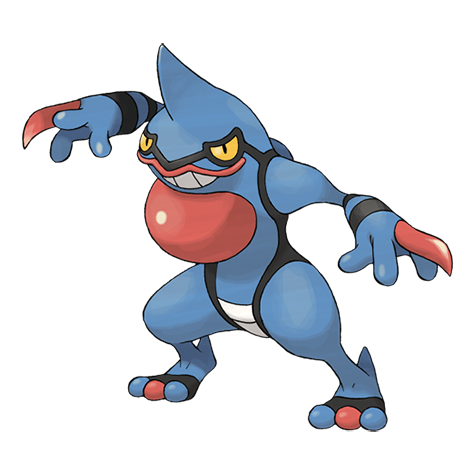 Toxicroakholds Sitrus Berry • Poison Jab / Brick Break / X Scissor / Swagger
Danger notes
The rematch uses the same Kadabra/Bronzor/Toxicroak structure at higher levels.
Practical counters
Prioritize fast pressure on Kadabra, identify Bronzor's ability, and reserve Psychic or Ground damage for Toxicroak.
 Commander MarsCommander Mars • source ID 528
Full team
- BronzorGyro Ball / Extrasensory / Light Screen / Confuse Ray
- GolbatAir Cutter / Bite / Poison Fang / Confuse Ray
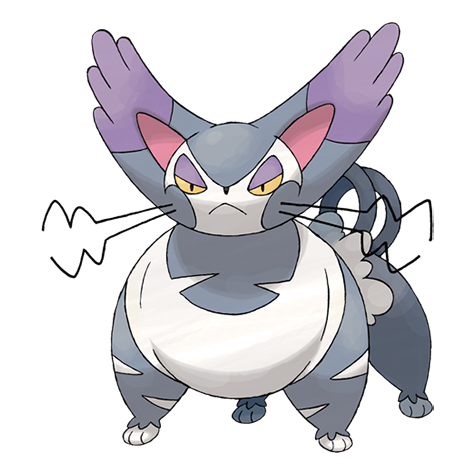 Puruglyholds Sitrus Berry • Slash / Shadow Claw / Aerial Ace / Hypnosis
Danger notes
Mars uses a fast Golbat line and a physically powerful Purugly.
Practical counters
Electric/Rock coverage and a Fighting answer give the cleanest split.
 Commander JupiterCommander Jupiter • source ID 407
Full team
- BronzorGyro Ball / Extrasensory / Rock Slide / Reflect
- GolbatSludge Bomb / Air Cutter / Giga Drain / Mean Look
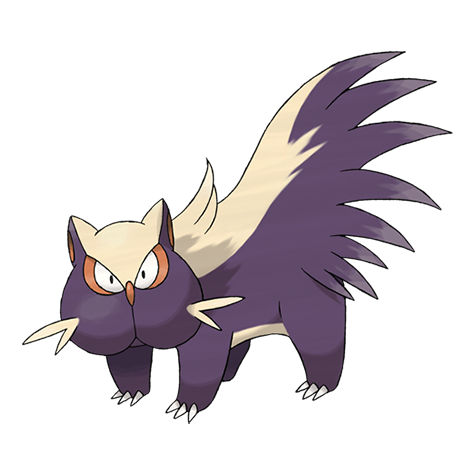
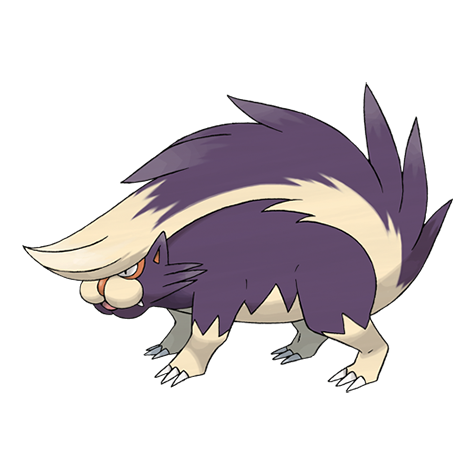 Skuntankholds Sitrus Berry • Night Slash / Poison Jab / Flamethrower / Smokescreen
Danger notes
Skuntank remains Jupiter's closer while Bronzor and Golbat drain resources first.
Practical counters
Save Ground for Skuntank, Electric or Rock for Golbat, and attack Bronzor through the weakness its ability leaves active.
Galactic Boss CyrusGalactic Boss • source ID 404Full team
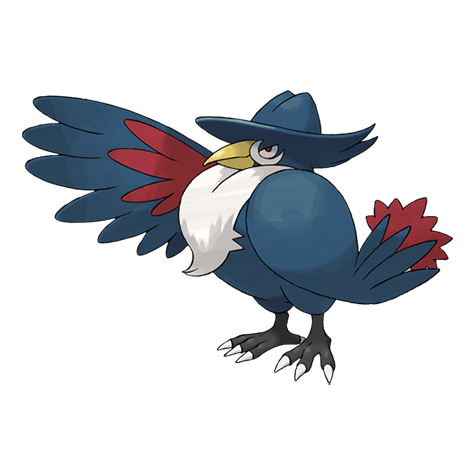 HonchkrowDrill Peck / Dark Pulse / Steel Wing / Embargo
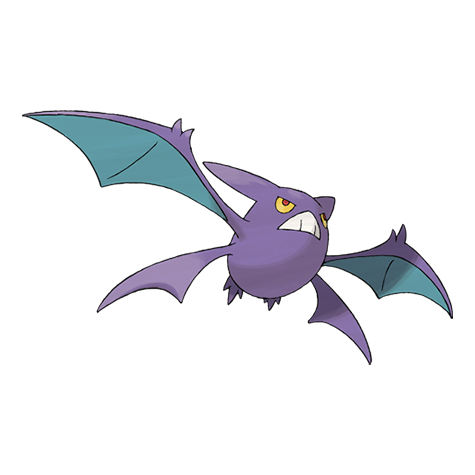 CrobatCross Poison / Air Slash / Bite / Confuse Ray
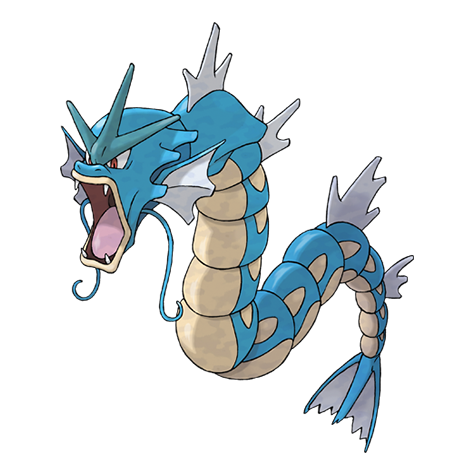 GyaradosGiga Impact / Aqua Tail / Ice Fang / Earthquake
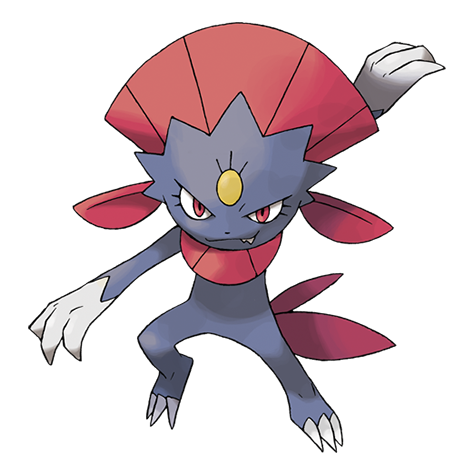 Weavileholds Sitrus Berry • Night Slash / Ice Punch / Brick Break / X Scissor
Danger notes
Weavile and Gyarados create opposite defensive demands, while Crobat is extremely fast and Honchkrow hits hard.
Practical counters
Bring Fighting for Weavile, Electric for Gyarados/Crobat, and Rock or Ice coverage for the fliers. Preserve answers across the full four-Pokémon fight.
 Leader VolknerLeader Volkner • source ID 320
Full team
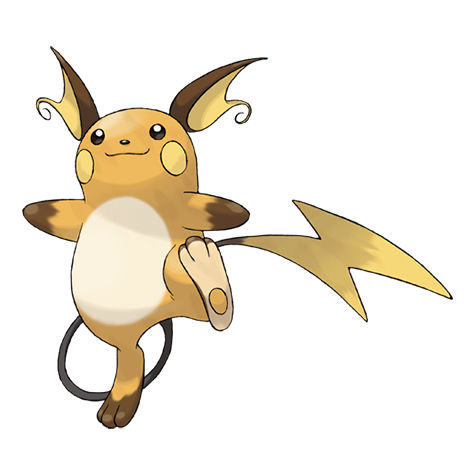 RaichuCharge Beam / Brick Break / Thunder Wave / Light Screen
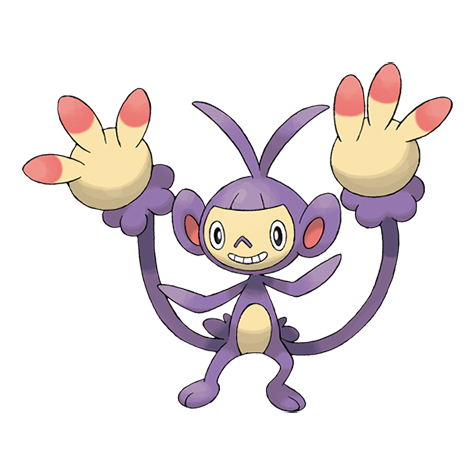 AmbipomShock Wave / Agility / Nasty Plot / Baton Pass
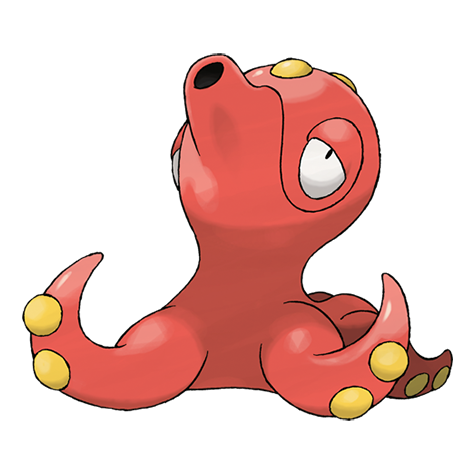 OctilleryCharge Beam / Octazooka / Aurora Beam / Bullet Seed
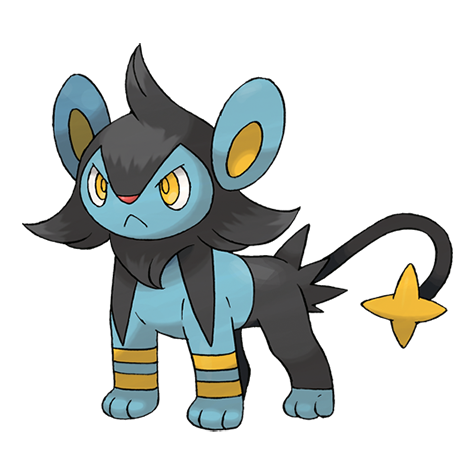
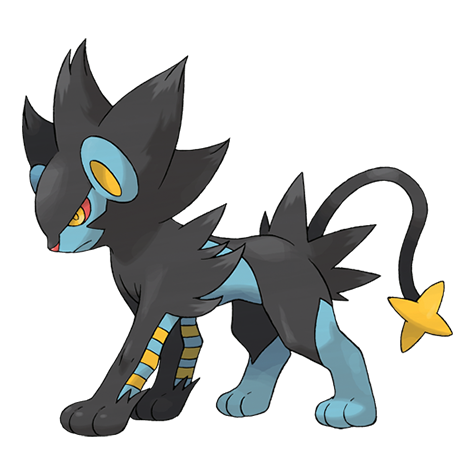 Luxrayholds Sitrus Berry • Charge Beam / Thunder Fang / Crunch / Thunder Wave
Danger notes
Volkner's Ambipom and Octillery punish a one-note Ground plan, while Luxray closes with high power.
Practical counters
Ground is central but not sufficient alone. Grass or Electric handles Octillery; Fighting checks Ambipom; preserve the Ground user for Raichu and Luxray.
 Pokémon Trainer BarryPokémon Trainer Barry • source ID 607
Partner team
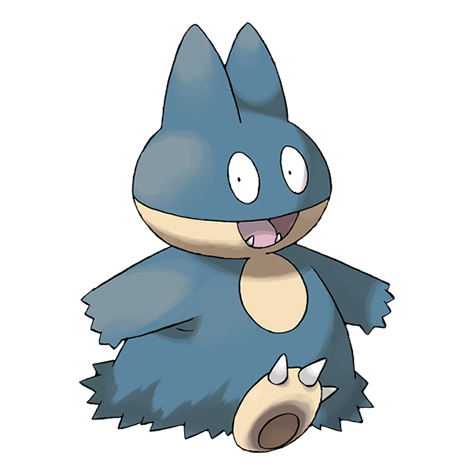 MunchlaxBody Slam / Stockpile / Swallow / Screech
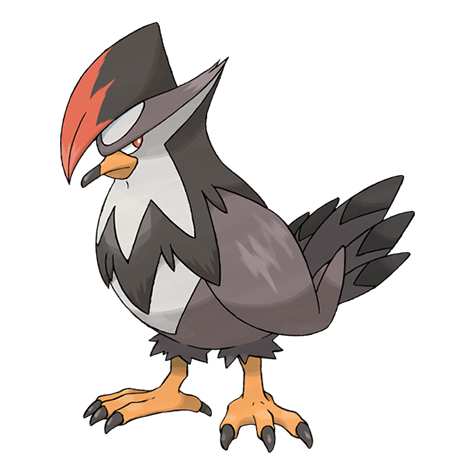 StaraptorClose Combat / Aerial Ace / Take Down / Quick Attack
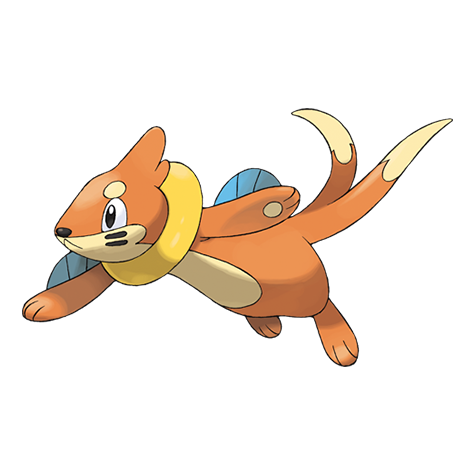 BuizelAqua Jet / Pursuit / Brick Break / Iron Tail
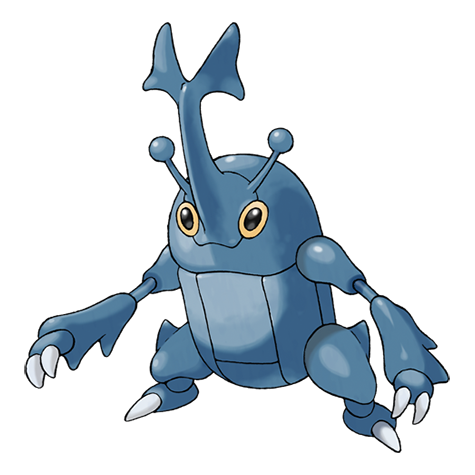 HeracrossClose Combat / Brick Break / Night Slash / Aerial Ace
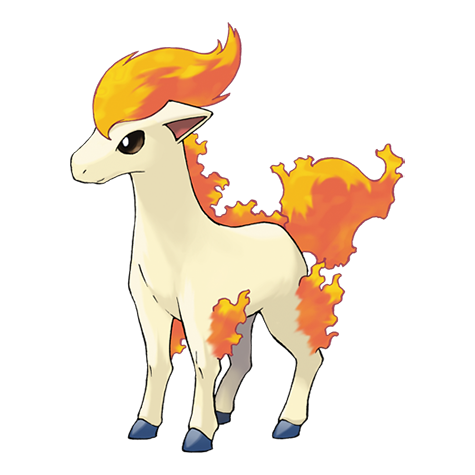 PonytaFire Blast / Will O Wisp / Stomp / Take Down
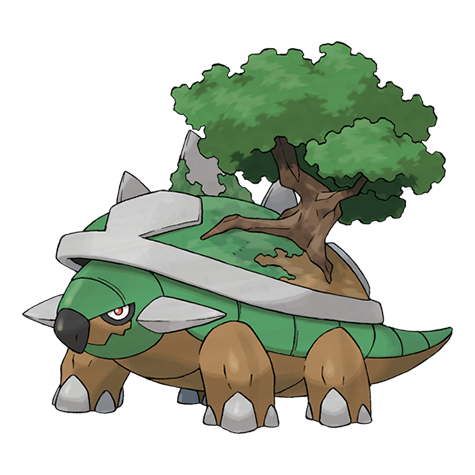 TorterraGiga Drain / Bite / Leech Seed / Synthesis
Partner role
Barry joins the Spear Pillar Commander battle; his team branch depends on the starter chosen by the player.
How to use the partner
Concentrate both sides on one Commander at a time. Barry heals the player's party after Mars and Jupiter, before the Cyrus battle.
Pokémon Trainer BarryPokémon Trainer Barry • source ID 619Partner team
- MunchlaxBody Slam / Stockpile / Swallow / Screech
- StaraptorClose Combat / Aerial Ace / Take Down / Quick Attack
- BuizelAqua Jet / Pursuit / Brick Break / Iron Tail
- HeracrossClose Combat / Brick Break / Night Slash / Aerial Ace
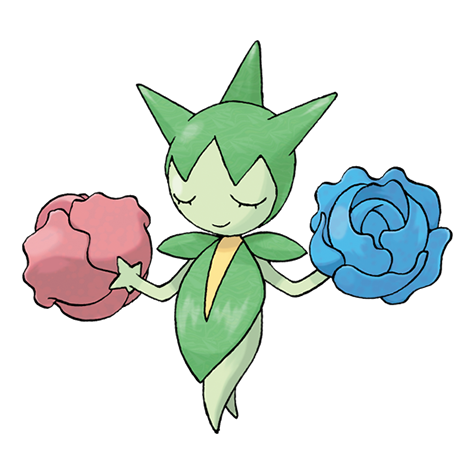 RoseliaGiga Drain / Toxic / Ingrain / Grass Whistle
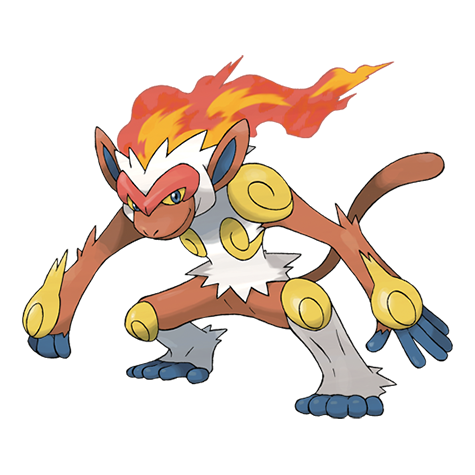 InfernapeClose Combat / Punishment / Flame Wheel / Will O Wisp
Partner role
Barry joins the Spear Pillar Commander battle; his team branch depends on the starter chosen by the player.
How to use the partner
Concentrate both sides on one Commander at a time. Barry heals the player's party after Mars and Jupiter, before the Cyrus battle.
Pokémon Trainer BarryPokémon Trainer Barry • source ID 620Partner team
- MunchlaxBody Slam / Stockpile / Swallow / Screech
- StaraptorClose Combat / Aerial Ace / Take Down / Quick Attack
- RoseliaGiga Drain / Toxic / Ingrain / Grass Whistle
- HeracrossClose Combat / Brick Break / Night Slash / Aerial Ace
- PonytaFire Blast / Will O Wisp / Stomp / Take Down
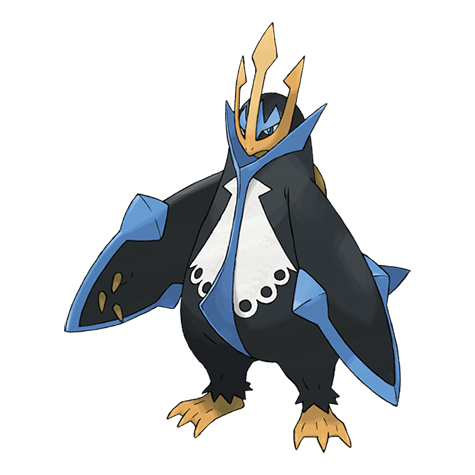 EmpoleonAqua Jet / Aerial Ace / Metal Claw / Swagger
Partner role
Barry joins the Spear Pillar Commander battle; his team branch depends on the starter chosen by the player.
How to use the partner
Concentrate both sides on one Commander at a time. Barry heals the player's party after Mars and Jupiter, before the Cyrus battle.
Data Coverage
This phase owns 42 Diamond/Pearl source maps and publishes 128 encounter rows, 48 trainer rows, 25 visible/scripted items, and 36 hidden-item rows. Counts include explicit starter/rival branches and curated systems but never substitute Platinum encounters or story maps.
Veilstone Galactic HQ
Acquire the Storage Key, enter through the warehouse basement, solve warp-panel floors, defeat Cyrus and Saturn, and free the lake guardians.
Source maps
Veilstone Galactic Headquarters 1F, Veilstone Galactic Headquarters 2F, Veilstone Galactic Headquarters 3F, Veilstone Galactic Headquarters 4F 1, Veilstone Galactic Headquarters B1F, Veilstone Galactic Headquarters B2F, Veilstone Galactic Headquarters 4F Back, and Veilstone Galactic Headquarters 4F 2.
Route Plan
Speak to the Grunt outside HQ and collect the Storage Key; enter through the warehouse; clear B1F and B2F for the Galactic Key; move to the front HQ entrance; explore every warp branch; defeat Cyrus; receive the Master Ball; defeat Saturn; press the release switch; free Uxie, Mesprit, and Azelf.
- Cyrus awards the Master Ball after his first battle. Preserve it for any target desired; Dialga and Palkia can also be caught normally with save-reset preparation.
- Diamond and Pearl HQ has Cyrus and Saturn only in this climax; do not add Charon, Looker, or Platinum's laboratory route.
Routes and encounters on this page are compiled from 8 pret map headers.
Trainers
| Trainer | Route order / placement | Full team | Reward | Access requirement | Optional / rematch note |
|---|---|---|---|---|---|
 Galactic Female GruntGalactic Female • source ID 428 Galactic Female GruntGalactic Female • source ID 428 | Veilstone Galactic Headquarters 1F • field order 1 at (41, 7) | ₽1,480 | Reach the trainer's named field subarea; line of sight determines whether the battle is avoidable. | Field order 1, tile (41, 7); sightline/path determines whether it can be avoided. No higher-level same-trainer rematch variant is defined in trdata. | |
 Scientist FredrickScientist • source ID 830 Scientist FredrickScientist • source ID 830 | Veilstone Galactic Headquarters 1F • field order 2 at (17, 6) | ₽1,680 | Reach the trainer's named field subarea; line of sight determines whether the battle is avoidable. | Field order 2, tile (17, 6); sightline/path determines whether it can be avoided. No higher-level same-trainer rematch variant is defined in trdata. | |
 Galactic GruntGalactic • source ID 510 Galactic GruntGalactic • source ID 510 | Veilstone Galactic Headquarters 2F • field order 1 at (10, 6) | ₽1,440 | Reach the trainer's named field subarea; line of sight determines whether the battle is avoidable. | Field order 1, tile (10, 6); sightline/path determines whether it can be avoided. No higher-level same-trainer rematch variant is defined in trdata. | |
| Galactic GruntGalactic • source ID 513 | Veilstone Galactic Headquarters 2F • field order 2 at (21, 16) | ₽1,440 | Reach the trainer's named field subarea; line of sight determines whether the battle is avoidable. | Field order 2, tile (21, 16); sightline/path determines whether it can be avoided. No higher-level same-trainer rematch variant is defined in trdata. | |
| Galactic Female GruntGalactic Female • source ID 430 | Veilstone Galactic Headquarters 2F • field order 3 at (26, 16) | ₽1,360 | Reach the trainer's named field subarea; line of sight determines whether the battle is avoidable. | Field order 3, tile (26, 16); sightline/path determines whether it can be avoided. No higher-level same-trainer rematch variant is defined in trdata. | |
| Scientist DarriusScientist • source ID 829 | Veilstone Galactic Headquarters 2F • field order 4 at (32, 6) |
| ₽1,776 | Reach the trainer's named field subarea; line of sight determines whether the battle is avoidable. | Field order 4, tile (32, 6); sightline/path determines whether it can be avoided. No higher-level same-trainer rematch variant is defined in trdata. |
| Galactic GruntGalactic • source ID 512 | Veilstone Galactic Headquarters 3F • field order 1 at (9, 20) | ₽1,440 | Reach the trainer's named field subarea; line of sight determines whether the battle is avoidable. | Field order 1, tile (9, 20); sightline/path determines whether it can be avoided. No higher-level same-trainer rematch variant is defined in trdata. | |
| Galactic GruntGalactic • source ID 514 | Veilstone Galactic Headquarters 3F • field order 2 at (42, 7) | ₽1,440 | Reach the trainer's named field subarea; line of sight determines whether the battle is avoidable. | Field order 2, tile (42, 7); sightline/path determines whether it can be avoided. No higher-level same-trainer rematch variant is defined in trdata. | |
| Galactic Female GruntGalactic Female • source ID 522 | Veilstone Galactic Headquarters 3F • field order 3 at (42, 3) | ₽1,400 | Reach the trainer's named field subarea; line of sight determines whether the battle is avoidable. | Field order 3, tile (42, 3); sightline/path determines whether it can be avoided. No higher-level same-trainer rematch variant is defined in trdata. | |
| Galactic GruntGalactic • source ID 509 | Veilstone Galactic Headquarters 3F • field order 4 at (4, 6) | ₽1,480 | Reach the trainer's named field subarea; line of sight determines whether the battle is avoidable. | Field order 4, tile (4, 6); sightline/path determines whether it can be avoided. No higher-level same-trainer rematch variant is defined in trdata. | |
| Galactic GruntGalactic • source ID 507 | Veilstone Galactic Headquarters B2F • field order 1 at (40, 15) | ₽1,480 | Reach the trainer's named field subarea; line of sight determines whether the battle is avoidable. | Field order 1, tile (40, 15); sightline/path determines whether it can be avoided. No higher-level same-trainer rematch variant is defined in trdata. | |
| Galactic GruntGalactic • source ID 508 | Veilstone Galactic Headquarters B2F • field order 2 at (71, 10) | ₽1,400 | Reach the trainer's named field subarea; line of sight determines whether the battle is avoidable. | Field order 2, tile (71, 10); sightline/path determines whether it can be avoided. No higher-level same-trainer rematch variant is defined in trdata. | |
| Galactic Boss CyrusGalactic Boss • source ID 403 | Veilstone Galactic Headquarters 4F 1 • scripted | ₽7,740 | Scripted story trigger; complete the local objective described in the route plan. | Major or story battle; not a VS Seeker rematch row. | |
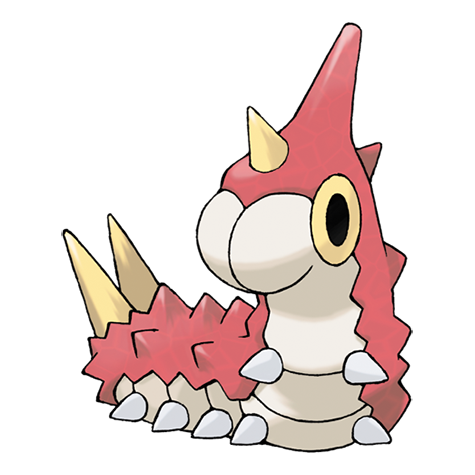
| Commander SaturnCommander Saturn • source ID 409 | Veilstone Galactic Headquarters 4F Back • scripted | ₽3,200 | Scripted story trigger; complete the local objective described in the route plan. | Major or story battle; not a VS Seeker rematch row. |
Items
| Item | Version | Type | Area / exact direction | Coordinate / script | Requirement | Source |
|---|---|---|---|---|---|---|
| TM49 | Diamond / Pearl | Visible item ball | Veilstone Galactic Headquarters 1F: Pick up the item ball in the eastern part of Veilstone Galactic Headquarters 1F, 7 tiles north of the Veilstone Galactic Headquarters 1F doorway or transition. | (52, 14) | Reach this subarea; check the route and puzzle notes for HM, Bicycle, time, or story gates. | event bank 292, script 7182 |
| Max Revive | Diamond / Pearl | Visible item ball | Veilstone Galactic Headquarters 2F: Pick up the item ball in the southeastern part of Veilstone Galactic Headquarters 2F, 3 tiles east and 1 tile north of the Veilstone Galactic Headquarters 2F doorway or transition. | (48, 21) | Reach this subarea; check the route and puzzle notes for HM, Bicycle, time, or story gates. | event bank 293, script 7184 |
| TM21 | Diamond / Pearl | Visible item ball | Veilstone Galactic Headquarters 3F: Pick up the item ball in the eastern part of Veilstone Galactic Headquarters 3F, 4 tiles east and 10 tiles north of the Veilstone Galactic Headquarters 3F doorway or transition. | (36, 12) | Reach this subarea; check the route and puzzle notes for HM, Bicycle, time, or story gates. | event bank 294, script 7183 |
| Elixir | Diamond / Pearl | Visible item ball | Veilstone Galactic Headquarters 3F: Pick up the item ball in the southeastern part of Veilstone Galactic Headquarters 3F, 2 tiles west and 9 tiles south of the Veilstone Galactic Headquarters 3F doorway or transition. | (50, 21) | Reach this subarea; check the route and puzzle notes for HM, Bicycle, time, or story gates. | event bank 294, script 7185 |
| TM36 | Diamond / Pearl | Visible item ball | Veilstone Galactic Headquarters B2F: Pick up the item ball in the western part of Veilstone Galactic Headquarters B2F, 21 tiles west and 8 tiles south of the Veilstone Galactic Headquarters 1F doorway or transition. | (29, 11) | Reach this subarea; check the route and puzzle notes for HM, Bicycle, time, or story gates. | event bank 297, script 7180 |
| Galactic Key | Diamond / Pearl | Visible item ball | Veilstone Galactic Headquarters B2F: Pick up the item ball in the northwestern part of Veilstone Galactic Headquarters B2F, 17 tiles east and 11 tiles north of the Veilstone Galactic Warehouse Entrance doorway or transition. | (20, 5) | Reach this subarea; check the route and puzzle notes for HM, Bicycle, time, or story gates. | event bank 297, script 7186 |
| Zinc | Diamond / Pearl | Visible item ball | Veilstone Galactic Headquarters B2F: Pick up the item ball in the northeastern part of Veilstone Galactic Headquarters B2F, 12 tiles east of the Veilstone Galactic Headquarters 1F doorway or transition. | (62, 3) | Reach this subarea; check the route and puzzle notes for HM, Bicycle, time, or story gates. | event bank 297, script 7181 |
| Master Ball | Diamond / Pearl | Boss reward | Veilstone Galactic HQ: Given by Cyrus after the Galactic HQ battle. | NPC / system | See the route plan. | editorial script/system note |
Hidden Items
| Hidden item | Area / plain-English placement | QA coordinate | Requirement | Source |
|---|---|---|---|---|
| PP Up | Veilstone Galactic Headquarters 1F: Use the Dowsing Machine in the eastern part of Veilstone Galactic Headquarters 1F, 5 tiles west of the Veilstone Galactic Headquarters 4F 1 doorway or transition and inspect that exact ground tile. | (36, 14) | Dowsing Machine Pokétch app. Reach this subarea; check the route and puzzle notes for HM, Bicycle, time, or story gates. | event bank 292, script 8074 |
| Ultra Ball | Veilstone Galactic Headquarters 2F: Use the Dowsing Machine in the northeastern part of Veilstone Galactic Headquarters 2F, 12 tiles east of the Veilstone Galactic Headquarters 1F doorway or transition and inspect that exact ground tile. | (36, 3) | Dowsing Machine Pokétch app. Reach this subarea; check the route and puzzle notes for HM, Bicycle, time, or story gates. | event bank 293, script 8075 |
| Full Heal | Veilstone Galactic Headquarters 2F: Use the Dowsing Machine in the western part of Veilstone Galactic Headquarters 2F, 3 tiles west of the Veilstone Galactic Headquarters 1F doorway or transition and inspect that exact ground tile. | (7, 11) | Dowsing Machine Pokétch app. Reach this subarea; check the route and puzzle notes for HM, Bicycle, time, or story gates. | event bank 293, script 8076 |
| Rare Candy | Veilstone Galactic Headquarters 3F: Use the Dowsing Machine in the southeastern part of Veilstone Galactic Headquarters 3F, 7 tiles east of the Veilstone Galactic Headquarters 3F doorway or transition and inspect that exact ground tile. | (39, 22) | Dowsing Machine Pokétch app. Reach this subarea; check the route and puzzle notes for HM, Bicycle, time, or story gates. | event bank 294, script 8078 |
| Elixir | Veilstone Galactic Headquarters 3F: Use the Dowsing Machine in the northwestern part of Veilstone Galactic Headquarters 3F, 14 tiles west of the Veilstone Galactic Headquarters 2F doorway or transition and inspect that exact ground tile. | (1, 3) | Dowsing Machine Pokétch app. Reach this subarea; check the route and puzzle notes for HM, Bicycle, time, or story gates. | event bank 294, script 8077 |
| Full Restore | Veilstone Galactic Headquarters 3F: Use the Dowsing Machine in the northeastern part of Veilstone Galactic Headquarters 3F, 5 tiles east of the Veilstone Galactic Headquarters 2F doorway or transition and inspect that exact ground tile. | (52, 3) | Dowsing Machine Pokétch app. Reach this subarea; check the route and puzzle notes for HM, Bicycle, time, or story gates. | event bank 294, script 8079 |
| Nugget | Veilstone Galactic Headquarters 4F 1: Use the Dowsing Machine in the northwestern part of Veilstone Galactic Headquarters 4F 1, 2 tiles west and 11 tiles north of the Veilstone Galactic Headquarters 3F doorway or transition and inspect that exact ground tile. | (1, 4) | Dowsing Machine Pokétch app. Reach this subarea; check the route and puzzle notes for HM, Bicycle, time, or story gates. | event bank 295, script 8080 |
Puzzles, Warps, And Switches
- Warp pads are color-coded but lead to both progress and loot. Take one pad, clear its destination, return to the last known hub, then mark it before testing the next.
- The Galactic Key opens yellow security doors across both warehouse and headquarters maps; backtrack through previously locked side rooms before leaving for Mt. Coronet.
Completion Checklist
- Complete the currently reachable part of this route plan: Speak to the Grunt outside HQ and collect the Storage Key; enter through the warehouse; clear B1F and B2F for the Galactic Key; move to the front HQ entrance; explore every warp branch; defeat Cyrus; receive the Master Ball; defeat Saturn; press the release switch; free Uxie, Mesprit, and Azelf.
Mt. Coronet Ascent
Enter from Oreburgh, combine Surf, Strength, Rock Climb, and Rock Smash, and climb the mountain's lower summit route.
Source maps
Mount Coronet North Mountainside and Mount Coronet South Mountainside.
Route Plan
Enter Mt. Coronet from Route 207; Surf across the northern pool; use Rock Climb; push Strength boulders; collect cave items before each staircase; exit to the mountainside; clear Galactic Grunts; re-enter the upper cave.
- Carry healing, status recovery, Repels, and many Poke Balls before beginning; the route is long and culminates in several boss battles plus a legendary encounter.
- Rock Climb creates optional treasure branches on both exterior walls. Finish each branch before using the cave entrance that advances to the summit.
Routes and encounters on this page are compiled from 2 pret map headers.
Mount Coronet North Mountainside
| Pokémon | Games | Levels | Rate | Requirement / notes | ||
|---|---|---|---|---|---|---|
| Morning | Day | Night | ||||
| Grass / cave floor | ||||||
 Abomasnow Abomasnow | DP | 40 | 20% | — | ||
 Machoke Machoke | DP | 39-40 | 20% | 20% | 10% | Rate counts base slots temporarily replaced by hard-shaking Poké Radar patches. |
 Medicham Medicham | DP | 39-40 | 20% | 20% | 10% | Rate counts base slots temporarily replaced by hard-shaking Poké Radar patches. |
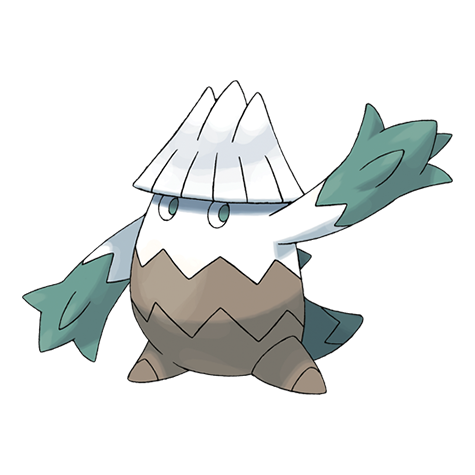 Snover Snover | DP | 38 | 20% | — | ||
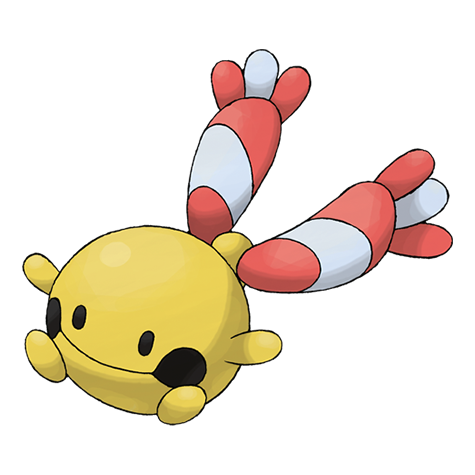 Chingling Chingling | DP | 39-40 | 10% | — | ||
| Golbat | DP | 39 | — | — | 10% | — |
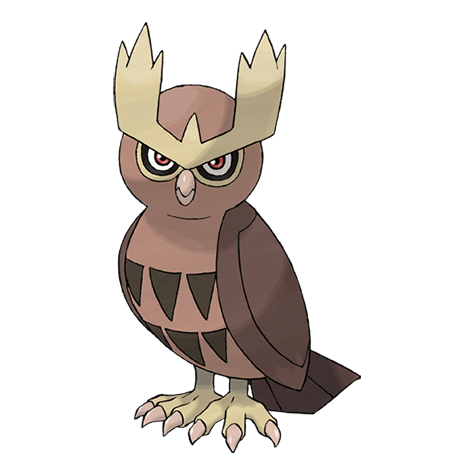 Noctowl Noctowl | DP | 39 | — | — | 10% | — |
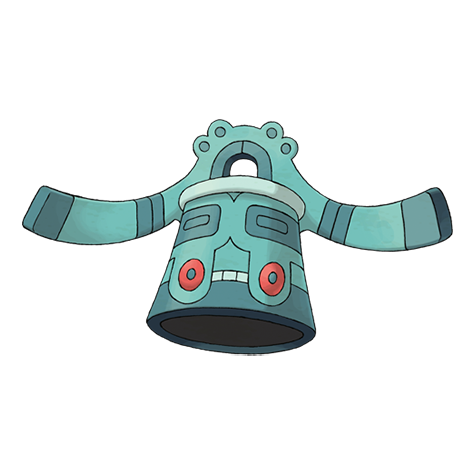 Bronzong Bronzong | DP | 39-40 | 5% | Rate counts base slots temporarily replaced by hard-shaking Poké Radar patches and GBA dual-slot insertions. | ||
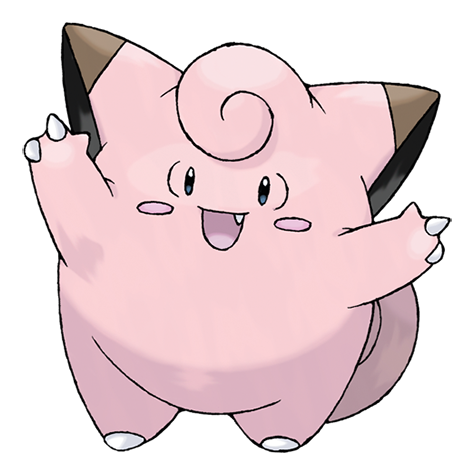 Clefairy Clefairy | DP | 38-39 | 5% | Rate counts base slots temporarily replaced by hard-shaking Poké Radar patches and GBA dual-slot insertions. | ||
| Poké Radar (post-National Dex) | ||||||
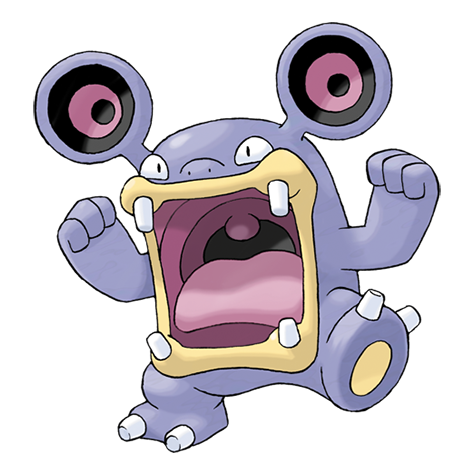 Loudred Loudred | DP | 39-40 | 22% | National Dex and Poké Radar required; replacement slot applies only in a hard/vigorous-shaking Radar patch. | ||
| Dual-slot GBA insertion (post-National Dex) | ||||||
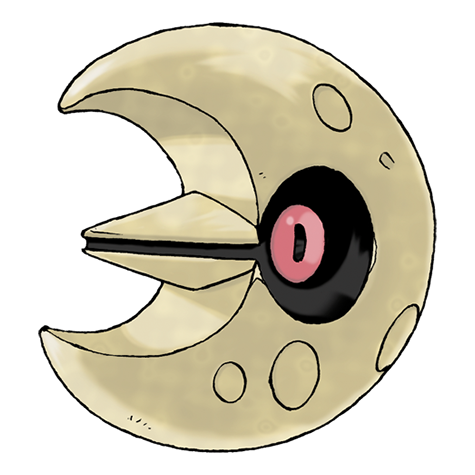 Lunatone Lunatone | DP | 38-39 | 8% | National Dex plus Pokémon Sapphire inserted in the Nintendo DS GBA slot; replaces grass slots 8-9. | ||
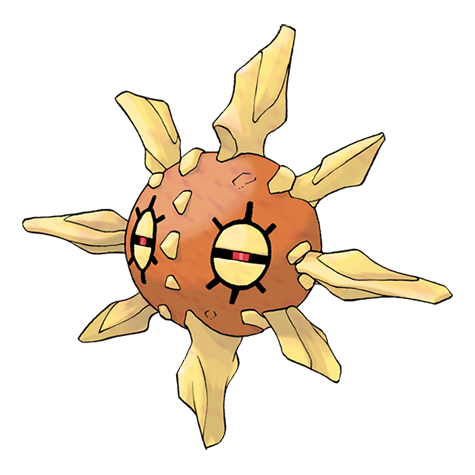 Solrock Solrock | DP | 38-39 | 8% | National Dex plus Pokémon Ruby inserted in the Nintendo DS GBA slot; replaces grass slots 8-9. | ||
Mount Coronet South Mountainside
| Pokémon | Games | Levels | Rate | Requirement / notes | ||
|---|---|---|---|---|---|---|
| Morning | Day | Night | ||||
| Grass / cave floor | ||||||
| Abomasnow | DP | 40 | 20% | — | ||
| Machoke | DP | 39-40 | 20% | 20% | 10% | Rate counts base slots temporarily replaced by hard-shaking Poké Radar patches. |
| Medicham | DP | 39-40 | 20% | 20% | 10% | Rate counts base slots temporarily replaced by hard-shaking Poké Radar patches. |
| Snover | DP | 38 | 20% | — | ||
| Chingling | DP | 39-40 | 10% | — | ||
| Golbat | DP | 39 | — | — | 10% | — |
| Noctowl | DP | 39 | — | — | 10% | — |
| Bronzong | DP | 39-40 | 5% | Rate counts base slots temporarily replaced by hard-shaking Poké Radar patches and GBA dual-slot insertions. | ||
| Clefairy | DP | 38-39 | 5% | Rate counts base slots temporarily replaced by hard-shaking Poké Radar patches and GBA dual-slot insertions. | ||
| Poké Radar (post-National Dex) | ||||||
| Loudred | DP | 39-40 | 22% | National Dex and Poké Radar required; replacement slot applies only in a hard/vigorous-shaking Radar patch. | ||
| Dual-slot GBA insertion (post-National Dex) | ||||||
| Lunatone | DP | 38-39 | 8% | National Dex plus Pokémon Sapphire inserted in the Nintendo DS GBA slot; replaces grass slots 8-9. | ||
| Solrock | DP | 38-39 | 8% | National Dex plus Pokémon Ruby inserted in the Nintendo DS GBA slot; replaces grass slots 8-9. | ||
Hidden Items
| Hidden item | Area / plain-English placement | QA coordinate | Requirement | Source |
|---|---|---|---|---|
| Big Mushroom | Mount Coronet North Mountainside: Use the Dowsing Machine in the northern part of Mount Coronet North Mountainside, 20 tiles east and 10 tiles north of the Mount Coronet 4F Room 3 doorway or transition and inspect that exact ground tile. | (33, 9) | Dowsing Machine Pokétch app. The Spear Pillar ascent requires Surf, Strength, and Rock Climb plus the late Galactic story state. | event bank 207, script 8085 |
| Tinymushroom | Mount Coronet North Mountainside: Use the Dowsing Machine in the northwestern part of Mount Coronet North Mountainside, 8 tiles east of the Mount Coronet 4F Room 3 doorway or transition and inspect that exact ground tile. | (21, 19) | Dowsing Machine Pokétch app. The Spear Pillar ascent requires Surf, Strength, and Rock Climb plus the late Galactic story state. | event bank 207, script 8086 |
| Rare Candy | Mount Coronet North Mountainside: Use the Dowsing Machine in the northeastern part of Mount Coronet North Mountainside, 2 tiles west and 11 tiles north of the Mount Coronet Tunnel Room doorway or transition and inspect that exact ground tile. | (43, 17) | Dowsing Machine Pokétch app. The Spear Pillar ascent requires Surf, Strength, and Rock Climb plus the late Galactic story state. | event bank 207, script 8088 |
| Stardust | Mount Coronet South Mountainside: Use the Dowsing Machine in the northeastern part of Mount Coronet South Mountainside, 2 tiles east and 11 tiles north of the Mount Coronet 4F Room 1 doorway or transition and inspect that exact ground tile. | (41, 7) | Dowsing Machine Pokétch app. Reach this subarea; check the route and puzzle notes for HM, Bicycle, time, or story gates. | event bank 208, script 8084 |
| Nugget | Mount Coronet South Mountainside: Use the Dowsing Machine in the northeastern part of Mount Coronet South Mountainside, 5 tiles east and 8 tiles north of the Mount Coronet 4F Room 1 doorway or transition and inspect that exact ground tile. | (44, 10) | Dowsing Machine Pokétch app. Reach this subarea; check the route and puzzle notes for HM, Bicycle, time, or story gates. | event bank 208, script 8092 |
| Max Potion | Mount Coronet South Mountainside: Use the Dowsing Machine in the southwestern part of Mount Coronet South Mountainside, 1 tile east and 6 tiles north of the Mount Coronet South 3F doorway or transition and inspect that exact ground tile. | (13, 29) | Dowsing Machine Pokétch app. Reach this subarea; check the route and puzzle notes for HM, Bicycle, time, or story gates. | event bank 208, script 8089 |
| Full Heal | Mount Coronet South Mountainside: Use the Dowsing Machine in the southern part of Mount Coronet South Mountainside, 19 tiles east and 2 tiles north of the Mount Coronet South 3F doorway or transition and inspect that exact ground tile. | (31, 33) | Dowsing Machine Pokétch app. Reach this subarea; check the route and puzzle notes for HM, Bicycle, time, or story gates. | event bank 208, script 8090 |
Puzzles, Warps, And Switches
- From the Route 207 entrance, Surf north, climb the wall, then use Strength to reach the exterior. On each mountainside, trace the lower perimeter before climbing toward the next doorway.
Completion Checklist
- Complete the currently reachable part of this route plan: Enter Mt. Coronet from Route 207; Surf across the northern pool; use Rock Climb; push Strength boulders; collect cave items before each staircase; exit to the mountainside; clear Galactic Grunts; re-enter the upper cave.
- Review all 24 encounter rows across the per-area tables, including game markers, method band, time-of-day rates, levels, and each conditional requirement; mark conditional rows for their stated revisit.
Mt. Coronet Upper Caves
Clear the final indoor floors and Galactic gauntlet, navigate exterior-to-interior loops, and reach Spear Pillar fully supplied.
Source maps
Mount Coronet 4F Room 1, Mount Coronet 4F Room 3, Mount Coronet 5F, Mount Coronet 6F, and Mount Coronet Tunnel Room.
Route Plan
Sweep 4F side rooms; collect hidden cave items; clear 5F and 6F Grunts; use the tunnel room as a navigation checkpoint; verify the team and Ball supply; save before the last doorway; step onto Spear Pillar.
- The upper caves have no convenient Pokemon Center. Escape Rope exits are possible before Spear Pillar, but returning means repeating the ascent.
- Check held items and move PP before the last Grunts; the next section contains a double battle and Cyrus without an automatic full heal.
Routes and encounters on this page are compiled from 5 pret map headers.
Mount Coronet 4F Room 1
| Pokémon | Games | Levels | Rate | Requirement / notes | ||
|---|---|---|---|---|---|---|
| Morning | Day | Night | ||||
| Grass / cave floor | ||||||
| Bronzong | DP | 38-40 | 25% | Rate counts base slots temporarily replaced by GBA dual-slot insertions. | ||
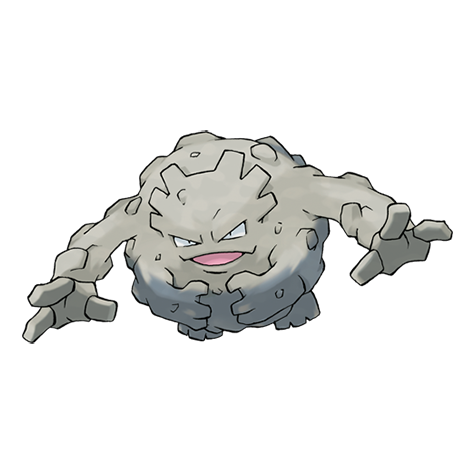 Graveler Graveler | DP | 38 | 20% | — | ||
| Clefairy | DP | 38-40 | 15% | Rate counts base slots temporarily replaced by GBA dual-slot insertions. | ||
| Chingling | DP | 39-40 | 10% | — | ||
| Golbat | DP | 39 | 10% | — | ||
| Machoke | DP | 39 | 10% | — | ||
| Medicham | DP | 39 | 10% | — | ||
| Dual-slot GBA insertion (post-National Dex) | ||||||
| Lunatone | DP | 38-39 | 8% | National Dex plus Pokémon Sapphire inserted in the Nintendo DS GBA slot; replaces grass slots 8-9. | ||
| Solrock | DP | 38-39 | 8% | National Dex plus Pokémon Ruby inserted in the Nintendo DS GBA slot; replaces grass slots 8-9. | ||
| Surfing | ||||||
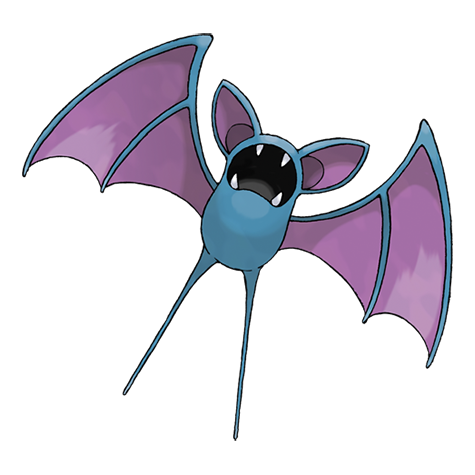 Zubat Zubat | DP | 20-40 | 90% | — | ||
| Golbat | DP | 20-40 | 10% | — | ||
| Fishing — Old Rod | ||||||
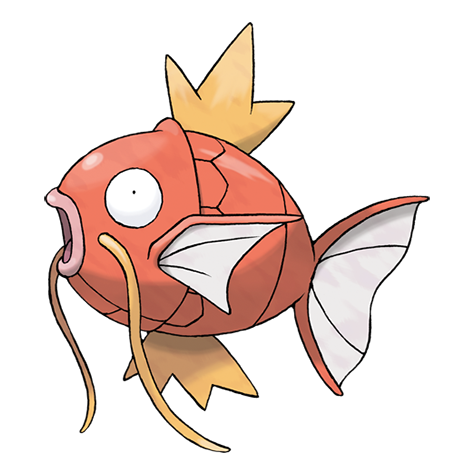 Magikarp Magikarp | DP | 3-10 | 100% | — | ||
| Fishing — Good Rod | ||||||
| Magikarp | DP | 10-25 | 55% | — | ||
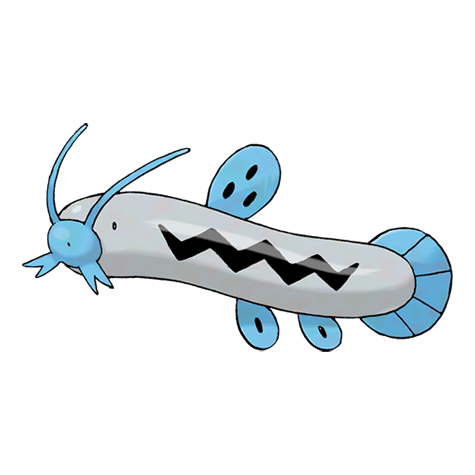 Barboach Barboach | DP | 10-25 | 45% | — | ||
| Fishing — Super Rod | ||||||
| Gyarados | DP | 30-55 | 55% | — | ||
 Dratini Dratini | DP | 15-20 | 40% | — | ||
 Dragonair Dragonair | DP | 15-40 | 5% | — | ||
Mount Coronet 4F Room 3
| Pokémon | Games | Levels | Rate | Requirement / notes | ||
|---|---|---|---|---|---|---|
| Morning | Day | Night | ||||
| Grass / cave floor | ||||||
| Bronzong | DP | 38-40 | 25% | Rate counts base slots temporarily replaced by GBA dual-slot insertions. | ||
| Graveler | DP | 38 | 20% | — | ||
| Clefairy | DP | 38-40 | 15% | Rate counts base slots temporarily replaced by GBA dual-slot insertions. | ||
| Golbat | DP | 39 | 10% | — | ||
| Machoke | DP | 39 | 10% | — | ||
| Medicham | DP | 39 | 10% | — | ||
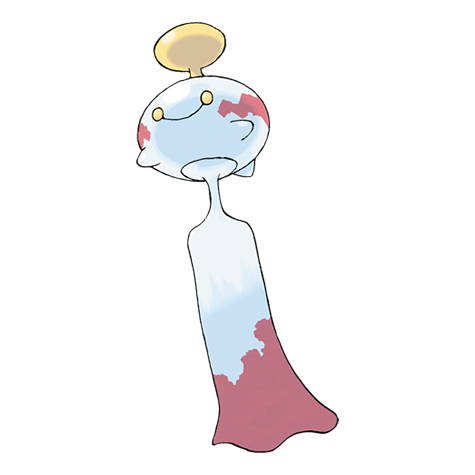 Chimecho Chimecho | DP | 40 | 5% | — | ||
| Chingling | DP | 40 | 5% | — | ||
| Dual-slot GBA insertion (post-National Dex) | ||||||
| Lunatone | DP | 38-39 | 8% | National Dex plus Pokémon Sapphire inserted in the Nintendo DS GBA slot; replaces grass slots 8-9. | ||
| Solrock | DP | 38-39 | 8% | National Dex plus Pokémon Ruby inserted in the Nintendo DS GBA slot; replaces grass slots 8-9. | ||
Mount Coronet 5F
| Pokémon | Games | Levels | Rate | Requirement / notes | ||
|---|---|---|---|---|---|---|
| Morning | Day | Night | ||||
| Grass / cave floor | ||||||
| Bronzong | DP | 40-42 | 25% | Rate counts base slots temporarily replaced by GBA dual-slot insertions. | ||
| Graveler | DP | 40 | 20% | — | ||
| Clefairy | DP | 40-42 | 15% | Rate counts base slots temporarily replaced by GBA dual-slot insertions. | ||
| Chimecho | DP | 41-42 | 10% | — | ||
| Golbat | DP | 41 | 10% | — | ||
| Machoke | DP | 41 | 10% | — | ||
| Medicham | DP | 41 | 10% | — | ||
| Dual-slot GBA insertion (post-National Dex) | ||||||
| Lunatone | DP | 40-41 | 8% | National Dex plus Pokémon Sapphire inserted in the Nintendo DS GBA slot; replaces grass slots 8-9. | ||
| Solrock | DP | 40-41 | 8% | National Dex plus Pokémon Ruby inserted in the Nintendo DS GBA slot; replaces grass slots 8-9. | ||
Mount Coronet 6F
| Pokémon | Games | Levels | Rate | Requirement / notes | ||
|---|---|---|---|---|---|---|
| Morning | Day | Night | ||||
| Grass / cave floor | ||||||
| Bronzong | DP | 40-42 | 25% | Rate counts base slots temporarily replaced by GBA dual-slot insertions. | ||
| Graveler | DP | 40 | 20% | — | ||
| Clefairy | DP | 40-42 | 15% | Rate counts base slots temporarily replaced by GBA dual-slot insertions. | ||
| Chimecho | DP | 41-42 | 10% | — | ||
| Golbat | DP | 41 | 10% | — | ||
| Machoke | DP | 41 | 10% | — | ||
| Medicham | DP | 41 | 10% | — | ||
| Dual-slot GBA insertion (post-National Dex) | ||||||
| Lunatone | DP | 40-41 | 8% | National Dex plus Pokémon Sapphire inserted in the Nintendo DS GBA slot; replaces grass slots 8-9. | ||
| Solrock | DP | 40-41 | 8% | National Dex plus Pokémon Ruby inserted in the Nintendo DS GBA slot; replaces grass slots 8-9. | ||
Mount Coronet Tunnel Room
| Pokémon | Games | Levels | Rate | Requirement / notes | ||
|---|---|---|---|---|---|---|
| Morning | Day | Night | ||||
| Grass / cave floor | ||||||
| Graveler | DP | 39-40 | 40% | — | ||
| Clefairy | DP | 38-40 | 15% | Rate counts base slots temporarily replaced by GBA dual-slot insertions. | ||
| Chingling | DP | 38 or 40 | 10% | — | ||
| Golbat | DP | 39 | 10% | — | ||
| Machoke | DP | 40 | 10% | — | ||
| Medicham | DP | 40 | 10% | — | ||
| Bronzong | DP | 39-40 | 5% | Rate counts base slots temporarily replaced by GBA dual-slot insertions. | ||
| Dual-slot GBA insertion (post-National Dex) | ||||||
| Lunatone | DP | 39-40 | 8% | National Dex plus Pokémon Sapphire inserted in the Nintendo DS GBA slot; replaces grass slots 8-9. | ||
| Solrock | DP | 39-40 | 8% | National Dex plus Pokémon Ruby inserted in the Nintendo DS GBA slot; replaces grass slots 8-9. | ||
Trainers
| Trainer | Route order / placement | Full team | Reward | Access requirement | Optional / rematch note |
|---|---|---|---|---|---|
| Galactic GruntGalactic • source ID 517 | Mount Coronet 4F Room 1 • field order 1 at (23, 5) | ₽1,520 | The Spear Pillar ascent requires Surf, Strength, and Rock Climb plus the late Galactic story state. | Field order 1, tile (23, 5); sightline/path determines whether it can be avoided. No higher-level same-trainer rematch variant is defined in trdata. | |
| Galactic GruntGalactic • source ID 516 | Mount Coronet 4F Room 1 • field order 2 at (10, 7) | ₽1,400 | The Spear Pillar ascent requires Surf, Strength, and Rock Climb plus the late Galactic story state. | Field order 2, tile (10, 7); sightline/path determines whether it can be avoided. No higher-level same-trainer rematch variant is defined in trdata. | |
| Galactic Female GruntGalactic Female • source ID 525 | Mount Coronet 5F • field order 1 at (26, 16) | ₽1,520 | The Spear Pillar ascent requires Surf, Strength, and Rock Climb plus the late Galactic story state. | Field order 1, tile (26, 16); sightline/path determines whether it can be avoided. No higher-level same-trainer rematch variant is defined in trdata. | |
| Galactic GruntGalactic • source ID 520 | Mount Coronet 5F • field order 2 at (20, 22) | ₽1,480 | The Spear Pillar ascent requires Surf, Strength, and Rock Climb plus the late Galactic story state. | Field order 2, tile (20, 22); sightline/path determines whether it can be avoided. No higher-level same-trainer rematch variant is defined in trdata. | |
| Galactic Female GruntGalactic Female • source ID 526 | Mount Coronet 6F • field order 1 at (10, 15) | ₽1,480 | The Spear Pillar ascent requires Surf, Strength, and Rock Climb plus the late Galactic story state. | Field order 1, tile (10, 15); sightline/path determines whether it can be avoided. No higher-level same-trainer rematch variant is defined in trdata. | |
| Galactic GruntGalactic • source ID 518 | Mount Coronet Tunnel Room • field order 1 at (20, 7) | ₽1,520 | The Spear Pillar ascent requires Surf, Strength, and Rock Climb plus the late Galactic story state. | Field order 1, tile (20, 7); sightline/path determines whether it can be avoided. No higher-level same-trainer rematch variant is defined in trdata. | |
| Galactic GruntGalactic • source ID 519 | Mount Coronet Tunnel Room • field order 2 at (3, 48) | ₽1,600 | The Spear Pillar ascent requires Surf, Strength, and Rock Climb plus the late Galactic story state. | Field order 2, tile (3, 48); sightline/path determines whether it can be avoided. No higher-level same-trainer rematch variant is defined in trdata. | |
| Galactic Female GruntGalactic Female • source ID 524 | Mount Coronet Tunnel Room • field order 3 at (25, 31) | ₽1,520 | The Spear Pillar ascent requires Surf, Strength, and Rock Climb plus the late Galactic story state. | Field order 3, tile (25, 31); sightline/path determines whether it can be avoided. No higher-level same-trainer rematch variant is defined in trdata. |

Hidden Items
| Hidden item | Area / plain-English placement | QA coordinate | Requirement | Source |
|---|---|---|---|---|
| Revive | Mount Coronet 4F Room 1: Use the Dowsing Machine in the northwestern part of Mount Coronet 4F Room 1, 12 tiles west of the Mount Coronet 4F Room 1 doorway or transition and inspect that exact ground tile. | (5, 6) | Dowsing Machine Pokétch app. The Spear Pillar ascent requires Surf, Strength, and Rock Climb plus the late Galactic story state. | event bank 209, script 8093 |
| Ether | Mount Coronet 4F Room 1: Use the Dowsing Machine in the northwestern part of Mount Coronet 4F Room 1, 2 tiles west and 4 tiles north of the Mount Coronet 4F Room 1 doorway or transition and inspect that exact ground tile. | (15, 2) | Dowsing Machine Pokétch app. The Spear Pillar ascent requires Surf, Strength, and Rock Climb plus the late Galactic story state. | event bank 209, script 8094 |
| Escape Rope | Mount Coronet 4F Room 1: Use the Dowsing Machine in the western part of Mount Coronet 4F Room 1, 6 tiles east and 6 tiles south of the Mount Coronet 4F Room 1 doorway or transition and inspect that exact ground tile. | (23, 12) | Dowsing Machine Pokétch app. The Spear Pillar ascent requires Surf, Strength, and Rock Climb plus the late Galactic story state. | event bank 209, script 8095 |
| Tinymushroom | Mount Coronet 4F Room 1: Use the Dowsing Machine in the southern part of Mount Coronet 4F Room 1, 9 tiles west and 6 tiles north of the Mount Coronet South Mountainside doorway or transition and inspect that exact ground tile. | (26, 18) | Dowsing Machine Pokétch app. The Spear Pillar ascent requires Surf, Strength, and Rock Climb plus the late Galactic story state. | event bank 209, script 8098 |
| PP Up | Mount Coronet 4F Room 1: Use the Dowsing Machine in the southern part of Mount Coronet 4F Room 1, 6 tiles west of the Mount Coronet South Mountainside doorway or transition and inspect that exact ground tile. | (29, 24) | Dowsing Machine Pokétch app. The Spear Pillar ascent requires Surf, Strength, and Rock Climb plus the late Galactic story state. | event bank 209, script 8097 |
| Ultra Ball | Mount Coronet 4F Room 1: Use the Dowsing Machine in the central part of Mount Coronet 4F Room 1, 2 tiles west and 4 tiles south of the Mount Coronet North Mountainside doorway or transition and inspect that exact ground tile. | (38, 14) | Dowsing Machine Pokétch app. The Spear Pillar ascent requires Surf, Strength, and Rock Climb plus the late Galactic story state. | event bank 209, script 8096 |
| Stone Plate | Mount Coronet 4F Room 1: Use the Dowsing Machine in the northeastern part of Mount Coronet 4F Room 1, 3 tiles north of the Mount Coronet 4F Room 1 doorway or transition and inspect that exact ground tile. | (59, 3) | Dowsing Machine Pokétch app. The Spear Pillar ascent requires Surf, Strength, and Rock Climb plus the late Galactic story state. | event bank 209, script 8099 |
| Tinymushroom | Mount Coronet 4F Room 3: Use the Dowsing Machine in the southwestern part of Mount Coronet 4F Room 3, 3 tiles east and 6 tiles south of the Mount Coronet North Mountainside doorway or transition and inspect that exact ground tile. | (5, 9) | Dowsing Machine Pokétch app. The Spear Pillar ascent requires Surf, Strength, and Rock Climb plus the late Galactic story state. | event bank 210, script 8100 |
| Max Potion | Mount Coronet 5F: Use the Dowsing Machine in the eastern part of Mount Coronet 5F, 6 tiles east and 10 tiles south of the Mount Coronet 4F Room 3 doorway or transition and inspect that exact ground tile. | (27, 17) | Dowsing Machine Pokétch app. The Spear Pillar ascent requires Surf, Strength, and Rock Climb plus the late Galactic story state. | event bank 211, script 8102 |
| Stardust | Mount Coronet 5F: Use the Dowsing Machine in the southeastern part of Mount Coronet 5F, 12 tiles east and 1 tile south of the Mount Coronet 6F doorway or transition and inspect that exact ground tile. | (25, 25) | Dowsing Machine Pokétch app. The Spear Pillar ascent requires Surf, Strength, and Rock Climb plus the late Galactic story state. | event bank 211, script 8101 |
| Full Restore | Mount Coronet Tunnel Room: Use the Dowsing Machine in the northwestern part of Mount Coronet Tunnel Room, 11 tiles west and 6 tiles north of the Mount Coronet North 1F Room 1 doorway or transition and inspect that exact ground tile. | (5, 7) | Dowsing Machine Pokétch app. The Spear Pillar ascent requires Surf, Strength, and Rock Climb plus the late Galactic story state. | event bank 213, script 8105 |
| Nugget | Mount Coronet Tunnel Room: Use the Dowsing Machine in the northern part of Mount Coronet Tunnel Room, 5 tiles west and 3 tiles north of the Mount Coronet North 1F Room 1 doorway or transition and inspect that exact ground tile. | (11, 10) | Dowsing Machine Pokétch app. The Spear Pillar ascent requires Surf, Strength, and Rock Climb plus the late Galactic story state. | event bank 213, script 8103 |
| Rare Candy | Mount Coronet Tunnel Room: Use the Dowsing Machine in the central part of Mount Coronet Tunnel Room, 22 tiles south of the Mount Coronet North 1F Room 1 doorway or transition and inspect that exact ground tile. | (16, 35) | Dowsing Machine Pokétch app. The Spear Pillar ascent requires Surf, Strength, and Rock Climb plus the late Galactic story state. | event bank 213, script 8104 |
| Revive | Mount Coronet Tunnel Room: Use the Dowsing Machine in the eastern part of Mount Coronet Tunnel Room, 3 tiles east and 26 tiles south of the Mount Coronet North 1F Room 1 doorway or transition and inspect that exact ground tile. | (19, 39) | Dowsing Machine Pokétch app. The Spear Pillar ascent requires Surf, Strength, and Rock Climb plus the late Galactic story state. | event bank 213, script 8107 |
| Max Ether | Mount Coronet Tunnel Room: Use the Dowsing Machine in the southeastern part of Mount Coronet Tunnel Room, 23 tiles east and 2 tiles north of the Mount Coronet North Mountainside doorway or transition and inspect that exact ground tile. | (25, 56) | Dowsing Machine Pokétch app. The Spear Pillar ascent requires Surf, Strength, and Rock Climb plus the late Galactic story state. | event bank 213, script 8106 |
| Big Mushroom | Mount Coronet Tunnel Room: Use the Dowsing Machine in the southeastern part of Mount Coronet Tunnel Room, 18 tiles east of the Mount Coronet North Mountainside doorway or transition and inspect that exact ground tile. | (20, 58) | Dowsing Machine Pokétch app. The Spear Pillar ascent requires Surf, Strength, and Rock Climb plus the late Galactic story state. | event bank 213, script 8108 |
Puzzles, Warps, And Switches
- Several doorways loop between exterior ledges and similarly shaped cave rooms. Use floor labels and the most recent doorway as checkpoints instead of navigating only by compass direction.
Completion Checklist
- Complete the currently reachable part of this route plan: Sweep 4F side rooms; collect hidden cave items; clear 5F and 6F Grunts; use the tunnel room as a navigation checkpoint; verify the team and Ball supply; save before the last doorway; step onto Spear Pillar.
- Review all 54 encounter rows across the per-area tables, including game markers, method band, time-of-day rates, levels, and each conditional requirement; mark conditional rows for their stated revisit.
Spear Pillar: Mars, Jupiter, and Cyrus
Break through the final Grunts, partner with Barry against Mars and Jupiter, receive his heal, and defeat Cyrus's full team.
Source maps
Mount Coronet Spear Pillar.
Route Plan
Save on arrival; clear the opening Grunts; watch the Red Chain scene; join Barry for the Commander double battle; focus one Commander at a time; accept Barry's post-battle heal; save again; defeat Cyrus; prepare for the immediate legendary encounter.
- Barry has three starter-dependent partner IDs for the Spear Pillar battle. Mars and Jupiter use their late-game teams, followed by Cyrus's Honchkrow, Crobat, Gyarados, and Weavile.
- Barry heals the player's party after the Commander fight, but save and reorganize before Cyrus because his fast coverage team can exploit a poor lead.
Routes and encounters on this page are compiled from 1 pret map header.
Trainers
| Trainer | Route order / placement | Full team | Reward | Access requirement | Optional / rematch note |
|---|---|---|---|---|---|
| Galactic GruntGalactic • source ID 521 | Mount Coronet Spear Pillar • scripted | ₽1,520 | The Spear Pillar ascent requires Surf, Strength, and Rock Climb plus the late Galactic story state. | Script-triggered battle; not treated as an ordinary field rematch. | |
| Galactic Female GruntGalactic Female • source ID 527 | Mount Coronet Spear Pillar • scripted | ₽1,520 | The Spear Pillar ascent requires Surf, Strength, and Rock Climb plus the late Galactic story state. | Script-triggered battle; not treated as an ordinary field rematch. | |
| Commander MarsCommander Mars • source ID 528 | Mount Coronet Spear Pillar • scripted | ₽3,600 | The Spear Pillar ascent requires Surf, Strength, and Rock Climb plus the late Galactic story state. | Major or story battle; not a VS Seeker rematch row. | |
| Commander JupiterCommander Jupiter • source ID 407 | Mount Coronet Spear Pillar • scripted | ₽3,680 | The Spear Pillar ascent requires Surf, Strength, and Rock Climb plus the late Galactic story state. | Major or story battle; not a VS Seeker rematch row. | |
| Galactic Boss CyrusGalactic Boss • source ID 404 | Mount Coronet Spear Pillar • scripted | ₽8,640 | The Spear Pillar ascent requires Surf, Strength, and Rock Climb plus the late Galactic story state. | Major or story battle; not a VS Seeker rematch row. |
Items
| Item | Version | Type | Area / exact direction | Coordinate / script | Requirement | Source |
|---|---|---|---|---|---|---|
| Adamant Orb | Diamond / Pearl | Visible item ball | Mount Coronet Spear Pillar: Pick up the item ball in the northern part of Mount Coronet Spear Pillar, 43 tiles north of the Mount Coronet 6F doorway or transition. | (31, 10) | The Spear Pillar ascent requires Surf, Strength, and Rock Climb plus the late Galactic story state. | event bank 217, script 7253 |
| Lustrous Orb | Diamond / Pearl | Visible item ball | Mount Coronet Spear Pillar: Pick up the item ball in the northern part of Mount Coronet Spear Pillar, 43 tiles north of the Mount Coronet 6F doorway or transition. | (31, 10) | The Spear Pillar ascent requires Surf, Strength, and Rock Climb plus the late Galactic story state. | event bank 217, script 7254 |
Puzzles, Warps, And Switches
- In the double battle, remove one Commander's active Pokemon quickly to reduce incoming actions; spread damage is less valuable than turning the fight into two-on-one.
- Do not leave the summit after Cyrus unless intentionally postponing the mascot catch; the encounter follows the story scene on the same map.
Completion Checklist
- Complete the currently reachable part of this route plan: Save on arrival; clear the opening Grunts; watch the Red Chain scene; join Barry for the Commander double battle; focus one Commander at a time; accept Barry's post-battle heal; save again; defeat Cyrus; prepare for the immediate legendary encounter.
Dialga or Palkia
Catch Diamond's Dialga or Pearl's Palkia, collect the Adamant or Lustrous Orb, and close the Spear Pillar crisis.
Source maps
.
Route Plan
Save before interacting; lead with sleep or paralysis; weaken without relying on recoil or residual knockout damage; throw Dusk Balls at night/in cave-qualified conditions only where applicable and Timer Balls in long fights; catch the mascot; collect its version orb behind the platform; speak to Rowan downstairs.
- Dialga and Palkia are version-exclusive in ordinary play. The other mascot requires trading or another compatible distribution/game path.
- If the mascot is defeated instead of caught, it reappears after entering the Hall of Fame again. Saving beforehand is still the fastest way to retry immediately.
Routes and encounters on this page are compiled from 0 pret map headers.
Wild Pokémon
| Pokémon | Games | Levels | Rate | Requirement / notes | ||
|---|---|---|---|---|---|---|
| Morning | Day | Night | ||||
| Overworld static encounter | ||||||
| Dialga | DP | 47 | One active encounter | After defeating Cyrus at Spear Pillar; returns after another Hall of Fame entry if defeated Save before the battle; holds no orb, so collect the Adamant Orb separately behind the platform. | ||
| Palkia | DP | 47 | One active encounter | After defeating Cyrus at Spear Pillar; returns after another Hall of Fame entry if defeated Save before the battle; collect the Lustrous Orb separately behind the platform. | ||
Puzzles, Warps, And Switches
- The Adamant Orb or Lustrous Orb sits beyond the legendary's starting position. Walk to the far edge and collect it before leaving Spear Pillar.
Completion Checklist
- Complete the currently reachable part of this route plan: Save before interacting; lead with sleep or paralysis; weaken without relying on recoil or residual knockout damage; throw Dusk Balls at night/in cave-qualified conditions only where applicable and Timer Balls in long fights; catch the mascot; collect its version orb behind the platform; speak to Rowan downstairs.
- Review all 2 encounter rows across the per-area tables, including game markers, method band, time-of-day rates, levels, and each conditional requirement; mark conditional rows for their stated revisit.
Lake Guardians: Uxie, Azelf, and Mesprit
Return to the restored lakes, catch stationary Uxie and Azelf, and release roaming Mesprit while tracking its changing route.
Source maps
Verity Cavern, Lake Valor, Valor Cavern, Lake Acuity, and Acuity Cavern.
Route Plan
Visit Lake Valor and save before Azelf; visit Lake Acuity and save before Uxie; visit Lake Verity and interact with Mesprit; obtain the Marking Map app if missed; choose a route-boundary tracking loop; use trapping or Mean Look plus status for Mesprit.
- Mesprit flees immediately from ordinary encounters while retaining damage and status between meetings. Its position changes when the player changes routes and can jump on Fly.
- Uxie and Azelf are stationary one-time encounters in their caverns; save separately before each.
Routes and encounters on this page are compiled from 5 pret map headers.
Lake Valor
| Pokémon | Games | Levels | Rate | Requirement / notes | ||
|---|---|---|---|---|---|---|
| Morning | Day | Night | ||||
| Grass / cave floor | ||||||
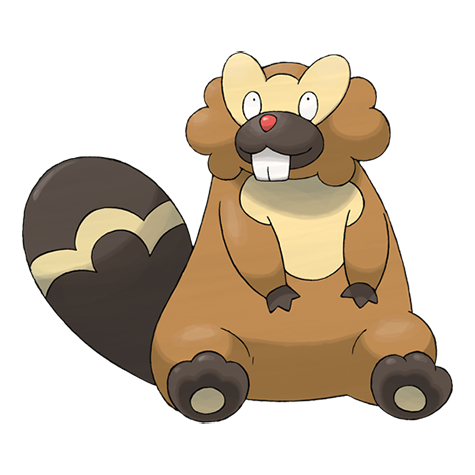 Bibarel Bibarel | DP | 34-36 | 45% | Rate counts base slots temporarily replaced by the daily swarm, hard-shaking Poké Radar patches, and GBA dual-slot insertions. | ||
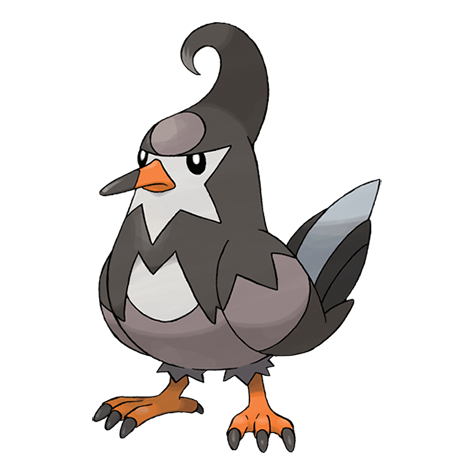 Staravia Staravia | DP | 34-36 | 25% | 25% | 5% | Rate counts base slots temporarily replaced by hard-shaking Poké Radar patches and GBA dual-slot insertions. |
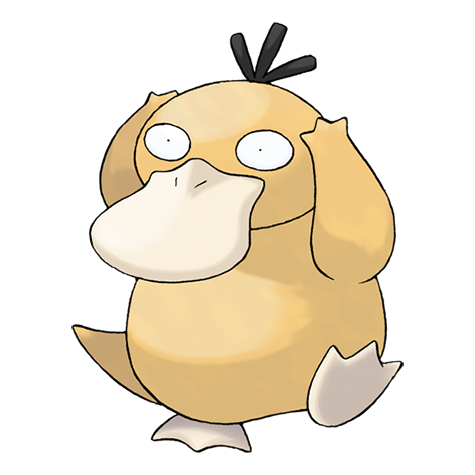 Psyduck Psyduck | DP | 35-36 | 20% | Rate counts base slots temporarily replaced by hard-shaking Poké Radar patches. | ||
| Noctowl | DP | 34 or 36 | — | — | 20% | — |
| Chingling | DP | 35-36 | 10% | — | ||
| Swarm (post-National Dex daily announcement) | ||||||
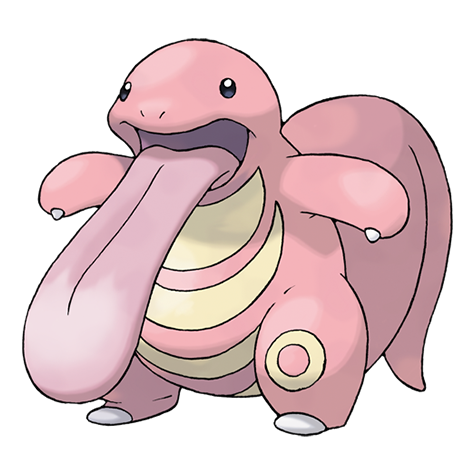 Lickitung Lickitung | DP | 34 or 36 | 40% | Post-National Dex daily swarm; replaces grass slots 0-1. | ||
| Poké Radar (post-National Dex) | ||||||
 Wobbuffet Wobbuffet | DP | 35-36 | 22% | National Dex and Poké Radar required; replacement slot applies only in a hard/vigorous-shaking Radar patch. | ||
| Dual-slot GBA insertion (post-National Dex) | ||||||
| Lunatone | DP | 35 | 8% | National Dex plus Pokémon Sapphire inserted in the Nintendo DS GBA slot; replaces grass slots 8-9. | ||
| Solrock | DP | 35 | 8% | National Dex plus Pokémon Ruby inserted in the Nintendo DS GBA slot; replaces grass slots 8-9. | ||
| Surfing | ||||||
| Psyduck | DP | 20-40 | 90% | — | ||
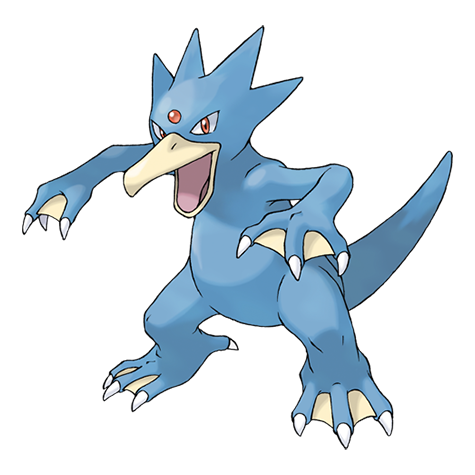 Golduck Golduck | DP | 20-40 | 10% | — | ||
| Fishing — Old Rod | ||||||
| Magikarp | DP | 3-10 | 100% | — | ||
| Fishing — Good Rod | ||||||
| Magikarp | DP | 10-25 | 55% | — | ||
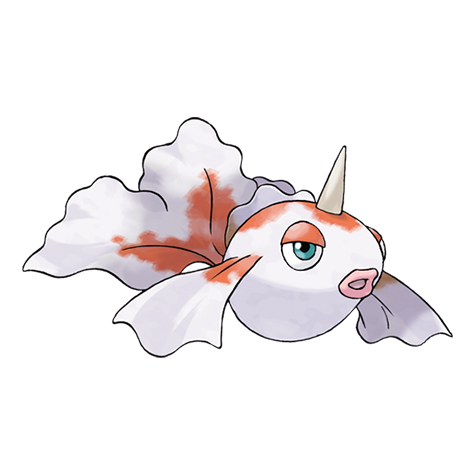 Goldeen Goldeen | DP | 10-25 | 45% | — | ||
| Fishing — Super Rod | ||||||
| Gyarados | DP | 30-55 | 55% | — | ||
 Seaking Seaking | DP | 20-50 | 45% | — | ||
Lake Guardians: Uxie, Azelf, and Mesprit
| Pokémon | Games | Levels | Rate | Requirement / notes | ||
|---|---|---|---|---|---|---|
| Morning | Day | Night | ||||
| Overworld static encounter | ||||||
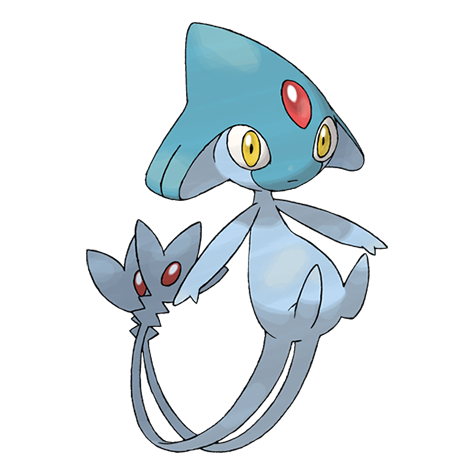 Azelf Azelf | DP | 50 | One | After the Spear Pillar crisis, inside Valor Cavern Stationary; save before interaction. | ||
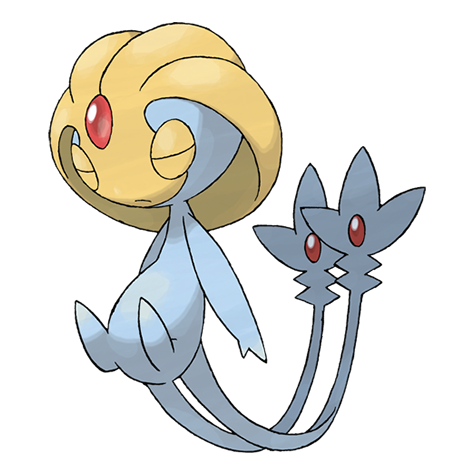 Uxie Uxie | DP | 50 | One | After the Spear Pillar crisis, inside Acuity Cavern Stationary; save before interaction. | ||
| Roaming encounter | ||||||
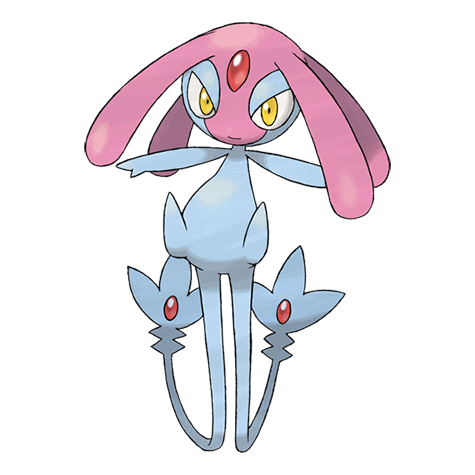 Mesprit Mesprit | DP | 50 | One roaming individual | Interact in Verity Cavern after the Spear Pillar crisis Flees on its first turn and retains HP/status; track with the Poketch Marking Map. | ||
Items
| Item | Version | Type | Area / exact direction | Coordinate / script | Requirement | Source |
|---|---|---|---|---|---|---|
| TM25 | Diamond / Pearl | Visible item ball | Lake Valor: On the restored Lake Valor water route; the drained Galactic-state object shares the same one-time pickup flag and is not a second copy. | (53, 46) | Relic Badge and Surf, plus completion of the Spear Pillar crisis so Lake Valor is restored. | event bank 302, script 7156 |
Puzzles, Warps, And Switches
- For Mesprit, stand at a boundary between two routes with nearby grass, cross until its Marking Map icon matches the player's route, then enter grass without Flying.
- A lead with Mean Look, Block, Spider Web, Arena Trap where applicable, or a fast sleep move makes the roaming capture far more controlled.
Completion Checklist
- Complete the currently reachable part of this route plan: Visit Lake Valor and save before Azelf; visit Lake Acuity and save before Uxie; visit Lake Verity and interact with Mesprit; obtain the Marking Map app if missed; choose a route-boundary tracking loop; use trapping or Mean Look plus status for Mesprit.
- Review all 19 encounter rows across the per-area tables, including game markers, method band, time-of-day rates, levels, and each conditional requirement; mark conditional rows for their stated revisit.
Route 222, Sunyshore City, and Vista Lighthouse
Clear the final east-coast route, enter Sunyshore, meet Flint, find Volkner at the lighthouse, and restore Gym access.
Source maps
Sunyshore, Sunyshore Pokémon Center, Sunyshore Pokémon Center 2F, Sunyshore Poké Mart, Sunyshore Market, Sunyshore Julia House, Sunyshore West House, Sunyshore North House, Sunyshore Unused House 1, Sunyshore Unused House 2, Sunyshore Pokétch Developer House, Sunyshore Vista Lighthouse Observation Deck, Route 222, Route 222 Pikachu Fan Club, Route 222 Pokémon Size Contest House, and Route 222 Sunyshore Gateouse, and 2 more submaps.
Route Plan
Fly to Valor Lakefront; pass the newly opened east gate; clear Route 222's beach and grass paths; visit both houses; enter Sunyshore; meet Flint; collect city gifts via elevated solar walkways; take the lighthouse elevator; speak to Volkner; return to the Gym.
- The Sunyshore Market rewards Pokemon with effort ribbons and sells seals; Julia gives one Ribbon per day based on the requested story response.
- Volkner remains at the lighthouse until spoken to after the blackout roadblock has cleared.
Routes and encounters on this page are compiled from 18 pret map headers.
Route 222
| Pokémon | Games | Levels | Rate | Requirement / notes | ||
|---|---|---|---|---|---|---|
| Morning | Day | Night | ||||
| Grass / cave floor | ||||||
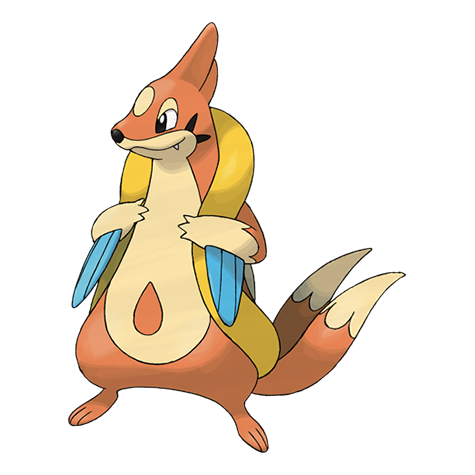 Floatzel Floatzel | DP | 40-42 | 25% | 25% | 35% | Rate counts base slots temporarily replaced by the daily swarm. |
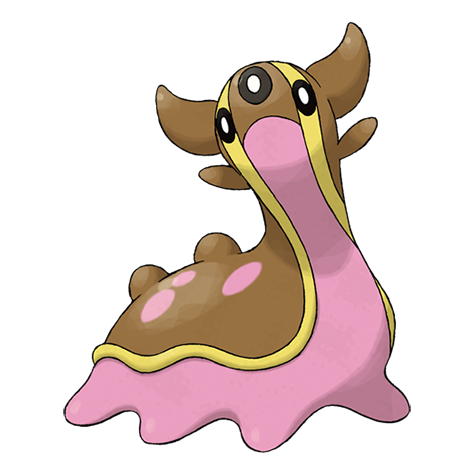 Gastrodon Gastrodon | DP | 40 | 20% | Rate counts base slots temporarily replaced by the daily swarm. | ||
| Gastrodon | DP | 40-42 | 10% | 10% | 20% | Rate counts base slots temporarily replaced by hard-shaking Poké Radar patches. |
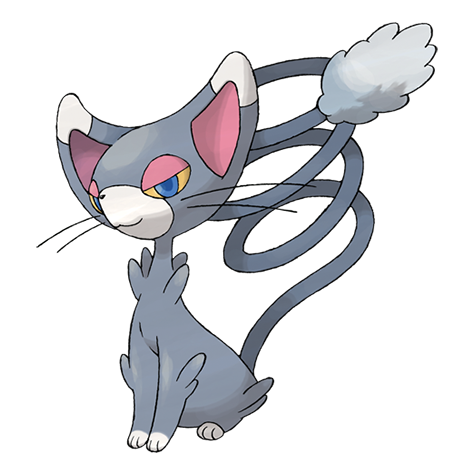 Glameow Glameow | DP | 40 | 20% | Rate counts base slots temporarily replaced by the daily swarm. | ||
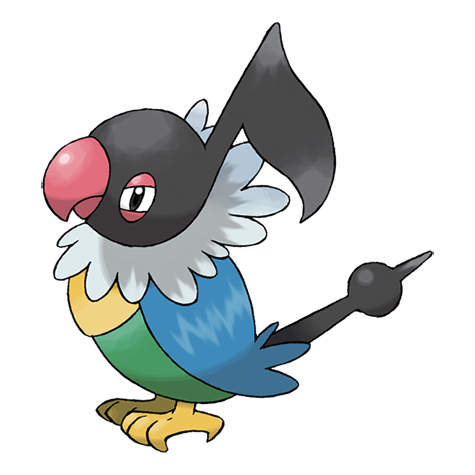 Chatot Chatot | DP | 40-41 | 20% | 20% | — | — |
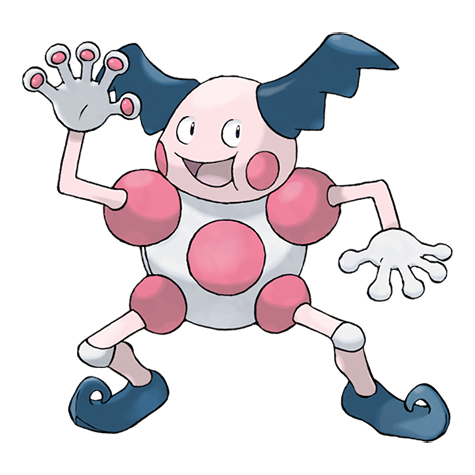 Mr Mime Mr Mime | DP | 41-42 | 15% | Rate counts base slots temporarily replaced by hard-shaking Poké Radar patches. | ||
| Purugly | DP | 41-42 | 15% | Rate counts base slots temporarily replaced by hard-shaking Poké Radar patches. | ||
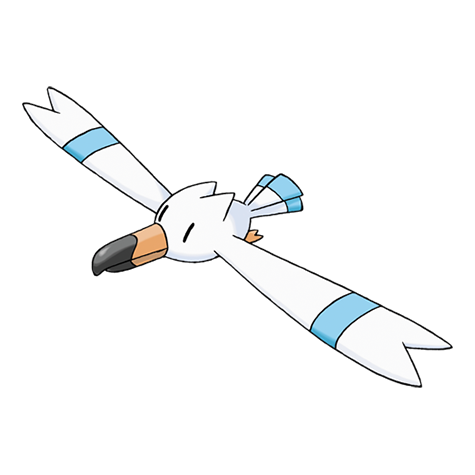 Wingull Wingull | DP | 41 | 10% | Rate counts base slots temporarily replaced by hard-shaking Poké Radar patches. | ||
| Swarm (post-National Dex daily announcement) | ||||||
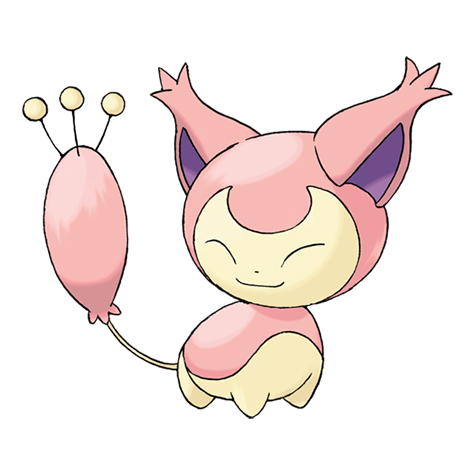 Skitty Skitty | DP | 40 | 40% | Post-National Dex daily swarm; replaces grass slots 0-1. | ||
| Poké Radar (post-National Dex) | ||||||
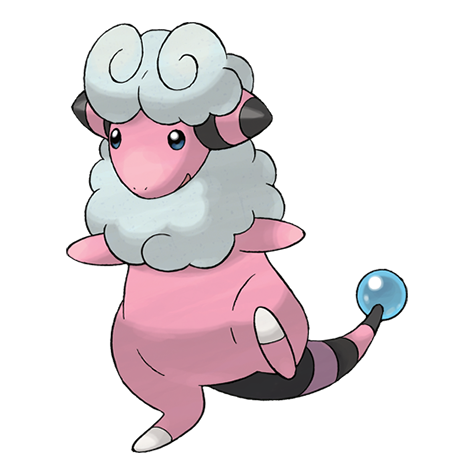 Flaaffy Flaaffy | DP | 41-42 | 22% | National Dex and Poké Radar required; replacement slot applies only in a hard/vigorous-shaking Radar patch. | ||
| Surfing | ||||||
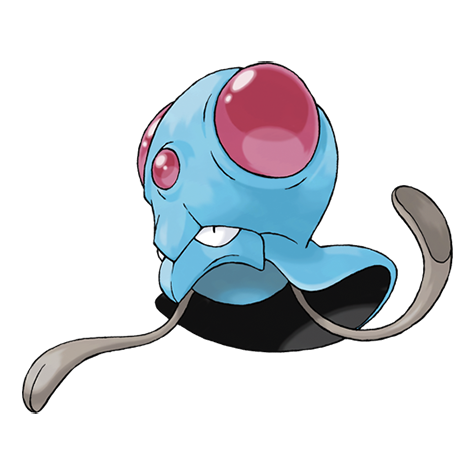 Tentacool Tentacool | DP | 20-30 | 60% | — | ||
| Wingull | DP | 20-30 | 30% | — | ||
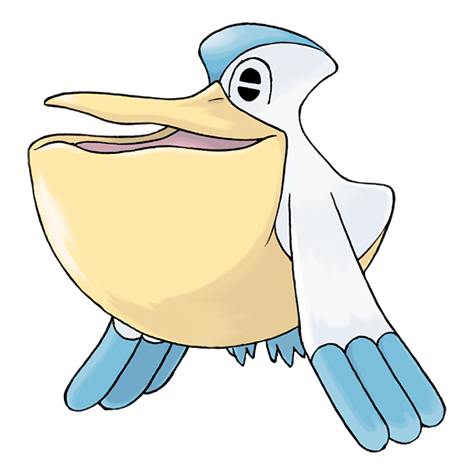 Pelipper Pelipper | DP | 20-40 | 5% | — | ||
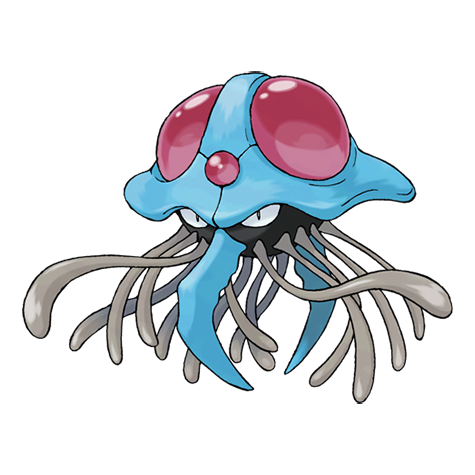 Tentacruel Tentacruel | DP | 20-40 | 5% | — | ||
| Fishing — Old Rod | ||||||
| Magikarp | DP | 3-10 | 100% | — | ||
| Fishing — Good Rod | ||||||
| Magikarp | DP | 10-25 | 55% | — | ||
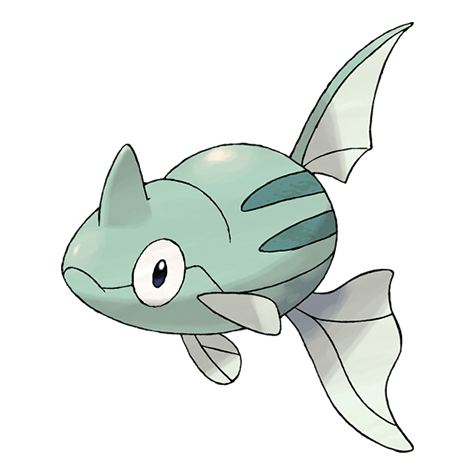 Remoraid Remoraid | DP | 10-25 | 45% | — | ||
| Fishing — Super Rod | ||||||
| Octillery | DP | 20-50 | 45% | — | ||
| Gyarados | DP | 30-40 | 40% | — | ||
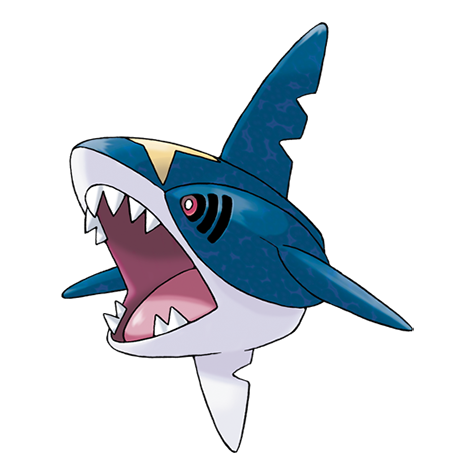 Sharpedo Sharpedo | DP | 40-55 | 15% | — | ||
Sunyshore
| Pokémon | Games | Levels | Rate | Requirement / notes | ||
|---|---|---|---|---|---|---|
| Morning | Day | Night | ||||
| Surfing | ||||||
| Tentacruel | DP | 35-45 | 60% | — | ||
| Pelipper | DP | 35-45 | 30% | — | ||
 Mantyke Mantyke | DP | 30-45 | 10% | — | ||
| Fishing — Old Rod | ||||||
| Magikarp | DP | 3-10 | 100% | — | ||
| Fishing — Good Rod | ||||||
| Magikarp | DP | 10-25 | 55% | — | ||
| Remoraid | DP | 10-25 | 45% | — | ||
| Fishing — Super Rod | ||||||
| Octillery | DP | 20-50 | 45% | — | ||
| Gyarados | DP | 30-40 | 40% | — | ||
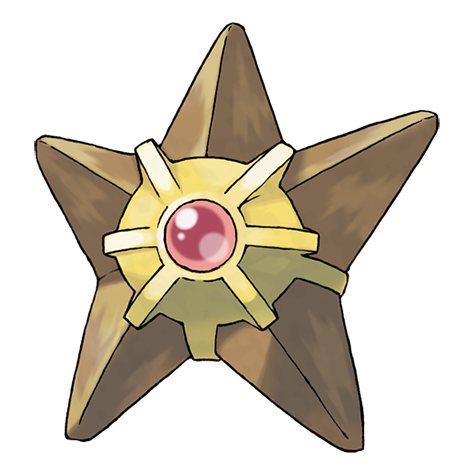 Staryu Staryu | DP | 20-40 | 15% | — | ||
Trainers
| Trainer | Route order / placement | Full team | Reward | Access requirement | Optional / rematch note |
|---|---|---|---|---|---|
 Fisherman BrettFisherman • source ID 172 Fisherman BrettFisherman • source ID 172 | Route 222 • field order 1 at (777, 790) | ₽1,248 | Reach the trainer's named field subarea; line of sight determines whether the battle is avoidable. | Field order 1, tile (777, 790); sightline/path determines whether it can be avoided. No higher-level same-trainer rematch variant is defined in trdata. | |
| Fisherman AlecFisherman • source ID 173 | Route 222 • field order 2 at (761, 789) | ₽1,344 | Reach the trainer's named field subarea; line of sight determines whether the battle is avoidable. | Field order 2, tile (761, 789); sightline/path determines whether it can be avoided. Higher-level source variants used by the rematch system: ID 686: Lv. 53/Lv. 53. | |
| Fisherman GeorgeFisherman • source ID 174 | Route 222 • field order 3 at (769, 789) | ₽1,344 | Reach the trainer's named field subarea; line of sight determines whether the battle is avoidable. | Field order 3, tile (769, 789); sightline/path determines whether it can be avoided. No higher-level same-trainer rematch variant is defined in trdata. | |
| Fisherman ColeFisherman • source ID 175 | Route 222 • field order 4 at (782, 790) | ₽1,312 | Reach the trainer's named field subarea; line of sight determines whether the battle is avoidable. | Field order 4, tile (782, 790); sightline/path determines whether it can be avoided. No higher-level same-trainer rematch variant is defined in trdata. | |
 Beauty NicolaBeauty • source ID 492 Beauty NicolaBeauty • source ID 492 | Route 222 • field order 5 at (771, 777) | ₽2,408 | Reach the trainer's named field subarea; line of sight determines whether the battle is avoidable. | Field order 5, tile (771, 777); sightline/path determines whether it can be avoided. No higher-level same-trainer rematch variant is defined in trdata. | |
 Tuber Male ConnerTuber Male • source ID 359 Tuber Male ConnerTuber Male • source ID 359 | Route 222 • field order 6 at (812, 781) | ₽172 | Reach the trainer's named field subarea; line of sight determines whether the battle is avoidable. | Field order 6, tile (812, 781); sightline/path determines whether it can be avoided. No higher-level same-trainer rematch variant is defined in trdata. | |
 Rich Boy TreyRich Boy • source ID 335 Rich Boy TreyRich Boy • source ID 335 | Route 222 • field order 7 at (751, 782) | ₽6,880 | Reach the trainer's named field subarea; line of sight determines whether the battle is avoidable. | Field order 7, tile (751, 782); sightline/path determines whether it can be avoided. Higher-level source variants used by the rematch system: ID 727: Lv. 55; ID 728: Lv. 60. | |
 Sailor LutherSailor • source ID 180 Sailor LutherSailor • source ID 180 | Route 222 • field order 8 at (814, 785) | ₽1,376 | Reach the trainer's named field subarea; line of sight determines whether the battle is avoidable. | Field order 8, tile (814, 785); sightline/path determines whether it can be avoided. No higher-level same-trainer rematch variant is defined in trdata. | |
 Policeman ThomasPoliceman • source ID 333 Policeman ThomasPoliceman • source ID 333 | Route 222 • field order 9 at (794, 778) | ₽1,680 | Battle is available only at night, 20:00-03:59. Reach the trainer's named field subarea; line of sight determines whether the battle is avoidable. | Field order 9, tile (794, 778); sightline/path determines whether it can be avoided. No higher-level same-trainer rematch variant is defined in trdata. | |
 Tuber Female HollyTuber Female • source ID 361 Tuber Female HollyTuber Female • source ID 361 | Route 222 • field order 10 at (787, 788) | ₽172 | Reach the trainer's named field subarea; line of sight determines whether the battle is avoidable. | Field order 10, tile (787, 788); sightline/path determines whether it can be avoided. No higher-level same-trainer rematch variant is defined in trdata. | |
| Sailor MarcSailor • source ID 337 | Route 222 • field order 11 at (808, 781) | ₽1,376 | Reach the trainer's named field subarea; line of sight determines whether the battle is avoidable. | Field order 11, tile (808, 781); sightline/path determines whether it can be avoided. Higher-level source variants used by the rematch system: ID 740: Lv. 54/Lv. 52; ID 741: Lv. 57/Lv. 59. | |
 Poké Kid JanetPoké Kid • source ID 832 Poké Kid JanetPoké Kid • source ID 832 | Route 222 Pikachu Fan Club • field order 1 at (4, 3) | ₽328 | Reach the trainer's named field subarea; line of sight determines whether the battle is avoidable. | Field order 1, tile (4, 3); sightline/path determines whether it can be avoided. No higher-level same-trainer rematch variant is defined in trdata. |

Items
| Item | Version | Type | Area / exact direction | Coordinate / script | Requirement | Source |
|---|---|---|---|---|---|---|
| Thunderstone | Diamond / Pearl | Visible item ball | Sunyshore: Pick up the item ball in the southeastern part of Sunyshore, 7 tiles west and 8 tiles south of the Sunyshore Pokétch Developer House doorway or transition. | (881, 779) | Reach this subarea; check the route and puzzle notes for HM, Bicycle, time, or story gates. | event bank 149, script 7194 |
| Honey | Diamond / Pearl | Visible item ball | Route 222: Pick up the item ball in the central part of Route 222, 10 tiles west and 3 tiles north of the Route 222 Pikachu Fan Club doorway or transition. | (785, 781) | Reach this subarea; check the route and puzzle notes for HM, Bicycle, time, or story gates. | event bank 380, script 7193 |
| Carbos | Diamond / Pearl | Visible item ball | Route 222: Pick up the item ball in the eastern part of Route 222, 9 tiles west and 7 tiles north of the Route 222 Sunyshore Gateouse doorway or transition. | (816, 783) | Reach this subarea; check the route and puzzle notes for HM, Bicycle, time, or story gates. | event bank 380, script 7192 |
| 2× Wiki Berry | Diamond / Pearl | Berry tree | Route 222: Harvest berry patch 82 in the northwestern part of Route 222, 35 tiles west and 12 tiles north of the Route 222 Pikachu Fan Club doorway or transition. The plot can be replanted after the initial harvest. | (760, 772) | Reach the outdoor patch on the named route or town; harvest its initial berries before planting a replacement. | berry table ov52_021D76F8, patch 82 |
| 2× Mago Berry | Diamond / Pearl | Berry tree | Route 222: Harvest berry patch 83 in the northwestern part of Route 222, 34 tiles west and 12 tiles north of the Route 222 Pikachu Fan Club doorway or transition. The plot can be replanted after the initial harvest. | (761, 772) | Reach the outdoor patch on the named route or town; harvest its initial berries before planting a replacement. | berry table ov52_021D76F8, patch 83 |
| 2× Aguav Berry | Diamond / Pearl | Berry tree | Route 222: Harvest berry patch 84 in the northwestern part of Route 222, 33 tiles west and 12 tiles north of the Route 222 Pikachu Fan Club doorway or transition. The plot can be replanted after the initial harvest. | (762, 772) | Reach the outdoor patch on the named route or town; harvest its initial berries before planting a replacement. | berry table ov52_021D76F8, patch 84 |
| Qualot Berry | Diamond / Pearl | Berry tree | Route 222: Harvest berry patch 85 in the northern part of Route 222, 32 tiles west and 12 tiles north of the Route 222 Pikachu Fan Club doorway or transition. The plot can be replanted after the initial harvest. | (763, 772) | Reach the outdoor patch on the named route or town; harvest its initial berries before planting a replacement. | berry table ov52_021D76F8, patch 85 |
| HM07 | Diamond / Pearl | NPC / scripted gift | Sunyshore: Jasmine gives HM07 Waterfall on Sunyshore's north beach after the Beacon Badge. | NPC (857, 741); script 9 | Defeat Volkner, then speak to Jasmine before leaving for Route 223. | script bank 150 |
| TM56 | Diamond / Pearl | NPC / scripted gift | Route 222: Speak to the item-giving NPC in the central part of Route 222, 7 tiles west and 3 tiles north of the Route 222 Pikachu Fan Club doorway or transition. | NPC (788, 781); script 2 | Reach Route 222 and complete the item-giving NPC's one-time dialogue. | script bank 446 |
| Net Ball | Diamond / Pearl | NPC / scripted gift | Route 222 Pokémon Size Contest House: Show the size-contest Fisherman a Remoraid larger than his current record; each new record earns another Net Ball. | NPC (5, 5); script 2 | Bring a qualifying Remoraid in the party. The reward is repeatable whenever a larger record is set. | script bank 448 |
| Julia's weekday Ribbon | Diamond / Pearl | Once-daily Ribbon gift | Route 222, Sunyshore City, and Vista Lighthouse: Monday Alert Ribbon; Tuesday Shock Ribbon; Wednesday Downcast Ribbon; Thursday Careless Ribbon; Friday Relax Ribbon; Saturday Snooze Ribbon; Sunday Smile Ribbon. | NPC / system | Once per day; place the intended recipient as the first non-Egg party member, visit Julia's Sunyshore house, and complete her requested story response. | editorial script/system note |
| Effort Ribbon | Diamond / Pearl | Sunyshore Market Ribbon gift | Route 222, Sunyshore City, and Vista Lighthouse: The Market ribbon giver awards it to the first non-Egg party Pokemon when that Pokemon has the complete 510 total EVs. | NPC / system | Place a Pokemon with 510 total effort values as the first non-Egg party member and speak to the ribbon giver. | editorial script/system note |
Hidden Items
| Hidden item | Area / plain-English placement | QA coordinate | Requirement | Source |
|---|---|---|---|---|
| Pearl | Sunyshore: Use the Dowsing Machine in the northern part of Sunyshore, 5 tiles east and 3 tiles north of the Sunyshore Market doorway or transition and inspect that exact ground tile. | (855, 759) | Dowsing Machine Pokétch app. Reach this subarea; check the route and puzzle notes for HM, Bicycle, time, or story gates. | event bank 149, script 8111 |
| Zap Plate | Sunyshore: Use the Dowsing Machine in the southeastern part of Sunyshore, 3 tiles east and 2 tiles south of the Sunyshore Vista Lighthouse Elevator doorway or transition and inspect that exact ground tile. | (889, 792) | Dowsing Machine Pokétch app. Reach this subarea; check the route and puzzle notes for HM, Bicycle, time, or story gates. | event bank 149, script 8110 |
| Big Mushroom | Route 222: Use the Dowsing Machine in the southeastern part of Route 222, 6 tiles west of the Route 222 Sunyshore Gateouse doorway or transition and inspect that exact ground tile. | (819, 791) | Dowsing Machine Pokétch app. Reach this subarea; check the route and puzzle notes for HM, Bicycle, time, or story gates. | event bank 380, script 8109 |
| Full Restore | Route 222: Use the Dowsing Machine in the northwestern part of Route 222, 65 tiles west and 11 tiles north of the Route 222 Pikachu Fan Club doorway or transition and inspect that exact ground tile. | (730, 773) | Dowsing Machine Pokétch app. Reach this subarea; check the route and puzzle notes for HM, Bicycle, time, or story gates. | event bank 380, script 8007 |
| Honey | Route 222: Use the Dowsing Machine in the southeastern part of Route 222, 8 tiles east and 6 tiles south of the Route 222 Pokémon Size Contest House doorway or transition and inspect that exact ground tile. | (809, 790) | Dowsing Machine Pokétch app. Reach this subarea; check the route and puzzle notes for HM, Bicycle, time, or story gates. | event bank 380, script 8157 |
| Ultra Ball | Route 222: Use the Dowsing Machine in the northern part of Route 222, 12 tiles west and 10 tiles north of the Route 222 Pikachu Fan Club doorway or transition and inspect that exact ground tile. | (783, 774) | Dowsing Machine Pokétch app. Reach this subarea; check the route and puzzle notes for HM, Bicycle, time, or story gates. | event bank 380, script 8158 |
Puzzles, Warps, And Switches
- Sunyshore's raised solar-panel paths connect buildings that look separated at street level. Traverse each elevated branch before taking the lighthouse elevator.
Completion Checklist
- Complete the currently reachable part of this route plan: Fly to Valor Lakefront; pass the newly opened east gate; clear Route 222's beach and grass paths; visit both houses; enter Sunyshore; meet Flint; collect city gifts via elevated solar walkways; take the lighthouse elevator; speak to Volkner; return to the Gym.
- Review all 29 encounter rows across the per-area tables, including game markers, method band, time-of-day rates, levels, and each conditional requirement; mark conditional rows for their stated revisit.
Sunyshore Gym and Volkner
Rotate gear bridges through three electrical rooms and defeat Volkner's mixed Electric-focused team.
Source maps
Sunyshore Gym Room 1, Sunyshore Gym Room 2, and Sunyshore Gym Room 3.
Route Plan
Bring Ground attacks but account for Ambipom and Octillery; step on colored switches to rotate gears; clear all trainers before leaving each stable alignment; create the final bridge to Volkner; save; defeat Raichu, Ambipom, Octillery, and Luxray.
- Only half of Volkner's Diamond/Pearl team is Electric type because the original regional Pokedex is small; Ground alone does not sweep Ambipom or Octillery super effectively.
- The Beacon Badge enables Waterfall, which Jasmine gives on Sunyshore's north beach after the victory.
Routes and encounters on this page are compiled from 3 pret map headers.
Trainers
| Trainer | Route order / placement | Full team | Reward | Access requirement | Optional / rematch note |
|---|---|---|---|---|---|
 School Kid Female TieraSchool Kid Female • source ID 344 School Kid Female TieraSchool Kid Female • source ID 344 | Sunyshore Gym Room 1 • field order 1 at (6, 4) |
| ₽880 | Reach the trainer's named field subarea; line of sight determines whether the battle is avoidable. | Field order 1, tile (6, 4); sightline/path determines whether it can be avoided. No higher-level same-trainer rematch variant is defined in trdata. |
 School Kid Male ForrestSchool Kid Male • source ID 341 School Kid Male ForrestSchool Kid Male • source ID 341 | Sunyshore Gym Room 2 • field order 1 at (4, 5) |
| ₽880 | Reach the trainer's named field subarea; line of sight determines whether the battle is avoidable. | Field order 1, tile (4, 5); sightline/path determines whether it can be avoided. No higher-level same-trainer rematch variant is defined in trdata. |
 Guitarist JerryGuitarist • source ID 301 Guitarist JerryGuitarist • source ID 301 | Sunyshore Gym Room 2 • field order 2 at (14, 11) |
| ₽1,056 | Reach the trainer's named field subarea; line of sight determines whether the battle is avoidable. | Field order 2, tile (14, 11); sightline/path determines whether it can be avoided. No higher-level same-trainer rematch variant is defined in trdata. |
| Poké Kid MeghanPoké Kid • source ID 331 | Sunyshore Gym Room 2 • field order 3 at (12, 4) | ₽328 | Reach the trainer's named field subarea; line of sight determines whether the battle is avoidable. | Field order 3, tile (12, 4); sightline/path determines whether it can be avoided. No higher-level same-trainer rematch variant is defined in trdata. | |
 Ace Trainer Female DestinyAce Trainer Female • source ID 285 Ace Trainer Female DestinyAce Trainer Female • source ID 285 | Sunyshore Gym Room 3 • field order 1 at (4, 23) | ₽2,640 | Reach the trainer's named field subarea; line of sight determines whether the battle is avoidable. | Field order 1, tile (4, 23); sightline/path determines whether it can be avoided. No higher-level same-trainer rematch variant is defined in trdata. | |
| Guitarist PrestonGuitarist • source ID 302 | Sunyshore Gym Room 3 • field order 2 at (3, 3) | ₽1,008 | Reach the trainer's named field subarea; line of sight determines whether the battle is avoidable. | Field order 2, tile (3, 3); sightline/path determines whether it can be avoided. No higher-level same-trainer rematch variant is defined in trdata. | |
| Guitarist LonnieGuitarist • source ID 303 | Sunyshore Gym Room 3 • field order 3 at (16, 23) |
| ₽1,056 | Reach the trainer's named field subarea; line of sight determines whether the battle is avoidable. | Field order 3, tile (16, 23); sightline/path determines whether it can be avoided. No higher-level same-trainer rematch variant is defined in trdata. |
 Ace Trainer Male ZacheryAce Trainer Male • source ID 281 Ace Trainer Male ZacheryAce Trainer Male • source ID 281 | Sunyshore Gym Room 3 • field order 4 at (21, 10) | ₽2,640 | Reach the trainer's named field subarea; line of sight determines whether the battle is avoidable. | Field order 4, tile (21, 10); sightline/path determines whether it can be avoided. No higher-level same-trainer rematch variant is defined in trdata. | |
| Leader VolknerLeader Volkner • source ID 320 | Sunyshore Gym Room 3 • scripted | ₽5,880 | Scripted story trigger; complete the local objective described in the route plan. | Major or story battle; not a VS Seeker rematch row. |

Items
| Item | Version | Type | Area / exact direction | Coordinate / script | Requirement | Source |
|---|---|---|---|---|---|---|
| TM57 | Diamond / Pearl | NPC / scripted gift | Sunyshore Gym Room 3: Receive this TM from the Gym Leader immediately after the badge victory. | NPC (11, 3); script 4 | Defeat the Gym Leader; this is part of the one-time badge reward. | script bank 154 |
| HM07 Waterfall | Diamond / Pearl | Gift after Gym | Sunyshore Gym and Volkner: Jasmine gives it on Sunyshore's north beach after Volkner is defeated; field use requires the Beacon Badge. | NPC / system | See the route plan. | editorial script/system note |
Puzzles, Warps, And Switches
- Green switches rotate adjacent gears a quarter turn and blue/red switches make larger changes. Step off after each rotation, inspect every bridge, then use the next switch only if it opens a new platform.
- In the final room, rotate the outer gears to cross both sides, then restore the center gear so its bridge points toward Volkner.
Completion Checklist
- Complete the currently reachable part of this route plan: Bring Ground attacks but account for Ambipom and Octillery; step on colored switches to rotate gears; clear all trainers before leaving each stable alignment; create the final bridge to Volkner; save; defeat Raichu, Ambipom, Octillery, and Luxray.
Dex quick links