
Phase 5 of 11


Pokemon Diamond and Pearl Phase 5: Relic Badge Walkthrough
 Relic Badge
 Clear Route 210's fog, protect Celestic's ruins, revisit Mt. Coronet with Surf, and return to Fantina's Hearthome Gym. 5 detailed sections with Diamond/Pearl encounters, trainers, items, puzzles, boss teams, and checklists.
Phase 5 Relic Badge Galactic grunt chase, Celestic Town, Route 210, Hearthome City, and Fantina. 05 / 11 
Phase Snapshot
Phase 5: Relic Badge
Clear Route 210's fog, protect Celestic's ruins, revisit Mt. Coronet with Surf, and return to Fantina's Hearthome Gym.
Data rows
Phase Sections
Major Battles And Partners
 Leader FantinaLeader Fantina • source ID 318
Full team
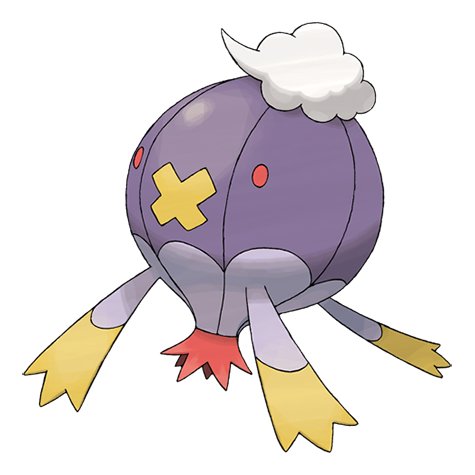 DrifblimOminous Wind / Gust / Astonish / Minimize
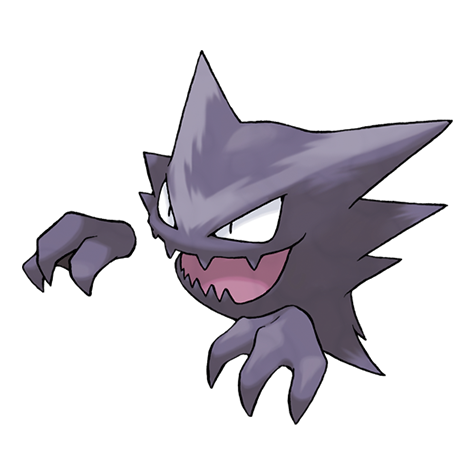
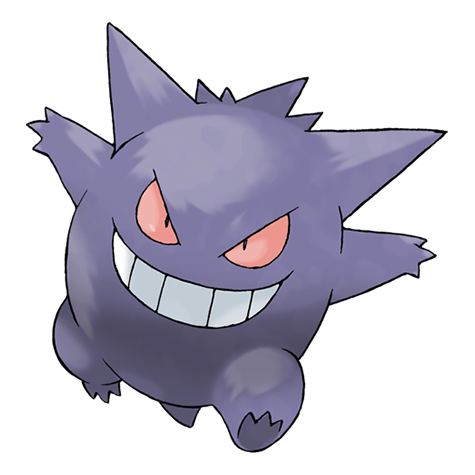 GengarShadow Claw / Poison Jab / Spite / Confuse Ray
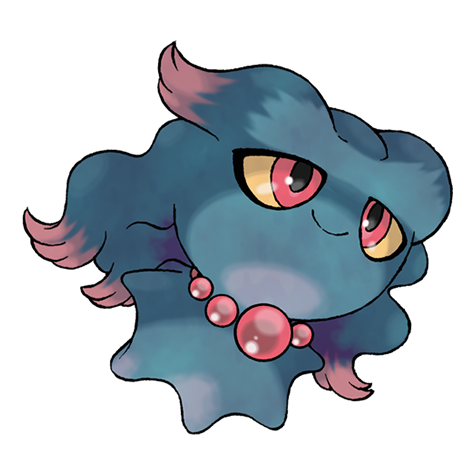
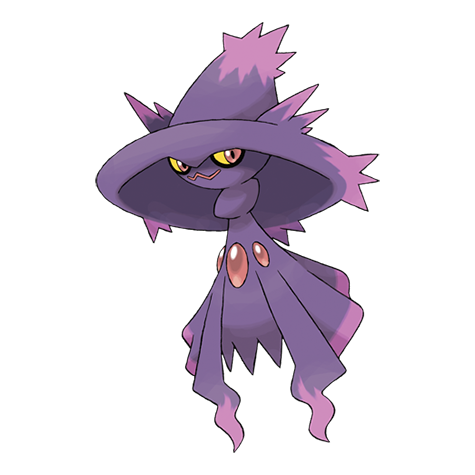 Mismagiusholds Sitrus Berry • Shadow Ball / Psybeam / Magical Leaf / Confuse Ray
Danger notes
Mismagius is fast, hits hard, and has no Ground weakness because of Levitate; Drifblim can absorb several hits.
Practical counters
Dark and Ghost moves are best. Normal Pokémon with Dark coverage can wall Ghost STAB, but avoid Fighting moves.
Data Coverage
This phase owns 31 Diamond/Pearl source maps and publishes 100 encounter rows, 32 trainer rows, 40 visible/scripted items, and 16 hidden-item rows. Counts include explicit starter/rival branches and curated systems but never substitute Platinum encounters or story maps.
Route 210 North and the Fog Route
Cure the Psyduck, receive the Old Charm, remove fog, cross narrow ledges, and battle through the mountain road to Celestic.
Source maps
Route 210 North and Route 210 Grandma Wilma House.
Route Plan
Use the SecretPotion on the Psyduck; accept Cynthia's Old Charm; teach Defog if desired; clear the lower grass; use Defog in the northern section; cross Bicycle rails; defeat every Ninja Boy and Ace Trainer; enter Celestic.
- Fog lowers move accuracy in battle and obscures navigation. Defog is optional mechanically but strongly recommended for a clean trainer sweep.
- Grandma Wilma teaches Draco Meteor to a sufficiently friendly Dragon-type in her house near the northern route.
Routes and encounters on this page are compiled from 2 pret map headers.
Wild Pokémon
| Pokémon | Games | Levels | Rate | Requirement / notes | ||
|---|---|---|---|---|---|---|
| Morning | Day | Night | ||||
| Grass / cave floor | ||||||
 Meditite Meditite | DP | 24-26 | 30% | 30% | 20% | Rate counts base slots temporarily replaced by hard-shaking Poké Radar patches and GBA dual-slot insertions. |
 Bibarel Bibarel | DP | 24 | 20% | — | ||
 Machop Machop | DP | 25-26 | 20% | 20% | 10% | Rate counts base slots temporarily replaced by hard-shaking Poké Radar patches. |
 Psyduck Psyduck | DP | 25 | 20% | — | ||
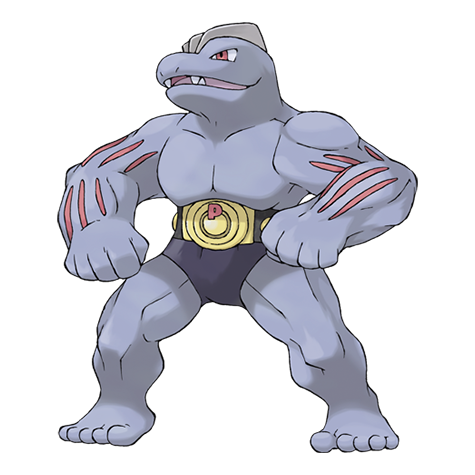 Machoke Machoke | DP | 26 | 10% | Rate counts base slots temporarily replaced by hard-shaking Poké Radar patches and GBA dual-slot insertions. | ||
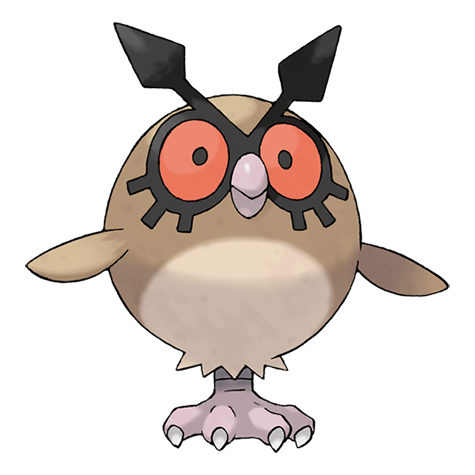 Hoothoot Hoothoot | DP | 24 | — | — | 10% | — |
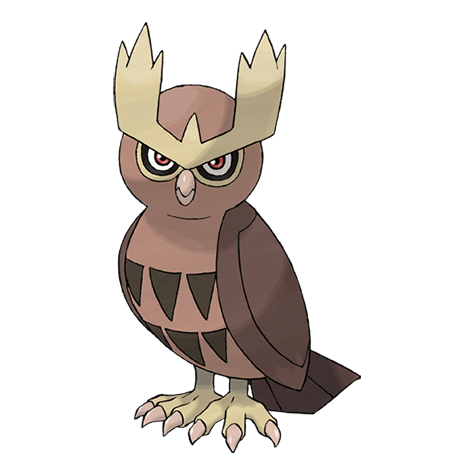 Noctowl Noctowl | DP | 25 | — | — | 10% | — |
| Poké Radar (post-National Dex) | ||||||
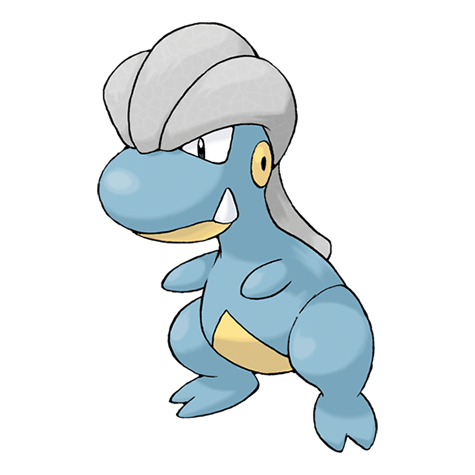 Bagon Bagon | DP | 25-26 | 22% | National Dex and Poké Radar required; replacement slot applies only in a hard/vigorous-shaking Radar patch. | ||
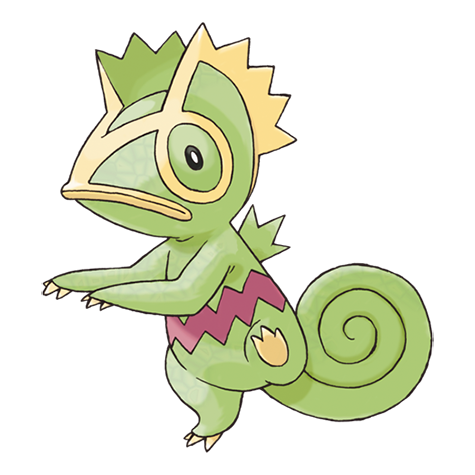 Kecleon Kecleon | DP | 25-26 | 22% | National Dex and Poké Radar required; replacement slot applies only in a hard/vigorous-shaking Radar patch. | ||
| Dual-slot GBA insertion (post-National Dex) | ||||||
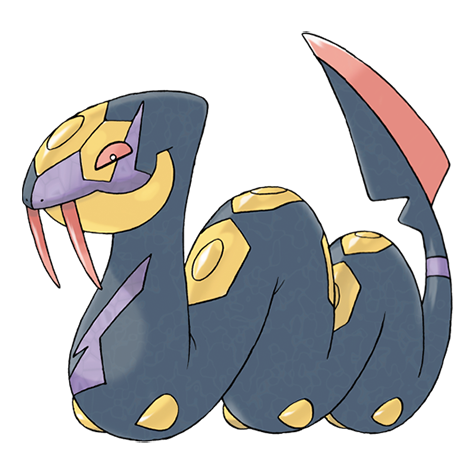 Seviper Seviper | DP | 26 | 8% | National Dex plus Pokémon Sapphire inserted in the Nintendo DS GBA slot; replaces grass slots 8-9. | ||
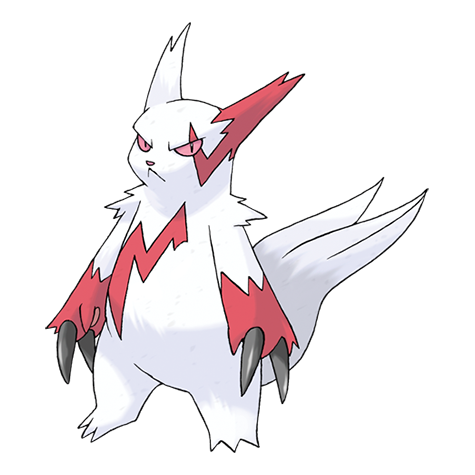 Zangoose Zangoose | DP | 26 | 8% | National Dex plus Pokémon Ruby inserted in the Nintendo DS GBA slot; replaces grass slots 8-9. | ||
| Surfing | ||||||
| Psyduck | DP | 20-40 | 90% | — | ||
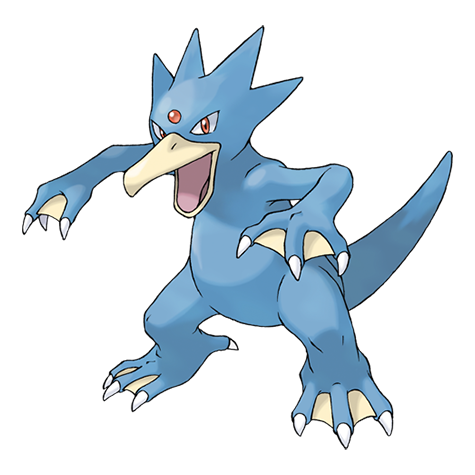 Golduck Golduck | DP | 20-40 | 10% | — | ||
| Fishing — Old Rod | ||||||
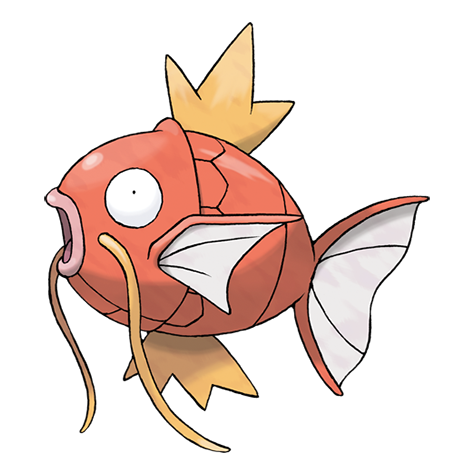 Magikarp Magikarp | DP | 3-10 | 100% | — | ||
| Fishing — Good Rod | ||||||
| Magikarp | DP | 10-25 | 55% | — | ||
 Barboach Barboach | DP | 10-25 | 45% | — | ||
| Fishing — Super Rod | ||||||
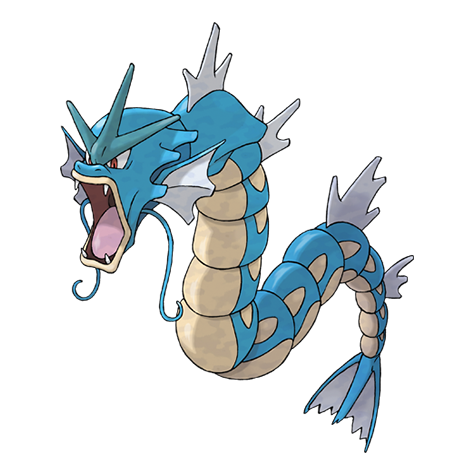 Gyarados Gyarados | DP | 30-55 | 55% | — | ||
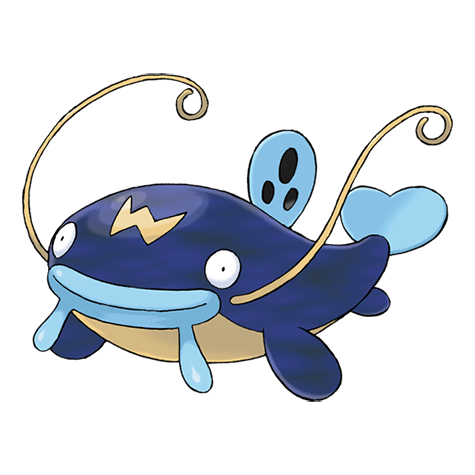 Whiscash Whiscash | DP | 20-50 | 45% | — | ||
Trainers
| Trainer | Route order / placement | Full team | Reward | Access requirement | Optional / rematch note |
|---|---|---|---|---|---|
 Ace Trainer Male ErnestAce Trainer Male • source ID 66 Ace Trainer Male ErnestAce Trainer Male • source ID 66 | Route 210 North • field order 1 at (534, 522) | ₽1,620 | Use the SecretPotion to clear the Psyduck; the Fen Badge and Defog are needed to remove the northern fog. | Field order 1, tile (534, 522); sightline/path determines whether it can be avoided. No higher-level same-trainer rematch variant is defined in trdata. | |
 Ace Trainer Female AlyssaAce Trainer Female • source ID 67 Ace Trainer Female AlyssaAce Trainer Female • source ID 67 | Route 210 North • field order 2 at (547, 534) | ₽1,620 | Use the SecretPotion to clear the Psyduck; the Fen Badge and Defog are needed to remove the northern fog. | Field order 2, tile (547, 534); sightline/path determines whether it can be avoided. No higher-level same-trainer rematch variant is defined in trdata. | |
 Ninja Boy JoelNinja Boy • source ID 70 Ninja Boy JoelNinja Boy • source ID 70 | Route 210 North • field order 3 at (564, 531) | ₽200 | Use the SecretPotion to clear the Psyduck; the Fen Badge and Defog are needed to remove the northern fog. | Field order 3, tile (564, 531); sightline/path determines whether it can be avoided. No higher-level same-trainer rematch variant is defined in trdata. | |
| Ninja Boy NathanNinja Boy • source ID 71 | Route 210 North • field order 4 at (525, 534) | ₽200 | Use the SecretPotion to clear the Psyduck; the Fen Badge and Defog are needed to remove the northern fog. | Field order 4, tile (525, 534); sightline/path determines whether it can be avoided. No higher-level same-trainer rematch variant is defined in trdata. | |
| Ninja Boy DavidoNinja Boy • source ID 72 | Route 210 North • field order 5 at (499, 521) | ₽216 | Use the SecretPotion to clear the Psyduck; the Fen Badge and Defog are needed to remove the northern fog. | Field order 5, tile (499, 521); sightline/path determines whether it can be avoided. No higher-level same-trainer rematch variant is defined in trdata. | |
 Dragon Tamer PatrickDragon Tamer • source ID 73 Dragon Tamer PatrickDragon Tamer • source ID 73 | Route 210 North • field order 6 at (560, 522) | ₽1,248 | Use the SecretPotion to clear the Psyduck; the Fen Badge and Defog are needed to remove the northern fog. | Field order 6, tile (560, 522); sightline/path determines whether it can be avoided. Higher-level source variants used by the rematch system: ID 659: Lv. 43; ID 660: Lv. 63. | |
 Bird Keeper BriannaBird Keeper • source ID 74 Bird Keeper BriannaBird Keeper • source ID 74 | Route 210 North • field order 7 at (511, 533) | ₽864 | Use the SecretPotion to clear the Psyduck; the Fen Badge and Defog are needed to remove the northern fog. | Field order 7, tile (511, 533); sightline/path determines whether it can be avoided. Higher-level source variants used by the rematch system: ID 636: Lv. 38/Lv. 42; ID 637: Lv. 60/Lv. 60. | |
 Double Team Zac & JenDouble Team • source ID 75 Double Team Zac & JenDouble Team • source ID 75 | Route 210 North • field order 8 at (537, 528) + field order 9 at (537, 529) | ₽6,480 | Use the SecretPotion to clear the Psyduck; the Fen Badge and Defog are needed to remove the northern fog. | Field order 8, tile (537, 528); Field order 9, tile (537, 529); sightline/path determines whether it can be avoided. No higher-level same-trainer rematch variant is defined in trdata. | |
 Veteran BrianVeteran • source ID 68 Veteran BrianVeteran • source ID 68 | Route 210 North • field order 10 at (494, 528) | ₽2,080 | Use the SecretPotion to clear the Psyduck; the Fen Badge and Defog are needed to remove the northern fog. | Field order 10, tile (494, 528); sightline/path determines whether it can be avoided. Higher-level source variants used by the rematch system: ID 774: Lv. 38/Lv. 40/Lv. 39; ID 776: Lv. 58/Lv. 59/Lv. 60. | |
 Black Belt AdamBlack Belt • source ID 69 Black Belt AdamBlack Belt • source ID 69 | Route 210 North • field order 11 at (518, 540) | ₽696 | Use the SecretPotion to clear the Psyduck; the Fen Badge and Defog are needed to remove the northern fog. | Field order 11, tile (518, 540); sightline/path determines whether it can be avoided. No higher-level same-trainer rematch variant is defined in trdata. |
Items
| Item | Version | Type | Area / exact direction | Coordinate / script | Requirement | Source |
|---|---|---|---|---|---|---|
| Smoke Ball | Diamond / Pearl | Visible item ball | Route 210 North: Pick up the item ball in the southern part of Route 210 North, 37 tiles west and 19 tiles south of the Route 210 Grandma Wilma House doorway or transition. | (527, 535) | Use the SecretPotion to clear the Psyduck; the Fen Badge and Defog are needed to remove the northern fog. | event bank 348, script 7129 |
| Wave Incense | Diamond / Pearl | Visible item ball | Route 210 North: Pick up the item ball in the southwestern part of Route 210 North, 67 tiles west and 17 tiles south of the Route 210 Grandma Wilma House doorway or transition. | (497, 533) | Use the SecretPotion to clear the Psyduck; the Fen Badge and Defog are needed to remove the northern fog. | event bank 348, script 7130 |
| TM30 | Diamond / Pearl | Visible item ball | Route 210 North: Pick up the item ball in the southwestern part of Route 210 North, 71 tiles west and 24 tiles south of the Route 210 Grandma Wilma House doorway or transition. | (493, 540) | Use the SecretPotion to clear the Psyduck; the Fen Badge and Defog are needed to remove the northern fog. | event bank 348, script 7131 |
| Sitrus Berry | Diamond / Pearl | Berry tree | Route 210 North: Harvest berry patch 42 in the northwestern part of Route 210 North, 72 tiles west and 4 tiles south of the Route 210 Grandma Wilma House doorway or transition. The plot can be replanted after the initial harvest. | (492, 520) | Use the SecretPotion to clear the Psyduck; the Fen Badge and Defog are needed to remove the northern fog. | berry table ov52_021D76F8, patch 42 |
| Chesto Berry | Diamond / Pearl | Berry tree | Route 210 North: Harvest berry patch 43 in the northwestern part of Route 210 North, 71 tiles west and 4 tiles south of the Route 210 Grandma Wilma House doorway or transition. The plot can be replanted after the initial harvest. | (493, 520) | Use the SecretPotion to clear the Psyduck; the Fen Badge and Defog are needed to remove the northern fog. | berry table ov52_021D76F8, patch 43 |
| Wiki Berry | Diamond / Pearl | Berry tree | Route 210 North: Harvest berry patch 44 in the northwestern part of Route 210 North, 70 tiles west and 4 tiles south of the Route 210 Grandma Wilma House doorway or transition. The plot can be replanted after the initial harvest. | (494, 520) | Use the SecretPotion to clear the Psyduck; the Fen Badge and Defog are needed to remove the northern fog. | berry table ov52_021D76F8, patch 44 |
| Aguav Berry | Diamond / Pearl | Berry tree | Route 210 North: Harvest berry patch 45 in the northwestern part of Route 210 North, 69 tiles west and 4 tiles south of the Route 210 Grandma Wilma House doorway or transition. The plot can be replanted after the initial harvest. | (495, 520) | Use the SecretPotion to clear the Psyduck; the Fen Badge and Defog are needed to remove the northern fog. | berry table ov52_021D76F8, patch 45 |
| Draco Meteor move tutor | Diamond / Pearl | Free repeatable move-tutor service | Route 210 North and the Fog Route: Grandma Wilma teaches Draco Meteor to one eligible Dragon-type Pokemon at maximum friendship. | NPC / system | Bring an eligible Dragon-type at maximum friendship to the Route 210 house; the service costs nothing and can be repeated for other eligible Pokemon. | editorial script/system note |
Hidden Items
| Hidden item | Area / plain-English placement | QA coordinate | Requirement | Source |
|---|---|---|---|---|
| Nugget | Route 210 North: Use the Dowsing Machine in the eastern part of Route 210 North, 17 tiles west and 9 tiles south of the Route 210 Grandma Wilma House doorway or transition and inspect that exact ground tile. | (547, 525) | Dowsing Machine Pokétch app. Use the SecretPotion to clear the Psyduck; the Fen Badge and Defog are needed to remove the northern fog. | event bank 348, script 8045 |
| Meadow Plate | Route 210 North: Use the Dowsing Machine in the northern part of Route 210 North, 38 tiles west and 3 tiles south of the Route 210 Grandma Wilma House doorway or transition and inspect that exact ground tile. | (526, 519) | Dowsing Machine Pokétch app. Use the SecretPotion to clear the Psyduck; the Fen Badge and Defog are needed to remove the northern fog. | event bank 348, script 8044 |
Puzzles, Warps, And Switches
- Some narrow rails require the Bicycle and exact alignment. Clear the ground-level grass branches before committing to the elevated rail route toward Celestic.
Completion Checklist
- Complete the currently reachable part of this route plan: Use the SecretPotion on the Psyduck; accept Cynthia's Old Charm; teach Defog if desired; clear the lower grass; use Defog in the northern section; cross Bicycle rails; defeat every Ninja Boy and Ace Trainer; enter Celestic.
- Review all 18 encounter rows across the per-area tables, including game markers, method band, time-of-day rates, levels, and each conditional requirement; mark conditional rows for their stated revisit.
Celestic Town and Celestic Ruins
Defeat the Galactic Grunt, return the Old Charm, inspect the lake mural, and receive HM03 Surf.
Source maps
Celestic, Celestic Pokémon Center, Celestic Pokémon Center 2F, Celestic Cynthia Grandparents House, Celestic Shop, Celestic Northeast House, Celestic Southwest House, Celestic Ruins, and Celestic Pokémon Center B1F.
Route Plan
Tour the town and shop; collect hidden items around the central crater; defeat the Grunt blocking the ruins; enter and examine the mural; give the Old Charm to Cynthia's grandmother; receive HM03; speak to residents before leaving.
- Diamond and Pearl use a Galactic Grunt at the ruins; Platinum's Cyrus battle here does not occur in these versions.
- Surf is received before Fantina but cannot be used outside battle until the Relic Badge is won.
Routes and encounters on this page are compiled from 9 pret map headers.
Wild Pokémon
| Pokémon | Games | Levels | Rate | Requirement / notes | ||
|---|---|---|---|---|---|---|
| Morning | Day | Night | ||||
| Surfing | ||||||
| Psyduck | DP | 20-40 | 90% | — | ||
| Golduck | DP | 20-40 | 10% | — | ||
| Fishing — Old Rod | ||||||
| Magikarp | DP | 3-10 | 100% | — | ||
| Fishing — Good Rod | ||||||
| Magikarp | DP | 10-25 | 55% | — | ||
| Barboach | DP | 10-25 | 45% | — | ||
| Fishing — Super Rod | ||||||
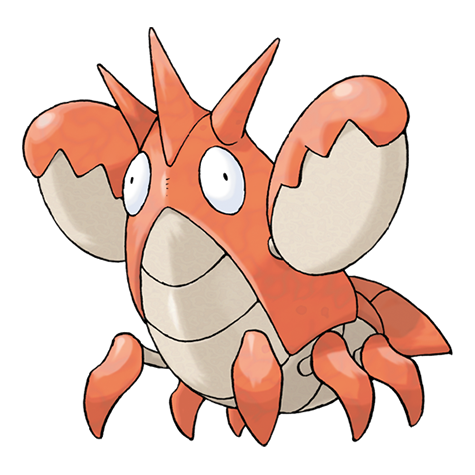 Corphish Corphish | DP | 30-40 | 40% | — | ||
| Gyarados | DP | 30-40 | 40% | — | ||
| Whiscash | DP | 40-55 | 15% | — | ||
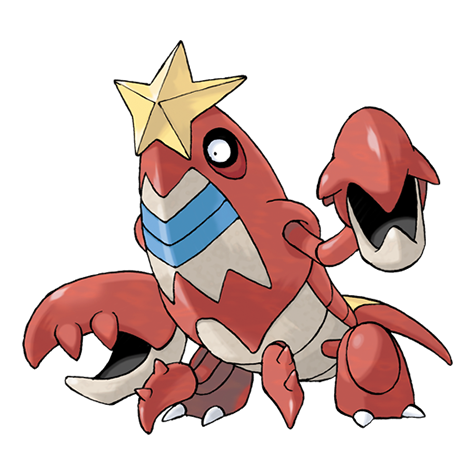 Crawdaunt Crawdaunt | DP | 35-55 | 5% | — | ||
Trainers
| Trainer | Route order / placement | Full team | Reward | Access requirement | Optional / rematch note |
|---|---|---|---|---|---|
 Galactic GruntGalactic • source ID 416 Galactic GruntGalactic • source ID 416 | Celestic • scripted | ₽1,080 | Scripted story trigger; complete the local objective described in the route plan. | Script-triggered battle; not treated as an ordinary field rematch. |

Items
| Item | Version | Type | Area / exact direction | Coordinate / script | Requirement | Source |
|---|---|---|---|---|---|---|
| Great Ball | Diamond / Pearl | NPC / scripted gift | Celestic Pokémon Center: Speak to the item-giving NPC in the western part of Celestic Pokémon Center, 1 tile east and 2 tiles north of the Celestic Pokémon Center 2F doorway or transition. | NPC (3, 8); script 4 | Reach Celestic Pokémon Center and complete the item-giving NPC's one-time dialogue. | script bank 1014 |
| HM03 Surf | Diamond / Pearl | Story gift | Celestic Town and Celestic Ruins: Cynthia's grandmother gives it after the ruins mural scene; field use requires the Relic Badge. | NPC / system | See the route plan. | editorial script/system note |
| Choice Specs | Diamond / Pearl | Time-of-day NPC gift | Celestic Town and Celestic Ruins: Talk to the Celestic Shop gift NPC during morning, 04:00-09:59. This uses its own one-time flag. | NPC / system | Morning 04:00-09:59; revisit for the other two glasses. | editorial script/system note |
| BlackGlasses | Diamond / Pearl | Time-of-day NPC gift | Celestic Town and Celestic Ruins: Talk to the Celestic Shop gift NPC during day, 10:00-19:59. This uses its own one-time flag. | NPC / system | Day 10:00-19:59; revisit for the other two glasses. | editorial script/system note |
| Wise Glasses | Diamond / Pearl | Time-of-day NPC gift | Celestic Town and Celestic Ruins: Talk to the Celestic Shop gift NPC during night, 20:00-03:59. This uses its own one-time flag. | NPC / system | Night 20:00-03:59; revisit for the other two glasses. | editorial script/system note |
Puzzles, Warps, And Switches
- The town's central depression has hidden items on its rim and inside the crater. Scan in a full circle with the Dowsing Machine before entering the ruins.
Completion Checklist
- Complete the currently reachable part of this route plan: Tour the town and shop; collect hidden items around the central crater; defeat the Grunt blocking the ruins; enter and examine the mural; give the Old Charm to Cynthia's grandmother; receive HM03; speak to residents before leaving.
- Review all 9 encounter rows across the per-area tables, including game markers, method band, time-of-day rates, levels, and each conditional requirement; mark conditional rows for their stated revisit.
Route 211 and Mt. Coronet Side Chambers
Clear both halves of Route 211 and inspect Mt. Coronet passages opened by Rock Smash while reserving Strength-gated progress.
Source maps
Route 211 West and Route 211 East.
Route Plan
Sweep Route 211 West from Eterna; revisit from Celestic for Route 211 East; collect all reachable items; enter both cave mouths; use Rock Smash for side pockets; mark Strength boulders for the Mine Badge journey.
- Route 211 is geographically split by Mt. Coronet; each side has different trainers and encounter ownership.
- The eastern cave route eventually leads toward Route 216, but Strength field use is still locked.
Routes and encounters on this page are compiled from 2 pret map headers.
Route 211 East
| Pokémon | Games | Levels | Rate | Requirement / notes | ||
|---|---|---|---|---|---|---|
| Morning | Day | Night | ||||
| Grass / cave floor | ||||||
| Meditite | DP | 27-28 | 35% | Rate counts base slots temporarily replaced by hard-shaking Poké Radar patches and GBA dual-slot insertions. | ||
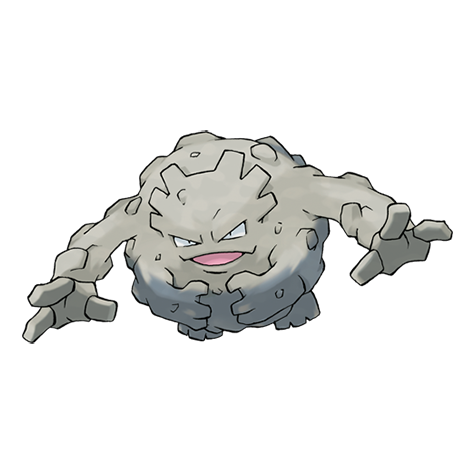 Graveler Graveler | DP | 27 | 20% | — | ||
| Machoke | DP | 27-28 | 20% | 20% | 10% | Rate counts base slots temporarily replaced by hard-shaking Poké Radar patches. |
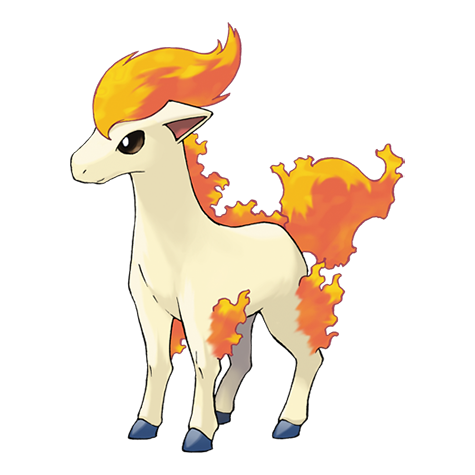 Ponyta Ponyta | DP | 26-28 | 15% | 15% | 5% | Rate counts base slots temporarily replaced by hard-shaking Poké Radar patches and GBA dual-slot insertions. |
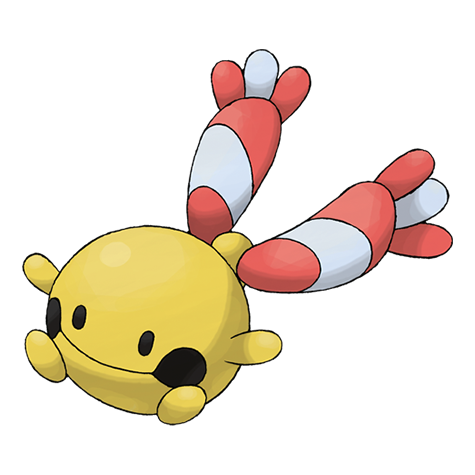 Chingling Chingling | DP | 27-28 | 10% | — | ||
| Noctowl | DP | 28 | — | — | 10% | — |
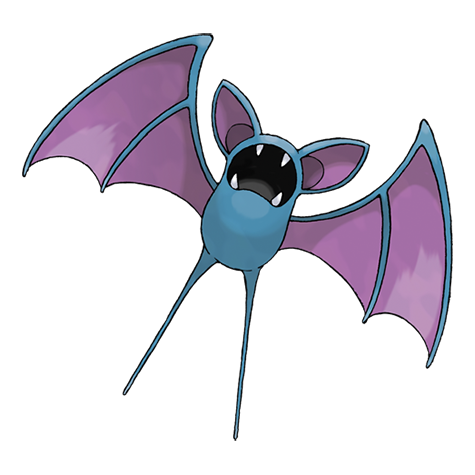 Zubat Zubat | DP | 26 | — | — | 10% | — |
| Poké Radar (post-National Dex) | ||||||
 Swablu Swablu | DP | 27-28 | 22% | National Dex and Poké Radar required; replacement slot applies only in a hard/vigorous-shaking Radar patch. | ||
| Dual-slot GBA insertion (post-National Dex) | ||||||
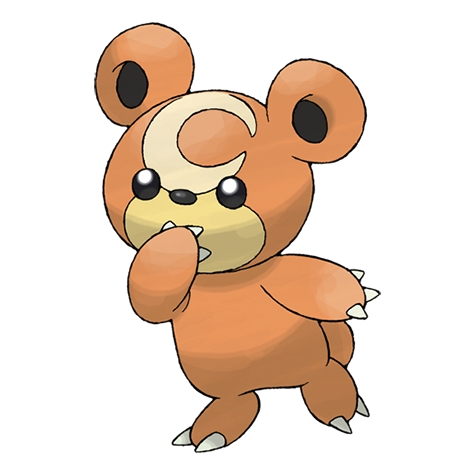 Teddiursa Teddiursa | DP | 27-28 | 8% | National Dex plus Pokémon Emerald inserted in the Nintendo DS GBA slot; replaces grass slots 8-9. | ||
Route 211 West
| Pokémon | Games | Levels | Rate | Requirement / notes | ||
|---|---|---|---|---|---|---|
| Morning | Day | Night | ||||
| Grass / cave floor | ||||||
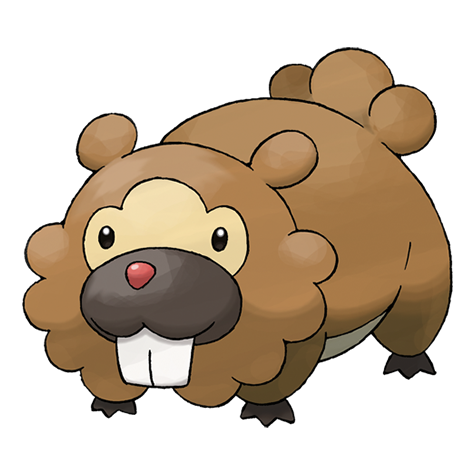 Bidoof Bidoof | DP | 12-14 | 35% | 35% | 25% | Rate counts base slots temporarily replaced by hard-shaking Poké Radar patches and GBA dual-slot insertions. |
| Meditite | DP | 12-14 | 35% | 35% | 25% | Rate counts base slots temporarily replaced by hard-shaking Poké Radar patches and GBA dual-slot insertions. |
| Chingling | DP | 13 | 10% | — | ||
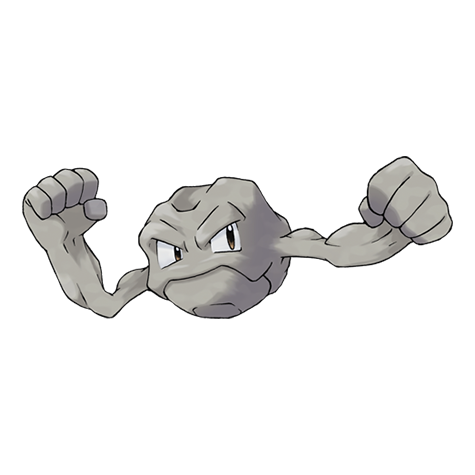 Geodude Geodude | DP | 13 | 10% | Rate counts base slots temporarily replaced by hard-shaking Poké Radar patches. | ||
| Ponyta | DP | 13 | 10% | Rate counts base slots temporarily replaced by hard-shaking Poké Radar patches. | ||
| Hoothoot | DP | 14 | — | — | 10% | — |
| Zubat | DP | 12 | — | — | 10% | — |
| Poké Radar (post-National Dex) | ||||||
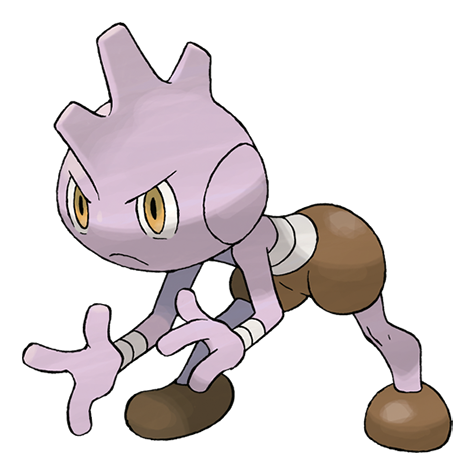 Tyrogue Tyrogue | DP | 12-14 | 22% | National Dex and Poké Radar required; replacement slot applies only in a hard/vigorous-shaking Radar patch. | ||
| Dual-slot GBA insertion (post-National Dex) | ||||||
| Teddiursa | DP | 12 or 14 | 8% | National Dex plus Pokémon Emerald inserted in the Nintendo DS GBA slot; replaces grass slots 8-9. | ||
Trainers
| Trainer | Route order / placement | Full team | Reward | Access requirement | Optional / rematch note |
|---|---|---|---|---|---|
| Bird Keeper AlexandraBird Keeper • source ID 76 | Route 211 West • field order 1 at (367, 523) | ₽608 | Reach the trainer's named field subarea; line of sight determines whether the battle is avoidable. | Field order 1, tile (367, 523); sightline/path determines whether it can be avoided. No higher-level same-trainer rematch variant is defined in trdata. | |
 Hiker LouisHiker • source ID 326 Hiker LouisHiker • source ID 326 | Route 211 West • field order 2 at (377, 529) | ₽480 | Reach the trainer's named field subarea; line of sight determines whether the battle is avoidable. | Field order 2, tile (377, 529); sightline/path determines whether it can be avoided. No higher-level same-trainer rematch variant is defined in trdata. | |
| Ninja Boy ZachNinja Boy • source ID 78 | Route 211 West • field order 3 at (361, 525) | ₽120 | Reach the trainer's named field subarea; line of sight determines whether the battle is avoidable. | Field order 3, tile (361, 525); sightline/path determines whether it can be avoided. Higher-level source variants used by the rematch system: ID 746: Lv. 26/Lv. 29/Lv. 29; ID 747: Lv. 36/Lv. 37/Lv. 38; ID 748: Lv. 51/Lv. 52/Lv. 53. | |
| Bird Keeper KatherineBird Keeper • source ID 81 | Route 211 East • field order 1 at (432, 520) | ₽992 | Reach the trainer's named field subarea; line of sight determines whether the battle is avoidable. | Field order 1, tile (432, 520); sightline/path determines whether it can be avoided. No higher-level same-trainer rematch variant is defined in trdata. | |
| Ninja Boy NickNinja Boy • source ID 80 | Route 211 East • field order 2 at (425, 520) | ₽216 | Reach the trainer's named field subarea; line of sight determines whether the battle is avoidable. | Field order 2, tile (425, 520); sightline/path determines whether it can be avoided. No higher-level same-trainer rematch variant is defined in trdata. | |
| Black Belt SeanBlack Belt • source ID 79 | Route 211 East • field order 3 at (428, 540) | ₽696 | Reach the trainer's named field subarea; line of sight determines whether the battle is avoidable. | Field order 3, tile (428, 540); sightline/path determines whether it can be avoided. No higher-level same-trainer rematch variant is defined in trdata. | |
 Ruin Maniac HarryRuin Maniac • source ID 442 Ruin Maniac HarryRuin Maniac • source ID 442 | Route 211 East • field order 4 at (429, 525) | ₽1,440 | Reach the trainer's named field subarea; line of sight determines whether the battle is avoidable. | Field order 4, tile (429, 525); sightline/path determines whether it can be avoided. Higher-level source variants used by the rematch system: ID 695: Lv. 41; ID 696: Lv. 56. |
Items
| Item | Version | Type | Area / exact direction | Coordinate / script | Requirement | Source |
|---|---|---|---|---|---|---|
| TM12 | Diamond / Pearl | Visible item ball | Route 211 West: Pick up the item ball in the southeastern part of Route 211 West, 12 tiles west and 3 tiles south of the Mount Coronet North 1F Room 1 doorway or transition. | (368, 535) | Reach this subarea; check the route and puzzle notes for HM, Bicycle, time, or story gates. | event bank 350, script 7042 |
| TM29 | Diamond / Pearl | Visible item ball | Route 211 East: Pick up the item ball in the northwestern part of Route 211 East, 5 tiles east and 13 tiles north of the Mount Coronet North 1F Room 1 doorway or transition. | (424, 514) | Reach this subarea; check the route and puzzle notes for HM, Bicycle, time, or story gates. | event bank 351, script 7159 |
| Pecha Berry | Diamond / Pearl | Berry tree | Route 211 East: Harvest berry patch 46 in the eastern part of Route 211 East, 16 tiles east and 3 tiles north of the Mount Coronet North 1F Room 1 doorway or transition. The plot can be replanted after the initial harvest. | (435, 524) | Reach the outdoor patch on the named route or town; harvest its initial berries before planting a replacement. | berry table ov52_021D76F8, patch 46 |
| Aspear Berry | Diamond / Pearl | Berry tree | Route 211 East: Harvest berry patch 47 in the eastern part of Route 211 East, 17 tiles east and 3 tiles north of the Mount Coronet North 1F Room 1 doorway or transition. The plot can be replanted after the initial harvest. | (436, 524) | Reach the outdoor patch on the named route or town; harvest its initial berries before planting a replacement. | berry table ov52_021D76F8, patch 47 |
| Iapapa Berry | Diamond / Pearl | Berry tree | Route 211 East: Harvest berry patch 48 in the eastern part of Route 211 East, 18 tiles east and 3 tiles north of the Mount Coronet North 1F Room 1 doorway or transition. The plot can be replanted after the initial harvest. | (437, 524) | Reach the outdoor patch on the named route or town; harvest its initial berries before planting a replacement. | berry table ov52_021D76F8, patch 48 |
| Grepa Berry | Diamond / Pearl | Berry tree | Route 211 East: Harvest berry patch 49 in the eastern part of Route 211 East, 19 tiles east and 3 tiles north of the Mount Coronet North 1F Room 1 doorway or transition. The plot can be replanted after the initial harvest. | (438, 524) | Reach the outdoor patch on the named route or town; harvest its initial berries before planting a replacement. | berry table ov52_021D76F8, patch 49 |
| TM77 | Diamond / Pearl | NPC / scripted gift | Route 211 East: Speak to the item-giving NPC in the central part of Route 211 East, 11 tiles east and 2 tiles south of the Mount Coronet North 1F Room 1 doorway or transition. | NPC (430, 529); script 1 | Reach Route 211 East and complete the item-giving NPC's one-time dialogue. | script bank 417 |
Hidden Items
| Hidden item | Area / plain-English placement | QA coordinate | Requirement | Source |
|---|---|---|---|---|
| Poké Ball | Route 211 West: Use the Dowsing Machine in the northwestern part of Route 211 West, 25 tiles west and 11 tiles north of the Mount Coronet North 1F Room 1 doorway or transition and inspect that exact ground tile. | (355, 521) | Dowsing Machine Pokétch app. Reach this subarea; check the route and puzzle notes for HM, Bicycle, time, or story gates. | event bank 350, script 8003 |
| PP Up | Route 211 West: Use the Dowsing Machine in the northwestern part of Route 211 West, 33 tiles west and 15 tiles north of the Mount Coronet North 1F Room 1 doorway or transition and inspect that exact ground tile. | (347, 517) | Dowsing Machine Pokétch app. Reach this subarea; check the route and puzzle notes for HM, Bicycle, time, or story gates. | event bank 350, script 8228 |
| Zinc | Route 211 East: Use the Dowsing Machine in the northern part of Route 211 East, 12 tiles east and 13 tiles north of the Mount Coronet North 1F Room 1 doorway or transition and inspect that exact ground tile. | (431, 514) | Dowsing Machine Pokétch app. Reach this subarea; check the route and puzzle notes for HM, Bicycle, time, or story gates. | event bank 351, script 8060 |
Puzzles, Warps, And Switches
- Do not force a through-route before Byron. Explore each entrance until the first Strength boulder, then turn back and record the remaining obstacle.
Completion Checklist
- Complete the currently reachable part of this route plan: Sweep Route 211 West from Eterna; revisit from Celestic for Route 211 East; collect all reachable items; enter both cave mouths; use Rock Smash for side pockets; mark Strength boulders for the Mine Badge journey.
- Review all 18 encounter rows across the per-area tables, including game markers, method band, time-of-day rates, levels, and each conditional requirement; mark conditional rows for their stated revisit.
Hearthome Gym and Fantina
Answer arithmetic doors, optionally fight every wrong-answer trainer, and defeat Fantina's Ghost team for Surf access.
Source maps
Hearthome Gym First Question Room, Hearthome Gym First Question Trainer Room 1, Hearthome Gym First Question Trainer Room 2, Hearthome Gym Second Question Room, Hearthome Gym Second Question Trainer Room 1, Hearthome Gym Third Question Room, Hearthome Gym Second Question Trainer Room 2, Hearthome Gym Fourth Question Room, Hearthome Gym Third Question Trainer Room 1, Hearthome Gym Third Question Trainer Room 2, Hearthome Gym Fourth Question Trainer Room 1, Hearthome Gym Fourth Question Trainer Room 2, and Hearthome Gym Leader Room.
Route Plan
Bring Dark or Ghost coverage and status healing; deliberately take wrong doors first to battle every trainer; return to each question room; choose the correct door to advance; save before Fantina; keep a healthy answer for Mismagius.
- Normal- and Fighting-type attacks fail against Fantina's Ghosts unless an ability or special effect changes immunities.
- Mismagius is fast and has broad special coverage; a Dark type is useful, but do not assume it is immune to every move.
Routes and encounters on this page are compiled from 13 pret map headers.
Trainers
| Trainer | Route order / placement | Full team | Reward | Access requirement | Optional / rematch note |
|---|---|---|---|---|---|
 Youngster DonnyYoungster • source ID 357 Youngster DonnyYoungster • source ID 357 | Hearthome Gym First Question Trainer Room 1 • field order 1 at (7, 6) | ₽464 | Reach the trainer's named field subarea; line of sight determines whether the battle is avoidable. | Field order 1, tile (7, 6); sightline/path determines whether it can be avoided. No higher-level same-trainer rematch variant is defined in trdata. | |
 Lass MollyLass • source ID 325 Lass MollyLass • source ID 325 | Hearthome Gym First Question Trainer Room 2 • field order 1 at (7, 6) |
| ₽480 | Reach the trainer's named field subarea; line of sight determines whether the battle is avoidable. | Field order 1, tile (7, 6); sightline/path determines whether it can be avoided. No higher-level same-trainer rematch variant is defined in trdata. |
 Camper DrewCamper • source ID 266 Camper DrewCamper • source ID 266 | Hearthome Gym Second Question Trainer Room 1 • field order 1 at (7, 6) | ₽432 | Reach the trainer's named field subarea; line of sight determines whether the battle is avoidable. | Field order 1, tile (7, 6); sightline/path determines whether it can be avoided. No higher-level same-trainer rematch variant is defined in trdata. | |
 Picnicker CheyennePicnicker • source ID 330 Picnicker CheyennePicnicker • source ID 330 | Hearthome Gym Second Question Trainer Room 2 • field order 1 at (7, 6) |
| ₽448 | Reach the trainer's named field subarea; line of sight determines whether the battle is avoidable. | Field order 1, tile (7, 6); sightline/path determines whether it can be avoided. No higher-level same-trainer rematch variant is defined in trdata. |
 School Kid Male ChanceSchool Kid Male • source ID 340 School Kid Male ChanceSchool Kid Male • source ID 340 | Hearthome Gym Third Question Trainer Room 1 • field order 1 at (7, 6) |
| ₽600 | Reach the trainer's named field subarea; line of sight determines whether the battle is avoidable. | Field order 1, tile (7, 6); sightline/path determines whether it can be avoided. No higher-level same-trainer rematch variant is defined in trdata. |
 School Kid Female MackenzieSchool Kid Female • source ID 343 School Kid Female MackenzieSchool Kid Female • source ID 343 | Hearthome Gym Third Question Trainer Room 2 • field order 1 at (7, 6) | ₽560 | Reach the trainer's named field subarea; line of sight determines whether the battle is avoidable. | Field order 1, tile (7, 6); sightline/path determines whether it can be avoided. No higher-level same-trainer rematch variant is defined in trdata. | |
| Ace Trainer Male AllenAce Trainer Male • source ID 280 | Hearthome Gym Fourth Question Trainer Room 1 • field order 1 at (7, 6) | ₽1,800 | Reach the trainer's named field subarea; line of sight determines whether the battle is avoidable. | Field order 1, tile (7, 6); sightline/path determines whether it can be avoided. No higher-level same-trainer rematch variant is defined in trdata. | |
| Ace Trainer Female CatherineAce Trainer Female • source ID 284 | Hearthome Gym Fourth Question Trainer Room 2 • field order 1 at (7, 6) |
| ₽1,800 | Reach the trainer's named field subarea; line of sight determines whether the battle is avoidable. | Field order 1, tile (7, 6); sightline/path determines whether it can be avoided. No higher-level same-trainer rematch variant is defined in trdata. |
| Leader FantinaLeader Fantina • source ID 318 | Hearthome Gym Leader Room • scripted | ₽4,320 | Scripted story trigger; complete the local objective described in the route plan. | Major or story battle; not a VS Seeker rematch row. |


Items
| Item | Version | Type | Area / exact direction | Coordinate / script | Requirement | Source |
|---|---|---|---|---|---|---|
| TM65 | Diamond / Pearl | NPC / scripted gift | Hearthome Gym Leader Room: Receive this TM from the Gym Leader immediately after the badge victory. | script 2 | Defeat the Gym Leader; this is part of the one-time badge reward. | script bank 96 |
Puzzles, Warps, And Switches
- Each floor displays a simple arithmetic question and several numbered doors. Wrong doors lead to optional trainers; correct doors lead upward. Clear wrong rooms before the correct door for full completion.
Completion Checklist
- Complete the currently reachable part of this route plan: Bring Dark or Ghost coverage and status healing; deliberately take wrong doors first to battle every trainer; return to each question room; choose the correct door to advance; save before Fantina; keep a healthy answer for Mismagius.
Surf Cleanup, Fuego Ironworks, and Feebas
Use newly enabled Surf for regional pickups, cross the river to Fuego Ironworks, solve floor spinners, and begin the daily Feebas tile hunt.
Source maps
Fuego Ironworks Exterior, Fuego Ironworks Interior, Mount Coronet South 2F, Mount Coronet South 3F, and Mount Coronet B1F.
Route Plan
Teach Surf; revisit Routes 204 and 205 plus Ravaged Path; Surf west from Route 205 to Fuego Ironworks; clear exterior and interior; ride each arrow tile to collect all items; enter Mt. Coronet B1F; fish candidate tiles for Feebas; leave Strength and Rock Climb branches marked.
- Feebas appears only on four water tiles selected for the day in Mt. Coronet B1F. The tiles change when the daily value changes, so finish a systematic grid search in one day when possible.
- Each correct Feebas tile yields Feebas on exactly 50% of fishing encounters; fish several times per tile before rejecting it.
Routes and encounters on this page are compiled from 5 pret map headers.
Fuego Ironworks Exterior
| Pokémon | Games | Levels | Rate | Requirement / notes | ||
|---|---|---|---|---|---|---|
| Morning | Day | Night | ||||
| Grass / cave floor | ||||||
 Floatzel Floatzel | DP | 29-30 | 25% | Rate counts base slots temporarily replaced by the daily swarm and hard-shaking Poké Radar patches. | ||
 Shellos Shellos | DP | 28 | 20% | Rate counts base slots temporarily replaced by the daily swarm. | ||
 Gastrodon Gastrodon | DP | 29-30 | 15% | Rate counts base slots temporarily replaced by hard-shaking Poké Radar patches. | ||
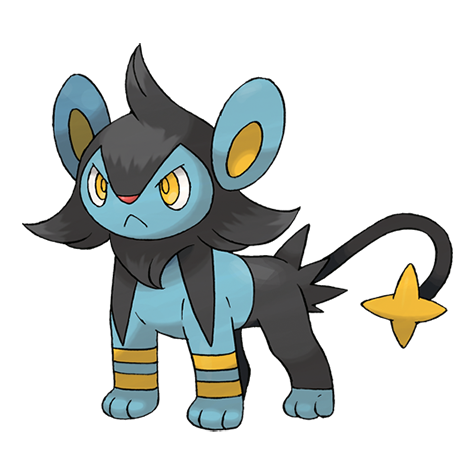 Luxio Luxio | DP | 29 | 10% | Rate counts base slots temporarily replaced by hard-shaking Poké Radar patches. | ||
 Pachirisu Pachirisu | DP | 29 | 10% | — | ||
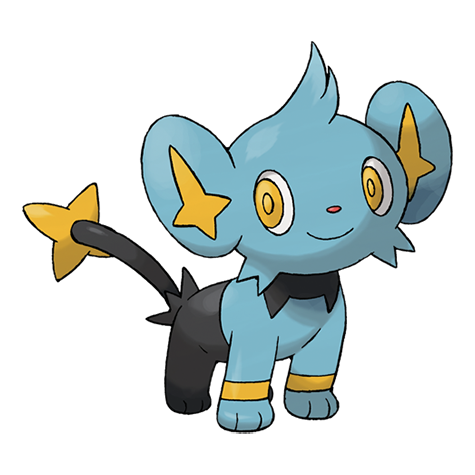 Shinx Shinx | DP | 28 | 10% | — | ||
 Wingull Wingull | DP | 29 | 10% | — | ||
| Swarm (post-National Dex daily announcement) | ||||||
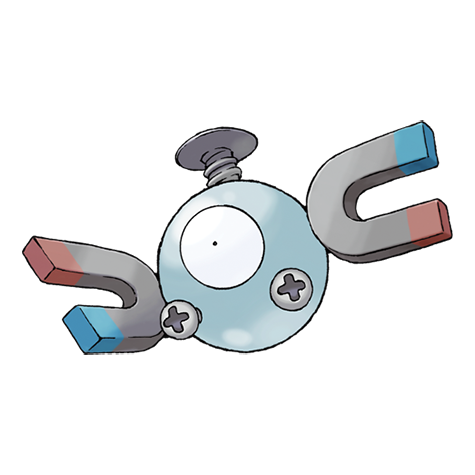 Magnemite Magnemite | DP | 28-29 | 40% | Post-National Dex daily swarm; replaces grass slots 0-1. | ||
| Poké Radar (post-National Dex) | ||||||
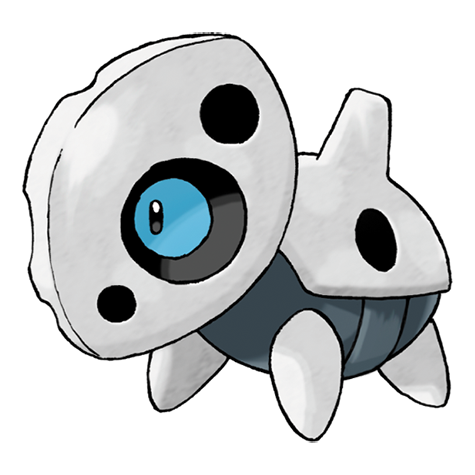 Aron Aron | DP | 29-30 | 22% | National Dex and Poké Radar required; replacement slot applies only in a hard/vigorous-shaking Radar patch. | ||
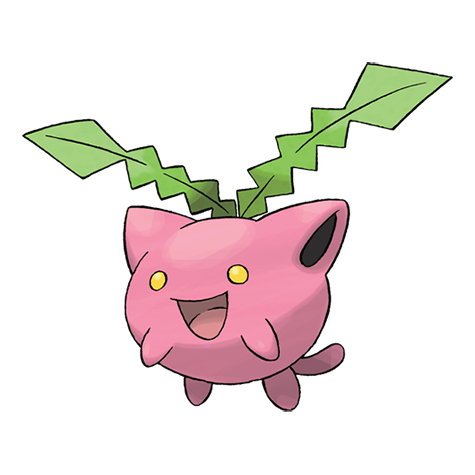 Hoppip Hoppip | DP | 29 | 20% | National Dex and Poké Radar required; replacement slot applies only in a hard/vigorous-shaking Radar patch. | ||
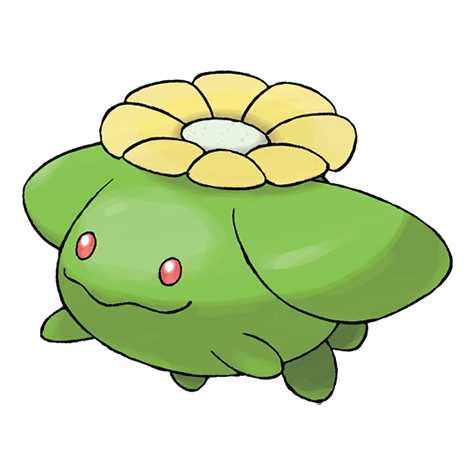 Skiploom Skiploom | DP | 30 | 2% | National Dex and Poké Radar required; replacement slot applies only in a hard/vigorous-shaking Radar patch. | ||
| Surfing | ||||||
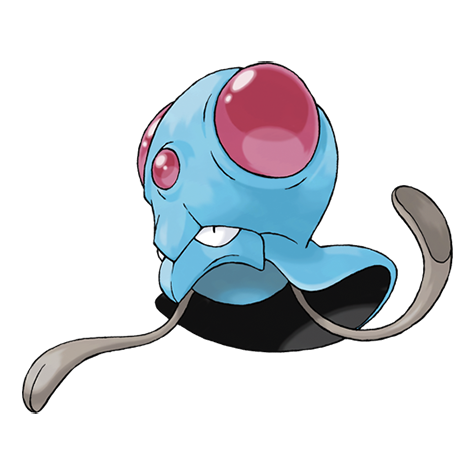 Tentacool Tentacool | DP | 20-30 | 60% | — | ||
| Wingull | DP | 20-30 | 30% | — | ||
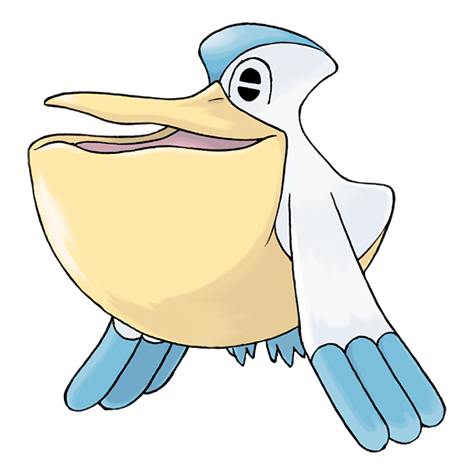 Pelipper Pelipper | DP | 20-40 | 5% | — | ||
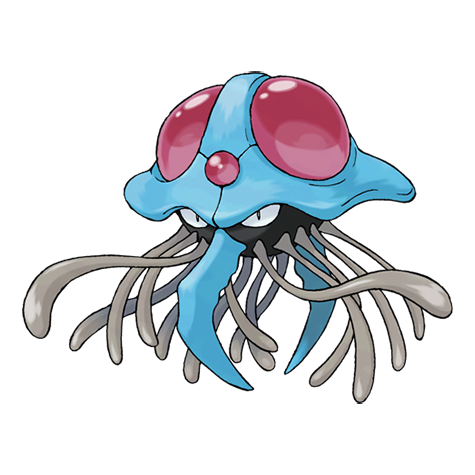 Tentacruel Tentacruel | DP | 20-40 | 5% | — | ||
| Fishing — Old Rod | ||||||
| Magikarp | DP | 3-10 | 100% | — | ||
| Fishing — Good Rod | ||||||
| Magikarp | DP | 10-25 | 55% | — | ||
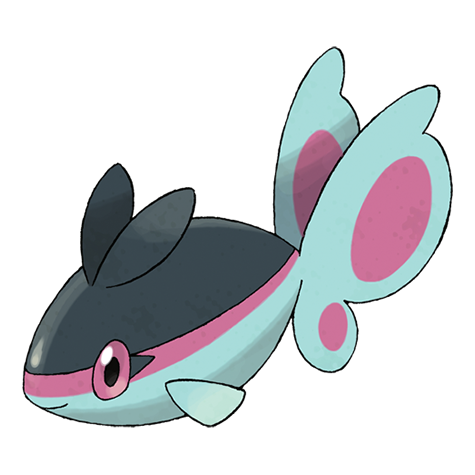 Finneon Finneon | DP | 10-25 | 45% | — | ||
| Fishing — Super Rod | ||||||
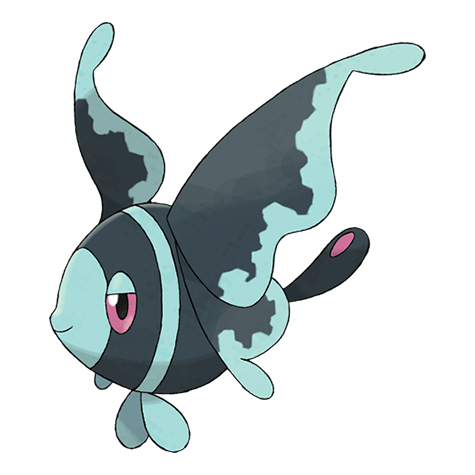 Lumineon Lumineon | DP | 20-50 | 45% | — | ||
| Gyarados | DP | 30-40 | 40% | — | ||
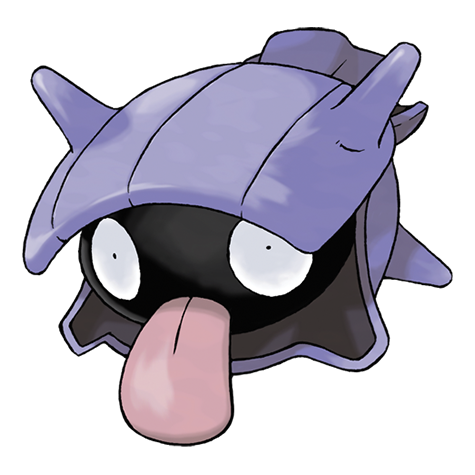 Shellder Shellder | DP | 20-40 | 15% | — | ||
Mount Coronet B1F
| Pokémon | Games | Levels | Rate | Requirement / notes | ||
|---|---|---|---|---|---|---|
| Morning | Day | Night | ||||
| Grass / cave floor | ||||||
| Meditite | DP | 31-32 | 25% | — | ||
 Golbat Golbat | DP | 31-32 | 20% | — | ||
| Graveler | DP | 31 | 20% | — | ||
 Clefairy Clefairy | DP | 30-32 | 15% | — | ||
| Chingling | DP | 30 | 10% | — | ||
| Machoke | DP | 31 | 10% | — | ||
| Surfing | ||||||
| Zubat | DP | 20-40 | 90% | — | ||
| Golbat | DP | 20-40 | 10% | — | ||
| Fishing — Old Rod | ||||||
| Magikarp | DP | 3-10 | 100% | — | ||
| Fishing — Good Rod | ||||||
| Magikarp | DP | 10-25 | 55% | — | ||
| Barboach | DP | 10-25 | 45% | — | ||
| Fishing — Super Rod | ||||||
| Gyarados | DP | 30-55 | 55% | — | ||
| Whiscash | DP | 20-50 | 45% | — | ||
Mount Coronet South 2F
| Pokémon | Games | Levels | Rate | Requirement / notes | ||
|---|---|---|---|---|---|---|
| Morning | Day | Night | ||||
| Grass / cave floor | ||||||
 Bronzong Bronzong | DP | 38 | 20% | — | ||
| Graveler | DP | 36 | 20% | — | ||
| Clefairy | DP | 36-38 | 15% | Rate counts base slots temporarily replaced by GBA dual-slot insertions. | ||
| Chingling | DP | 37-38 | 10% | — | ||
| Golbat | DP | 37 | 10% | — | ||
| Machoke | DP | 37 | 10% | — | ||
 Medicham Medicham | DP | 37 | 10% | — | ||
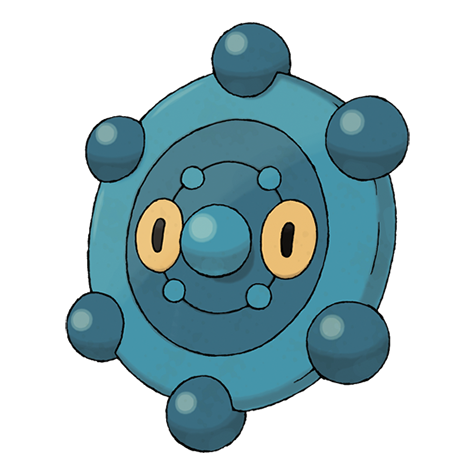 Bronzor Bronzor | DP | 36 | 5% | Rate counts base slots temporarily replaced by GBA dual-slot insertions. | ||
| Dual-slot GBA insertion (post-National Dex) | ||||||
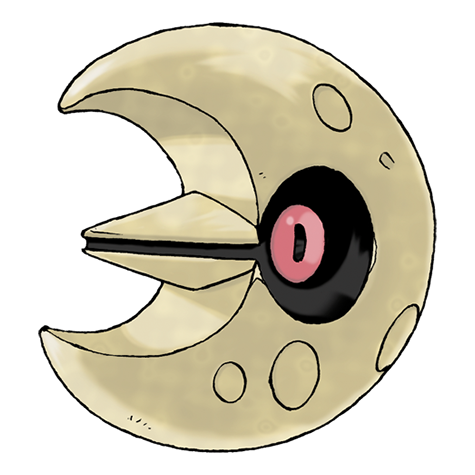 Lunatone Lunatone | DP | 36-37 | 8% | National Dex plus Pokémon Sapphire inserted in the Nintendo DS GBA slot; replaces grass slots 8-9. | ||
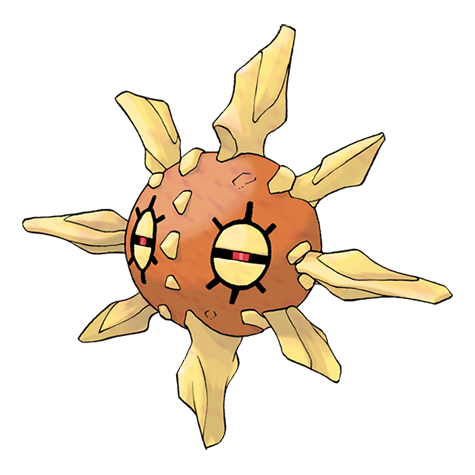 Solrock Solrock | DP | 36-37 | 8% | National Dex plus Pokémon Ruby inserted in the Nintendo DS GBA slot; replaces grass slots 8-9. | ||
Mount Coronet South 3F
| Pokémon | Games | Levels | Rate | Requirement / notes | ||
|---|---|---|---|---|---|---|
| Morning | Day | Night | ||||
| Grass / cave floor | ||||||
| Bronzong | DP | 38 | 20% | — | ||
| Graveler | DP | 36 | 20% | — | ||
| Clefairy | DP | 36-38 | 15% | Rate counts base slots temporarily replaced by GBA dual-slot insertions. | ||
| Chingling | DP | 37-38 | 10% | — | ||
| Golbat | DP | 37 | 10% | — | ||
| Machoke | DP | 37 | 10% | — | ||
| Medicham | DP | 37 | 10% | — | ||
| Bronzor | DP | 36 | 5% | Rate counts base slots temporarily replaced by GBA dual-slot insertions. | ||
| Dual-slot GBA insertion (post-National Dex) | ||||||
| Lunatone | DP | 36-37 | 8% | National Dex plus Pokémon Sapphire inserted in the Nintendo DS GBA slot; replaces grass slots 8-9. | ||
| Solrock | DP | 36-37 | 8% | National Dex plus Pokémon Ruby inserted in the Nintendo DS GBA slot; replaces grass slots 8-9. | ||
Surf Cleanup, Fuego Ironworks, and Feebas
| Pokémon | Games | Levels | Rate | Requirement / notes | ||
|---|---|---|---|---|---|---|
| Morning | Day | Night | ||||
| Fishing | ||||||
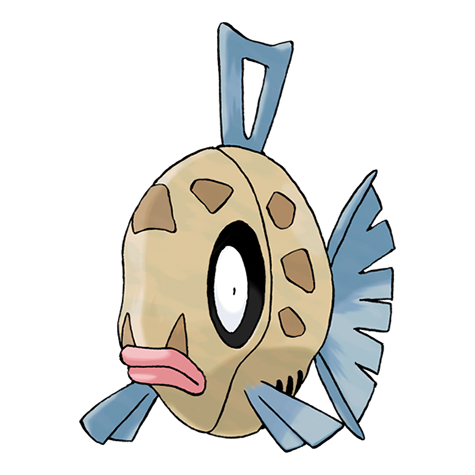 Feebas Feebas | DP | 10-20 | 50% on four daily tiles | Four randomly selected fishable tiles in Mt. Coronet B1F Old, Good, or Super Rod can trigger the Feebas override. Fish multiple times on every tile and complete the grid before the daily tile set changes. | ||
Trainers
| Trainer | Route order / placement | Full team | Reward | Access requirement | Optional / rematch note |
|---|---|---|---|---|---|
 Worker DillanWorker • source ID 844 Worker DillanWorker • source ID 844 | Fuego Ironworks Interior • field order 1 at (3, 7) | ₽1,240 | Reach the trainer's named field subarea; line of sight determines whether the battle is avoidable. | Field order 1, tile (3, 7); sightline/path determines whether it can be avoided. No higher-level same-trainer rematch variant is defined in trdata. | |
| Worker HoldenWorker • source ID 845 | Fuego Ironworks Interior • field order 2 at (26, 6) | ₽1,320 | Reach the trainer's named field subarea; line of sight determines whether the battle is avoidable. | Field order 2, tile (26, 6); sightline/path determines whether it can be avoided. No higher-level same-trainer rematch variant is defined in trdata. | |
| Worker ConradWorker • source ID 846 | Fuego Ironworks Interior • field order 3 at (35, 25) | ₽1,320 | Reach the trainer's named field subarea; line of sight determines whether the battle is avoidable. | Field order 3, tile (35, 25); sightline/path determines whether it can be avoided. No higher-level same-trainer rematch variant is defined in trdata. | |
 Galactic Female GruntGalactic Female • source ID 523 Galactic Female GruntGalactic Female • source ID 523 | Mount Coronet South 3F • field order 1 at (15, 15) | ₽1,600 | Phase-8 return after the Lake Acuity story; the Galactic ascent route requires Surf, Strength, and Rock Climb. | Field order 1, tile (15, 15); sightline/path determines whether it can be avoided. No higher-level same-trainer rematch variant is defined in trdata. | |
| Galactic GruntGalactic • source ID 515 | Mount Coronet South 3F • field order 2 at (2, 20) | ₽1,560 | Surf reaches this Mt. Coronet branch; later side pockets additionally require Strength or Rock Climb and must be revisited when the route notes say so. | Field order 2, tile (2, 20); sightline/path determines whether it can be avoided. No higher-level same-trainer rematch variant is defined in trdata. |
Items
| Item | Version | Type | Area / exact direction | Coordinate / script | Requirement | Source |
|---|---|---|---|---|---|---|
| TM35 | Diamond / Pearl | Visible item ball | Fuego Ironworks Interior: Pick up the item ball in the southern part of Fuego Ironworks Interior, 5 tiles west and 5 tiles north of the Fuego Ironworks Exterior doorway or transition. | (21, 21) | Reach this subarea; check the route and puzzle notes for HM, Bicycle, time, or story gates. | event bank 203, script 7132 |
| Burn Heal | Diamond / Pearl | Visible item ball | Fuego Ironworks Interior: Pick up the item ball in the northwestern part of Fuego Ironworks Interior, 15 tiles west and 19 tiles north of the Fuego Ironworks Exterior doorway or transition. | (11, 7) | Reach this subarea; check the route and puzzle notes for HM, Bicycle, time, or story gates. | event bank 203, script 7134 |
| Rock Incense | Diamond / Pearl | Visible item ball | Fuego Ironworks Interior: Pick up the item ball in the southeastern part of Fuego Ironworks Interior, 20 tiles east and 6 tiles north of the Fuego Ironworks Exterior doorway or transition. | (46, 20) | Reach this subarea; check the route and puzzle notes for HM, Bicycle, time, or story gates. | event bank 203, script 7133 |
| Fire Stone | Diamond / Pearl | Visible item ball | Fuego Ironworks Interior: Pick up the item ball in the northeastern part of Fuego Ironworks Interior, 25 tiles east and 20 tiles north of the Fuego Ironworks Exterior doorway or transition. | (51, 6) | Reach this subarea; check the route and puzzle notes for HM, Bicycle, time, or story gates. | event bank 203, script 7135 |
| Revive | Diamond / Pearl | Visible item ball | Mount Coronet South 2F: Pick up the item ball in the western part of Mount Coronet South 2F, 4 tiles west and 8 tiles south of the Mount Coronet South 2F doorway or transition. | (3, 31) | Surf reaches this Mt. Coronet branch; later side pockets additionally require Strength or Rock Climb and must be revisited when the route notes say so. | event bank 205, script 7187 |
| Max Potion | Diamond / Pearl | Visible item ball | Mount Coronet South 2F: Pick up the item ball in the eastern part of Mount Coronet South 2F, 4 tiles west and 11 tiles north of the Mount Coronet South 1F doorway or transition. | (23, 37) | Surf reaches this Mt. Coronet branch; later side pockets additionally require Strength or Rock Climb and must be revisited when the route notes say so. | event bank 205, script 7189 |
| TM80 | Diamond / Pearl | Visible item ball | Mount Coronet South 2F: Pick up the item ball in the southwestern part of Mount Coronet South 2F, 1 tile east and 4 tiles north of the Route 207 doorway or transition. | (3, 55) | Surf reaches this Mt. Coronet branch; later side pockets additionally require Strength or Rock Climb and must be revisited when the route notes say so. | event bank 205, script 7188 |
| Escape Rope | Diamond / Pearl | Visible item ball | Mount Coronet South 2F: Pick up the item ball in the southern part of Mount Coronet South 2F, 11 tiles east and 1 tile south of the Route 207 doorway or transition. | (13, 60) | Surf reaches this Mt. Coronet branch; later side pockets additionally require Strength or Rock Climb and must be revisited when the route notes say so. | event bank 205, script 7190 |
| Revive | Diamond / Pearl | Visible item ball | Mount Coronet B1F: Pick up the item ball in the northern part of Mount Coronet B1F, 9 tiles east and 8 tiles south of the Mount Coronet North 1F Room 2 doorway or transition. | (17, 11) | Surf reaches this Mt. Coronet branch; later side pockets additionally require Strength or Rock Climb and must be revisited when the route notes say so. | event bank 216, script 7168 |
| Soft Sand | Diamond / Pearl | Visible item ball | Mount Coronet B1F: Pick up the item ball in the northwestern part of Mount Coronet B1F, 2 tiles west and 15 tiles south of the Mount Coronet North 1F Room 2 doorway or transition. | (6, 18) | Surf reaches this Mt. Coronet branch; later side pockets additionally require Strength or Rock Climb and must be revisited when the route notes say so. | event bank 216, script 7163 |
| Light Clay | Diamond / Pearl | Visible item ball | Mount Coronet B1F: Pick up the item ball in the eastern part of Mount Coronet B1F, 14 tiles east and 24 tiles north of the Mount Coronet North 1F Room 1 doorway or transition. | (22, 36) | Surf reaches this Mt. Coronet branch; later side pockets additionally require Strength or Rock Climb and must be revisited when the route notes say so. | event bank 216, script 7164 |
| Max Elixir | Diamond / Pearl | Visible item ball | Mount Coronet B1F: Pick up the item ball in the northeastern part of Mount Coronet B1F, 18 tiles east and 14 tiles south of the Mount Coronet North 1F Room 2 doorway or transition. | (26, 17) | Surf reaches this Mt. Coronet branch; later side pockets additionally require Strength or Rock Climb and must be revisited when the route notes say so. | event bank 216, script 7167 |
| Full Restore | Diamond / Pearl | Visible item ball | Mount Coronet B1F: Pick up the item ball in the eastern part of Mount Coronet B1F, 21 tiles east and 28 tiles north of the Mount Coronet North 1F Room 1 doorway or transition. | (29, 32) | Surf reaches this Mt. Coronet branch; later side pockets additionally require Strength or Rock Climb and must be revisited when the route notes say so. | event bank 216, script 7166 |
| Stardust | Diamond / Pearl | Visible item ball | Mount Coronet B1F: Pick up the item ball in the southwestern part of Mount Coronet B1F, 6 tiles west of the Mount Coronet North 1F Room 1 doorway or transition. | (2, 60) | Surf reaches this Mt. Coronet branch; later side pockets additionally require Strength or Rock Climb and must be revisited when the route notes say so. | event bank 216, script 7165 |
| Sitrus Berry | Diamond / Pearl | Berry tree | Fuego Ironworks Exterior: Harvest berry patch 10 in the southwestern part of Fuego Ironworks Exterior, 7 tiles south of the Fuego Ironworks Interior doorway or transition. The plot can be replanted after the initial harvest. | (168, 594) | Reach the outdoor patch on the named route or town; harvest its initial berries before planting a replacement. | berry table ov52_021D76F8, patch 10 |
| 2× Wepear Berry | Diamond / Pearl | Berry tree | Fuego Ironworks Exterior: Harvest berry patch 11 in the southwestern part of Fuego Ironworks Exterior, 7 tiles south of the Fuego Ironworks Interior doorway or transition. The plot can be replanted after the initial harvest. | (169, 594) | Reach the outdoor patch on the named route or town; harvest its initial berries before planting a replacement. | berry table ov52_021D76F8, patch 11 |
| 2× Wepear Berry | Diamond / Pearl | Berry tree | Fuego Ironworks Exterior: Harvest berry patch 12 in the southwestern part of Fuego Ironworks Exterior, 7 tiles south of the Fuego Ironworks Interior doorway or transition. The plot can be replanted after the initial harvest. | (170, 594) | Reach the outdoor patch on the named route or town; harvest its initial berries before planting a replacement. | berry table ov52_021D76F8, patch 12 |
| Kelpsy Berry | Diamond / Pearl | Berry tree | Fuego Ironworks Exterior: Harvest berry patch 13 in the southwestern part of Fuego Ironworks Exterior, 1 tile east and 7 tiles south of the Fuego Ironworks Interior doorway or transition. The plot can be replanted after the initial harvest. | (171, 594) | Reach the outdoor patch on the named route or town; harvest its initial berries before planting a replacement. | berry table ov52_021D76F8, patch 13 |
| Fire Stone | Diamond / Pearl | NPC / scripted gift | Fuego Ironworks Interior: Speak to the item-giving NPC in the southern part of Fuego Ironworks Interior, 1 tile west and 7 tiles north of the Fuego Ironworks Exterior doorway or transition. | NPC (25, 19); script 2 | Reach Fuego Ironworks Interior and complete the item-giving NPC's one-time dialogue. | script bank 215 |
Hidden Items
| Hidden item | Area / plain-English placement | QA coordinate | Requirement | Source |
|---|---|---|---|---|
| Ultra Ball | Fuego Ironworks Exterior: Use the Dowsing Machine in the southeastern part of Fuego Ironworks Exterior, 17 tiles east and 7 tiles south of the Fuego Ironworks Interior doorway or transition and inspect that exact ground tile. | (187, 594) | Dowsing Machine Pokétch app. Reach this subarea; check the route and puzzle notes for HM, Bicycle, time, or story gates. | event bank 202, script 8156 |
| Max Potion | Fuego Ironworks Exterior: Use the Dowsing Machine in the northern part of Fuego Ironworks Exterior, 7 tiles east and 6 tiles north of the Fuego Ironworks Interior doorway or transition and inspect that exact ground tile. | (177, 581) | Dowsing Machine Pokétch app. Reach this subarea; check the route and puzzle notes for HM, Bicycle, time, or story gates. | event bank 202, script 8155 |
| Hyper Potion | Fuego Ironworks Interior: Use the Dowsing Machine in the eastern part of Fuego Ironworks Interior, 18 tiles east and 11 tiles north of the Fuego Ironworks Exterior doorway or transition and inspect that exact ground tile. | (44, 15) | Dowsing Machine Pokétch app. Reach this subarea; check the route and puzzle notes for HM, Bicycle, time, or story gates. | event bank 203, script 8047 |
| Full Heal | Fuego Ironworks Interior: Use the Dowsing Machine in the northern part of Fuego Ironworks Interior, 4 tiles west and 23 tiles north of the Fuego Ironworks Exterior doorway or transition and inspect that exact ground tile. | (22, 3) | Dowsing Machine Pokétch app. Reach this subarea; check the route and puzzle notes for HM, Bicycle, time, or story gates. | event bank 203, script 8046 |
| Max Revive | Mount Coronet South 2F: Use the Dowsing Machine in the northeastern part of Mount Coronet South 2F, 4 tiles east and 7 tiles south of the Mount Coronet South 3F doorway or transition and inspect that exact ground tile. | (25, 11) | Dowsing Machine Pokétch app. Surf reaches this Mt. Coronet branch; later side pockets additionally require Strength or Rock Climb and must be revisited when the route notes say so. | event bank 205, script 8082 |
| Ether | Mount Coronet South 2F: Use the Dowsing Machine in the central part of Mount Coronet South 2F, 9 tiles east and 12 tiles south of the Mount Coronet South 2F doorway or transition and inspect that exact ground tile. | (16, 35) | Dowsing Machine Pokétch app. Surf reaches this Mt. Coronet branch; later side pockets additionally require Strength or Rock Climb and must be revisited when the route notes say so. | event bank 205, script 8081 |
| Super Repel | Mount Coronet South 3F: Use the Dowsing Machine in the northwestern part of Mount Coronet South 3F, 1 tile west and 16 tiles north of the Mount Coronet South Mountainside doorway or transition and inspect that exact ground tile. | (2, 13) | Dowsing Machine Pokétch app. Surf reaches this Mt. Coronet branch; later side pockets additionally require Strength or Rock Climb and must be revisited when the route notes say so. | event bank 206, script 8083 |
| Ultra Ball | Mount Coronet B1F: Use the Dowsing Machine in the northwestern part of Mount Coronet B1F, 3 tiles east and 9 tiles south of the Mount Coronet North 1F Room 2 doorway or transition and inspect that exact ground tile. | (11, 12) | Dowsing Machine Pokétch app. Surf reaches this Mt. Coronet branch; later side pockets additionally require Strength or Rock Climb and must be revisited when the route notes say so. | event bank 216, script 8070 |
| Rare Candy | Mount Coronet B1F: Use the Dowsing Machine in the northwestern part of Mount Coronet B1F, 6 tiles west of the Mount Coronet North 1F Room 2 doorway or transition and inspect that exact ground tile. | (2, 3) | Dowsing Machine Pokétch app. Surf reaches this Mt. Coronet branch; later side pockets additionally require Strength or Rock Climb and must be revisited when the route notes say so. | event bank 216, script 8069 |
| PP Up | Mount Coronet B1F: Use the Dowsing Machine in the western part of Mount Coronet B1F, 1 tile west and 24 tiles south of the Mount Coronet North 1F Room 2 doorway or transition and inspect that exact ground tile. | (7, 27) | Dowsing Machine Pokétch app. Surf reaches this Mt. Coronet branch; later side pockets additionally require Strength or Rock Climb and must be revisited when the route notes say so. | event bank 216, script 8068 |
| Nugget | Mount Coronet B1F: Use the Dowsing Machine in the southwestern part of Mount Coronet B1F, 6 tiles west and 1 tile south of the Mount Coronet North 1F Room 1 doorway or transition and inspect that exact ground tile. | (2, 61) | Dowsing Machine Pokétch app. Surf reaches this Mt. Coronet branch; later side pockets additionally require Strength or Rock Climb and must be revisited when the route notes say so. | event bank 216, script 8067 |
Puzzles, Warps, And Switches
- Fuego Ironworks arrow tiles force movement until the next stop. Work backward from each visible item, identify the arrow that feeds its platform, and take side loops before the central furnace.
- For Feebas, search fishable tiles in a fixed row-by-row order and log completed rows. Old, Good, or Super Rod can find it on an active tile.
Completion Checklist
- Complete the currently reachable part of this route plan: Teach Surf; revisit Routes 204 and 205 plus Ravaged Path; Surf west from Route 205 to Fuego Ironworks; clear exterior and interior; ride each arrow tile to collect all items; enter Mt. Coronet B1F; fish candidate tiles for Feebas; leave Strength and Rock Climb branches marked.
- Review all 55 encounter rows across the per-area tables, including game markers, method band, time-of-day rates, levels, and each conditional requirement; mark conditional rows for their stated revisit.
Dex quick links