Phase 10 of 11


Pokemon Diamond and Pearl Phase 10: Post-Game Battle Zone and National Dex Walkthrough
Complete Sinnoh's seen Pokedex, unlock the National Dex and Battle Zone, master special encounter systems, and catch the non-event postgame legendaries. 13 detailed sections with Diamond/Pearl encounters, trainers, items, puzzles, boss teams, and checklists.
Phase Snapshot
Phase 10: Post-Game Battle Zone and National Dex
Complete Sinnoh's seen Pokedex, unlock the National Dex and Battle Zone, master special encounter systems, and catch the non-event postgame legendaries.
Data rows
Phase Sections
Major Battles And Partners
 Pokémon Trainer BarryPokémon Trainer Barry • source ID 837
Full team
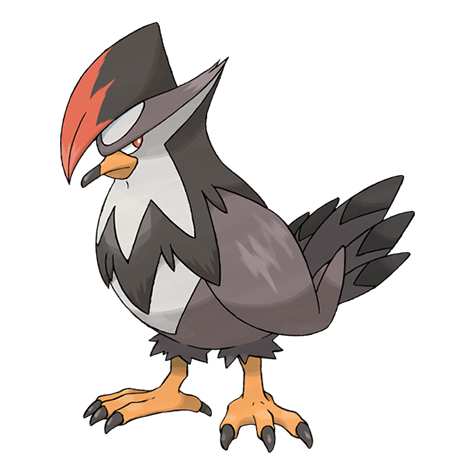 StaraptorClose Combat / Aerial Ace / Steel Wing / U Turn
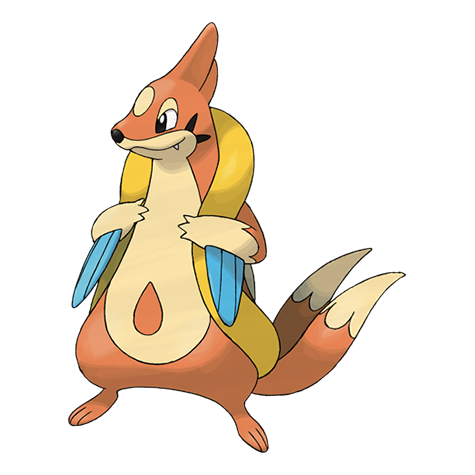 FloatzelAqua Jet / Crunch / Ice Fang / Brick Break
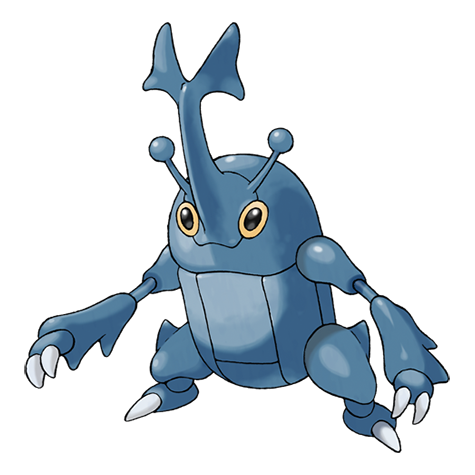 HeracrossMegahorn / Close Combat / Night Slash / Rock Slide
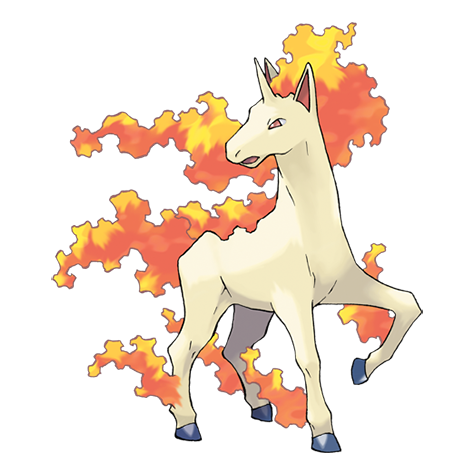 RapidashFire Blast / Sunny Day / Bounce / Will O Wisp
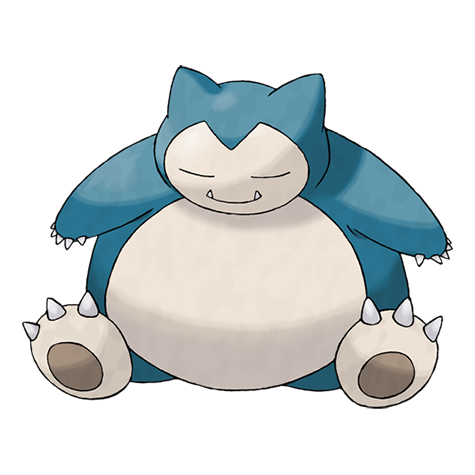 SnorlaxBody Slam / Crunch / Earthquake / Rest
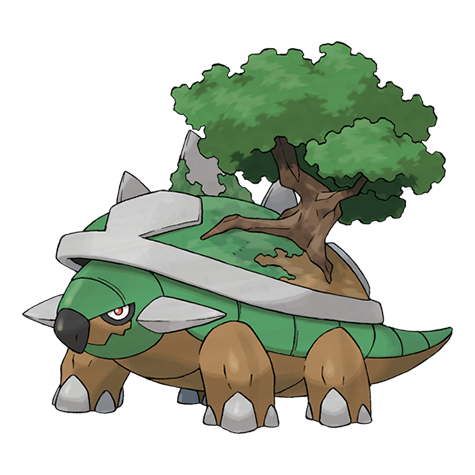 TorterraLeaf Storm / Earthquake / Crunch / Leech Seed
Practical counters
Pokémon Trainer BarryPokémon Trainer Barry • source ID 838Full team
- StaraptorClose Combat / Aerial Ace / Steel Wing / U Turn
- FloatzelAqua Jet / Crunch / Ice Fang / Brick Break
- HeracrossMegahorn / Close Combat / Night Slash / Rock Slide
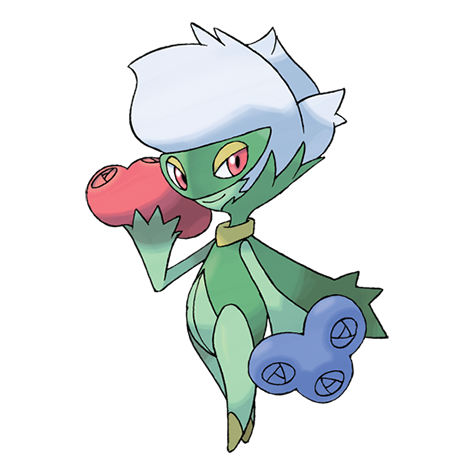 RoseradePoison Jab / Giga Drain / Shadow Ball / Grass Whistle
- SnorlaxBody Slam / Crunch / Earthquake / Rest
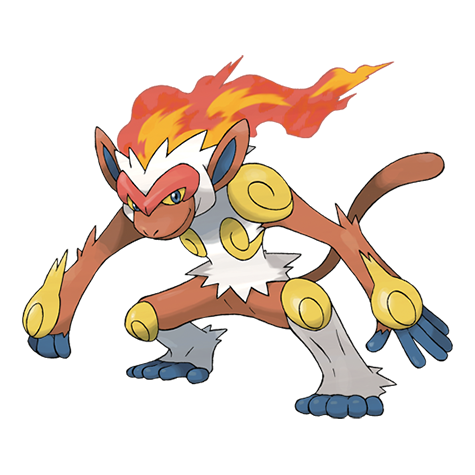 InfernapeFlamethrower / Focus Blast / Shadow Claw / Aerial Ace
Practical counters
Pokémon Trainer BarryPokémon Trainer Barry • source ID 839Full team
- StaraptorClose Combat / Aerial Ace / Steel Wing / U Turn
- RoseradePoison Jab / Giga Drain / Shadow Ball / Grass Whistle
- HeracrossMegahorn / Close Combat / Night Slash / Rock Slide
- RapidashFire Blast / Sunny Day / Bounce / Will O Wisp
- SnorlaxBody Slam / Crunch / Earthquake / Rest
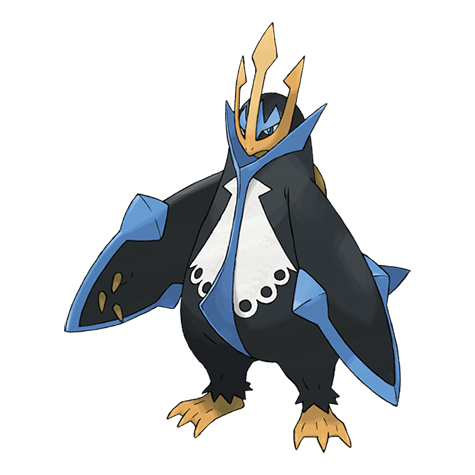 EmpoleonHydro Pump / Metal Claw / Drill Peck / Shadow Claw
Practical counters
Pokémon Trainer BarryPokémon Trainer Barry • source ID 840Full team
- StaraptorClose Combat / Aerial Ace / Steel Wing / U Turn
- FloatzelAqua Jet / Crunch / Ice Fang / Brick Break
- HeracrossMegahorn / Close Combat / Night Slash / Rock Slide
- RapidashFire Blast / Sunny Day / Megahorn / Will O Wisp
- SnorlaxGiga Impact / Crunch / Earthquake / Brick Break
- TorterraLeaf Storm / Earthquake / Crunch / Stone Edge
Practical counters
Pokémon Trainer BarryPokémon Trainer Barry • source ID 841Full team
- StaraptorClose Combat / Aerial Ace / Steel Wing / U Turn
- FloatzelAqua Jet / Crunch / Ice Fang / Brick Break
- HeracrossMegahorn / Close Combat / Night Slash / Rock Slide
- RoseradeSludge Bomb / Giga Drain / Shadow Ball / Grass Whistle
- SnorlaxGiga Impact / Crunch / Earthquake / Brick Break
- InfernapeFlare Blitz / Focus Blast / Shadow Claw / Aerial Ace
Practical counters
Pokémon Trainer BarryPokémon Trainer Barry • source ID 842Full team
- StaraptorClose Combat / Aerial Ace / Steel Wing / U Turn
- RoseradeSludge Bomb / Giga Drain / Shadow Ball / Grass Whistle
- HeracrossMegahorn / Close Combat / Night Slash / Rock Slide
- RapidashFire Blast / Sunny Day / Megahorn / Will O Wisp
- SnorlaxGiga Impact / Crunch / Earthquake / Brick Break
- EmpoleonHydro Pump / Metal Claw / Drill Peck / Ice Beam
Practical counters
 Pokémon Trainer BuckPokémon Trainer Buck • source ID 611
Partner team
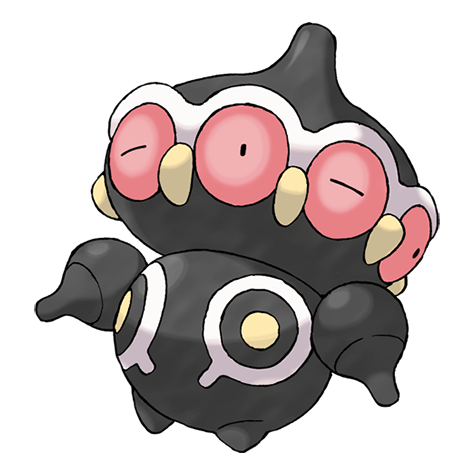 ClaydolPsychic / Ancient Power / Light Screen / Reflect
Partner role
This stat trainer travels beside the player, turns eligible fights into doubles, and heals the party after each battle during the escort.
How to use the partner
Focus one opposing Pokémon to reduce incoming actions. In wild doubles, leave only the intended catch on the field before throwing a Ball.
 Pokémon Trainer MarleyPokémon Trainer Marley • source ID 610
Partner team
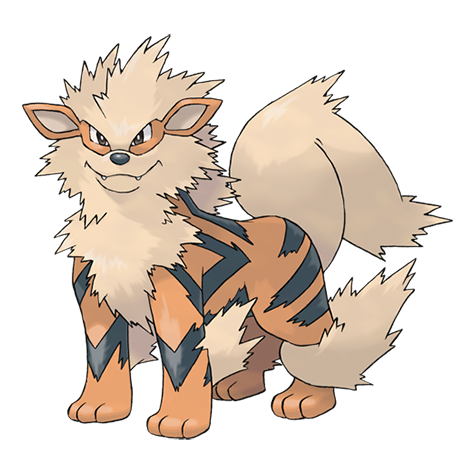 ArcanineExtreme Speed / Fire Fang / Helping Hand / Agility
Partner role
This stat trainer travels beside the player, turns eligible fights into doubles, and heals the party after each battle during the escort.
How to use the partner
Focus one opposing Pokémon to reduce incoming actions. In wild doubles, leave only the intended catch on the field before throwing a Ball.
 Tower Tycoon Palmer — Singles battle 21Battle Tower trainer 305 • sets 469 / 476 / 481
All three are Lv. 50 with 31 IVs. The facility samples the roster without replacement, so the lead and order are not fixed.
Full Lv. 50 roster
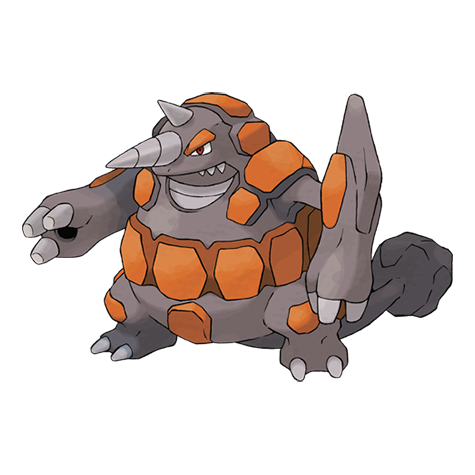 RhyperiorExpert Belt • Lightning Rod or Solid Rock (personality-dependent slot) • Quiet nature • EVs 255 Attack / 255 Special Attack • IVs 31 in every stat • Rock Wrecker / Ice Beam / Thunderbolt / Flamethrower
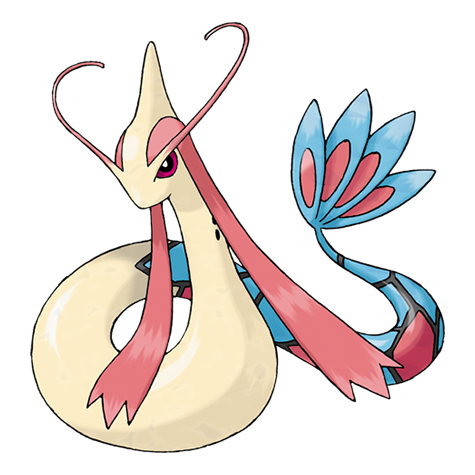 MiloticSalac Berry • Marvel Scale • Timid nature • EVs 255 Defense / 255 Speed • IVs 31 in every stat • Hydro Pump / Dragon Pulse / Recover / Hypnosis
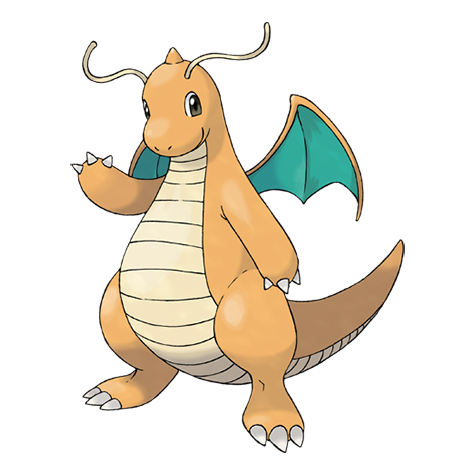 DragoniteWide Lens • Inner Focus • Adamant nature • EVs 255 HP / 255 Attack • IVs 31 in every stat • Dragon Rush / Aqua Tail / Iron Tail / Stone Edge
Danger notes
Rhyperior mixes physical and special coverage, Milotic can recover and put a counter to sleep, and Dragonite's Wide Lens makes four powerful but imperfectly accurate attacks much steadier.
Practical counters
Carry a fast Grass or Water answer for Rhyperior, strong Electric or Grass pressure for Milotic, and Ice coverage for Dragonite. Because the lead is random, avoid a plan that loses immediately to one member.
Tower Tycoon Palmer — Singles battle 49Battle Tower trainer 306 • sets 948 / 949 / 950All three are Lv. 50 with 31 IVs. The facility samples the roster without replacement, so the lead and order are not fixed.
Full Lv. 50 roster
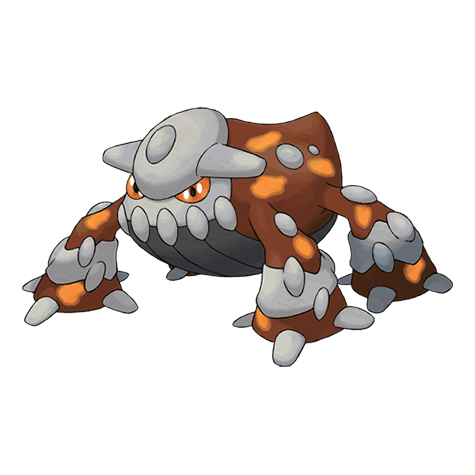 HeatranBrightPowder • Flash Fire • Quiet nature • EVs 170 HP / 170 Attack / 170 Special Attack • IVs 31 in every stat • Explosion / Magma Storm / Dark Pulse / Flash Cannon
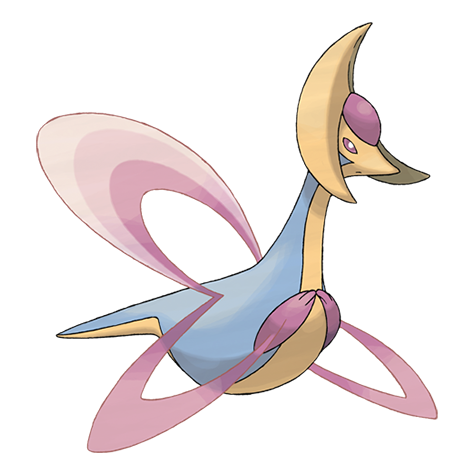 CresseliaLeftovers • Levitate • Bold nature • EVs 255 HP / 255 Defense • IVs 31 in every stat • Calm Mind / Moonlight / Psychic / Shadow Ball
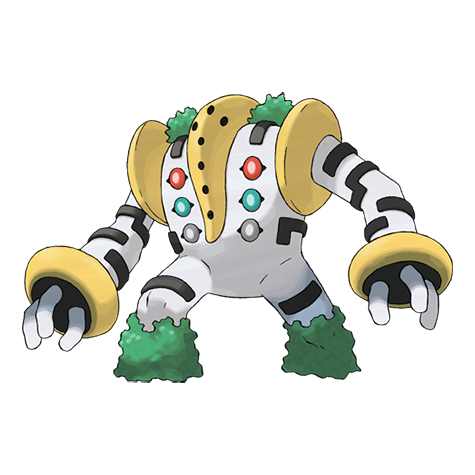 RegigigasChople Berry • Slow Start • Adamant nature • EVs 255 HP / 255 Attack • IVs 31 in every stat • Crush Grip / Ice Punch / Stone Edge / Brick Break
Danger notes
Heatran can trade itself with Explosion, Cresselia can become unbreakable after Calm Mind and Moonlight, and Regigigas can outlast Slow Start with its bulk and Fighting-resist Berry.
Practical counters
Use Ground into Heatran, Taunt or strong physical Dark/Ghost pressure into Cresselia, and repeated Fighting damage into Regigigas. Preserve a win condition instead of trading recklessly with Heatran.
Data Coverage
This phase owns 141 Diamond/Pearl source maps and publishes 757 encounter rows, 95 trainer rows, 262 visible/scripted items, and 50 hidden-item rows. Counts include explicit starter/rival branches and curated systems but never substitute Platinum encounters or story maps.
National Dex, Swarms, Poke Radar, and Dual-Slot Encounters
See all 150 required Sinnoh species, receive Oak's National Dex upgrade and Poke Radar, then unlock daily and cartridge-slot encounter systems.
Source maps
.
Route Plan
Audit the Sinnoh seen Pokedex; fill missing trainer-seen species; visit Rowan's Sandgem lab; receive the National Dex from Oak; collect the Poke Radar; speak to the assistant's sister once to enable swarms and revisit her to identify the current route; check Trophy Garden and Great Marsh rotations; insert a compatible GBA game before boot for dual-slot encounters; use Radar only in large grass patches.
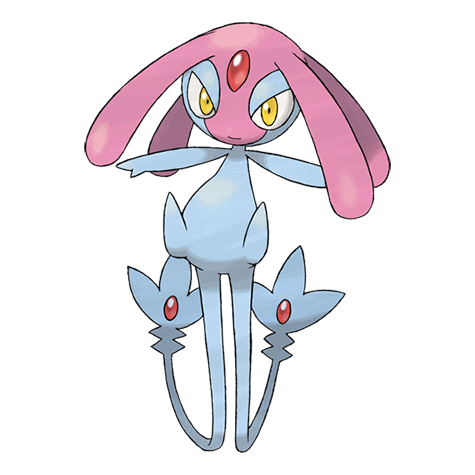
- Manaphy is shown as regional number 151 but is not required for the Diamond/Pearl National Dex upgrade. Seeing the first 150 is sufficient.
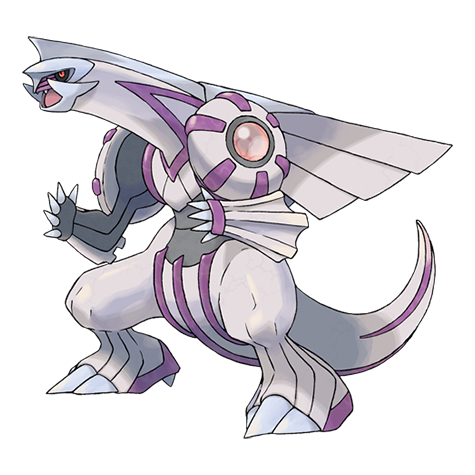
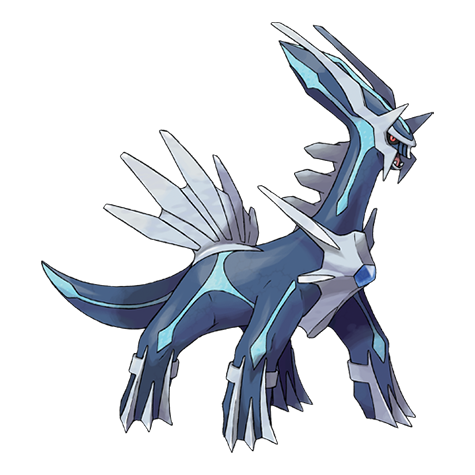
- The opposite version mascot does not require a trade for the seen checklist: after the Spear Pillar story, Cynthia's grandmother in Celestic Town shows Palkia's picture in Diamond or Dialga's picture in Pearl and registers that species as seen.
- The first eligible conversation with Lucas's or Dawn's sister enables the automatically rotating daily swarm system; later conversations report the current route. Swarms do not need to be reactivated every day.
- Daily swarms replace designated grass slots on one announced route. Poke Radar and dual-slot encounters are additional conditional tables and must not be blended into ordinary grass odds.
- Radar-only species replace slots 4/5/10/11 only inside a hard or vigorous-shaking Radar patch. A soft-shaking patch retains the ordinary base-table species in those slots.
- Dual-slot encounters require an original Nintendo DS or Nintendo DS Lite with the chosen Ruby, Sapphire, Emerald, FireRed, or LeafGreen cartridge inserted in Slot-2 before boot. A DSi or 3DS has no GBA slot and cannot activate this feature.
- Honey Tree, Great Marsh, and Trophy Garden systems remain active after the National Dex; their expanded pools should link back to the phase sections where the locations were first mapped.
Routes and encounters on this page are compiled from 0 pret map headers.
Acuity Lakefront
| Pokémon | Games | Levels | Rate | Requirement / notes | ||
|---|---|---|---|---|---|---|
| Morning | Day | Night | ||||
| Poké Radar (post-National Dex) | ||||||
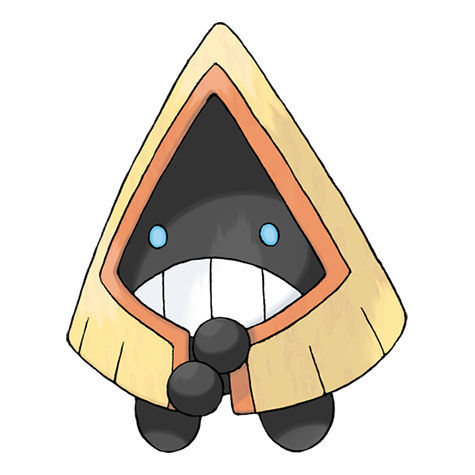 Snorunt Snorunt | DP | 35-36 | 22% | National Dex and Poké Radar required; replacement slot applies only in a hard/vigorous-shaking Radar patch. | ||
| Dual-slot GBA insertion (post-National Dex) | ||||||
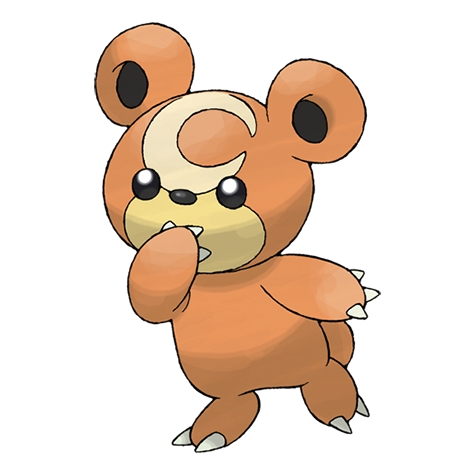 Teddiursa Teddiursa | DP | 36 | 8% | National Dex plus Pokémon Emerald inserted in the Nintendo DS GBA slot; replaces grass slots 8-9. | ||
Eterna Forest Interior
| Pokémon | Games | Levels | Rate | Requirement / notes | ||
|---|---|---|---|---|---|---|
| Morning | Day | Night | ||||
| Swarm (post-National Dex daily announcement) | ||||||
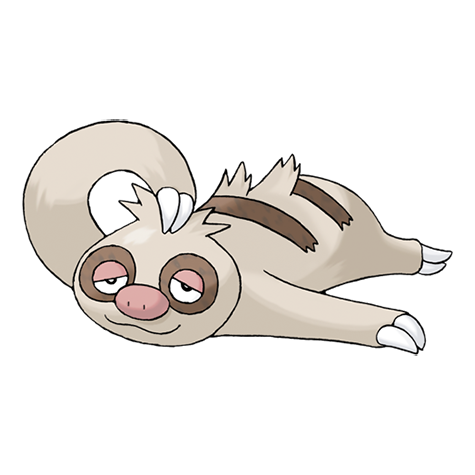 Slakoth Slakoth | DP | 10 | 40% | Post-National Dex daily swarm; replaces grass slots 0-1. | ||
| Poké Radar (post-National Dex) | ||||||
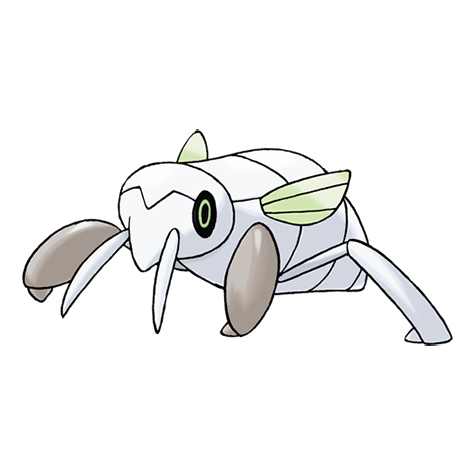 Nincada Nincada | DP | 10-12 | 22% | National Dex and Poké Radar required; replacement slot applies only in a hard/vigorous-shaking Radar patch. | ||
| Dual-slot GBA insertion (post-National Dex) | ||||||
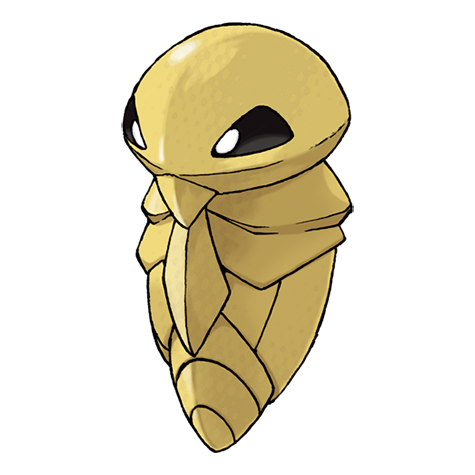 Kakuna Kakuna | DP | 12 | 8% | National Dex plus Pokémon LeafGreen inserted in the Nintendo DS GBA slot; replaces grass slots 8-9. | ||
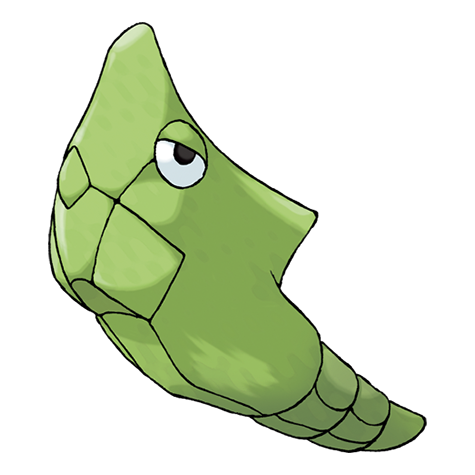 Metapod Metapod | DP | 12 | 8% | National Dex plus Pokémon FireRed inserted in the Nintendo DS GBA slot; replaces grass slots 8-9. | ||
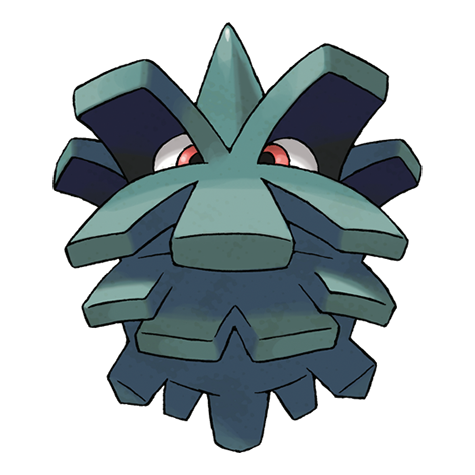 Pineco Pineco | DP | 12 | 8% | National Dex plus Pokémon Emerald inserted in the Nintendo DS GBA slot; replaces grass slots 8-9. | ||
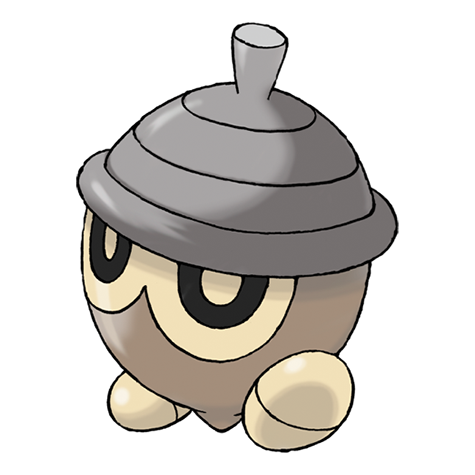 Seedot Seedot | DP | 12 | 8% | National Dex plus Pokémon Ruby inserted in the Nintendo DS GBA slot; replaces grass slots 8-9. | ||
Fuego Ironworks Exterior
| Pokémon | Games | Levels | Rate | Requirement / notes | ||
|---|---|---|---|---|---|---|
| Morning | Day | Night | ||||
| Swarm (post-National Dex daily announcement) | ||||||
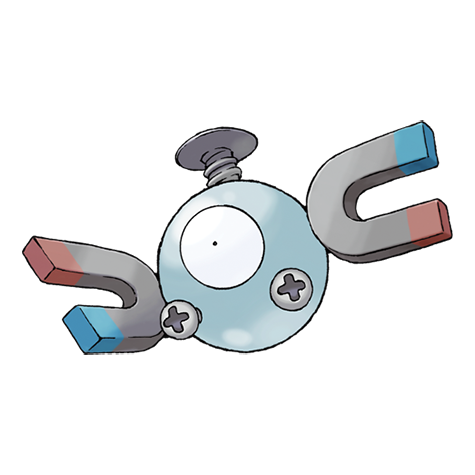 Magnemite Magnemite | DP | 28-29 | 40% | Post-National Dex daily swarm; replaces grass slots 0-1. | ||
| Poké Radar (post-National Dex) | ||||||
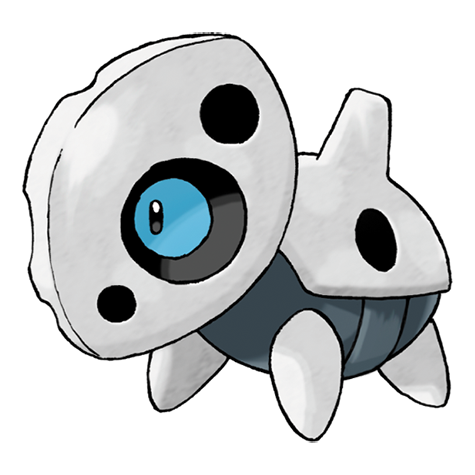 Aron Aron | DP | 29-30 | 22% | National Dex and Poké Radar required; replacement slot applies only in a hard/vigorous-shaking Radar patch. | ||
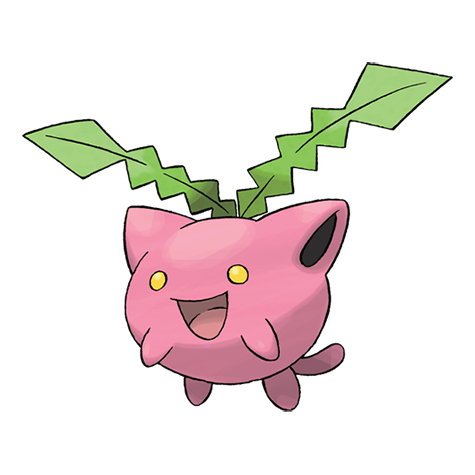 Hoppip Hoppip | DP | 29 | 20% | National Dex and Poké Radar required; replacement slot applies only in a hard/vigorous-shaking Radar patch. | ||
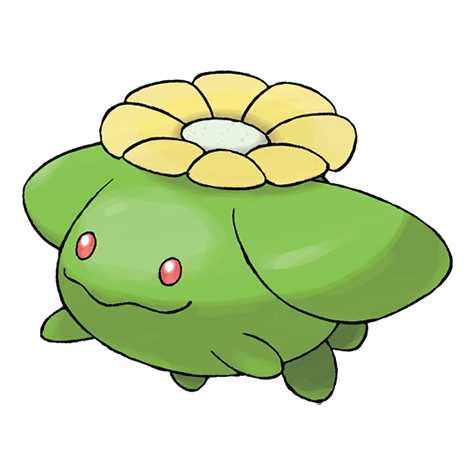 Skiploom Skiploom | DP | 30 | 2% | National Dex and Poké Radar required; replacement slot applies only in a hard/vigorous-shaking Radar patch. | ||
Great Marsh Area 1
| Pokémon | Games | Levels | Rate | Requirement / notes | ||
|---|---|---|---|---|---|---|
| Morning | Day | Night | ||||
| Dual-slot GBA insertion (post-National Dex) | ||||||
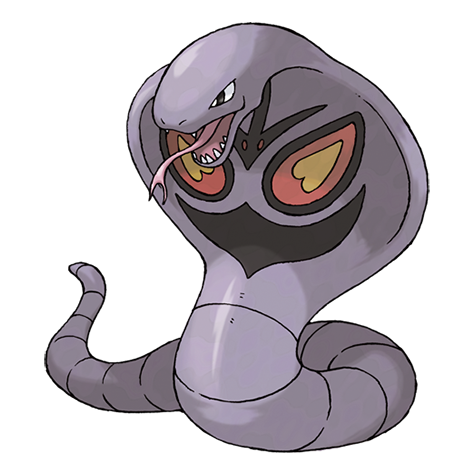 Arbok Arbok | DP | 24 or 26 | 8% | National Dex plus Pokémon FireRed inserted in the Nintendo DS GBA slot; replaces grass slots 8-9. | ||
Great Marsh Area 2
| Pokémon | Games | Levels | Rate | Requirement / notes | ||
|---|---|---|---|---|---|---|
| Morning | Day | Night | ||||
| Dual-slot GBA insertion (post-National Dex) | ||||||
| Arbok | DP | 24 or 26 | 8% | National Dex plus Pokémon FireRed inserted in the Nintendo DS GBA slot; replaces grass slots 8-9. | ||
Great Marsh Area 3
| Pokémon | Games | Levels | Rate | Requirement / notes | ||
|---|---|---|---|---|---|---|
| Morning | Day | Night | ||||
| Dual-slot GBA insertion (post-National Dex) | ||||||
| Arbok | DP | 22 or 24 | 8% | National Dex plus Pokémon FireRed inserted in the Nintendo DS GBA slot; replaces grass slots 8-9. | ||
Great Marsh Area 4
| Pokémon | Games | Levels | Rate | Requirement / notes | ||
|---|---|---|---|---|---|---|
| Morning | Day | Night | ||||
| Dual-slot GBA insertion (post-National Dex) | ||||||
| Arbok | DP | 22 or 24 | 8% | National Dex plus Pokémon FireRed inserted in the Nintendo DS GBA slot; replaces grass slots 8-9. | ||
Great Marsh Area 5
| Pokémon | Games | Levels | Rate | Requirement / notes | ||
|---|---|---|---|---|---|---|
| Morning | Day | Night | ||||
| Dual-slot GBA insertion (post-National Dex) | ||||||
| Arbok | DP | 20 or 22 | 8% | National Dex plus Pokémon FireRed inserted in the Nintendo DS GBA slot; replaces grass slots 8-9. | ||
Great Marsh Area 6
| Pokémon | Games | Levels | Rate | Requirement / notes | ||
|---|---|---|---|---|---|---|
| Morning | Day | Night | ||||
| Dual-slot GBA insertion (post-National Dex) | ||||||
| Arbok | DP | 20 or 22 | 8% | National Dex plus Pokémon FireRed inserted in the Nintendo DS GBA slot; replaces grass slots 8-9. | ||
Iron Island B1F Room 1
| Pokémon | Games | Levels | Rate | Requirement / notes | ||
|---|---|---|---|---|---|---|
| Morning | Day | Night | ||||
| Dual-slot GBA insertion (post-National Dex) | ||||||
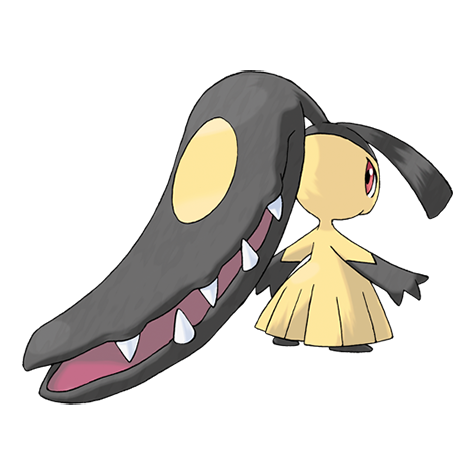 Mawile Mawile | DP | 31 or 33 | 8% | National Dex plus Pokémon Ruby inserted in the Nintendo DS GBA slot; replaces grass slots 8-9. | ||
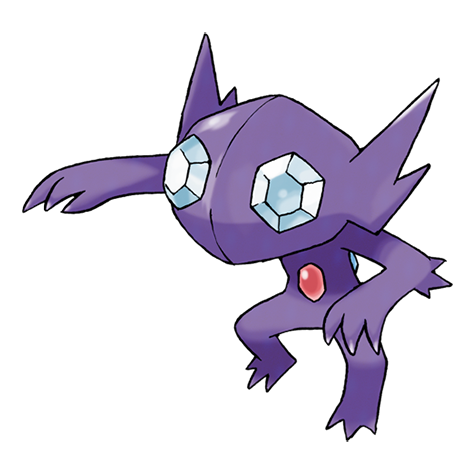 Sableye Sableye | DP | 31 or 33 | 8% | National Dex plus Pokémon Sapphire inserted in the Nintendo DS GBA slot; replaces grass slots 8-9. | ||
Iron Island B1F Room 2
| Pokémon | Games | Levels | Rate | Requirement / notes | ||
|---|---|---|---|---|---|---|
| Morning | Day | Night | ||||
| Dual-slot GBA insertion (post-National Dex) | ||||||
| Mawile | DP | 31 or 33 | 8% | National Dex plus Pokémon Ruby inserted in the Nintendo DS GBA slot; replaces grass slots 8-9. | ||
| Sableye | DP | 31 or 33 | 8% | National Dex plus Pokémon Sapphire inserted in the Nintendo DS GBA slot; replaces grass slots 8-9. | ||
Iron Island B2F Room 1
| Pokémon | Games | Levels | Rate | Requirement / notes | ||
|---|---|---|---|---|---|---|
| Morning | Day | Night | ||||
| Dual-slot GBA insertion (post-National Dex) | ||||||
| Mawile | DP | 31 or 33 | 8% | National Dex plus Pokémon Ruby inserted in the Nintendo DS GBA slot; replaces grass slots 8-9. | ||
| Sableye | DP | 31 or 33 | 8% | National Dex plus Pokémon Sapphire inserted in the Nintendo DS GBA slot; replaces grass slots 8-9. | ||
Iron Island B2F Room 2
| Pokémon | Games | Levels | Rate | Requirement / notes | ||
|---|---|---|---|---|---|---|
| Morning | Day | Night | ||||
| Dual-slot GBA insertion (post-National Dex) | ||||||
| Mawile | DP | 32 or 34 | 8% | National Dex plus Pokémon Ruby inserted in the Nintendo DS GBA slot; replaces grass slots 8-9. | ||
| Sableye | DP | 32 or 34 | 8% | National Dex plus Pokémon Sapphire inserted in the Nintendo DS GBA slot; replaces grass slots 8-9. | ||
Iron Island B3F
| Pokémon | Games | Levels | Rate | Requirement / notes | ||
|---|---|---|---|---|---|---|
| Morning | Day | Night | ||||
| Dual-slot GBA insertion (post-National Dex) | ||||||
| Mawile | DP | 32 or 34 | 8% | National Dex plus Pokémon Ruby inserted in the Nintendo DS GBA slot; replaces grass slots 8-9. | ||
| Sableye | DP | 32 or 34 | 8% | National Dex plus Pokémon Sapphire inserted in the Nintendo DS GBA slot; replaces grass slots 8-9. | ||
Lake Acuity
| Pokémon | Games | Levels | Rate | Requirement / notes | ||
|---|---|---|---|---|---|---|
| Morning | Day | Night | ||||
| Swarm (post-National Dex daily announcement) | ||||||
 Smoochum Smoochum | DP | 35 | 40% | Post-National Dex daily swarm; replaces grass slots 0-1. | ||
| Poké Radar (post-National Dex) | ||||||
 Wobbuffet Wobbuffet | DP | 34-36 | 22% | National Dex and Poké Radar required; replacement slot applies only in a hard/vigorous-shaking Radar patch. | ||
| Dual-slot GBA insertion (post-National Dex) | ||||||
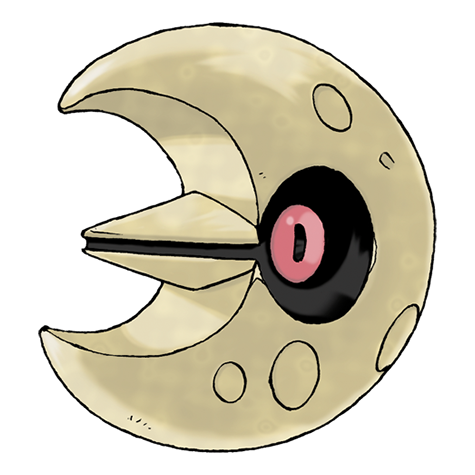 Lunatone Lunatone | DP | 34 or 36 | 8% | National Dex plus Pokémon Sapphire inserted in the Nintendo DS GBA slot; replaces grass slots 8-9. | ||
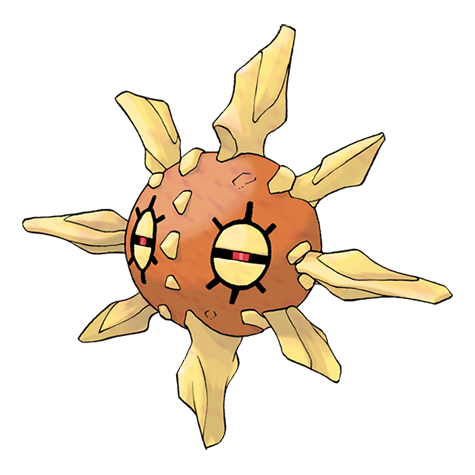 Solrock Solrock | DP | 34 or 36 | 8% | National Dex plus Pokémon Ruby inserted in the Nintendo DS GBA slot; replaces grass slots 8-9. | ||
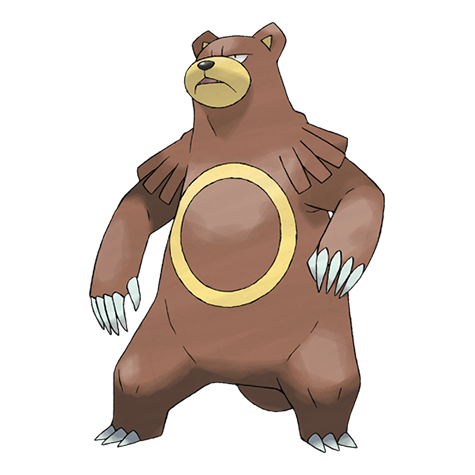 Ursaring Ursaring | DP | 34 or 36 | 8% | National Dex plus Pokémon Emerald inserted in the Nintendo DS GBA slot; replaces grass slots 8-9. | ||
Lake Valor
| Pokémon | Games | Levels | Rate | Requirement / notes | ||
|---|---|---|---|---|---|---|
| Morning | Day | Night | ||||
| Swarm (post-National Dex daily announcement) | ||||||
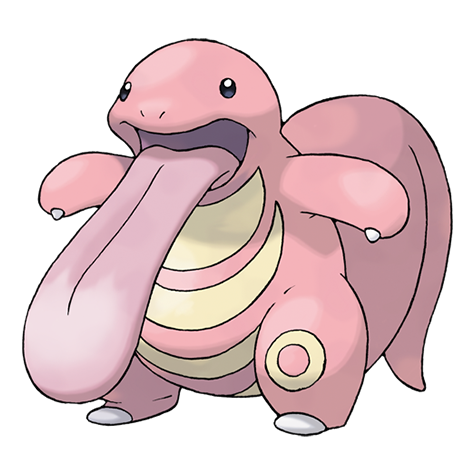 Lickitung Lickitung | DP | 34 or 36 | 40% | Post-National Dex daily swarm; replaces grass slots 0-1. | ||
| Poké Radar (post-National Dex) | ||||||
| Wobbuffet | DP | 35-36 | 22% | National Dex and Poké Radar required; replacement slot applies only in a hard/vigorous-shaking Radar patch. | ||
| Dual-slot GBA insertion (post-National Dex) | ||||||
| Lunatone | DP | 35 | 8% | National Dex plus Pokémon Sapphire inserted in the Nintendo DS GBA slot; replaces grass slots 8-9. | ||
| Solrock | DP | 35 | 8% | National Dex plus Pokémon Ruby inserted in the Nintendo DS GBA slot; replaces grass slots 8-9. | ||
Lake Verity
| Pokémon | Games | Levels | Rate | Requirement / notes | ||
|---|---|---|---|---|---|---|
| Morning | Day | Night | ||||
| Swarm (post-National Dex daily announcement) | ||||||
 Surskit Surskit | DP | 2 | 40% | Post-National Dex daily swarm; replaces grass slots 0-1. | ||
| Poké Radar (post-National Dex) | ||||||
| Wobbuffet | DP | 3-4 | 22% | National Dex and Poké Radar required; replacement slot applies only in a hard/vigorous-shaking Radar patch. | ||
| Dual-slot GBA insertion (post-National Dex) | ||||||
| Lunatone | DP | 4 | 8% | National Dex plus Pokémon Sapphire inserted in the Nintendo DS GBA slot; replaces grass slots 8-9. | ||
| Solrock | DP | 4 | 8% | National Dex plus Pokémon Ruby inserted in the Nintendo DS GBA slot; replaces grass slots 8-9. | ||
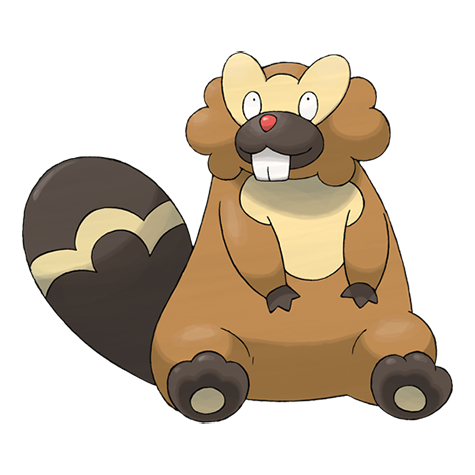 Bibarel Bibarel | DP | 4 | 4% | National Dex plus Pokémon Emerald inserted in the Nintendo DS GBA slot; replaces grass slots 8-9. | ||
| Bibarel | DP | 4 | 4% | National Dex plus Pokémon FireRed inserted in the Nintendo DS GBA slot; replaces grass slots 8-9. | ||
| Bibarel | DP | 4 | 4% | National Dex plus Pokémon LeafGreen inserted in the Nintendo DS GBA slot; replaces grass slots 8-9. | ||
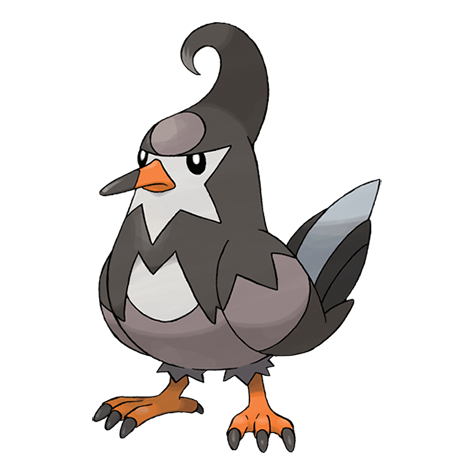 Staravia Staravia | DP | 4 | 4% | National Dex plus Pokémon Emerald inserted in the Nintendo DS GBA slot; replaces grass slots 8-9. | ||
| Staravia | DP | 4 | 4% | National Dex plus Pokémon FireRed inserted in the Nintendo DS GBA slot; replaces grass slots 8-9. | ||
| Staravia | DP | 4 | 4% | National Dex plus Pokémon LeafGreen inserted in the Nintendo DS GBA slot; replaces grass slots 8-9. | ||
Mount Coronet 4F Room 1
| Pokémon | Games | Levels | Rate | Requirement / notes | ||
|---|---|---|---|---|---|---|
| Morning | Day | Night | ||||
| Dual-slot GBA insertion (post-National Dex) | ||||||
| Lunatone | DP | 38-39 | 8% | National Dex plus Pokémon Sapphire inserted in the Nintendo DS GBA slot; replaces grass slots 8-9. | ||
| Solrock | DP | 38-39 | 8% | National Dex plus Pokémon Ruby inserted in the Nintendo DS GBA slot; replaces grass slots 8-9. | ||
Mount Coronet 4F Room 3
| Pokémon | Games | Levels | Rate | Requirement / notes | ||
|---|---|---|---|---|---|---|
| Morning | Day | Night | ||||
| Dual-slot GBA insertion (post-National Dex) | ||||||
| Lunatone | DP | 38-39 | 8% | National Dex plus Pokémon Sapphire inserted in the Nintendo DS GBA slot; replaces grass slots 8-9. | ||
| Solrock | DP | 38-39 | 8% | National Dex plus Pokémon Ruby inserted in the Nintendo DS GBA slot; replaces grass slots 8-9. | ||
Mount Coronet 5F
| Pokémon | Games | Levels | Rate | Requirement / notes | ||
|---|---|---|---|---|---|---|
| Morning | Day | Night | ||||
| Dual-slot GBA insertion (post-National Dex) | ||||||
| Lunatone | DP | 40-41 | 8% | National Dex plus Pokémon Sapphire inserted in the Nintendo DS GBA slot; replaces grass slots 8-9. | ||
| Solrock | DP | 40-41 | 8% | National Dex plus Pokémon Ruby inserted in the Nintendo DS GBA slot; replaces grass slots 8-9. | ||
Mount Coronet 6F
| Pokémon | Games | Levels | Rate | Requirement / notes | ||
|---|---|---|---|---|---|---|
| Morning | Day | Night | ||||
| Dual-slot GBA insertion (post-National Dex) | ||||||
| Lunatone | DP | 40-41 | 8% | National Dex plus Pokémon Sapphire inserted in the Nintendo DS GBA slot; replaces grass slots 8-9. | ||
| Solrock | DP | 40-41 | 8% | National Dex plus Pokémon Ruby inserted in the Nintendo DS GBA slot; replaces grass slots 8-9. | ||
Mount Coronet North 1F Room 1
| Pokémon | Games | Levels | Rate | Requirement / notes | ||
|---|---|---|---|---|---|---|
| Morning | Day | Night | ||||
| Dual-slot GBA insertion (post-National Dex) | ||||||
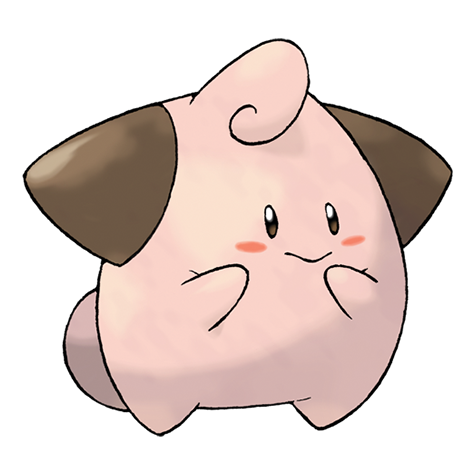 Cleffa Cleffa | DP | 14 | 4% | National Dex plus Pokémon Sapphire inserted in the Nintendo DS GBA slot; replaces grass slots 8-9. | ||
Mount Coronet North Mountainside
| Pokémon | Games | Levels | Rate | Requirement / notes | ||
|---|---|---|---|---|---|---|
| Morning | Day | Night | ||||
| Poké Radar (post-National Dex) | ||||||
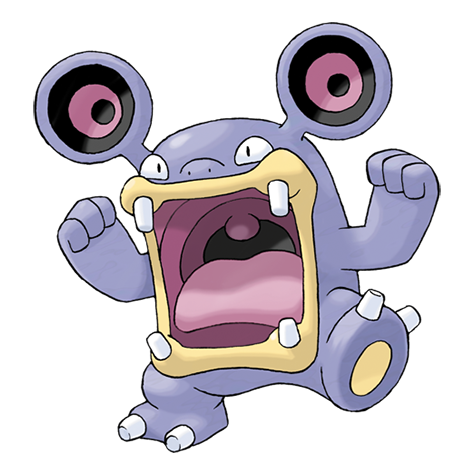 Loudred Loudred | DP | 39-40 | 22% | National Dex and Poké Radar required; replacement slot applies only in a hard/vigorous-shaking Radar patch. | ||
| Dual-slot GBA insertion (post-National Dex) | ||||||
| Lunatone | DP | 38-39 | 8% | National Dex plus Pokémon Sapphire inserted in the Nintendo DS GBA slot; replaces grass slots 8-9. | ||
| Solrock | DP | 38-39 | 8% | National Dex plus Pokémon Ruby inserted in the Nintendo DS GBA slot; replaces grass slots 8-9. | ||
Mount Coronet South 2F
| Pokémon | Games | Levels | Rate | Requirement / notes | ||
|---|---|---|---|---|---|---|
| Morning | Day | Night | ||||
| Dual-slot GBA insertion (post-National Dex) | ||||||
| Lunatone | DP | 36-37 | 8% | National Dex plus Pokémon Sapphire inserted in the Nintendo DS GBA slot; replaces grass slots 8-9. | ||
| Solrock | DP | 36-37 | 8% | National Dex plus Pokémon Ruby inserted in the Nintendo DS GBA slot; replaces grass slots 8-9. | ||
Mount Coronet South 3F
| Pokémon | Games | Levels | Rate | Requirement / notes | ||
|---|---|---|---|---|---|---|
| Morning | Day | Night | ||||
| Dual-slot GBA insertion (post-National Dex) | ||||||
| Lunatone | DP | 36-37 | 8% | National Dex plus Pokémon Sapphire inserted in the Nintendo DS GBA slot; replaces grass slots 8-9. | ||
| Solrock | DP | 36-37 | 8% | National Dex plus Pokémon Ruby inserted in the Nintendo DS GBA slot; replaces grass slots 8-9. | ||
Mount Coronet South Mountainside
| Pokémon | Games | Levels | Rate | Requirement / notes | ||
|---|---|---|---|---|---|---|
| Morning | Day | Night | ||||
| Poké Radar (post-National Dex) | ||||||
| Loudred | DP | 39-40 | 22% | National Dex and Poké Radar required; replacement slot applies only in a hard/vigorous-shaking Radar patch. | ||
| Dual-slot GBA insertion (post-National Dex) | ||||||
| Lunatone | DP | 38-39 | 8% | National Dex plus Pokémon Sapphire inserted in the Nintendo DS GBA slot; replaces grass slots 8-9. | ||
| Solrock | DP | 38-39 | 8% | National Dex plus Pokémon Ruby inserted in the Nintendo DS GBA slot; replaces grass slots 8-9. | ||
Mount Coronet Tunnel Room
| Pokémon | Games | Levels | Rate | Requirement / notes | ||
|---|---|---|---|---|---|---|
| Morning | Day | Night | ||||
| Dual-slot GBA insertion (post-National Dex) | ||||||
| Lunatone | DP | 39-40 | 8% | National Dex plus Pokémon Sapphire inserted in the Nintendo DS GBA slot; replaces grass slots 8-9. | ||
| Solrock | DP | 39-40 | 8% | National Dex plus Pokémon Ruby inserted in the Nintendo DS GBA slot; replaces grass slots 8-9. | ||
Old Chateau 1F
| Pokémon | Games | Levels | Rate | Requirement / notes | ||
|---|---|---|---|---|---|---|
| Morning | Day | Night | ||||
| Dual-slot GBA insertion (post-National Dex) | ||||||
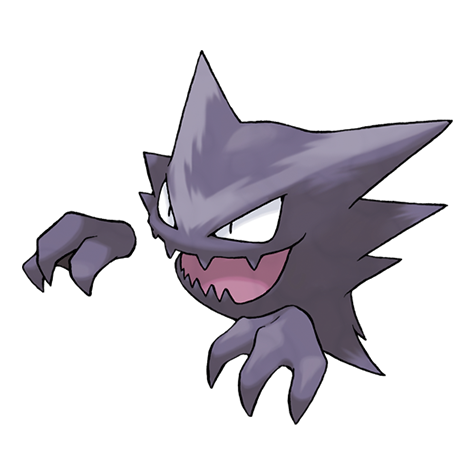 Haunter Haunter | DP | 16 | 8% | National Dex plus Pokémon Ruby inserted in the Nintendo DS GBA slot; replaces grass slots 8-9. | ||
| Haunter | DP | 16 | 8% | National Dex plus Pokémon Sapphire inserted in the Nintendo DS GBA slot; replaces grass slots 8-9. | ||
| Haunter | DP | 16 | 8% | National Dex plus Pokémon Emerald inserted in the Nintendo DS GBA slot; replaces grass slots 8-9. | ||
| Haunter | DP | 16 | 8% | National Dex plus Pokémon FireRed inserted in the Nintendo DS GBA slot; replaces grass slots 8-9. | ||
| Haunter | DP | 16 | 8% | National Dex plus Pokémon LeafGreen inserted in the Nintendo DS GBA slot; replaces grass slots 8-9. | ||
Old Chateau 2F Corridor
| Pokémon | Games | Levels | Rate | Requirement / notes | ||
|---|---|---|---|---|---|---|
| Morning | Day | Night | ||||
| Dual-slot GBA insertion (post-National Dex) | ||||||
| Haunter | DP | 16 | 8% | National Dex plus Pokémon Ruby inserted in the Nintendo DS GBA slot; replaces grass slots 8-9. | ||
| Haunter | DP | 16 | 8% | National Dex plus Pokémon Sapphire inserted in the Nintendo DS GBA slot; replaces grass slots 8-9. | ||
| Haunter | DP | 16 | 8% | National Dex plus Pokémon Emerald inserted in the Nintendo DS GBA slot; replaces grass slots 8-9. | ||
| Haunter | DP | 16 | 8% | National Dex plus Pokémon FireRed inserted in the Nintendo DS GBA slot; replaces grass slots 8-9. | ||
| Haunter | DP | 16 | 8% | National Dex plus Pokémon LeafGreen inserted in the Nintendo DS GBA slot; replaces grass slots 8-9. | ||
Old Chateau 2F Room 1
| Pokémon | Games | Levels | Rate | Requirement / notes | ||
|---|---|---|---|---|---|---|
| Morning | Day | Night | ||||
| Dual-slot GBA insertion (post-National Dex) | ||||||
| Haunter | DP | 16 | 8% | National Dex plus Pokémon Ruby inserted in the Nintendo DS GBA slot; replaces grass slots 8-9. | ||
| Haunter | DP | 16 | 8% | National Dex plus Pokémon Sapphire inserted in the Nintendo DS GBA slot; replaces grass slots 8-9. | ||
| Haunter | DP | 16 | 8% | National Dex plus Pokémon Emerald inserted in the Nintendo DS GBA slot; replaces grass slots 8-9. | ||
| Haunter | DP | 16 | 8% | National Dex plus Pokémon FireRed inserted in the Nintendo DS GBA slot; replaces grass slots 8-9. | ||
| Haunter | DP | 16 | 8% | National Dex plus Pokémon LeafGreen inserted in the Nintendo DS GBA slot; replaces grass slots 8-9. | ||
Old Chateau 2F Room 2
| Pokémon | Games | Levels | Rate | Requirement / notes | ||
|---|---|---|---|---|---|---|
| Morning | Day | Night | ||||
| Dual-slot GBA insertion (post-National Dex) | ||||||
| Haunter | DP | 16 | 8% | National Dex plus Pokémon Ruby inserted in the Nintendo DS GBA slot; replaces grass slots 8-9. | ||
| Haunter | DP | 16 | 8% | National Dex plus Pokémon Sapphire inserted in the Nintendo DS GBA slot; replaces grass slots 8-9. | ||
| Haunter | DP | 16 | 8% | National Dex plus Pokémon Emerald inserted in the Nintendo DS GBA slot; replaces grass slots 8-9. | ||
| Haunter | DP | 16 | 8% | National Dex plus Pokémon FireRed inserted in the Nintendo DS GBA slot; replaces grass slots 8-9. | ||
| Haunter | DP | 16 | 8% | National Dex plus Pokémon LeafGreen inserted in the Nintendo DS GBA slot; replaces grass slots 8-9. | ||
Old Chateau 2F Room 3
| Pokémon | Games | Levels | Rate | Requirement / notes | ||
|---|---|---|---|---|---|---|
| Morning | Day | Night | ||||
| Dual-slot GBA insertion (post-National Dex) | ||||||
| Haunter | DP | 16 | 8% | National Dex plus Pokémon Ruby inserted in the Nintendo DS GBA slot; replaces grass slots 8-9. | ||
| Haunter | DP | 16 | 8% | National Dex plus Pokémon Sapphire inserted in the Nintendo DS GBA slot; replaces grass slots 8-9. | ||
| Haunter | DP | 16 | 8% | National Dex plus Pokémon Emerald inserted in the Nintendo DS GBA slot; replaces grass slots 8-9. | ||
| Haunter | DP | 16 | 8% | National Dex plus Pokémon FireRed inserted in the Nintendo DS GBA slot; replaces grass slots 8-9. | ||
| Haunter | DP | 16 | 8% | National Dex plus Pokémon LeafGreen inserted in the Nintendo DS GBA slot; replaces grass slots 8-9. | ||
Old Chateau 2F Room 4
| Pokémon | Games | Levels | Rate | Requirement / notes | ||
|---|---|---|---|---|---|---|
| Morning | Day | Night | ||||
| Dual-slot GBA insertion (post-National Dex) | ||||||
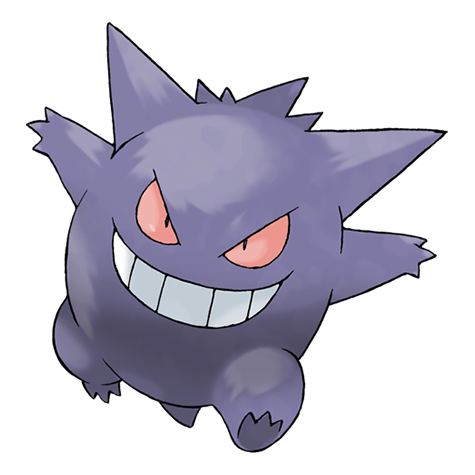 Gengar Gengar | DP | 16 | 4% | National Dex plus Pokémon Ruby inserted in the Nintendo DS GBA slot; replaces grass slots 8-9. | ||
| Gengar | DP | 16 | 4% | National Dex plus Pokémon Sapphire inserted in the Nintendo DS GBA slot; replaces grass slots 8-9. | ||
| Gengar | DP | 16 | 4% | National Dex plus Pokémon Emerald inserted in the Nintendo DS GBA slot; replaces grass slots 8-9. | ||
| Gengar | DP | 16 | 4% | National Dex plus Pokémon FireRed inserted in the Nintendo DS GBA slot; replaces grass slots 8-9. | ||
| Gengar | DP | 16 | 4% | National Dex plus Pokémon LeafGreen inserted in the Nintendo DS GBA slot; replaces grass slots 8-9. | ||
| Haunter | DP | 16 | 4% | National Dex plus Pokémon Ruby inserted in the Nintendo DS GBA slot; replaces grass slots 8-9. | ||
| Haunter | DP | 16 | 4% | National Dex plus Pokémon Sapphire inserted in the Nintendo DS GBA slot; replaces grass slots 8-9. | ||
| Haunter | DP | 16 | 4% | National Dex plus Pokémon Emerald inserted in the Nintendo DS GBA slot; replaces grass slots 8-9. | ||
| Haunter | DP | 16 | 4% | National Dex plus Pokémon FireRed inserted in the Nintendo DS GBA slot; replaces grass slots 8-9. | ||
| Haunter | DP | 16 | 4% | National Dex plus Pokémon LeafGreen inserted in the Nintendo DS GBA slot; replaces grass slots 8-9. | ||
Old Chateau 2F Room 5
| Pokémon | Games | Levels | Rate | Requirement / notes | ||
|---|---|---|---|---|---|---|
| Morning | Day | Night | ||||
| Dual-slot GBA insertion (post-National Dex) | ||||||
| Haunter | DP | 16 | 8% | National Dex plus Pokémon Ruby inserted in the Nintendo DS GBA slot; replaces grass slots 8-9. | ||
| Haunter | DP | 16 | 8% | National Dex plus Pokémon Sapphire inserted in the Nintendo DS GBA slot; replaces grass slots 8-9. | ||
| Haunter | DP | 16 | 8% | National Dex plus Pokémon Emerald inserted in the Nintendo DS GBA slot; replaces grass slots 8-9. | ||
| Haunter | DP | 16 | 8% | National Dex plus Pokémon FireRed inserted in the Nintendo DS GBA slot; replaces grass slots 8-9. | ||
| Haunter | DP | 16 | 8% | National Dex plus Pokémon LeafGreen inserted in the Nintendo DS GBA slot; replaces grass slots 8-9. | ||
Old Chateau 2F Side Rooms
| Pokémon | Games | Levels | Rate | Requirement / notes | ||
|---|---|---|---|---|---|---|
| Morning | Day | Night | ||||
| Dual-slot GBA insertion (post-National Dex) | ||||||
| Haunter | DP | 16 | 8% | National Dex plus Pokémon Ruby inserted in the Nintendo DS GBA slot; replaces grass slots 8-9. | ||
| Haunter | DP | 16 | 8% | National Dex plus Pokémon Sapphire inserted in the Nintendo DS GBA slot; replaces grass slots 8-9. | ||
| Haunter | DP | 16 | 8% | National Dex plus Pokémon Emerald inserted in the Nintendo DS GBA slot; replaces grass slots 8-9. | ||
| Haunter | DP | 16 | 8% | National Dex plus Pokémon FireRed inserted in the Nintendo DS GBA slot; replaces grass slots 8-9. | ||
| Haunter | DP | 16 | 8% | National Dex plus Pokémon LeafGreen inserted in the Nintendo DS GBA slot; replaces grass slots 8-9. | ||
Old Chateau Entrance
| Pokémon | Games | Levels | Rate | Requirement / notes | ||
|---|---|---|---|---|---|---|
| Morning | Day | Night | ||||
| Dual-slot GBA insertion (post-National Dex) | ||||||
| Haunter | DP | 16 | 8% | National Dex plus Pokémon Ruby inserted in the Nintendo DS GBA slot; replaces grass slots 8-9. | ||
| Haunter | DP | 16 | 8% | National Dex plus Pokémon Sapphire inserted in the Nintendo DS GBA slot; replaces grass slots 8-9. | ||
| Haunter | DP | 16 | 8% | National Dex plus Pokémon Emerald inserted in the Nintendo DS GBA slot; replaces grass slots 8-9. | ||
| Haunter | DP | 16 | 8% | National Dex plus Pokémon FireRed inserted in the Nintendo DS GBA slot; replaces grass slots 8-9. | ||
| Haunter | DP | 16 | 8% | National Dex plus Pokémon LeafGreen inserted in the Nintendo DS GBA slot; replaces grass slots 8-9. | ||
Route 201
| Pokémon | Games | Levels | Rate | Requirement / notes | ||
|---|---|---|---|---|---|---|
| Morning | Day | Night | ||||
| Swarm (post-National Dex daily announcement) | ||||||
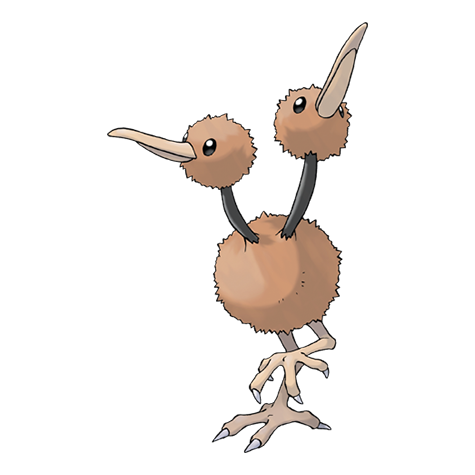 Doduo Doduo | DP | 2 | 40% | Post-National Dex daily swarm; replaces grass slots 0-1. | ||
| Poké Radar (post-National Dex) | ||||||
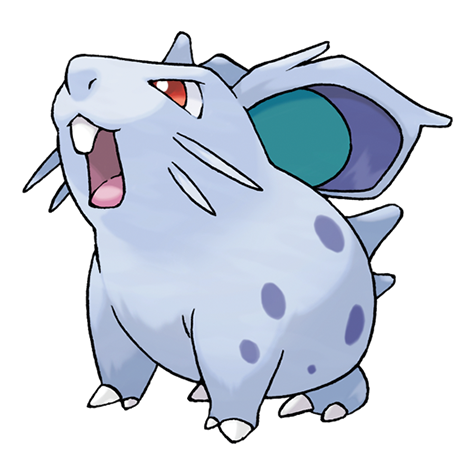 Nidoran F Nidoran F | DP | 3 | 20% | National Dex and Poké Radar required; replacement slot applies only in a hard/vigorous-shaking Radar patch. | ||
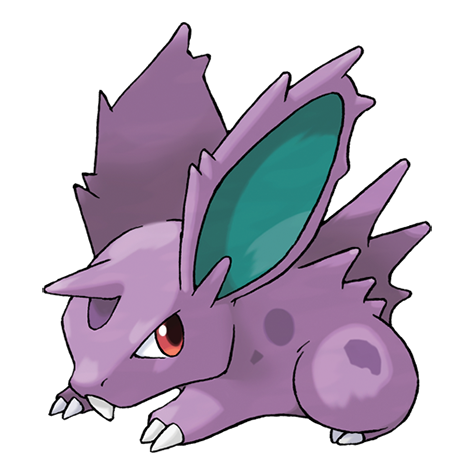 Nidoran M Nidoran M | DP | 3 | 20% | National Dex and Poké Radar required; replacement slot applies only in a hard/vigorous-shaking Radar patch. | ||
| Nidoran F | DP | 2 | 2% | National Dex and Poké Radar required; replacement slot applies only in a hard/vigorous-shaking Radar patch. | ||
| Nidoran M | DP | 2 | 2% | National Dex and Poké Radar required; replacement slot applies only in a hard/vigorous-shaking Radar patch. | ||
| Dual-slot GBA insertion (post-National Dex) | ||||||
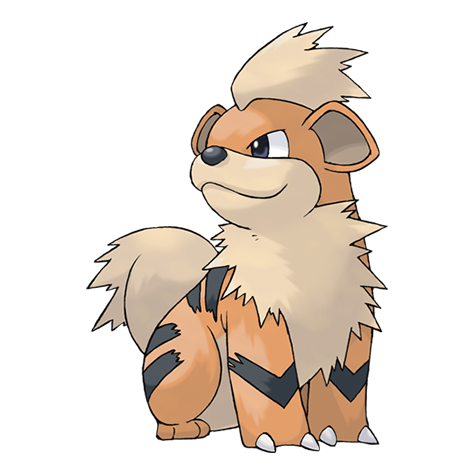 Growlithe Growlithe | DP | 2 | 8% | National Dex plus Pokémon FireRed inserted in the Nintendo DS GBA slot; replaces grass slots 8-9. | ||
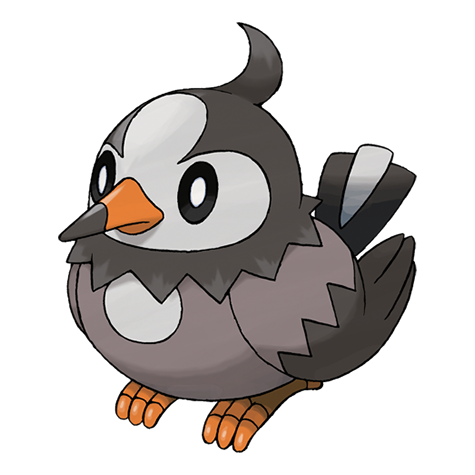 Starly Starly | DP | 2 | 4% | National Dex plus Pokémon Ruby inserted in the Nintendo DS GBA slot; replaces grass slots 8-9. | ||
| Starly | DP | 2 | 4% | National Dex plus Pokémon Sapphire inserted in the Nintendo DS GBA slot; replaces grass slots 8-9. | ||
| Starly | DP | 2 | 4% | National Dex plus Pokémon Emerald inserted in the Nintendo DS GBA slot; replaces grass slots 8-9. | ||
| Starly | DP | 2 | 4% | National Dex plus Pokémon LeafGreen inserted in the Nintendo DS GBA slot; replaces grass slots 8-9. | ||
Route 202
| Pokémon | Games | Levels | Rate | Requirement / notes | ||
|---|---|---|---|---|---|---|
| Morning | Day | Night | ||||
| Swarm (post-National Dex daily announcement) | ||||||
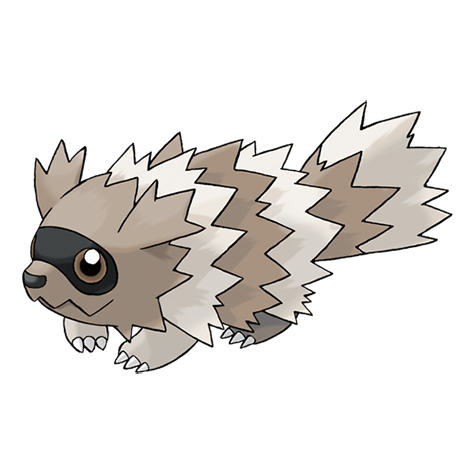 Zigzagoon Zigzagoon | DP | 3 | 40% | Post-National Dex daily swarm; replaces grass slots 0-1. | ||
| Poké Radar (post-National Dex) | ||||||
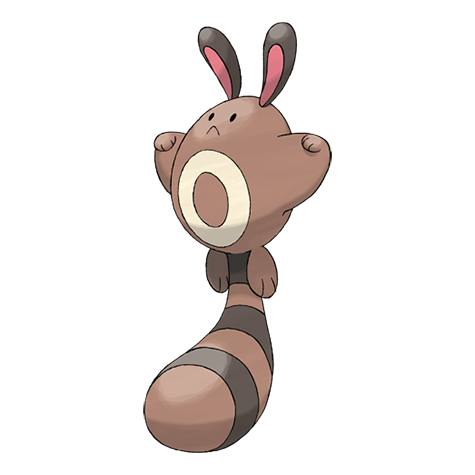 Sentret Sentret | DP | 2-4 | 22% | National Dex and Poké Radar required; replacement slot applies only in a hard/vigorous-shaking Radar patch. | ||
| Dual-slot GBA insertion (post-National Dex) | ||||||
| Growlithe | DP | 2 | 8% | National Dex plus Pokémon FireRed inserted in the Nintendo DS GBA slot; replaces grass slots 8-9. | ||
Route 203
| Pokémon | Games | Levels | Rate | Requirement / notes | ||
|---|---|---|---|---|---|---|
| Morning | Day | Night | ||||
| Swarm (post-National Dex daily announcement) | ||||||
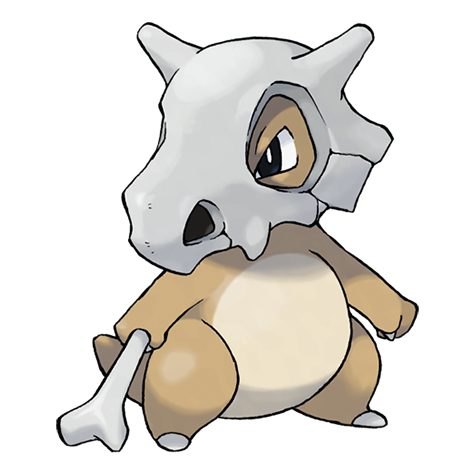 Cubone Cubone | DP | 4 | 40% | Post-National Dex daily swarm; replaces grass slots 0-1. | ||
| Poké Radar (post-National Dex) | ||||||
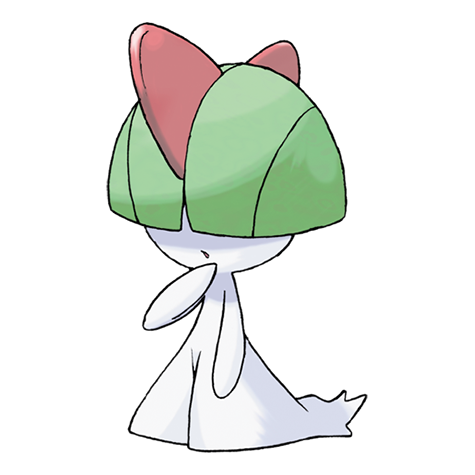 Ralts Ralts | DP | 4-6 | 21% | National Dex and Poké Radar required; replacement slot applies only in a hard/vigorous-shaking Radar patch. | ||
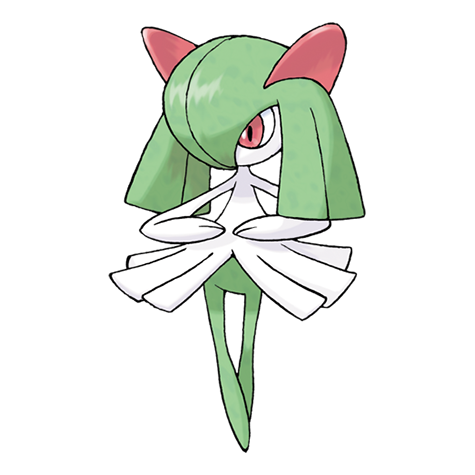 Kirlia Kirlia | DP | 6 | 1% | National Dex and Poké Radar required; replacement slot applies only in a hard/vigorous-shaking Radar patch. | ||
| Dual-slot GBA insertion (post-National Dex) | ||||||
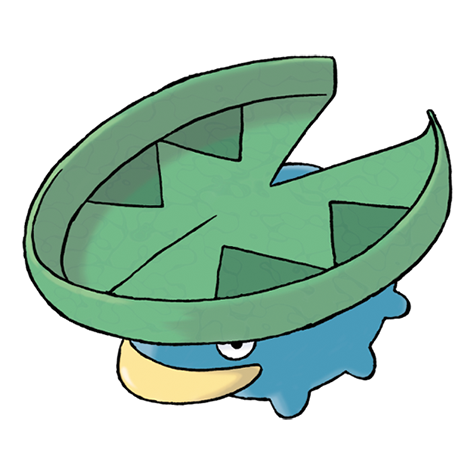 Lotad Lotad | DP | 5 | 8% | National Dex plus Pokémon Sapphire inserted in the Nintendo DS GBA slot; replaces grass slots 8-9. | ||
| Pineco | DP | 5 | 8% | National Dex plus Pokémon Emerald inserted in the Nintendo DS GBA slot; replaces grass slots 8-9. | ||
| Seedot | DP | 5 | 8% | National Dex plus Pokémon Ruby inserted in the Nintendo DS GBA slot; replaces grass slots 8-9. | ||
Route 204 North
| Pokémon | Games | Levels | Rate | Requirement / notes | ||
|---|---|---|---|---|---|---|
| Morning | Day | Night | ||||
| Poké Radar (post-National Dex) | ||||||
 Sunkern Sunkern | DP | 6 or 8 | 22% | National Dex and Poké Radar required; replacement slot applies only in a hard/vigorous-shaking Radar patch. | ||
| Dual-slot GBA insertion (post-National Dex) | ||||||
| Lotad | DP | 8 | 8% | National Dex plus Pokémon Sapphire inserted in the Nintendo DS GBA slot; replaces grass slots 8-9. | ||
| Pineco | DP | 8 | 8% | National Dex plus Pokémon Emerald inserted in the Nintendo DS GBA slot; replaces grass slots 8-9. | ||
| Seedot | DP | 8 | 8% | National Dex plus Pokémon Ruby inserted in the Nintendo DS GBA slot; replaces grass slots 8-9. | ||
Route 204 South
| Pokémon | Games | Levels | Rate | Requirement / notes | ||
|---|---|---|---|---|---|---|
| Morning | Day | Night | ||||
| Poké Radar (post-National Dex) | ||||||
| Ralts | DP | 4 or 6 | 21% | National Dex and Poké Radar required; replacement slot applies only in a hard/vigorous-shaking Radar patch. | ||
| Kirlia | DP | 6 | 1% | National Dex and Poké Radar required; replacement slot applies only in a hard/vigorous-shaking Radar patch. | ||
| Dual-slot GBA insertion (post-National Dex) | ||||||
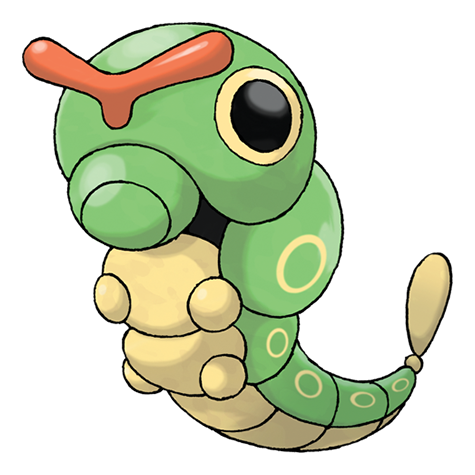 Caterpie Caterpie | DP | 6 | 8% | National Dex plus Pokémon FireRed inserted in the Nintendo DS GBA slot; replaces grass slots 8-9. | ||
| Lotad | DP | 6 | 8% | National Dex plus Pokémon Sapphire inserted in the Nintendo DS GBA slot; replaces grass slots 8-9. | ||
| Pineco | DP | 6 | 8% | National Dex plus Pokémon Emerald inserted in the Nintendo DS GBA slot; replaces grass slots 8-9. | ||
| Seedot | DP | 6 | 8% | National Dex plus Pokémon Ruby inserted in the Nintendo DS GBA slot; replaces grass slots 8-9. | ||
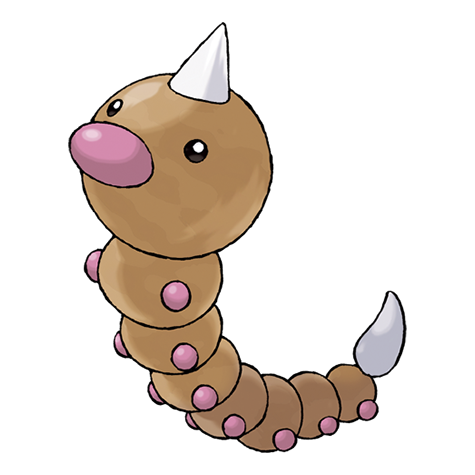 Weedle Weedle | DP | 6 | 8% | National Dex plus Pokémon LeafGreen inserted in the Nintendo DS GBA slot; replaces grass slots 8-9. | ||
Route 205 North
| Pokémon | Games | Levels | Rate | Requirement / notes | ||
|---|---|---|---|---|---|---|
| Morning | Day | Night | ||||
| Poké Radar (post-National Dex) | ||||||
 Slowpoke Slowpoke | DP | 11-12 | 22% | National Dex and Poké Radar required; replacement slot applies only in a hard/vigorous-shaking Radar patch. | ||
| Hoppip | DP | 11 | 20% | National Dex and Poké Radar required; replacement slot applies only in a hard/vigorous-shaking Radar patch. | ||
| Skiploom | DP | 12 | 2% | National Dex and Poké Radar required; replacement slot applies only in a hard/vigorous-shaking Radar patch. | ||
| Dual-slot GBA insertion (post-National Dex) | ||||||
| Lotad | DP | 12 | 8% | National Dex plus Pokémon Sapphire inserted in the Nintendo DS GBA slot; replaces grass slots 8-9. | ||
Route 205 South
| Pokémon | Games | Levels | Rate | Requirement / notes | ||
|---|---|---|---|---|---|---|
| Morning | Day | Night | ||||
| Poké Radar (post-National Dex) | ||||||
| Hoppip | DP | 9-10 | 22% | National Dex and Poké Radar required; replacement slot applies only in a hard/vigorous-shaking Radar patch. | ||
| Dual-slot GBA insertion (post-National Dex) | ||||||
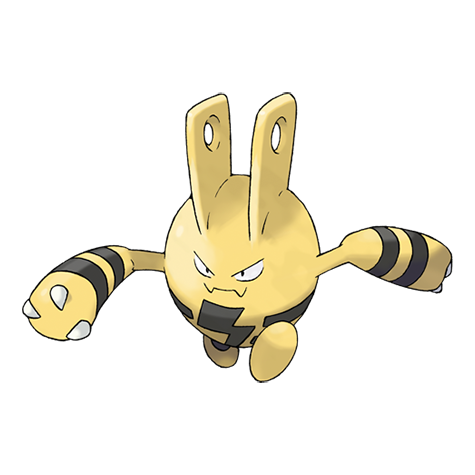 Elekid Elekid | DP | 10 | 8% | National Dex plus Pokémon FireRed inserted in the Nintendo DS GBA slot; replaces grass slots 8-9. | ||
Route 206
| Pokémon | Games | Levels | Rate | Requirement / notes | ||
|---|---|---|---|---|---|---|
| Morning | Day | Night | ||||
| Swarm (post-National Dex daily announcement) | ||||||
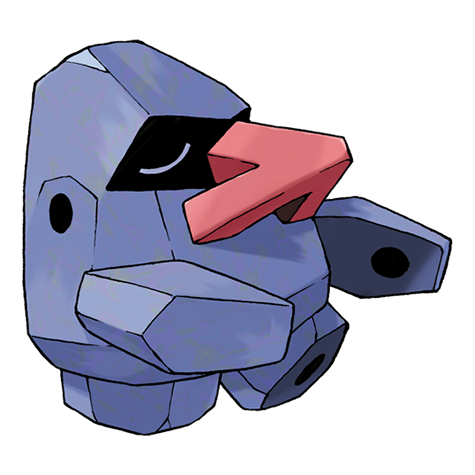 Nosepass Nosepass | DP | 14 | 40% | Post-National Dex daily swarm; replaces grass slots 0-1. | ||
| Poké Radar (post-National Dex) | ||||||
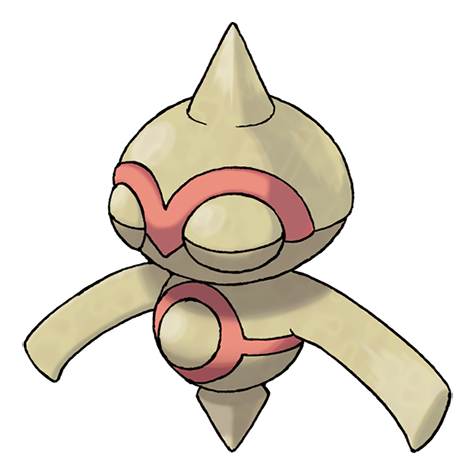 Baltoy Baltoy | DP | 14-16 | 22% | National Dex and Poké Radar required; replacement slot applies only in a hard/vigorous-shaking Radar patch. | ||
| Dual-slot GBA insertion (post-National Dex) | ||||||
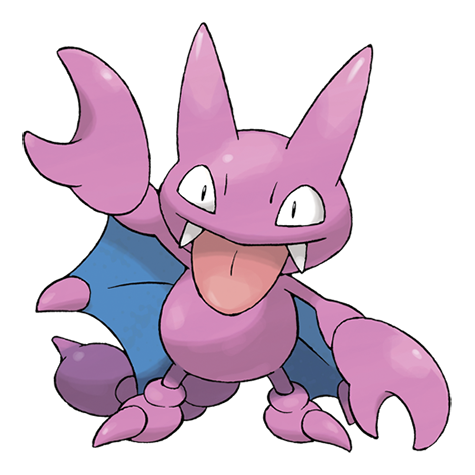 Gligar Gligar | DP | 15 | 8% | National Dex plus Pokémon Emerald inserted in the Nintendo DS GBA slot; replaces grass slots 8-9. | ||
Route 207
| Pokémon | Games | Levels | Rate | Requirement / notes | ||
|---|---|---|---|---|---|---|
| Morning | Day | Night | ||||
| Swarm (post-National Dex daily announcement) | ||||||
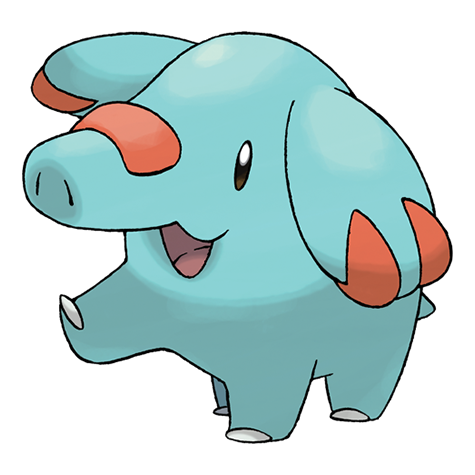 Phanpy Phanpy | DP | 5 | 40% | Post-National Dex daily swarm; replaces grass slots 0-1. | ||
| Poké Radar (post-National Dex) | ||||||
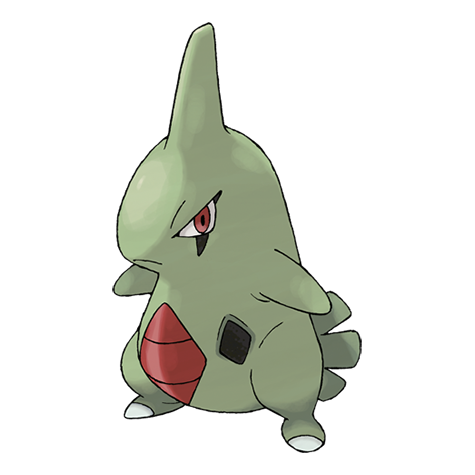 Larvitar Larvitar | DP | 6-7 | 22% | National Dex and Poké Radar required; replacement slot applies only in a hard/vigorous-shaking Radar patch. | ||
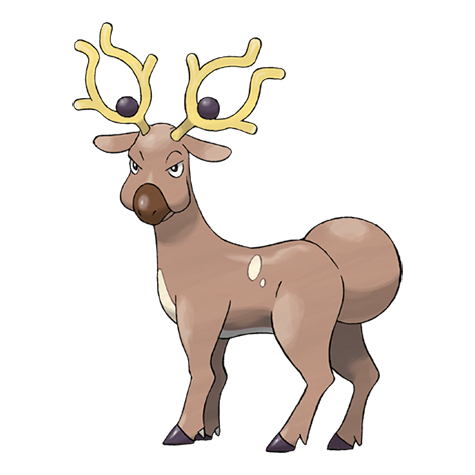 Stantler Stantler | DP | 6-7 | 22% | National Dex and Poké Radar required; replacement slot applies only in a hard/vigorous-shaking Radar patch. | ||
| Dual-slot GBA insertion (post-National Dex) | ||||||
| Gligar | DP | 7 | 8% | National Dex plus Pokémon Emerald inserted in the Nintendo DS GBA slot; replaces grass slots 8-9. | ||
Route 208
| Pokémon | Games | Levels | Rate | Requirement / notes | ||
|---|---|---|---|---|---|---|
| Morning | Day | Night | ||||
| Swarm (post-National Dex daily announcement) | ||||||
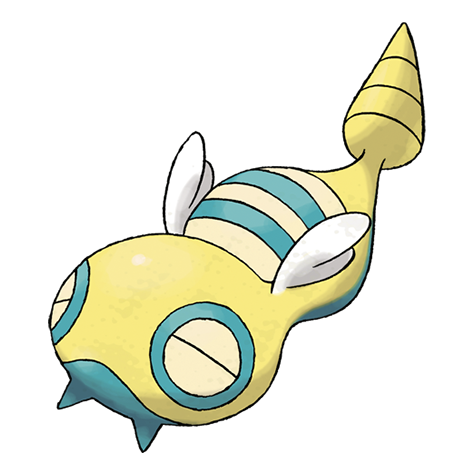 Dunsparce Dunsparce | DP | 16 | 40% | Post-National Dex daily swarm; replaces grass slots 0-1. | ||
| Poké Radar (post-National Dex) | ||||||
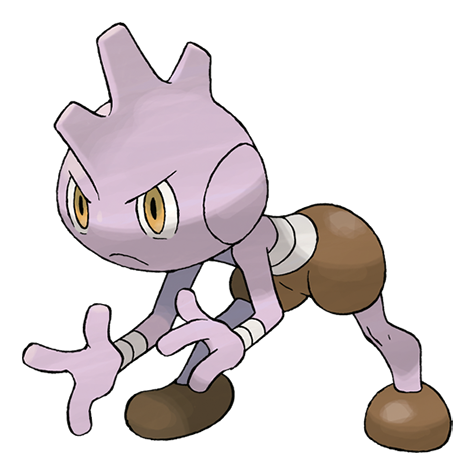 Tyrogue Tyrogue | DP | 17-18 | 22% | National Dex and Poké Radar required; replacement slot applies only in a hard/vigorous-shaking Radar patch. | ||
| Dual-slot GBA insertion (post-National Dex) | ||||||
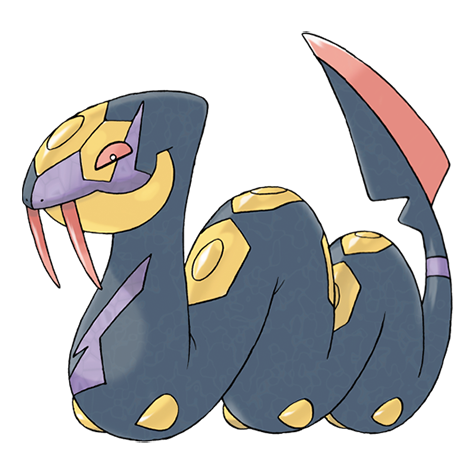 Seviper Seviper | DP | 18 | 8% | National Dex plus Pokémon Sapphire inserted in the Nintendo DS GBA slot; replaces grass slots 8-9. | ||
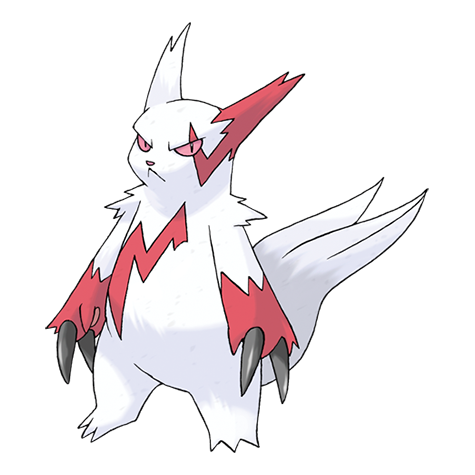 Zangoose Zangoose | DP | 18 | 8% | National Dex plus Pokémon Ruby inserted in the Nintendo DS GBA slot; replaces grass slots 8-9. | ||
Route 209
| Pokémon | Games | Levels | Rate | Requirement / notes | ||
|---|---|---|---|---|---|---|
| Morning | Day | Night | ||||
| Swarm (post-National Dex daily announcement) | ||||||
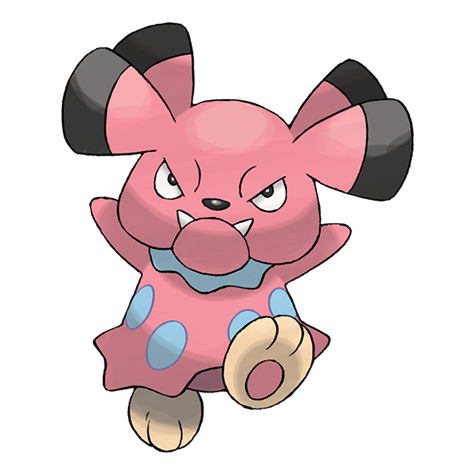 Snubbull Snubbull | DP | 16 | 40% | Post-National Dex daily swarm; replaces grass slots 0-1. | ||
| Poké Radar (post-National Dex) | ||||||
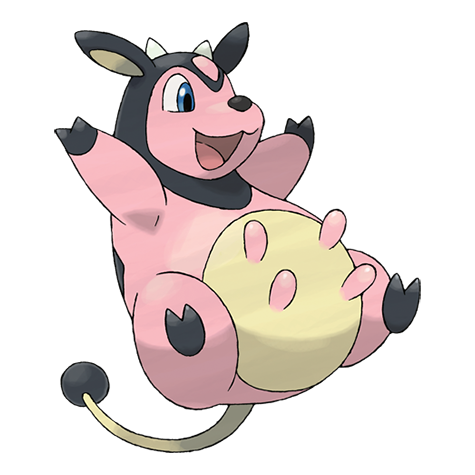 Miltank Miltank | DP | 17 | 20% | National Dex and Poké Radar required; replacement slot applies only in a hard/vigorous-shaking Radar patch. | ||
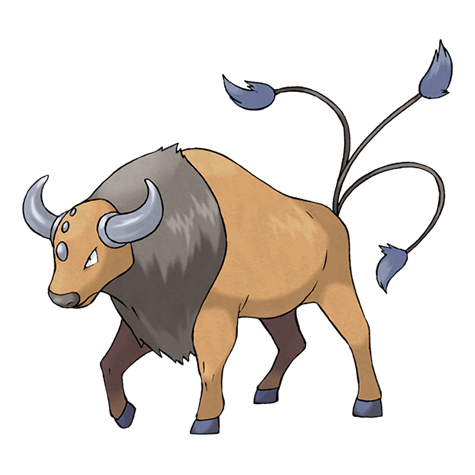 Tauros Tauros | DP | 17 | 20% | National Dex and Poké Radar required; replacement slot applies only in a hard/vigorous-shaking Radar patch. | ||
| Miltank | DP | 16 | 2% | National Dex and Poké Radar required; replacement slot applies only in a hard/vigorous-shaking Radar patch. | ||
| Tauros | DP | 16 | 2% | National Dex and Poké Radar required; replacement slot applies only in a hard/vigorous-shaking Radar patch. | ||
| Dual-slot GBA insertion (post-National Dex) | ||||||
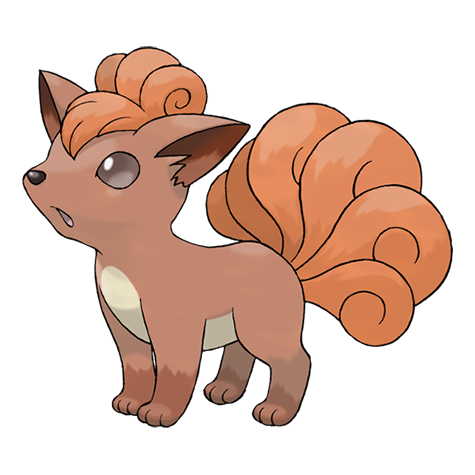 Vulpix Vulpix | DP | 16 | 8% | National Dex plus Pokémon LeafGreen inserted in the Nintendo DS GBA slot; replaces grass slots 8-9. | ||
Route 210 North
| Pokémon | Games | Levels | Rate | Requirement / notes | ||
|---|---|---|---|---|---|---|
| Morning | Day | Night | ||||
| Poké Radar (post-National Dex) | ||||||
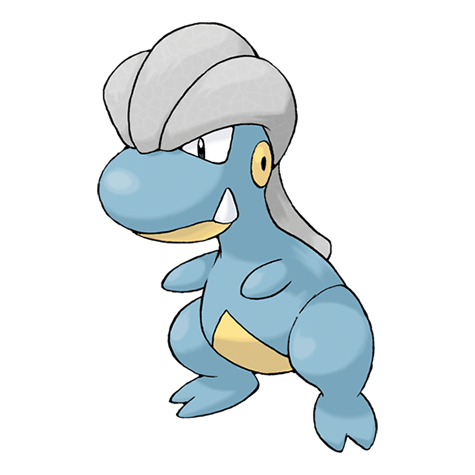 Bagon Bagon | DP | 25-26 | 22% | National Dex and Poké Radar required; replacement slot applies only in a hard/vigorous-shaking Radar patch. | ||
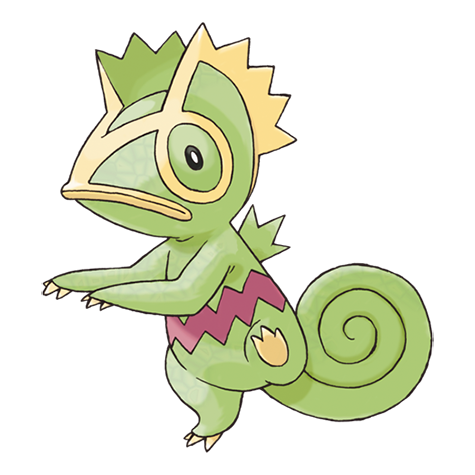 Kecleon Kecleon | DP | 25-26 | 22% | National Dex and Poké Radar required; replacement slot applies only in a hard/vigorous-shaking Radar patch. | ||
| Dual-slot GBA insertion (post-National Dex) | ||||||
| Seviper | DP | 26 | 8% | National Dex plus Pokémon Sapphire inserted in the Nintendo DS GBA slot; replaces grass slots 8-9. | ||
| Zangoose | DP | 26 | 8% | National Dex plus Pokémon Ruby inserted in the Nintendo DS GBA slot; replaces grass slots 8-9. | ||
Route 210 South
| Pokémon | Games | Levels | Rate | Requirement / notes | ||
|---|---|---|---|---|---|---|
| Morning | Day | Night | ||||
| Poké Radar (post-National Dex) | ||||||
| Miltank | DP | 19 | 20% | National Dex and Poké Radar required; replacement slot applies only in a hard/vigorous-shaking Radar patch. | ||
| Tauros | DP | 19 | 20% | National Dex and Poké Radar required; replacement slot applies only in a hard/vigorous-shaking Radar patch. | ||
| Miltank | DP | 20 | 2% | National Dex and Poké Radar required; replacement slot applies only in a hard/vigorous-shaking Radar patch. | ||
| Tauros | DP | 20 | 2% | National Dex and Poké Radar required; replacement slot applies only in a hard/vigorous-shaking Radar patch. | ||
| Dual-slot GBA insertion (post-National Dex) | ||||||
| Pineco | DP | 18 or 20 | 8% | National Dex plus Pokémon Emerald inserted in the Nintendo DS GBA slot; replaces grass slots 8-9. | ||
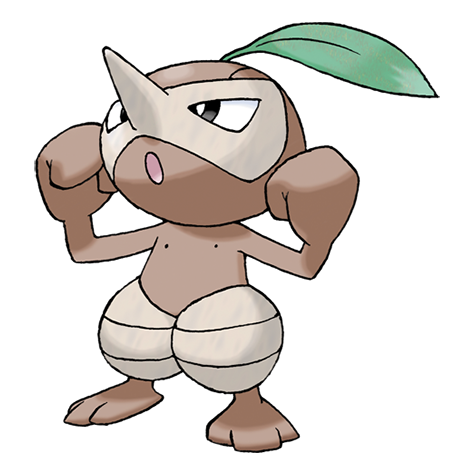 Nuzleaf Nuzleaf | DP | 20 | 4% | National Dex plus Pokémon Ruby inserted in the Nintendo DS GBA slot; replaces grass slots 8-9. | ||
| Seedot | DP | 18 | 4% | National Dex plus Pokémon Ruby inserted in the Nintendo DS GBA slot; replaces grass slots 8-9. | ||
Route 211 East
| Pokémon | Games | Levels | Rate | Requirement / notes | ||
|---|---|---|---|---|---|---|
| Morning | Day | Night | ||||
| Poké Radar (post-National Dex) | ||||||
 Swablu Swablu | DP | 27-28 | 22% | National Dex and Poké Radar required; replacement slot applies only in a hard/vigorous-shaking Radar patch. | ||
| Dual-slot GBA insertion (post-National Dex) | ||||||
| Teddiursa | DP | 27-28 | 8% | National Dex plus Pokémon Emerald inserted in the Nintendo DS GBA slot; replaces grass slots 8-9. | ||
Route 211 West
| Pokémon | Games | Levels | Rate | Requirement / notes | ||
|---|---|---|---|---|---|---|
| Morning | Day | Night | ||||
| Poké Radar (post-National Dex) | ||||||
| Tyrogue | DP | 12-14 | 22% | National Dex and Poké Radar required; replacement slot applies only in a hard/vigorous-shaking Radar patch. | ||
| Dual-slot GBA insertion (post-National Dex) | ||||||
| Teddiursa | DP | 12 or 14 | 8% | National Dex plus Pokémon Emerald inserted in the Nintendo DS GBA slot; replaces grass slots 8-9. | ||
Route 212 North
| Pokémon | Games | Levels | Rate | Requirement / notes | ||
|---|---|---|---|---|---|---|
| Morning | Day | Night | ||||
| Poké Radar (post-National Dex) | ||||||
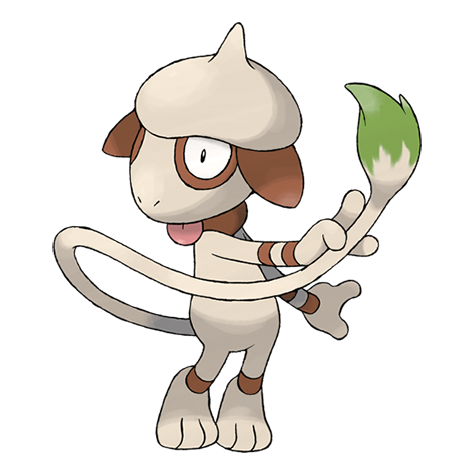 Smeargle Smeargle | DP | 16 or 18 | 22% | National Dex and Poké Radar required; replacement slot applies only in a hard/vigorous-shaking Radar patch. | ||
Route 212 South
| Pokémon | Games | Levels | Rate | Requirement / notes | ||
|---|---|---|---|---|---|---|
| Morning | Day | Night | ||||
| Poké Radar (post-National Dex) | ||||||
 Grimer Grimer | DP | 18 or 20 | 22% | National Dex and Poké Radar required; replacement slot applies only in a hard/vigorous-shaking Radar patch. | ||
| Dual-slot GBA insertion (post-National Dex) | ||||||
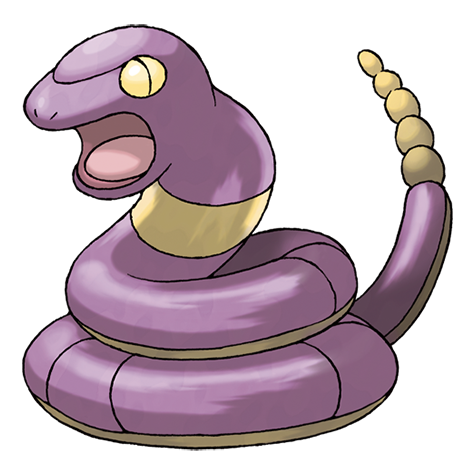 Ekans Ekans | DP | 18 or 20 | 8% | National Dex plus Pokémon FireRed inserted in the Nintendo DS GBA slot; replaces grass slots 8-9. | ||
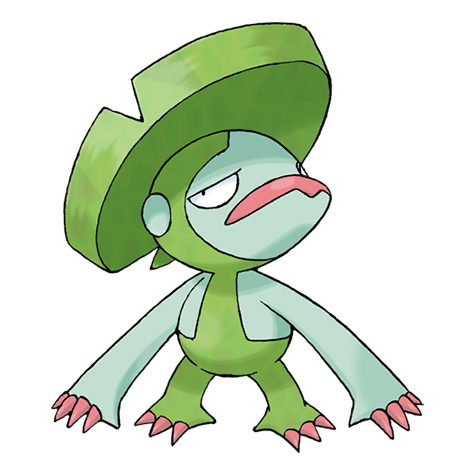 Lombre Lombre | DP | 20 | 4% | National Dex plus Pokémon Sapphire inserted in the Nintendo DS GBA slot; replaces grass slots 8-9. | ||
| Lotad | DP | 18 | 4% | National Dex plus Pokémon Sapphire inserted in the Nintendo DS GBA slot; replaces grass slots 8-9. | ||
Route 213
| Pokémon | Games | Levels | Rate | Requirement / notes | ||
|---|---|---|---|---|---|---|
| Morning | Day | Night | ||||
| Swarm (post-National Dex daily announcement) | ||||||
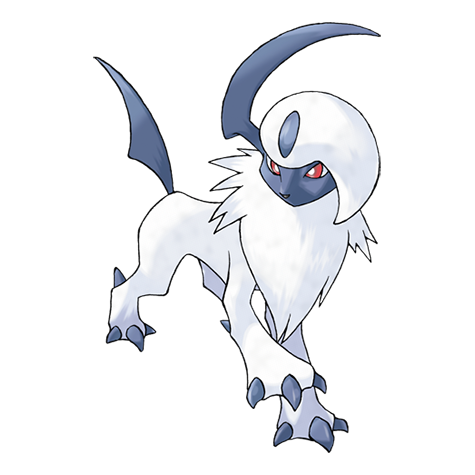 Absol Absol | DP | 20 | 40% | Post-National Dex daily swarm; replaces grass slots 0-1. | ||
| Poké Radar (post-National Dex) | ||||||
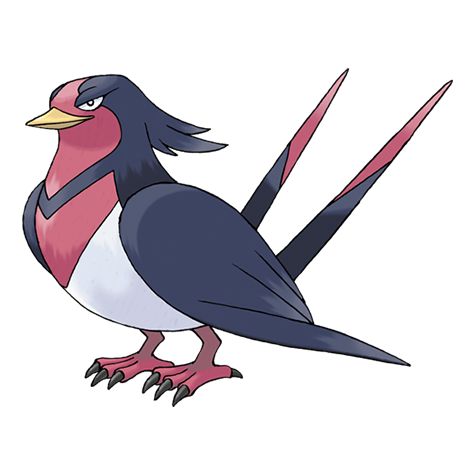 Swellow Swellow | DP | 20-22 | 22% | National Dex and Poké Radar required; replacement slot applies only in a hard/vigorous-shaking Radar patch. | ||
Route 214
| Pokémon | Games | Levels | Rate | Requirement / notes | ||
|---|---|---|---|---|---|---|
| Morning | Day | Night | ||||
| Swarm (post-National Dex daily announcement) | ||||||
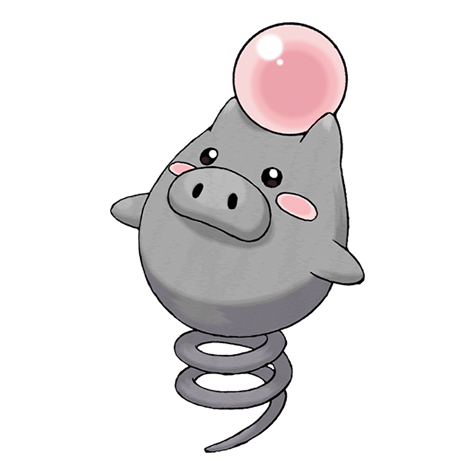 Spoink Spoink | DP | 22-23 | 40% | Post-National Dex daily swarm; replaces grass slots 0-1. | ||
| Poké Radar (post-National Dex) | ||||||
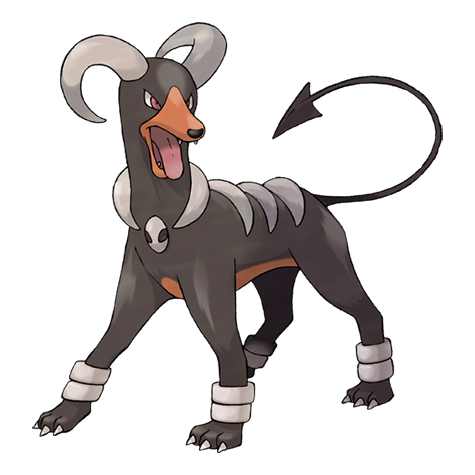 Houndoom Houndoom | DP | 23-24 | 22% | National Dex and Poké Radar required; replacement slot applies only in a hard/vigorous-shaking Radar patch. | ||
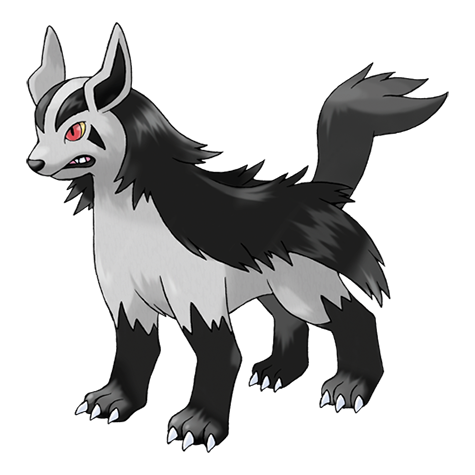 Mightyena Mightyena | DP | 23-24 | 22% | National Dex and Poké Radar required; replacement slot applies only in a hard/vigorous-shaking Radar patch. | ||
| Dual-slot GBA insertion (post-National Dex) | ||||||
| Gligar | DP | 24 | 8% | National Dex plus Pokémon Emerald inserted in the Nintendo DS GBA slot; replaces grass slots 8-9. | ||
| Vulpix | DP | 24 | 8% | National Dex plus Pokémon LeafGreen inserted in the Nintendo DS GBA slot; replaces grass slots 8-9. | ||
Route 215
| Pokémon | Games | Levels | Rate | Requirement / notes | ||
|---|---|---|---|---|---|---|
| Morning | Day | Night | ||||
| Swarm (post-National Dex daily announcement) | ||||||
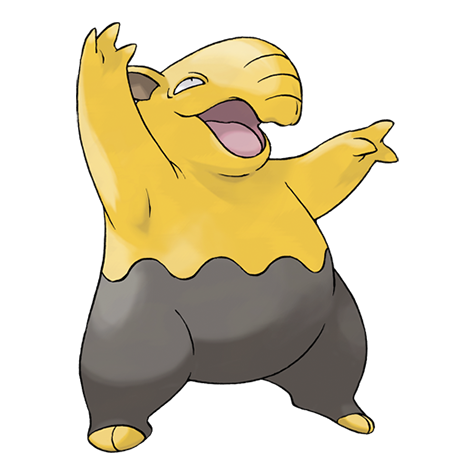 Drowzee Drowzee | DP | 20-21 | 40% | Post-National Dex daily swarm; replaces grass slots 0-1. | ||
| Poké Radar (post-National Dex) | ||||||
| Houndoom | DP | 20 or 22 | 22% | National Dex and Poké Radar required; replacement slot applies only in a hard/vigorous-shaking Radar patch. | ||
| Mightyena | DP | 20 or 22 | 22% | National Dex and Poké Radar required; replacement slot applies only in a hard/vigorous-shaking Radar patch. | ||
| Dual-slot GBA insertion (post-National Dex) | ||||||
| Gligar | DP | 22 | 8% | National Dex plus Pokémon Emerald inserted in the Nintendo DS GBA slot; replaces grass slots 8-9. | ||
Route 216
| Pokémon | Games | Levels | Rate | Requirement / notes | ||
|---|---|---|---|---|---|---|
| Morning | Day | Night | ||||
| Swarm (post-National Dex daily announcement) | ||||||
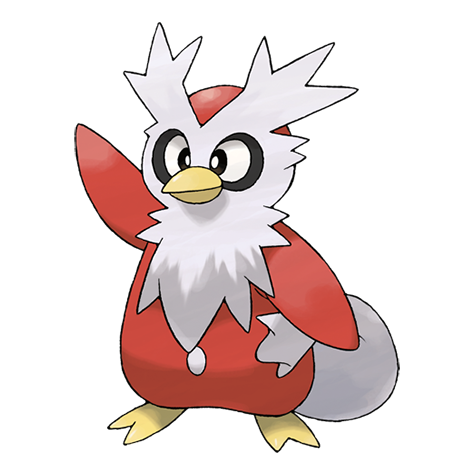 Delibird Delibird | DP | 32 | 40% | Post-National Dex daily swarm; replaces grass slots 0-1. | ||
| Poké Radar (post-National Dex) | ||||||
| Snorunt | DP | 33-34 | 22% | National Dex and Poké Radar required; replacement slot applies only in a hard/vigorous-shaking Radar patch. | ||
| Dual-slot GBA insertion (post-National Dex) | ||||||
| Ursaring | DP | 33-34 | 8% | National Dex plus Pokémon Emerald inserted in the Nintendo DS GBA slot; replaces grass slots 8-9. | ||
Route 217
| Pokémon | Games | Levels | Rate | Requirement / notes | ||
|---|---|---|---|---|---|---|
| Morning | Day | Night | ||||
| Swarm (post-National Dex daily announcement) | ||||||
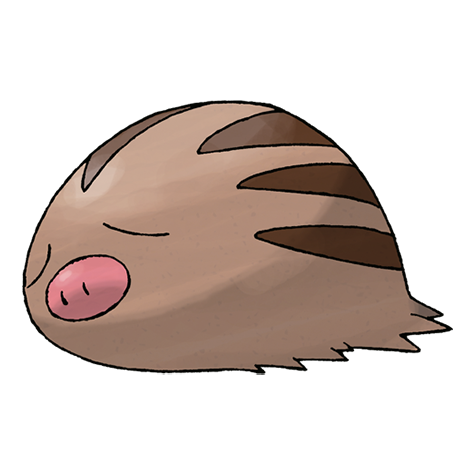 Swinub Swinub | DP | 34 | 40% | Post-National Dex daily swarm; replaces grass slots 0-1. | ||
| Poké Radar (post-National Dex) | ||||||
| Snorunt | DP | 35-36 | 22% | National Dex and Poké Radar required; replacement slot applies only in a hard/vigorous-shaking Radar patch. | ||
| Dual-slot GBA insertion (post-National Dex) | ||||||
| Ursaring | DP | 36 | 8% | National Dex plus Pokémon Emerald inserted in the Nintendo DS GBA slot; replaces grass slots 8-9. | ||
Route 218
| Pokémon | Games | Levels | Rate | Requirement / notes | ||
|---|---|---|---|---|---|---|
| Morning | Day | Night | ||||
| Swarm (post-National Dex daily announcement) | ||||||
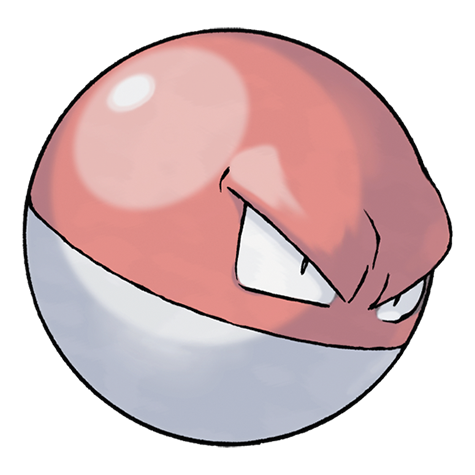 Voltorb Voltorb | DP | 28 | 40% | Post-National Dex daily swarm; replaces grass slots 0-1. | ||
| Poké Radar (post-National Dex) | ||||||
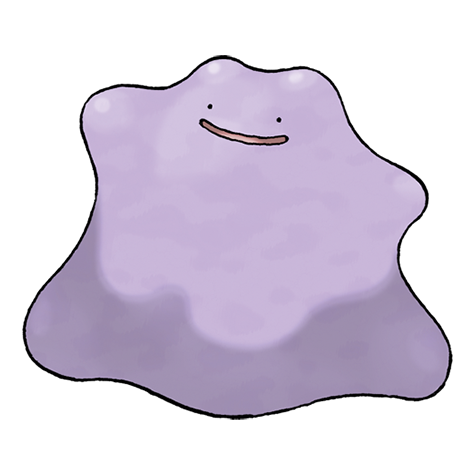 Ditto Ditto | DP | 29-30 | 22% | National Dex and Poké Radar required; replacement slot applies only in a hard/vigorous-shaking Radar patch. | ||
Route 221
| Pokémon | Games | Levels | Rate | Requirement / notes | ||
|---|---|---|---|---|---|---|
| Morning | Day | Night | ||||
| Swarm (post-National Dex daily announcement) | ||||||
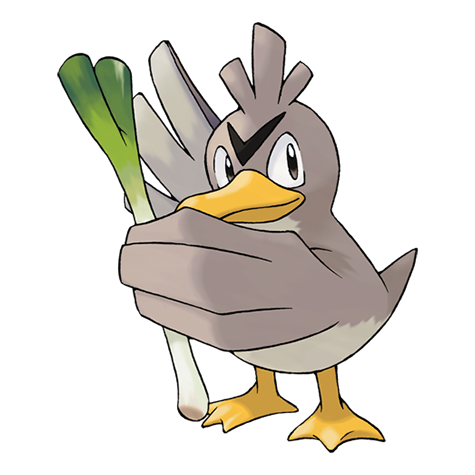 Farfetchd Farfetchd | DP | 28 | 40% | Post-National Dex daily swarm; replaces grass slots 0-1. | ||
| Poké Radar (post-National Dex) | ||||||
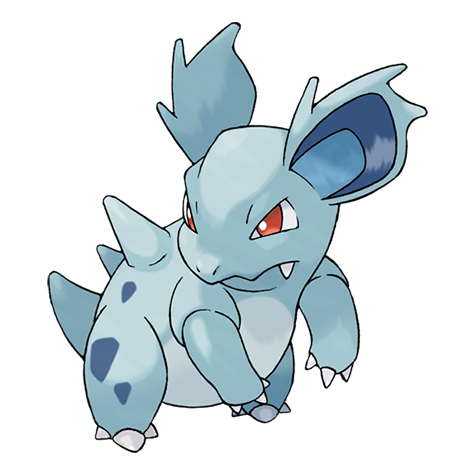 Nidorina Nidorina | DP | 29 | 20% | National Dex and Poké Radar required; replacement slot applies only in a hard/vigorous-shaking Radar patch. | ||
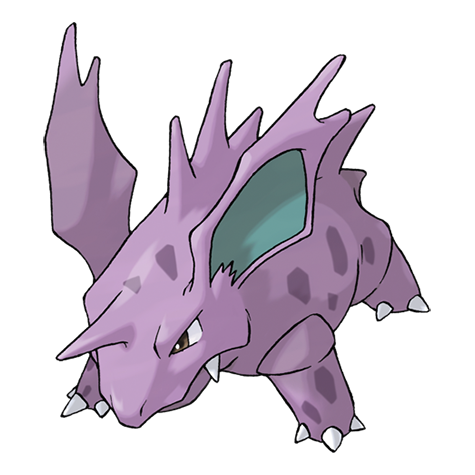 Nidorino Nidorino | DP | 29 | 20% | National Dex and Poké Radar required; replacement slot applies only in a hard/vigorous-shaking Radar patch. | ||
| Nidorina | DP | 30 | 2% | National Dex and Poké Radar required; replacement slot applies only in a hard/vigorous-shaking Radar patch. | ||
| Nidorino | DP | 30 | 2% | National Dex and Poké Radar required; replacement slot applies only in a hard/vigorous-shaking Radar patch. | ||
Route 222
| Pokémon | Games | Levels | Rate | Requirement / notes | ||
|---|---|---|---|---|---|---|
| Morning | Day | Night | ||||
| Swarm (post-National Dex daily announcement) | ||||||
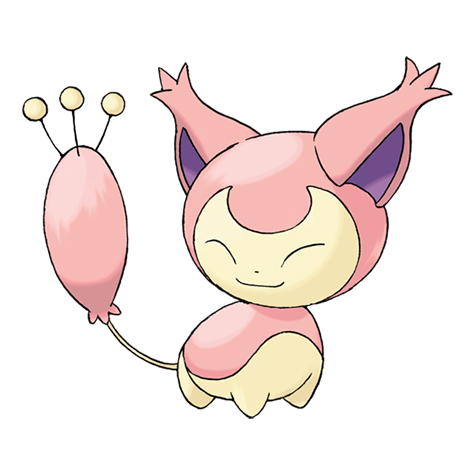 Skitty Skitty | DP | 40 | 40% | Post-National Dex daily swarm; replaces grass slots 0-1. | ||
| Poké Radar (post-National Dex) | ||||||
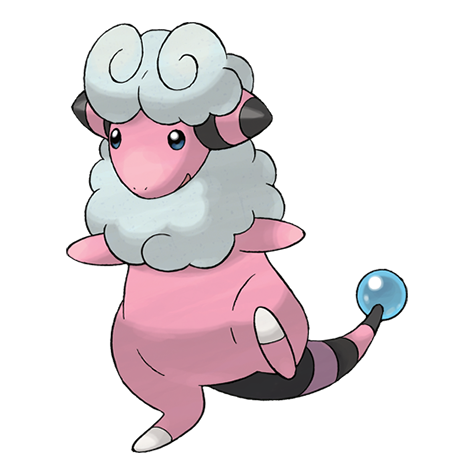 Flaaffy Flaaffy | DP | 41-42 | 22% | National Dex and Poké Radar required; replacement slot applies only in a hard/vigorous-shaking Radar patch. | ||
Route 224
| Pokémon | Games | Levels | Rate | Requirement / notes | ||
|---|---|---|---|---|---|---|
| Morning | Day | Night | ||||
| Swarm (post-National Dex daily announcement) | ||||||
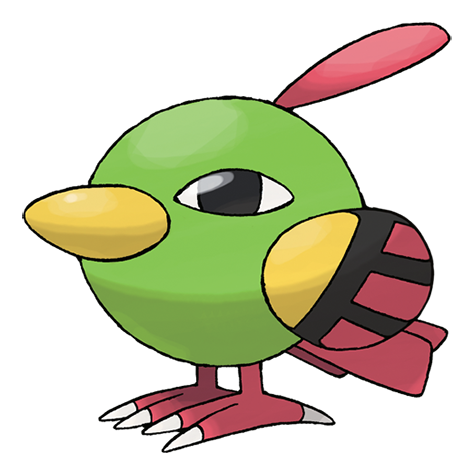 Natu Natu | DP | 53 | 40% | Post-National Dex daily swarm; replaces grass slots 0-1. | ||
| Poké Radar (post-National Dex) | ||||||
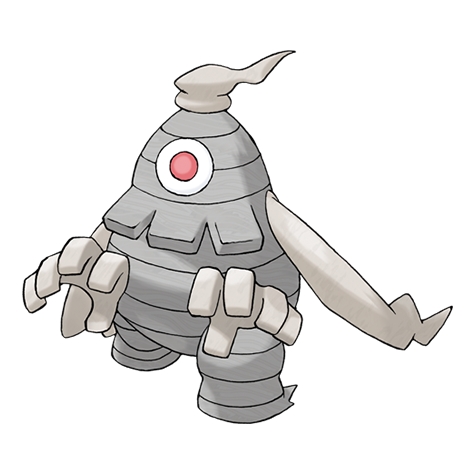 Dusclops Dusclops | DP | 52 or 54 | 20% | National Dex and Poké Radar required; replacement slot applies only in a hard/vigorous-shaking Radar patch. | ||
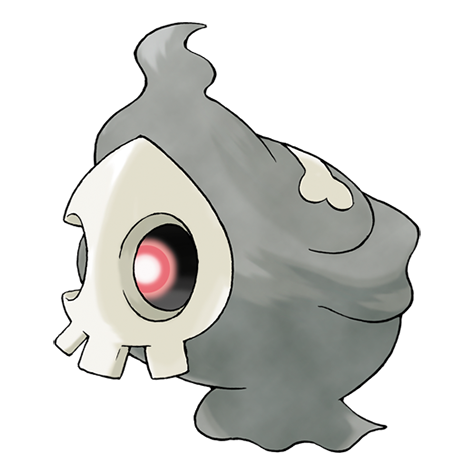 Duskull Duskull | DP | 23 | 2% | National Dex and Poké Radar required; replacement slot applies only in a hard/vigorous-shaking Radar patch. | ||
| Dual-slot GBA insertion (post-National Dex) | ||||||
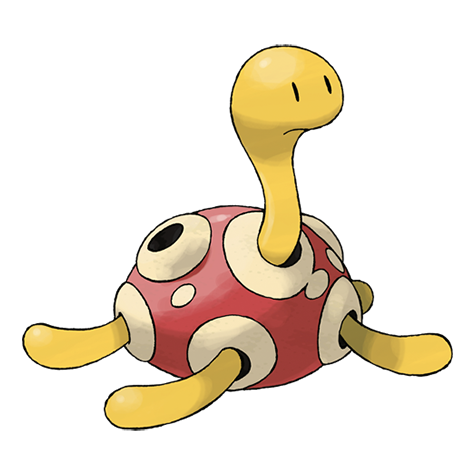 Shuckle Shuckle | DP | 23 | 8% | National Dex plus Pokémon Emerald inserted in the Nintendo DS GBA slot; replaces grass slots 8-9. | ||
Route 225
| Pokémon | Games | Levels | Rate | Requirement / notes | ||
|---|---|---|---|---|---|---|
| Morning | Day | Night | ||||
| Swarm (post-National Dex daily announcement) | ||||||
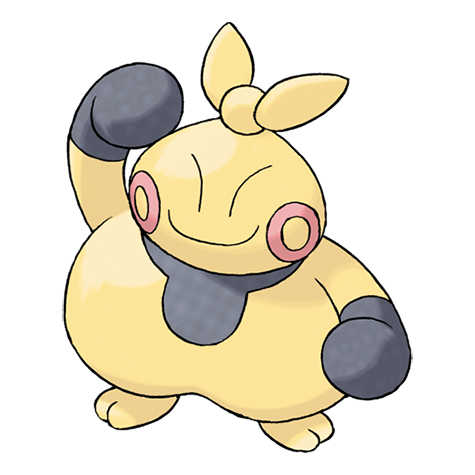 Makuhita Makuhita | DP | 50-51 | 40% | Post-National Dex daily swarm; replaces grass slots 0-1. | ||
| Poké Radar (post-National Dex) | ||||||
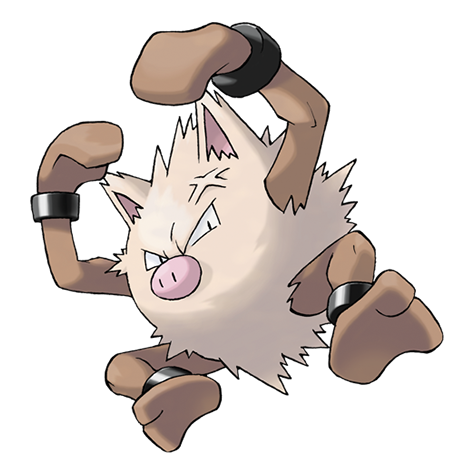 Primeape Primeape | DP | 51-52 | 20% | National Dex and Poké Radar required; replacement slot applies only in a hard/vigorous-shaking Radar patch. | ||
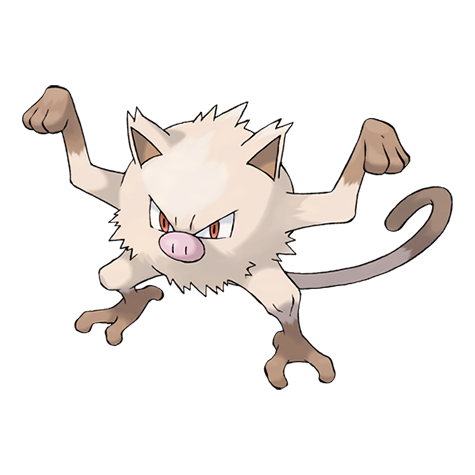 Mankey Mankey | DP | 22 | 2% | National Dex and Poké Radar required; replacement slot applies only in a hard/vigorous-shaking Radar patch. | ||
Route 226
| Pokémon | Games | Levels | Rate | Requirement / notes | ||
|---|---|---|---|---|---|---|
| Morning | Day | Night | ||||
| Swarm (post-National Dex daily announcement) | ||||||
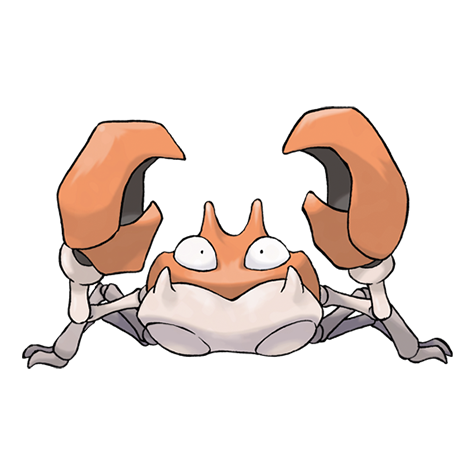 Krabby Krabby | DP | 52 | 40% | Post-National Dex daily swarm; replaces grass slots 0-1. | ||
| Poké Radar (post-National Dex) | ||||||
| Primeape | DP | 51 or 53 | 20% | National Dex and Poké Radar required; replacement slot applies only in a hard/vigorous-shaking Radar patch. | ||
| Mankey | DP | 22 | 2% | National Dex and Poké Radar required; replacement slot applies only in a hard/vigorous-shaking Radar patch. | ||
Route 227
| Pokémon | Games | Levels | Rate | Requirement / notes | ||
|---|---|---|---|---|---|---|
| Morning | Day | Night | ||||
| Swarm (post-National Dex daily announcement) | ||||||
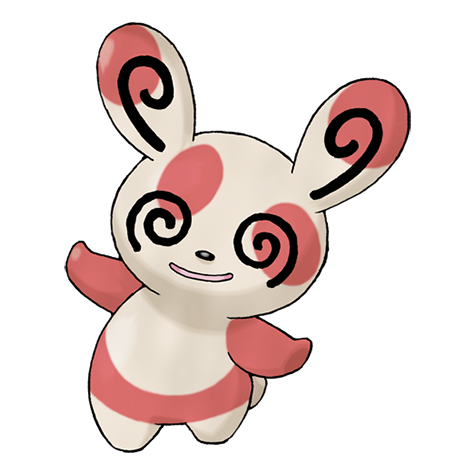 Spinda Spinda | DP | 55 | 40% | Post-National Dex daily swarm; replaces grass slots 0-1. | ||
| Poké Radar (post-National Dex) | ||||||
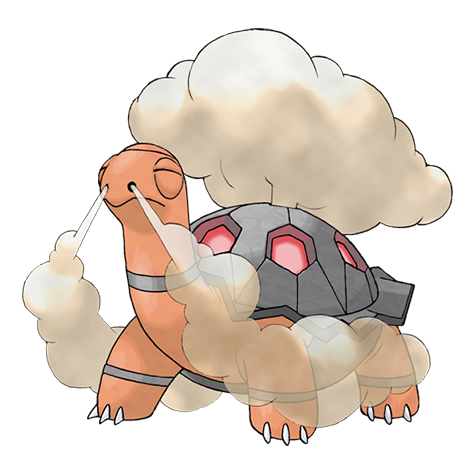 Torkoal Torkoal | DP | 24 or 55 | 22% | National Dex and Poké Radar required; replacement slot applies only in a hard/vigorous-shaking Radar patch. | ||
| Dual-slot GBA insertion (post-National Dex) | ||||||
| Gligar | DP | 22 | 8% | National Dex plus Pokémon Emerald inserted in the Nintendo DS GBA slot; replaces grass slots 8-9. | ||
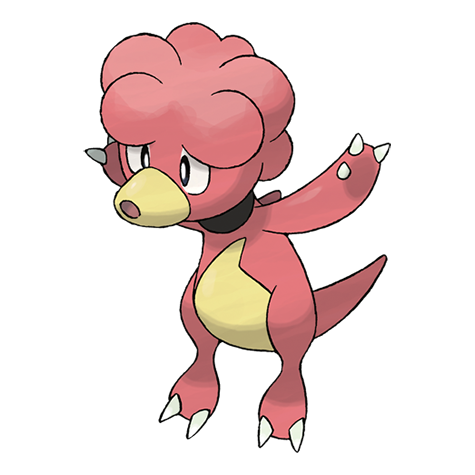 Magby Magby | DP | 22 | 8% | National Dex plus Pokémon LeafGreen inserted in the Nintendo DS GBA slot; replaces grass slots 8-9. | ||
Route 228
| Pokémon | Games | Levels | Rate | Requirement / notes | ||
|---|---|---|---|---|---|---|
| Morning | Day | Night | ||||
| Swarm (post-National Dex daily announcement) | ||||||
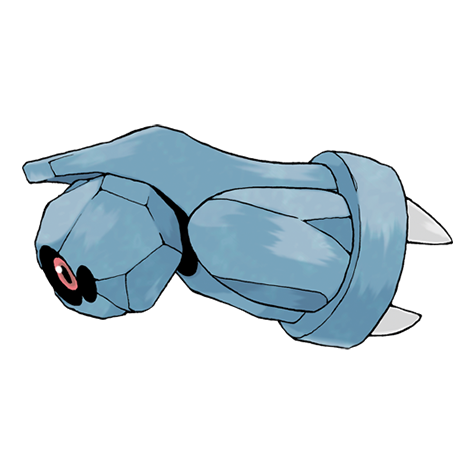 Beldum Beldum | DP | 53 | 40% | Post-National Dex daily swarm; replaces grass slots 0-1. | ||
| Poké Radar (post-National Dex) | ||||||
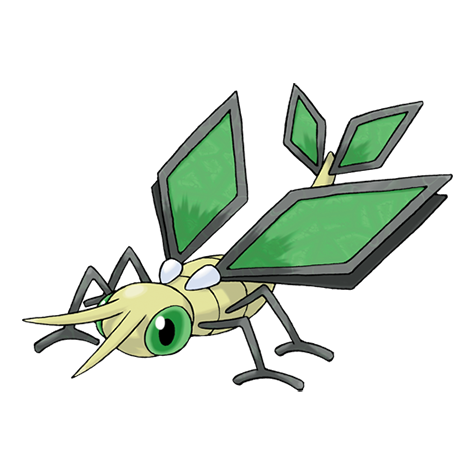 Vibrava Vibrava | DP | 53-54 | 20% | National Dex and Poké Radar required; replacement slot applies only in a hard/vigorous-shaking Radar patch. | ||
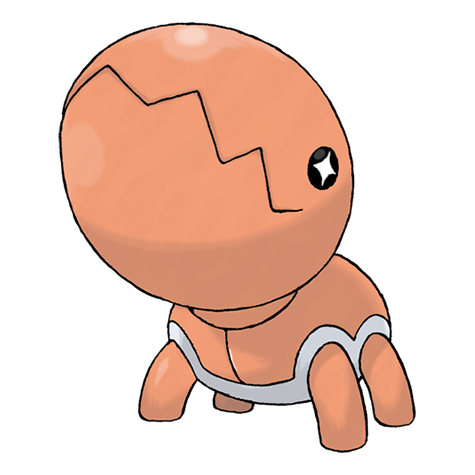 Trapinch Trapinch | DP | 25 | 2% | National Dex and Poké Radar required; replacement slot applies only in a hard/vigorous-shaking Radar patch. | ||
| Dual-slot GBA insertion (post-National Dex) | ||||||
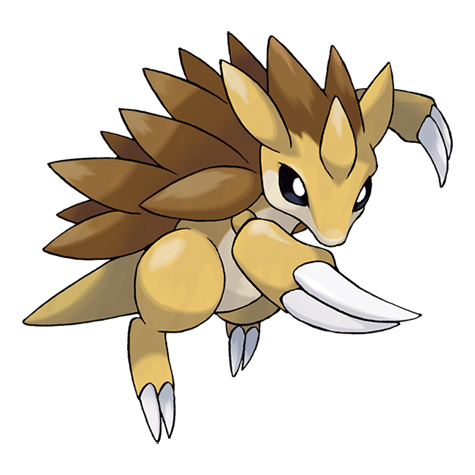 Sandslash Sandslash | DP | 23 | 8% | National Dex plus Pokémon LeafGreen inserted in the Nintendo DS GBA slot; replaces grass slots 8-9. | ||
Route 229
| Pokémon | Games | Levels | Rate | Requirement / notes | ||
|---|---|---|---|---|---|---|
| Morning | Day | Night | ||||
| Swarm (post-National Dex daily announcement) | ||||||
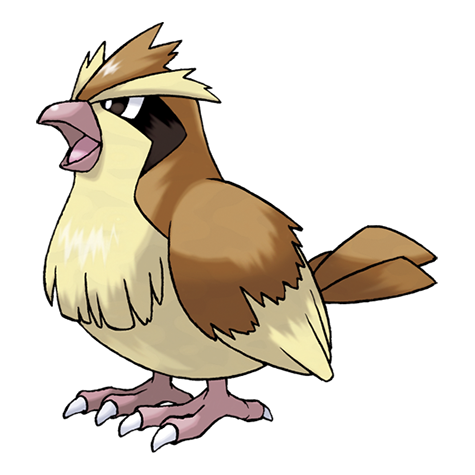 Pidgey Pidgey | DP | 51 | 40% | Post-National Dex daily swarm; replaces grass slots 0-1. | ||
| Poké Radar (post-National Dex) | ||||||
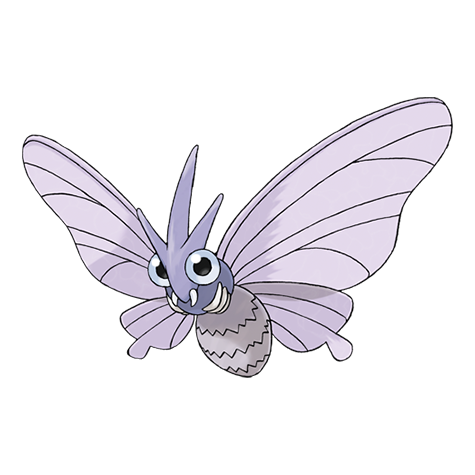 Venomoth Venomoth | DP | 50 | 20% | National Dex and Poké Radar required; replacement slot applies only in a hard/vigorous-shaking Radar patch. | ||
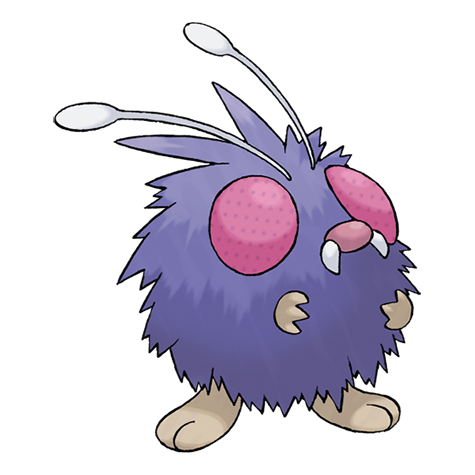 Venonat Venonat | DP | 22 | 2% | National Dex and Poké Radar required; replacement slot applies only in a hard/vigorous-shaking Radar patch. | ||
| Dual-slot GBA insertion (post-National Dex) | ||||||
| Lombre | DP | 20 | 8% | National Dex plus Pokémon Sapphire inserted in the Nintendo DS GBA slot; replaces grass slots 8-9. | ||
| Nuzleaf | DP | 20 | 8% | National Dex plus Pokémon Ruby inserted in the Nintendo DS GBA slot; replaces grass slots 8-9. | ||
| Pineco | DP | 20 | 8% | National Dex plus Pokémon Emerald inserted in the Nintendo DS GBA slot; replaces grass slots 8-9. | ||
Route 230
| Pokémon | Games | Levels | Rate | Requirement / notes | ||
|---|---|---|---|---|---|---|
| Morning | Day | Night | ||||
| Swarm (post-National Dex daily announcement) | ||||||
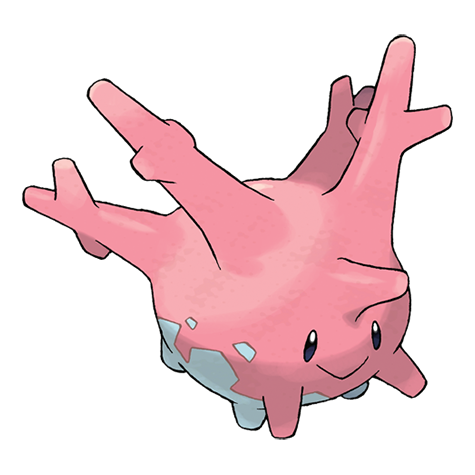 Corsola Corsola | DP | 50 | 40% | Post-National Dex daily swarm; replaces grass slots 0-1. | ||
| Poké Radar (post-National Dex) | ||||||
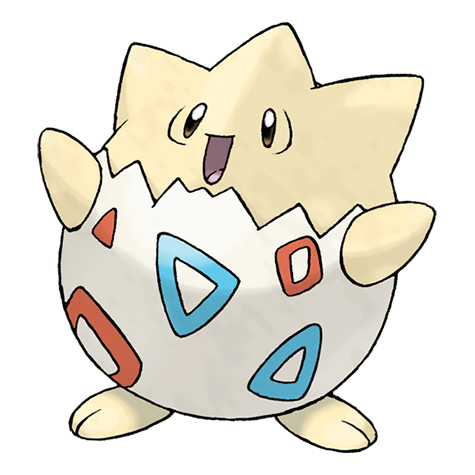 Togepi Togepi | DP | 18 or 23 | 22% | National Dex and Poké Radar required; replacement slot applies only in a hard/vigorous-shaking Radar patch. | ||
Sendoff Spring
| Pokémon | Games | Levels | Rate | Requirement / notes | ||
|---|---|---|---|---|---|---|
| Morning | Day | Night | ||||
| Dual-slot GBA insertion (post-National Dex) | ||||||
| Lunatone | DP | 52 | 8% | National Dex plus Pokémon Sapphire inserted in the Nintendo DS GBA slot; replaces grass slots 8-9. | ||
| Solrock | DP | 52 | 8% | National Dex plus Pokémon Ruby inserted in the Nintendo DS GBA slot; replaces grass slots 8-9. | ||
Stark Mountain Exterior
| Pokémon | Games | Levels | Rate | Requirement / notes | ||
|---|---|---|---|---|---|---|
| Morning | Day | Night | ||||
| Poké Radar (post-National Dex) | ||||||
| Torkoal | DP | 24 or 55 | 22% | National Dex and Poké Radar required; replacement slot applies only in a hard/vigorous-shaking Radar patch. | ||
| Dual-slot GBA insertion (post-National Dex) | ||||||
| Gligar | DP | 22 | 8% | National Dex plus Pokémon Emerald inserted in the Nintendo DS GBA slot; replaces grass slots 8-9. | ||
| Magby | DP | 22 | 8% | National Dex plus Pokémon LeafGreen inserted in the Nintendo DS GBA slot; replaces grass slots 8-9. | ||
Stark Mountain Interior 1
| Pokémon | Games | Levels | Rate | Requirement / notes | ||
|---|---|---|---|---|---|---|
| Morning | Day | Night | ||||
| Dual-slot GBA insertion (post-National Dex) | ||||||
| Magby | DP | 25 | 8% | National Dex plus Pokémon LeafGreen inserted in the Nintendo DS GBA slot; replaces grass slots 8-9. | ||
Stark Mountain Interior 2
| Pokémon | Games | Levels | Rate | Requirement / notes | ||
|---|---|---|---|---|---|---|
| Morning | Day | Night | ||||
| Dual-slot GBA insertion (post-National Dex) | ||||||
| Magby | DP | 27 | 8% | National Dex plus Pokémon LeafGreen inserted in the Nintendo DS GBA slot; replaces grass slots 8-9. | ||
Turnback Cave Random Room 1
| Pokémon | Games | Levels | Rate | Requirement / notes | ||
|---|---|---|---|---|---|---|
| Morning | Day | Night | ||||
| Dual-slot GBA insertion (post-National Dex) | ||||||
| Lunatone | DP | 44 or 46 | 8% | National Dex plus Pokémon Sapphire inserted in the Nintendo DS GBA slot; replaces grass slots 8-9. | ||
| Solrock | DP | 44 or 46 | 8% | National Dex plus Pokémon Ruby inserted in the Nintendo DS GBA slot; replaces grass slots 8-9. | ||
Turnback Cave Random Room 10
| Pokémon | Games | Levels | Rate | Requirement / notes | ||
|---|---|---|---|---|---|---|
| Morning | Day | Night | ||||
| Dual-slot GBA insertion (post-National Dex) | ||||||
| Lunatone | DP | 54 or 56 | 8% | National Dex plus Pokémon Sapphire inserted in the Nintendo DS GBA slot; replaces grass slots 8-9. | ||
| Solrock | DP | 54 or 56 | 8% | National Dex plus Pokémon Ruby inserted in the Nintendo DS GBA slot; replaces grass slots 8-9. | ||
Turnback Cave Random Room 11
| Pokémon | Games | Levels | Rate | Requirement / notes | ||
|---|---|---|---|---|---|---|
| Morning | Day | Night | ||||
| Dual-slot GBA insertion (post-National Dex) | ||||||
| Lunatone | DP | 54 or 56 | 8% | National Dex plus Pokémon Sapphire inserted in the Nintendo DS GBA slot; replaces grass slots 8-9. | ||
| Solrock | DP | 54 or 56 | 8% | National Dex plus Pokémon Ruby inserted in the Nintendo DS GBA slot; replaces grass slots 8-9. | ||
Turnback Cave Random Room 12
| Pokémon | Games | Levels | Rate | Requirement / notes | ||
|---|---|---|---|---|---|---|
| Morning | Day | Night | ||||
| Dual-slot GBA insertion (post-National Dex) | ||||||
| Lunatone | DP | 54 or 56 | 8% | National Dex plus Pokémon Sapphire inserted in the Nintendo DS GBA slot; replaces grass slots 8-9. | ||
| Solrock | DP | 54 or 56 | 8% | National Dex plus Pokémon Ruby inserted in the Nintendo DS GBA slot; replaces grass slots 8-9. | ||
Turnback Cave Random Room 13
| Pokémon | Games | Levels | Rate | Requirement / notes | ||
|---|---|---|---|---|---|---|
| Morning | Day | Night | ||||
| Dual-slot GBA insertion (post-National Dex) | ||||||
| Lunatone | DP | 64 or 66 | 8% | National Dex plus Pokémon Sapphire inserted in the Nintendo DS GBA slot; replaces grass slots 8-9. | ||
| Solrock | DP | 64 or 66 | 8% | National Dex plus Pokémon Ruby inserted in the Nintendo DS GBA slot; replaces grass slots 8-9. | ||
Turnback Cave Random Room 15
| Pokémon | Games | Levels | Rate | Requirement / notes | ||
|---|---|---|---|---|---|---|
| Morning | Day | Night | ||||
| Dual-slot GBA insertion (post-National Dex) | ||||||
| Lunatone | DP | 64 or 66 | 8% | National Dex plus Pokémon Sapphire inserted in the Nintendo DS GBA slot; replaces grass slots 8-9. | ||
| Solrock | DP | 64 or 66 | 8% | National Dex plus Pokémon Ruby inserted in the Nintendo DS GBA slot; replaces grass slots 8-9. | ||
Turnback Cave Random Room 16
| Pokémon | Games | Levels | Rate | Requirement / notes | ||
|---|---|---|---|---|---|---|
| Morning | Day | Night | ||||
| Dual-slot GBA insertion (post-National Dex) | ||||||
| Lunatone | DP | 64 or 66 | 8% | National Dex plus Pokémon Sapphire inserted in the Nintendo DS GBA slot; replaces grass slots 8-9. | ||
| Solrock | DP | 64 or 66 | 8% | National Dex plus Pokémon Ruby inserted in the Nintendo DS GBA slot; replaces grass slots 8-9. | ||
Turnback Cave Random Room 17
| Pokémon | Games | Levels | Rate | Requirement / notes | ||
|---|---|---|---|---|---|---|
| Morning | Day | Night | ||||
| Dual-slot GBA insertion (post-National Dex) | ||||||
| Lunatone | DP | 64 or 66 | 8% | National Dex plus Pokémon Sapphire inserted in the Nintendo DS GBA slot; replaces grass slots 8-9. | ||
| Solrock | DP | 64 or 66 | 8% | National Dex plus Pokémon Ruby inserted in the Nintendo DS GBA slot; replaces grass slots 8-9. | ||
Turnback Cave Random Room 18
| Pokémon | Games | Levels | Rate | Requirement / notes | ||
|---|---|---|---|---|---|---|
| Morning | Day | Night | ||||
| Dual-slot GBA insertion (post-National Dex) | ||||||
| Lunatone | DP | 64 or 66 | 8% | National Dex plus Pokémon Sapphire inserted in the Nintendo DS GBA slot; replaces grass slots 8-9. | ||
| Solrock | DP | 64 or 66 | 8% | National Dex plus Pokémon Ruby inserted in the Nintendo DS GBA slot; replaces grass slots 8-9. | ||
Turnback Cave Random Room 2
| Pokémon | Games | Levels | Rate | Requirement / notes | ||
|---|---|---|---|---|---|---|
| Morning | Day | Night | ||||
| Dual-slot GBA insertion (post-National Dex) | ||||||
| Lunatone | DP | 44 or 46 | 8% | National Dex plus Pokémon Sapphire inserted in the Nintendo DS GBA slot; replaces grass slots 8-9. | ||
| Solrock | DP | 44 or 46 | 8% | National Dex plus Pokémon Ruby inserted in the Nintendo DS GBA slot; replaces grass slots 8-9. | ||
Turnback Cave Random Room 3
| Pokémon | Games | Levels | Rate | Requirement / notes | ||
|---|---|---|---|---|---|---|
| Morning | Day | Night | ||||
| Dual-slot GBA insertion (post-National Dex) | ||||||
| Lunatone | DP | 44 or 46 | 8% | National Dex plus Pokémon Sapphire inserted in the Nintendo DS GBA slot; replaces grass slots 8-9. | ||
| Solrock | DP | 44 or 46 | 8% | National Dex plus Pokémon Ruby inserted in the Nintendo DS GBA slot; replaces grass slots 8-9. | ||
Turnback Cave Random Room 4
| Pokémon | Games | Levels | Rate | Requirement / notes | ||
|---|---|---|---|---|---|---|
| Morning | Day | Night | ||||
| Dual-slot GBA insertion (post-National Dex) | ||||||
| Lunatone | DP | 44 or 46 | 8% | National Dex plus Pokémon Sapphire inserted in the Nintendo DS GBA slot; replaces grass slots 8-9. | ||
| Solrock | DP | 44 or 46 | 8% | National Dex plus Pokémon Ruby inserted in the Nintendo DS GBA slot; replaces grass slots 8-9. | ||
Turnback Cave Random Room 5
| Pokémon | Games | Levels | Rate | Requirement / notes | ||
|---|---|---|---|---|---|---|
| Morning | Day | Night | ||||
| Dual-slot GBA insertion (post-National Dex) | ||||||
| Lunatone | DP | 44 or 46 | 8% | National Dex plus Pokémon Sapphire inserted in the Nintendo DS GBA slot; replaces grass slots 8-9. | ||
| Solrock | DP | 44 or 46 | 8% | National Dex plus Pokémon Ruby inserted in the Nintendo DS GBA slot; replaces grass slots 8-9. | ||
Turnback Cave Random Room 6
| Pokémon | Games | Levels | Rate | Requirement / notes | ||
|---|---|---|---|---|---|---|
| Morning | Day | Night | ||||
| Dual-slot GBA insertion (post-National Dex) | ||||||
| Lunatone | DP | 44 or 46 | 8% | National Dex plus Pokémon Sapphire inserted in the Nintendo DS GBA slot; replaces grass slots 8-9. | ||
| Solrock | DP | 44 or 46 | 8% | National Dex plus Pokémon Ruby inserted in the Nintendo DS GBA slot; replaces grass slots 8-9. | ||
Turnback Cave Random Room 7
| Pokémon | Games | Levels | Rate | Requirement / notes | ||
|---|---|---|---|---|---|---|
| Morning | Day | Night | ||||
| Dual-slot GBA insertion (post-National Dex) | ||||||
| Lunatone | DP | 54 or 56 | 8% | National Dex plus Pokémon Sapphire inserted in the Nintendo DS GBA slot; replaces grass slots 8-9. | ||
| Solrock | DP | 54 or 56 | 8% | National Dex plus Pokémon Ruby inserted in the Nintendo DS GBA slot; replaces grass slots 8-9. | ||
Turnback Cave Random Room 8
| Pokémon | Games | Levels | Rate | Requirement / notes | ||
|---|---|---|---|---|---|---|
| Morning | Day | Night | ||||
| Dual-slot GBA insertion (post-National Dex) | ||||||
| Lunatone | DP | 54 or 56 | 8% | National Dex plus Pokémon Sapphire inserted in the Nintendo DS GBA slot; replaces grass slots 8-9. | ||
| Solrock | DP | 54 or 56 | 8% | National Dex plus Pokémon Ruby inserted in the Nintendo DS GBA slot; replaces grass slots 8-9. | ||
Turnback Cave Random Room 9
| Pokémon | Games | Levels | Rate | Requirement / notes | ||
|---|---|---|---|---|---|---|
| Morning | Day | Night | ||||
| Dual-slot GBA insertion (post-National Dex) | ||||||
| Lunatone | DP | 54 or 56 | 8% | National Dex plus Pokémon Sapphire inserted in the Nintendo DS GBA slot; replaces grass slots 8-9. | ||
| Solrock | DP | 54 or 56 | 8% | National Dex plus Pokémon Ruby inserted in the Nintendo DS GBA slot; replaces grass slots 8-9. | ||
Valley Windworks Exterior
| Pokémon | Games | Levels | Rate | Requirement / notes | ||
|---|---|---|---|---|---|---|
| Morning | Day | Night | ||||
| Swarm (post-National Dex daily announcement) | ||||||
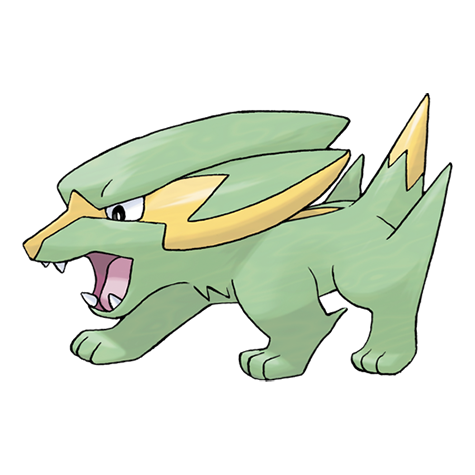 Electrike Electrike | DP | 7 | 40% | Post-National Dex daily swarm; replaces grass slots 0-1. | ||
| Poké Radar (post-National Dex) | ||||||
 Mareep Mareep | DP | 7-9 | 22% | National Dex and Poké Radar required; replacement slot applies only in a hard/vigorous-shaking Radar patch. | ||
| Dual-slot GBA insertion (post-National Dex) | ||||||
| Elekid | DP | 9 | 8% | National Dex plus Pokémon FireRed inserted in the Nintendo DS GBA slot; replaces grass slots 8-9. | ||
Valor Lakefront
| Pokémon | Games | Levels | Rate | Requirement / notes | ||
|---|---|---|---|---|---|---|
| Morning | Day | Night | ||||
| Poké Radar (post-National Dex) | ||||||
| Nidorina | DP | 21-22 | 20% | National Dex and Poké Radar required; replacement slot applies only in a hard/vigorous-shaking Radar patch. | ||
| Nidorino | DP | 21-22 | 20% | National Dex and Poké Radar required; replacement slot applies only in a hard/vigorous-shaking Radar patch. | ||
| Nidorina | DP | 22 | 2% | National Dex and Poké Radar required; replacement slot applies only in a hard/vigorous-shaking Radar patch. | ||
| Nidorino | DP | 22 | 2% | National Dex and Poké Radar required; replacement slot applies only in a hard/vigorous-shaking Radar patch. | ||
Wayward Cave 1F
| Pokémon | Games | Levels | Rate | Requirement / notes | ||
|---|---|---|---|---|---|---|
| Morning | Day | Night | ||||
| Dual-slot GBA insertion (post-National Dex) | ||||||
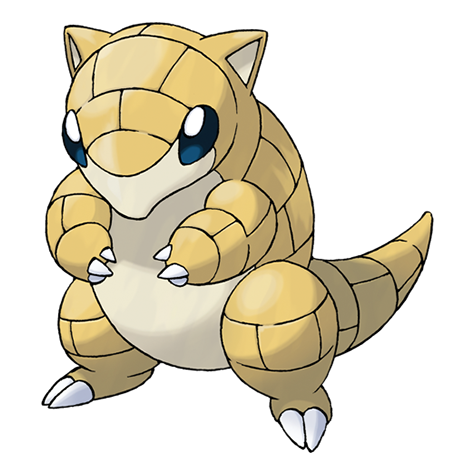 Sandshrew Sandshrew | DP | 16 | 8% | National Dex plus Pokémon LeafGreen inserted in the Nintendo DS GBA slot; replaces grass slots 8-9. | ||
Wayward Cave B1F
| Pokémon | Games | Levels | Rate | Requirement / notes | ||
|---|---|---|---|---|---|---|
| Morning | Day | Night | ||||
| Dual-slot GBA insertion (post-National Dex) | ||||||
| Sandshrew | DP | 16-17 | 8% | National Dex plus Pokémon LeafGreen inserted in the Nintendo DS GBA slot; replaces grass slots 8-9. | ||
Items
| Item | Version | Type | Area / exact direction | Coordinate / script | Requirement | Source |
|---|---|---|---|---|---|---|
| Aspear Berry | Diamond / Pearl | Wild held item — Smoochum | Lake Acuity: Catch wild Smoochum, or use Thief or Covet without already holding an item. | personal matching common+rare (guaranteed) slot; personal_pearl matching common+rare (guaranteed) slot | Base held-item chance 100%. Some listed locations use conditional tables: Post-National Dex daily swarm; replaces grass slots 0-1. | pret/pokediamond files/poketool/personal/personal.json + D/P encounter archives and curated special-system tables; pret/pokediamond files/poketool/personal_pearl/personal.json + D/P encounter archives and curated special-system tables |
| Babiri Berry | Diamond / Pearl | Wild held item — Snorunt | Acuity Lakefront, Route 216, Route 217: Catch wild Snorunt, or use Thief or Covet without already holding an item. | personal rare slot; personal_pearl rare slot | Base held-item chance 5%. Some listed locations use conditional tables: National Dex and Poké Radar required; replacement slot applies only in a hard/vigorous-shaking Radar patch. | pret/pokediamond files/poketool/personal/personal.json + D/P encounter archives and curated special-system tables; pret/pokediamond files/poketool/personal_pearl/personal.json + D/P encounter archives and curated special-system tables |
| Big Mushroom | Diamond / Pearl | Wild held item — Paras | Pastoria City, Great Marsh, and Barry: Catch wild Paras and inspect it after capture. Thief and Covet cannot be used during the Great Marsh Safari Game; those moves remain options at any listed location outside the Marsh when the user holds no item. | personal rare slot; personal_pearl rare slot | Base held-item chance 5%. Special-system availability: Great Marsh daily replacement: National Dex obtained One of 32 post-National-Dex selection entries; replaces grass slots 6-7. | pret/pokediamond files/poketool/personal/personal.json + D/P encounter archives and curated special-system tables; pret/pokediamond files/poketool/personal_pearl/personal.json + D/P encounter archives and curated special-system tables |
| Big Pearl | Diamond / Pearl | Wild held item — Clamperl | Route 219, Route 221: Catch wild Clamperl, or use Thief or Covet without already holding an item. | personal rare slot; personal_pearl rare slot | Base held-item chance 5%. Use the encounter rows for the named areas to choose a compatible method and time. | pret/pokediamond files/poketool/personal/personal.json + D/P encounter archives and curated special-system tables; pret/pokediamond files/poketool/personal_pearl/personal.json + D/P encounter archives and curated special-system tables |
| Big Pearl | Diamond / Pearl | Wild held item — Gulpin | Pastoria City, Great Marsh, and Barry: Catch wild Gulpin and inspect it after capture. Thief and Covet cannot be used during the Great Marsh Safari Game; those moves remain options at any listed location outside the Marsh when the user holds no item. | personal rare slot; personal_pearl rare slot | Base held-item chance 5%. Special-system availability: Great Marsh daily replacement: National Dex obtained One of 32 post-National-Dex selection entries; replaces grass slots 6-7. | pret/pokediamond files/poketool/personal/personal.json + D/P encounter archives and curated special-system tables; pret/pokediamond files/poketool/personal_pearl/personal.json + D/P encounter archives and curated special-system tables |
| Big Pearl | Diamond / Pearl | Wild held item — Shellder | Fuego Ironworks Exterior, Route 205 South, Valley Windworks Exterior: Catch wild Shellder, or use Thief or Covet without already holding an item. | personal rare slot; personal_pearl rare slot | Base held-item chance 5%. Use the encounter rows for the named areas to choose a compatible method and time. | pret/pokediamond files/poketool/personal/personal.json + D/P encounter archives and curated special-system tables; pret/pokediamond files/poketool/personal_pearl/personal.json + D/P encounter archives and curated special-system tables |
| Black Sludge | Diamond / Pearl | Wild held item — Croagunk | Pastoria City, Great Marsh, and Barry: Catch wild Croagunk and inspect it after capture. Thief and Covet cannot be used during the Great Marsh Safari Game; those moves remain options at any listed location outside the Marsh when the user holds no item. | personal rare slot; personal_pearl rare slot | Base held-item chance 5%. Special-system availability: Great Marsh daily replacement: Pre- or post-National Dex; one saved daily choice per area Replaces grass slots 6-7. Areas 1-2 use Lv. 26, 3-4 Lv. 24, and 5-6 Lv. 22. | pret/pokediamond files/poketool/personal/personal.json + D/P encounter archives and curated special-system tables; pret/pokediamond files/poketool/personal_pearl/personal.json + D/P encounter archives and curated special-system tables |
| Black Sludge | Diamond / Pearl | Wild held item — Toxicroak | Pastoria City, Great Marsh, and Barry: Catch wild Toxicroak and inspect it after capture. Thief and Covet cannot be used during the Great Marsh Safari Game; those moves remain options at any listed location outside the Marsh when the user holds no item. | personal rare slot; personal_pearl rare slot | Base held-item chance 5%. Special-system availability: Great Marsh daily replacement: National Dex obtained One of 32 post-National-Dex selection entries; replaces grass slots 6-7. | pret/pokediamond files/poketool/personal/personal.json + D/P encounter archives and curated special-system tables; pret/pokediamond files/poketool/personal_pearl/personal.json + D/P encounter archives and curated special-system tables |
| Charti Berry | Diamond / Pearl | Wild held item — Swellow | Route 213: Catch wild Swellow, or use Thief or Covet without already holding an item. | personal rare slot; personal_pearl rare slot | Base held-item chance 5%. Some listed locations use conditional tables: National Dex and Poké Radar required; replacement slot applies only in a hard/vigorous-shaking Radar patch. | pret/pokediamond files/poketool/personal/personal.json + D/P encounter archives and curated special-system tables; pret/pokediamond files/poketool/personal_pearl/personal.json + D/P encounter archives and curated special-system tables |
| Cheri Berry | Pearl | Wild held item — Glameow | Route 218, Route 222: Catch wild Glameow, or use Thief or Covet without already holding an item. | personal_pearl rare slot | Base held-item chance 5%. Use the encounter rows for the named areas to choose a compatible method and time. | pret/pokediamond files/poketool/personal_pearl/personal.json + D/P encounter archives and curated special-system tables |
| Cheri Berry | Pearl | Wild held item — Purugly | Route 222, Route 229: Catch wild Purugly, or use Thief or Covet without already holding an item. | personal_pearl rare slot | Base held-item chance 5%. Use the encounter rows for the named areas to choose a compatible method and time. | pret/pokediamond files/poketool/personal_pearl/personal.json + D/P encounter archives and curated special-system tables |
| Chesto Berry | Diamond / Pearl | Wild held item — Loudred | Mount Coronet North Mountainside, Mount Coronet South Mountainside: Catch wild Loudred, or use Thief or Covet without already holding an item. | personal rare slot; personal_pearl rare slot | Base held-item chance 5%. Some listed locations use conditional tables: National Dex and Poké Radar required; replacement slot applies only in a hard/vigorous-shaking Radar patch. | pret/pokediamond files/poketool/personal/personal.json + D/P encounter archives and curated special-system tables; pret/pokediamond files/poketool/personal_pearl/personal.json + D/P encounter archives and curated special-system tables |
| Chesto Berry | Diamond / Pearl | Wild held item — Spinda | Route 227: Catch wild Spinda, or use Thief or Covet without already holding an item. | personal rare slot; personal_pearl rare slot | Base held-item chance 5%. Some listed locations use conditional tables: Post-National Dex daily swarm; replaces grass slots 0-1. | pret/pokediamond files/poketool/personal/personal.json + D/P encounter archives and curated special-system tables; pret/pokediamond files/poketool/personal_pearl/personal.json + D/P encounter archives and curated special-system tables |
| Chilan Berry | Diamond / Pearl | Wild held item — Raticate | Route 225, Route 226: Catch wild Raticate, or use Thief or Covet without already holding an item. | personal rare slot; personal_pearl rare slot | Base held-item chance 5%. Use the encounter rows for the named areas to choose a compatible method and time. | pret/pokediamond files/poketool/personal/personal.json + D/P encounter archives and curated special-system tables; pret/pokediamond files/poketool/personal_pearl/personal.json + D/P encounter archives and curated special-system tables |
| Chilan Berry | Diamond / Pearl | Wild held item — Rattata | Route 225, Route 226: Catch wild Rattata, or use Thief or Covet without already holding an item. | personal rare slot; personal_pearl rare slot | Base held-item chance 5%. Use the encounter rows for the named areas to choose a compatible method and time. | pret/pokediamond files/poketool/personal/personal.json + D/P encounter archives and curated special-system tables; pret/pokediamond files/poketool/personal_pearl/personal.json + D/P encounter archives and curated special-system tables |
| Chople Berry | Diamond / Pearl | Wild held item — Buneary | Eterna Forest Interior: Catch wild Buneary, or use Thief or Covet without already holding an item. | personal rare slot; personal_pearl rare slot | Base held-item chance 5%. Use the encounter rows for the named areas to choose a compatible method and time. | pret/pokediamond files/poketool/personal/personal.json + D/P encounter archives and curated special-system tables; pret/pokediamond files/poketool/personal_pearl/personal.json + D/P encounter archives and curated special-system tables |
| Coba Berry | Diamond / Pearl | Wild held item — Sunkern | Route 204 North: Catch wild Sunkern, or use Thief or Covet without already holding an item. | personal rare slot; personal_pearl rare slot | Base held-item chance 5%. Some listed locations use conditional tables: National Dex and Poké Radar required; replacement slot applies only in a hard/vigorous-shaking Radar patch. | pret/pokediamond files/poketool/personal/personal.json + D/P encounter archives and curated special-system tables; pret/pokediamond files/poketool/personal_pearl/personal.json + D/P encounter archives and curated special-system tables |
| Colbur Berry | Diamond / Pearl | Wild held item — Chimecho | Mount Coronet 4F Room 3, Mount Coronet 5F, Mount Coronet 6F, Sendoff Spring: Catch wild Chimecho, or use Thief or Covet without already holding an item. | personal rare slot; personal_pearl rare slot | Base held-item chance 5%. Use the encounter rows for the named areas to choose a compatible method and time. | pret/pokediamond files/poketool/personal/personal.json + D/P encounter archives and curated special-system tables; pret/pokediamond files/poketool/personal_pearl/personal.json + D/P encounter archives and curated special-system tables |
| Colbur Berry | Diamond / Pearl | Wild held item — Chingling | Lake Acuity, Lake Valor, Mount Coronet 4F Room 1, Mount Coronet 4F Room 3, Mount Coronet B1F, Mount Coronet North 1F Room 1, Mount Coronet North 1F Room 2, Mount Coronet North Mountainside, Mount Coronet South 1F, Mount Coronet South 2F, Mount Coronet South 3F, Mount Coronet South Mountainside, Mount Coronet Tunnel Room, Route 211 East, Route 211 West: Catch wild Chingling, or use Thief or Covet without already holding an item. | personal rare slot; personal_pearl rare slot | Base held-item chance 5%. Use the encounter rows for the named areas to choose a compatible method and time. | pret/pokediamond files/poketool/personal/personal.json + D/P encounter archives and curated special-system tables; pret/pokediamond files/poketool/personal_pearl/personal.json + D/P encounter archives and curated special-system tables |
| Deepseascale | Diamond / Pearl | Wild held item — Chinchou | Route 220: Catch wild Chinchou, or use Thief or Covet without already holding an item. | personal rare slot; personal_pearl rare slot | Base held-item chance 5%. Use the encounter rows for the named areas to choose a compatible method and time. | pret/pokediamond files/poketool/personal/personal.json + D/P encounter archives and curated special-system tables; pret/pokediamond files/poketool/personal_pearl/personal.json + D/P encounter archives and curated special-system tables |
| Deepseascale | Diamond / Pearl | Wild held item — Lanturn | Route 220: Catch wild Lanturn, or use Thief or Covet without already holding an item. | personal rare slot; personal_pearl rare slot | Base held-item chance 5%. Use the encounter rows for the named areas to choose a compatible method and time. | pret/pokediamond files/poketool/personal/personal.json + D/P encounter archives and curated special-system tables; pret/pokediamond files/poketool/personal_pearl/personal.json + D/P encounter archives and curated special-system tables |
| Deepseascale | Diamond / Pearl | Wild held item — Relicanth | Route 226: Catch wild Relicanth, or use Thief or Covet without already holding an item. | personal rare slot; personal_pearl rare slot | Base held-item chance 5%. Use the encounter rows for the named areas to choose a compatible method and time. | pret/pokediamond files/poketool/personal/personal.json + D/P encounter archives and curated special-system tables; pret/pokediamond files/poketool/personal_pearl/personal.json + D/P encounter archives and curated special-system tables |
| Deepseatooth | Diamond / Pearl | Wild held item — Carvanha | Great Marsh Area 1, Great Marsh Area 2, Great Marsh Area 3, Great Marsh Area 4, Great Marsh Area 6: Catch wild Carvanha, or use Thief or Covet without already holding an item. | personal rare slot; personal_pearl rare slot | Base held-item chance 5%. Use the encounter rows for the named areas to choose a compatible method and time. | pret/pokediamond files/poketool/personal/personal.json + D/P encounter archives and curated special-system tables; pret/pokediamond files/poketool/personal_pearl/personal.json + D/P encounter archives and curated special-system tables |
| Deepseatooth | Diamond / Pearl | Wild held item — Sharpedo | Route 213, Route 222: Catch wild Sharpedo, or use Thief or Covet without already holding an item. | personal rare slot; personal_pearl rare slot | Base held-item chance 5%. Use the encounter rows for the named areas to choose a compatible method and time. | pret/pokediamond files/poketool/personal/personal.json + D/P encounter archives and curated special-system tables; pret/pokediamond files/poketool/personal_pearl/personal.json + D/P encounter archives and curated special-system tables |
| Dragon Fang | Pearl | Wild held item — Bagon | Route 210 North: Catch wild Bagon, or use Thief or Covet without already holding an item. | personal_pearl rare slot | Base held-item chance 5%. Some listed locations use conditional tables: National Dex and Poké Radar required; replacement slot applies only in a hard/vigorous-shaking Radar patch. | pret/pokediamond files/poketool/personal_pearl/personal.json + D/P encounter archives and curated special-system tables |
| Dragon Scale | Diamond / Pearl | Wild held item — Dragonair | Mount Coronet 4F Room 1: Catch wild Dragonair, or use Thief or Covet without already holding an item. | personal rare slot; personal_pearl rare slot | Base held-item chance 5%. Use the encounter rows for the named areas to choose a compatible method and time. | pret/pokediamond files/poketool/personal/personal.json + D/P encounter archives and curated special-system tables; pret/pokediamond files/poketool/personal_pearl/personal.json + D/P encounter archives and curated special-system tables |
| Dragon Scale | Diamond / Pearl | Wild held item — Dratini | Mount Coronet 4F Room 1: Catch wild Dratini, or use Thief or Covet without already holding an item. | personal rare slot; personal_pearl rare slot | Base held-item chance 5%. Use the encounter rows for the named areas to choose a compatible method and time. | pret/pokediamond files/poketool/personal/personal.json + D/P encounter archives and curated special-system tables; pret/pokediamond files/poketool/personal_pearl/personal.json + D/P encounter archives and curated special-system tables |
| Dragon Scale | Diamond / Pearl | Wild held item — Horsea | Route 226: Catch wild Horsea, or use Thief or Covet without already holding an item. | personal rare slot; personal_pearl rare slot | Base held-item chance 5%. Use the encounter rows for the named areas to choose a compatible method and time. | pret/pokediamond files/poketool/personal/personal.json + D/P encounter archives and curated special-system tables; pret/pokediamond files/poketool/personal_pearl/personal.json + D/P encounter archives and curated special-system tables |
| Dragon Scale | Diamond / Pearl | Wild held item — Seadra | Route 226: Catch wild Seadra, or use Thief or Covet without already holding an item. | personal rare slot; personal_pearl rare slot | Base held-item chance 5%. Use the encounter rows for the named areas to choose a compatible method and time. | pret/pokediamond files/poketool/personal/personal.json + D/P encounter archives and curated special-system tables; pret/pokediamond files/poketool/personal_pearl/personal.json + D/P encounter archives and curated special-system tables |
| Electirizer | Diamond | Wild held item — Elekid | Route 205 South, Valley Windworks Exterior: Catch wild Elekid, or use Thief or Covet without already holding an item. | personal common slot | Base held-item chance 50%. Some listed locations use conditional tables: National Dex plus Pokémon FireRed inserted in the Nintendo DS GBA slot; replaces grass slots 8-9. | pret/pokediamond files/poketool/personal/personal.json + D/P encounter archives and curated special-system tables |
| Electirizer | Pearl | Wild held item — Elekid | Route 205 South, Valley Windworks Exterior: Catch wild Elekid, or use Thief or Covet without already holding an item. | personal_pearl rare slot | Base held-item chance 5%. Some listed locations use conditional tables: National Dex plus Pokémon FireRed inserted in the Nintendo DS GBA slot; replaces grass slots 8-9. | pret/pokediamond files/poketool/personal_pearl/personal.json + D/P encounter archives and curated special-system tables |
| Everstone | Diamond / Pearl | Wild held item — Geodude | Iron Island 1F, Iron Island B1F Room 1, Iron Island B1F Room 2, Iron Island B2F Room 1, Iron Island B2F Room 2, Iron Island B3F, Mount Coronet North 1F Room 1, Mount Coronet South 1F, Oreburgh Gate 1F, Oreburgh Gate B1F, Oreburgh Mine B1F, Oreburgh Mine B2F, Ravaged Path, Route 206, Route 207, Route 210 South, Route 211 West, Route 214, Route 215, Ruin Maniac Cave Stage 1, Ruin Maniac Cave Stage 2, Ruin Maniac Cave Stage 3, Stark Mountain Interior 1, Stark Mountain Interior 2, Valor Lakefront, Wayward Cave 1F, Wayward Cave B1F: Catch wild Geodude, or use Thief or Covet without already holding an item. | personal rare slot; personal_pearl rare slot | Base held-item chance 5%. Use the encounter rows for the named areas to choose a compatible method and time. | pret/pokediamond files/poketool/personal/personal.json + D/P encounter archives and curated special-system tables; pret/pokediamond files/poketool/personal_pearl/personal.json + D/P encounter archives and curated special-system tables |
| Everstone | Diamond / Pearl | Wild held item — Graveler | Iron Island 1F, Iron Island B1F Room 1, Iron Island B1F Room 2, Iron Island B2F Room 1, Iron Island B2F Room 2, Iron Island B3F, Mount Coronet 4F Room 1, Mount Coronet 4F Room 3, Mount Coronet 5F, Mount Coronet 6F, Mount Coronet B1F, Mount Coronet North 1F Room 2, Mount Coronet South 2F, Mount Coronet South 3F, Mount Coronet Tunnel Room, Route 211 East, Route 214, Route 216, Route 227, Snowpoint Temple 1F, Snowpoint Temple B1F, Snowpoint Temple B2F, Snowpoint Temple B3F, Snowpoint Temple B4F, Snowpoint Temple B5F, Stark Mountain Exterior, Stark Mountain Interior 1, Stark Mountain Interior 2, Valor Lakefront, Victory Road 1F, Victory Road 1F Back 1, Victory Road 1F Back 3, Victory Road 2F: Catch wild Graveler, or use Thief or Covet without already holding an item. | personal rare slot; personal_pearl rare slot | Base held-item chance 5%. Use the encounter rows for the named areas to choose a compatible method and time. | pret/pokediamond files/poketool/personal/personal.json + D/P encounter archives and curated special-system tables; pret/pokediamond files/poketool/personal_pearl/personal.json + D/P encounter archives and curated special-system tables |
| Grip Claw | Diamond / Pearl | Wild held item — Sneasel | Acuity Lakefront, Lake Acuity, Route 216, Route 217, Snowpoint Temple 1F, Snowpoint Temple B1F, Snowpoint Temple B2F, Snowpoint Temple B3F, Snowpoint Temple B4F, Snowpoint Temple B5F: Catch wild Sneasel, or use Thief or Covet without already holding an item. | personal common slot; personal_pearl common slot | Base held-item chance 50%. Use the encounter rows for the named areas to choose a compatible method and time. | pret/pokediamond files/poketool/personal/personal.json + D/P encounter archives and curated special-system tables; pret/pokediamond files/poketool/personal_pearl/personal.json + D/P encounter archives and curated special-system tables |
| Haban Berry | Diamond / Pearl | Wild held item — Gible | Wayward Cave B1F: Catch wild Gible, or use Thief or Covet without already holding an item. | personal rare slot; personal_pearl rare slot | Base held-item chance 5%. Use the encounter rows for the named areas to choose a compatible method and time. | pret/pokediamond files/poketool/personal/personal.json + D/P encounter archives and curated special-system tables; pret/pokediamond files/poketool/personal_pearl/personal.json + D/P encounter archives and curated special-system tables |
| Hard Stone | Diamond | Wild held item — Aron | Fuego Ironworks Exterior: Catch wild Aron, or use Thief or Covet without already holding an item. | personal rare slot | Base held-item chance 5%. Some listed locations use conditional tables: National Dex and Poké Radar required; replacement slot applies only in a hard/vigorous-shaking Radar patch. | pret/pokediamond files/poketool/personal/personal.json + D/P encounter archives and curated special-system tables |
| Hard Stone | Diamond / Pearl | Wild held item — Corsola | Route 230: Catch wild Corsola, or use Thief or Covet without already holding an item. | personal rare slot; personal_pearl rare slot | Base held-item chance 5%. Some listed locations use conditional tables: Post-National Dex daily swarm; replaces grass slots 0-1. | pret/pokediamond files/poketool/personal/personal.json + D/P encounter archives and curated special-system tables; pret/pokediamond files/poketool/personal_pearl/personal.json + D/P encounter archives and curated special-system tables |
| Hard Stone | Diamond / Pearl | Wild held item — Nosepass | Route 206: Catch wild Nosepass, or use Thief or Covet without already holding an item. | personal rare slot; personal_pearl rare slot | Base held-item chance 5%. Some listed locations use conditional tables: Post-National Dex daily swarm; replaces grass slots 0-1. | pret/pokediamond files/poketool/personal/personal.json + D/P encounter archives and curated special-system tables; pret/pokediamond files/poketool/personal_pearl/personal.json + D/P encounter archives and curated special-system tables |
| Heart Scale | Diamond / Pearl | Wild held item — Luvdisc | Pokémon League, Route 224: Catch wild Luvdisc, or use Thief or Covet without already holding an item. | personal common slot; personal_pearl common slot | Base held-item chance 50%. Use the encounter rows for the named areas to choose a compatible method and time. | pret/pokediamond files/poketool/personal/personal.json + D/P encounter archives and curated special-system tables; pret/pokediamond files/poketool/personal_pearl/personal.json + D/P encounter archives and curated special-system tables |
| Honey | Diamond / Pearl | Wild held item — Combee | Floaroma Town and Floaroma Meadow: Catch wild Combee, or use Thief or Covet without already holding an item. | personal matching common+rare (guaranteed) slot; personal_pearl matching common+rare (guaranteed) slot | Base held-item chance 100%. Special-system availability: Honey Tree — regular tree: Slather Honey and return after about 6 hours Aggregate of common and rare table slots. Honey Tree — eligible Munchlax tree: Use one of the save's four eligible trees Aggregate of common and rare table slots. | pret/pokediamond files/poketool/personal/personal.json + D/P encounter archives and curated special-system tables; pret/pokediamond files/poketool/personal_pearl/personal.json + D/P encounter archives and curated special-system tables |
| Kasib Berry | Diamond / Pearl | Wild held item — Dusclops | Route 224: Catch wild Dusclops, or use Thief or Covet without already holding an item. | personal rare slot; personal_pearl rare slot | Base held-item chance 5%. Some listed locations use conditional tables: National Dex and Poké Radar required; replacement slot applies only in a hard/vigorous-shaking Radar patch. | pret/pokediamond files/poketool/personal/personal.json + D/P encounter archives and curated special-system tables; pret/pokediamond files/poketool/personal_pearl/personal.json + D/P encounter archives and curated special-system tables |
| Kasib Berry | Diamond / Pearl | Wild held item — Duskull | Route 224: Catch wild Duskull, or use Thief or Covet without already holding an item. | personal rare slot; personal_pearl rare slot | Base held-item chance 5%. Some listed locations use conditional tables: National Dex and Poké Radar required; replacement slot applies only in a hard/vigorous-shaking Radar patch. | pret/pokediamond files/poketool/personal/personal.json + D/P encounter archives and curated special-system tables; pret/pokediamond files/poketool/personal_pearl/personal.json + D/P encounter archives and curated special-system tables |
| Kebia Berry | Diamond / Pearl | Wild held item — Shroomish | Pastoria City, Great Marsh, and Barry: Catch wild Shroomish and inspect it after capture. Thief and Covet cannot be used during the Great Marsh Safari Game; those moves remain options at any listed location outside the Marsh when the user holds no item. | personal rare slot; personal_pearl rare slot | Base held-item chance 5%. Special-system availability: Great Marsh daily replacement: National Dex obtained One of 32 post-National-Dex selection entries; replaces grass slots 6-7. | pret/pokediamond files/poketool/personal/personal.json + D/P encounter archives and curated special-system tables; pret/pokediamond files/poketool/personal_pearl/personal.json + D/P encounter archives and curated special-system tables |
| Kings Rock | Diamond / Pearl | Wild held item — Poliwhirl | Route 225, Route 227, Route 228: Catch wild Poliwhirl, or use Thief or Covet without already holding an item. | personal rare slot; personal_pearl rare slot | Base held-item chance 5%. Use the encounter rows for the named areas to choose a compatible method and time. | pret/pokediamond files/poketool/personal/personal.json + D/P encounter archives and curated special-system tables; pret/pokediamond files/poketool/personal_pearl/personal.json + D/P encounter archives and curated special-system tables |
| Lagging Tail | Diamond / Pearl | Wild held item — Lickitung | Lake Valor: Catch wild Lickitung, or use Thief or Covet without already holding an item. | personal rare slot; personal_pearl rare slot | Base held-item chance 5%. Some listed locations use conditional tables: Post-National Dex daily swarm; replaces grass slots 0-1. | pret/pokediamond files/poketool/personal/personal.json + D/P encounter archives and curated special-system tables; pret/pokediamond files/poketool/personal_pearl/personal.json + D/P encounter archives and curated special-system tables |
| Lagging Tail | Pearl | Wild held item — Slowpoke | Route 205 North: Catch wild Slowpoke, or use Thief or Covet without already holding an item. | personal_pearl rare slot | Base held-item chance 5%. Some listed locations use conditional tables: National Dex and Poké Radar required; replacement slot applies only in a hard/vigorous-shaking Radar patch. | pret/pokediamond files/poketool/personal_pearl/personal.json + D/P encounter archives and curated special-system tables |
| Leftovers | Diamond / Pearl | Wild held item — Munchlax | Floaroma Town and Floaroma Meadow: Catch wild Munchlax, or use Thief or Covet without already holding an item. | personal matching common+rare (guaranteed) slot; personal_pearl matching common+rare (guaranteed) slot | Base held-item chance 100%. Special-system availability: Honey Tree — eligible Munchlax tree: Only four trees derived from the save's Trainer ID are eligible The four locations are save-specific; do not use a fixed online tree list without first deriving the save's eligible indices. | pret/pokediamond files/poketool/personal/personal.json + D/P encounter archives and curated special-system tables; pret/pokediamond files/poketool/personal_pearl/personal.json + D/P encounter archives and curated special-system tables |
| Leppa Berry | Diamond / Pearl | Wild held item — Clefairy | Mount Coronet 4F Room 1, Mount Coronet 4F Room 3, Mount Coronet 5F, Mount Coronet 6F, Mount Coronet B1F, Mount Coronet North 1F Room 2, Mount Coronet North Mountainside, Mount Coronet South 2F, Mount Coronet South 3F, Mount Coronet South Mountainside, Mount Coronet Tunnel Room, Route 212, Pokemon Mansion, and Trophy Garden: Catch wild Clefairy, or use Thief or Covet without already holding an item. | personal common slot; personal_pearl common slot | Base held-item chance 50%. Special-system availability: Trophy Garden daily visitor: National Dex; speak to Mr. Backlot once per day Today's and yesterday's announced visitors occupy separate 5% replacement slots. | pret/pokediamond files/poketool/personal/personal.json + D/P encounter archives and curated special-system tables; pret/pokediamond files/poketool/personal_pearl/personal.json + D/P encounter archives and curated special-system tables |
| Leppa Berry | Diamond / Pearl | Wild held item — Cleffa | Mount Coronet North 1F Room 1, Mount Coronet South 1F, Route 212, Pokemon Mansion, and Trophy Garden: Catch wild Cleffa, or use Thief or Covet without already holding an item. | personal common slot; personal_pearl common slot | Base held-item chance 50%. Some listed locations use conditional tables: National Dex plus Pokémon Sapphire inserted in the Nintendo DS GBA slot; replaces grass slots 8-9. Special-system availability: Trophy Garden daily visitor: National Dex; speak to Mr. Backlot once per day Today's and yesterday's announced visitors occupy separate 5% replacement slots. | pret/pokediamond files/poketool/personal/personal.json + D/P encounter archives and curated special-system tables; pret/pokediamond files/poketool/personal_pearl/personal.json + D/P encounter archives and curated special-system tables |
| Leppa Berry | Diamond | Wild held item — Mime Jr | Route 209, Route 210 South, Route 212, Pokemon Mansion, and Trophy Garden: Catch wild Mime Jr, or use Thief or Covet without already holding an item. | personal rare slot | Base held-item chance 5%. Special-system availability: Trophy Garden daily visitor: National Dex; speak to Mr. Backlot once per day Shared member of the 16-species announcement pool; the ordinary garden table remains version-specific where applicable. | pret/pokediamond files/poketool/personal/personal.json + D/P encounter archives and curated special-system tables |
| Leppa Berry | Pearl | Wild held item — Mime Jr | Route 212, Pokemon Mansion, and Trophy Garden: Catch wild Mime Jr, or use Thief or Covet without already holding an item. | personal_pearl rare slot | Base held-item chance 5%. Special-system availability: Trophy Garden daily visitor: National Dex; speak to Mr. Backlot once per day Shared member of the 16-species announcement pool; the ordinary garden table remains version-specific where applicable. | pret/pokediamond files/poketool/personal_pearl/personal.json + D/P encounter archives and curated special-system tables |
| Leppa Berry | Diamond | Wild held item — Mr Mime | Route 218, Route 222: Catch wild Mr Mime, or use Thief or Covet without already holding an item. | personal rare slot | Base held-item chance 5%. Use the encounter rows for the named areas to choose a compatible method and time. | pret/pokediamond files/poketool/personal/personal.json + D/P encounter archives and curated special-system tables |
| Leppa Berry | Diamond / Pearl | Wild held item — Skitty | Route 222: Catch wild Skitty, or use Thief or Covet without already holding an item. | personal rare slot; personal_pearl rare slot | Base held-item chance 5%. Some listed locations use conditional tables: Post-National Dex daily swarm; replaces grass slots 0-1. | pret/pokediamond files/poketool/personal/personal.json + D/P encounter archives and curated special-system tables; pret/pokediamond files/poketool/personal_pearl/personal.json + D/P encounter archives and curated special-system tables |
| Light Ball | Diamond / Pearl | Wild held item — Pikachu | Trophy Garden: Catch wild Pikachu, or use Thief or Covet without already holding an item. | personal rare slot; personal_pearl rare slot | Base held-item chance 5%. Use the encounter rows for the named areas to choose a compatible method and time. | pret/pokediamond files/poketool/personal/personal.json + D/P encounter archives and curated special-system tables; pret/pokediamond files/poketool/personal_pearl/personal.json + D/P encounter archives and curated special-system tables |
| Lucky Egg | Diamond / Pearl | Wild held item — Chansey | Route 209, Route 210 South, Route 212, Pokemon Mansion, and Trophy Garden: Catch wild Chansey, or use Thief or Covet without already holding an item. | personal rare slot; personal_pearl rare slot | Base held-item chance 5%. Special-system availability: Trophy Garden daily visitor: National Dex; speak to Mr. Backlot once per day Today's and yesterday's announced visitors occupy separate 5% replacement slots. | pret/pokediamond files/poketool/personal/personal.json + D/P encounter archives and curated special-system tables; pret/pokediamond files/poketool/personal_pearl/personal.json + D/P encounter archives and curated special-system tables |
| Lucky Punch | Diamond / Pearl | Wild held item — Happiny | Route 212, Pokemon Mansion, and Trophy Garden: Catch wild Happiny, or use Thief or Covet without already holding an item. | personal rare slot; personal_pearl rare slot | Base held-item chance 5%. Special-system availability: Trophy Garden daily visitor: National Dex; speak to Mr. Backlot once per day Today's and yesterday's announced visitors occupy separate 5% replacement slots. | pret/pokediamond files/poketool/personal/personal.json + D/P encounter archives and curated special-system tables; pret/pokediamond files/poketool/personal_pearl/personal.json + D/P encounter archives and curated special-system tables |
| Magmarizer | Diamond | Wild held item — Magby | Route 227, Stark Mountain Exterior, Stark Mountain Interior 1, Stark Mountain Interior 2: Catch wild Magby, or use Thief or Covet without already holding an item. | personal rare slot | Base held-item chance 5%. Some listed locations use conditional tables: National Dex plus Pokémon LeafGreen inserted in the Nintendo DS GBA slot; replaces grass slots 8-9. | pret/pokediamond files/poketool/personal/personal.json + D/P encounter archives and curated special-system tables |
| Magmarizer | Pearl | Wild held item — Magby | Route 227, Stark Mountain Exterior, Stark Mountain Interior 1, Stark Mountain Interior 2: Catch wild Magby, or use Thief or Covet without already holding an item. | personal_pearl common slot | Base held-item chance 50%. Some listed locations use conditional tables: National Dex plus Pokémon LeafGreen inserted in the Nintendo DS GBA slot; replaces grass slots 8-9. | pret/pokediamond files/poketool/personal_pearl/personal.json + D/P encounter archives and curated special-system tables |
| Metal Coat | Diamond / Pearl | Wild held item — Beldum | Route 228: Catch wild Beldum, or use Thief or Covet without already holding an item. | personal rare slot; personal_pearl rare slot | Base held-item chance 5%. Some listed locations use conditional tables: Post-National Dex daily swarm; replaces grass slots 0-1. | pret/pokediamond files/poketool/personal/personal.json + D/P encounter archives and curated special-system tables; pret/pokediamond files/poketool/personal_pearl/personal.json + D/P encounter archives and curated special-system tables |
| Metal Coat | Diamond / Pearl | Wild held item — Bronzong | Mount Coronet 4F Room 1, Mount Coronet 4F Room 3, Mount Coronet 5F, Mount Coronet 6F, Mount Coronet North Mountainside, Mount Coronet South 2F, Mount Coronet South 3F, Mount Coronet South Mountainside, Mount Coronet Tunnel Room, Turnback Cave Random Room 1, Turnback Cave Random Room 10, Turnback Cave Random Room 11, Turnback Cave Random Room 12, Turnback Cave Random Room 13, Turnback Cave Random Room 15, Turnback Cave Random Room 16, Turnback Cave Random Room 17, Turnback Cave Random Room 18, Turnback Cave Random Room 2, Turnback Cave Random Room 3, Turnback Cave Random Room 4, Turnback Cave Random Room 5, Turnback Cave Random Room 6, Turnback Cave Random Room 7, Turnback Cave Random Room 8, Turnback Cave Random Room 9: Catch wild Bronzong, or use Thief or Covet without already holding an item. | personal rare slot; personal_pearl rare slot | Base held-item chance 5%. Use the encounter rows for the named areas to choose a compatible method and time. | pret/pokediamond files/poketool/personal/personal.json + D/P encounter archives and curated special-system tables; pret/pokediamond files/poketool/personal_pearl/personal.json + D/P encounter archives and curated special-system tables |
| Metal Coat | Diamond / Pearl | Wild held item — Bronzor | Mount Coronet South 2F, Mount Coronet South 3F, Route 206, Turnback Cave Random Room 1, Turnback Cave Random Room 10, Turnback Cave Random Room 11, Turnback Cave Random Room 12, Turnback Cave Random Room 13, Turnback Cave Random Room 15, Turnback Cave Random Room 16, Turnback Cave Random Room 17, Turnback Cave Random Room 18, Turnback Cave Random Room 2, Turnback Cave Random Room 3, Turnback Cave Random Room 4, Turnback Cave Random Room 5, Turnback Cave Random Room 6, Turnback Cave Random Room 7, Turnback Cave Random Room 8, Turnback Cave Random Room 9, Wayward Cave 1F, Wayward Cave B1F: Catch wild Bronzor, or use Thief or Covet without already holding an item. | personal rare slot; personal_pearl rare slot | Base held-item chance 5%. Use the encounter rows for the named areas to choose a compatible method and time. | pret/pokediamond files/poketool/personal/personal.json + D/P encounter archives and curated special-system tables; pret/pokediamond files/poketool/personal_pearl/personal.json + D/P encounter archives and curated special-system tables |
| Metal Coat | Diamond / Pearl | Wild held item — Magnemite | Fuego Ironworks Exterior: Catch wild Magnemite, or use Thief or Covet without already holding an item. | personal rare slot; personal_pearl rare slot | Base held-item chance 5%. Some listed locations use conditional tables: Post-National Dex daily swarm; replaces grass slots 0-1. | pret/pokediamond files/poketool/personal/personal.json + D/P encounter archives and curated special-system tables; pret/pokediamond files/poketool/personal_pearl/personal.json + D/P encounter archives and curated special-system tables |
| Metal Coat | Diamond / Pearl | Wild held item — Steelix | Iron Island B2F Room 2, Iron Island B3F, Snowpoint Temple 1F, Snowpoint Temple B1F, Snowpoint Temple B2F, Snowpoint Temple B3F, Snowpoint Temple B4F, Snowpoint Temple B5F, Victory Road 1F, Victory Road 1F Back 1, Victory Road 1F Back 2, Victory Road 1F Back 3, Victory Road 2F, Victory Road B1F: Catch wild Steelix, or use Thief or Covet without already holding an item. | personal rare slot; personal_pearl rare slot | Base held-item chance 5%. Use the encounter rows for the named areas to choose a compatible method and time. | pret/pokediamond files/poketool/personal/personal.json + D/P encounter archives and curated special-system tables; pret/pokediamond files/poketool/personal_pearl/personal.json + D/P encounter archives and curated special-system tables |
| Metal Powder | Diamond / Pearl | Wild held item — Ditto | Route 218: Catch wild Ditto, or use Thief or Covet without already holding an item. | personal rare slot; personal_pearl rare slot | Base held-item chance 5%. Some listed locations use conditional tables: National Dex and Poké Radar required; replacement slot applies only in a hard/vigorous-shaking Radar patch. | pret/pokediamond files/poketool/personal/personal.json + D/P encounter archives and curated special-system tables; pret/pokediamond files/poketool/personal_pearl/personal.json + D/P encounter archives and curated special-system tables |
| Metronome | Diamond / Pearl | Wild held item — Chatot | Route 222, Route 224: Catch wild Chatot, or use Thief or Covet without already holding an item. | personal rare slot; personal_pearl rare slot | Base held-item chance 5%. Use the encounter rows for the named areas to choose a compatible method and time. | pret/pokediamond files/poketool/personal/personal.json + D/P encounter archives and curated special-system tables; pret/pokediamond files/poketool/personal_pearl/personal.json + D/P encounter archives and curated special-system tables |
| Metronome | Diamond / Pearl | Wild held item — Kricketot | Route 202, Route 203, Route 204 North, Route 204 South, Route 206, Route 207: Catch wild Kricketot, or use Thief or Covet without already holding an item. | personal rare slot; personal_pearl rare slot | Base held-item chance 5%. Use the encounter rows for the named areas to choose a compatible method and time. | pret/pokediamond files/poketool/personal/personal.json + D/P encounter archives and curated special-system tables; pret/pokediamond files/poketool/personal_pearl/personal.json + D/P encounter archives and curated special-system tables |
| Metronome | Diamond / Pearl | Wild held item — Kricketune | Route 206, Route 210 South, Route 212 North, Route 212 South, Route 214, Route 215, Trophy Garden, Valor Lakefront: Catch wild Kricketune, or use Thief or Covet without already holding an item. | personal rare slot; personal_pearl rare slot | Base held-item chance 5%. Use the encounter rows for the named areas to choose a compatible method and time. | pret/pokediamond files/poketool/personal/personal.json + D/P encounter archives and curated special-system tables; pret/pokediamond files/poketool/personal_pearl/personal.json + D/P encounter archives and curated special-system tables |
| Miracle Seed | Diamond / Pearl | Wild held item — Cherubi | Floaroma Town and Floaroma Meadow: Catch wild Cherubi, or use Thief or Covet without already holding an item. | personal rare slot; personal_pearl rare slot | Base held-item chance 5%. Special-system availability: Honey Tree — regular tree: Slather Honey and return after about 6 hours Aggregate of common and rare table slots. Honey Tree — eligible Munchlax tree: Use one of the save's four eligible trees Aggregate of common and rare table slots. | pret/pokediamond files/poketool/personal/personal.json + D/P encounter archives and curated special-system tables; pret/pokediamond files/poketool/personal_pearl/personal.json + D/P encounter archives and curated special-system tables |
| Moomoo Milk | Diamond / Pearl | Wild held item — Miltank | Route 209, Route 210 South: Catch wild Miltank, or use Thief or Covet without already holding an item. | personal matching common+rare (guaranteed) slot; personal_pearl matching common+rare (guaranteed) slot | Base held-item chance 100%. Some listed locations use conditional tables: National Dex and Poké Radar required; replacement slot applies only in a hard/vigorous-shaking Radar patch. | pret/pokediamond files/poketool/personal/personal.json + D/P encounter archives and curated special-system tables; pret/pokediamond files/poketool/personal_pearl/personal.json + D/P encounter archives and curated special-system tables |
| Moon Stone | Diamond / Pearl | Wild held item — Clefairy | Mount Coronet 4F Room 1, Mount Coronet 4F Room 3, Mount Coronet 5F, Mount Coronet 6F, Mount Coronet B1F, Mount Coronet North 1F Room 2, Mount Coronet North Mountainside, Mount Coronet South 2F, Mount Coronet South 3F, Mount Coronet South Mountainside, Mount Coronet Tunnel Room, Route 212, Pokemon Mansion, and Trophy Garden: Catch wild Clefairy, or use Thief or Covet without already holding an item. | personal rare slot; personal_pearl rare slot | Base held-item chance 5%. Special-system availability: Trophy Garden daily visitor: National Dex; speak to Mr. Backlot once per day Today's and yesterday's announced visitors occupy separate 5% replacement slots. | pret/pokediamond files/poketool/personal/personal.json + D/P encounter archives and curated special-system tables; pret/pokediamond files/poketool/personal_pearl/personal.json + D/P encounter archives and curated special-system tables |
| Moon Stone | Diamond / Pearl | Wild held item — Cleffa | Mount Coronet North 1F Room 1, Mount Coronet South 1F, Route 212, Pokemon Mansion, and Trophy Garden: Catch wild Cleffa, or use Thief or Covet without already holding an item. | personal rare slot; personal_pearl rare slot | Base held-item chance 5%. Some listed locations use conditional tables: National Dex plus Pokémon Sapphire inserted in the Nintendo DS GBA slot; replaces grass slots 8-9. Special-system availability: Trophy Garden daily visitor: National Dex; speak to Mr. Backlot once per day Today's and yesterday's announced visitors occupy separate 5% replacement slots. | pret/pokediamond files/poketool/personal/personal.json + D/P encounter archives and curated special-system tables; pret/pokediamond files/poketool/personal_pearl/personal.json + D/P encounter archives and curated special-system tables |
| Moon Stone | Diamond / Pearl | Wild held item — Lunatone | Lake Acuity, Lake Valor, Lake Verity, Mount Coronet 4F Room 1, Mount Coronet 4F Room 3, Mount Coronet 5F, Mount Coronet 6F, Mount Coronet North Mountainside, Mount Coronet South 2F, Mount Coronet South 3F, Mount Coronet South Mountainside, Mount Coronet Tunnel Room, Sendoff Spring, Turnback Cave Random Room 1, Turnback Cave Random Room 10, Turnback Cave Random Room 11, Turnback Cave Random Room 12, Turnback Cave Random Room 13, Turnback Cave Random Room 15, Turnback Cave Random Room 16, Turnback Cave Random Room 17, Turnback Cave Random Room 18, Turnback Cave Random Room 2, Turnback Cave Random Room 3, Turnback Cave Random Room 4, Turnback Cave Random Room 5, Turnback Cave Random Room 6, Turnback Cave Random Room 7, Turnback Cave Random Room 8, Turnback Cave Random Room 9: Catch wild Lunatone, or use Thief or Covet without already holding an item. | personal rare slot; personal_pearl rare slot | Base held-item chance 5%. Some listed locations use conditional tables: National Dex plus Pokémon Sapphire inserted in the Nintendo DS GBA slot; replaces grass slots 8-9. | pret/pokediamond files/poketool/personal/personal.json + D/P encounter archives and curated special-system tables; pret/pokediamond files/poketool/personal_pearl/personal.json + D/P encounter archives and curated special-system tables |
| Mystic Water | Diamond / Pearl | Wild held item — Castform | Route 212, Pokemon Mansion, and Trophy Garden: Catch wild Castform, or use Thief or Covet without already holding an item. | personal matching common+rare (guaranteed) slot; personal_pearl matching common+rare (guaranteed) slot | Base held-item chance 100%. Special-system availability: Trophy Garden daily visitor: National Dex; speak to Mr. Backlot once per day Today's and yesterday's announced visitors occupy separate 5% replacement slots. | pret/pokediamond files/poketool/personal/personal.json + D/P encounter archives and curated special-system tables; pret/pokediamond files/poketool/personal_pearl/personal.json + D/P encounter archives and curated special-system tables |
| Nevermeltice | Diamond / Pearl | Wild held item — Abomasnow | Mount Coronet North Mountainside, Mount Coronet South Mountainside: Catch wild Abomasnow, or use Thief or Covet without already holding an item. | personal rare slot; personal_pearl rare slot | Base held-item chance 5%. Use the encounter rows for the named areas to choose a compatible method and time. | pret/pokediamond files/poketool/personal/personal.json + D/P encounter archives and curated special-system tables; pret/pokediamond files/poketool/personal_pearl/personal.json + D/P encounter archives and curated special-system tables |
| Nevermeltice | Diamond / Pearl | Wild held item — Snover | Acuity Lakefront, Mount Coronet North Mountainside, Mount Coronet South Mountainside, Route 216, Route 217: Catch wild Snover, or use Thief or Covet without already holding an item. | personal rare slot; personal_pearl rare slot | Base held-item chance 5%. Use the encounter rows for the named areas to choose a compatible method and time. | pret/pokediamond files/poketool/personal/personal.json + D/P encounter archives and curated special-system tables; pret/pokediamond files/poketool/personal_pearl/personal.json + D/P encounter archives and curated special-system tables |
| Nugget | Diamond / Pearl | Wild held item — Grimer | Route 212 South: Catch wild Grimer, or use Thief or Covet without already holding an item. | personal rare slot; personal_pearl rare slot | Base held-item chance 5%. Some listed locations use conditional tables: National Dex and Poké Radar required; replacement slot applies only in a hard/vigorous-shaking Radar patch. | pret/pokediamond files/poketool/personal/personal.json + D/P encounter archives and curated special-system tables; pret/pokediamond files/poketool/personal_pearl/personal.json + D/P encounter archives and curated special-system tables |
| Occa Berry | Diamond / Pearl | Wild held item — Mawile | Iron Island B1F Room 1, Iron Island B1F Room 2, Iron Island B2F Room 1, Iron Island B2F Room 2, Iron Island B3F: Catch wild Mawile, or use Thief or Covet without already holding an item. | personal rare slot; personal_pearl rare slot | Base held-item chance 5%. Some listed locations use conditional tables: National Dex plus Pokémon Ruby inserted in the Nintendo DS GBA slot; replaces grass slots 8-9. | pret/pokediamond files/poketool/personal/personal.json + D/P encounter archives and curated special-system tables; pret/pokediamond files/poketool/personal_pearl/personal.json + D/P encounter archives and curated special-system tables |
| Oran Berry | Diamond / Pearl | Wild held item — Bibarel | Great Marsh Area 1, Great Marsh Area 2, Great Marsh Area 3, Great Marsh Area 4, Great Marsh Area 5, Great Marsh Area 6, Lake Acuity, Lake Valor, Lake Verity, Pastoria City, Great Marsh, and Barry, Route 208, Route 209, Route 210 North, Route 212 South, Sendoff Spring, Valor Lakefront: Catch wild Bibarel and inspect it after capture. Thief and Covet cannot be used during the Great Marsh Safari Game; those moves remain options at any listed location outside the Marsh when the user holds no item. | personal common slot; personal_pearl common slot | Base held-item chance 50%. Some listed locations use conditional tables: National Dex plus Pokémon Emerald inserted in the Nintendo DS GBA slot; replaces grass slots 8-9. National Dex plus Pokémon FireRed inserted in the Nintendo DS GBA slot; replaces grass slots 8-9. National Dex plus Pokémon LeafGreen inserted in the Nintendo DS GBA slot; replaces grass slots 8-9. Special-system availability: Great Marsh daily replacement: Before the National Dex One of 32 pre-National-Dex selection entries; replaces grass slots 6-7. | pret/pokediamond files/poketool/personal/personal.json + D/P encounter archives and curated special-system tables; pret/pokediamond files/poketool/personal_pearl/personal.json + D/P encounter archives and curated special-system tables |
| Oran Berry | Diamond / Pearl | Wild held item — Pichu | Trophy Garden: Catch wild Pichu, or use Thief or Covet without already holding an item. | personal rare slot; personal_pearl rare slot | Base held-item chance 5%. Use the encounter rows for the named areas to choose a compatible method and time. | pret/pokediamond files/poketool/personal/personal.json + D/P encounter archives and curated special-system tables; pret/pokediamond files/poketool/personal_pearl/personal.json + D/P encounter archives and curated special-system tables |
| Oran Berry | Diamond / Pearl | Wild held item — Pikachu | Trophy Garden: Catch wild Pikachu, or use Thief or Covet without already holding an item. | personal common slot; personal_pearl common slot | Base held-item chance 50%. Use the encounter rows for the named areas to choose a compatible method and time. | pret/pokediamond files/poketool/personal/personal.json + D/P encounter archives and curated special-system tables; pret/pokediamond files/poketool/personal_pearl/personal.json + D/P encounter archives and curated special-system tables |
| Oran Berry | Diamond / Pearl | Wild held item — Sentret | Route 202: Catch wild Sentret, or use Thief or Covet without already holding an item. | personal rare slot; personal_pearl rare slot | Base held-item chance 5%. Some listed locations use conditional tables: National Dex and Poké Radar required; replacement slot applies only in a hard/vigorous-shaking Radar patch. | pret/pokediamond files/poketool/personal/personal.json + D/P encounter archives and curated special-system tables; pret/pokediamond files/poketool/personal_pearl/personal.json + D/P encounter archives and curated special-system tables |
| Oran Berry | Diamond / Pearl | Wild held item — Shuckle | Route 224: Catch wild Shuckle, or use Thief or Covet without already holding an item. | personal matching common+rare (guaranteed) slot; personal_pearl matching common+rare (guaranteed) slot | Base held-item chance 100%. Some listed locations use conditional tables: National Dex plus Pokémon Emerald inserted in the Nintendo DS GBA slot; replaces grass slots 8-9. | pret/pokediamond files/poketool/personal/personal.json + D/P encounter archives and curated special-system tables; pret/pokediamond files/poketool/personal_pearl/personal.json + D/P encounter archives and curated special-system tables |
| Oran Berry | Diamond / Pearl | Wild held item — Zigzagoon | Route 202: Catch wild Zigzagoon, or use Thief or Covet without already holding an item. | personal rare slot; personal_pearl rare slot | Base held-item chance 5%. Some listed locations use conditional tables: Post-National Dex daily swarm; replaces grass slots 0-1. | pret/pokediamond files/poketool/personal/personal.json + D/P encounter archives and curated special-system tables; pret/pokediamond files/poketool/personal_pearl/personal.json + D/P encounter archives and curated special-system tables |
| Oval Stone | Diamond / Pearl | Wild held item — Chansey | Route 209, Route 210 South, Route 212, Pokemon Mansion, and Trophy Garden: Catch wild Chansey, or use Thief or Covet without already holding an item. | personal common slot; personal_pearl common slot | Base held-item chance 50%. Special-system availability: Trophy Garden daily visitor: National Dex; speak to Mr. Backlot once per day Today's and yesterday's announced visitors occupy separate 5% replacement slots. | pret/pokediamond files/poketool/personal/personal.json + D/P encounter archives and curated special-system tables; pret/pokediamond files/poketool/personal_pearl/personal.json + D/P encounter archives and curated special-system tables |
| Oval Stone | Diamond / Pearl | Wild held item — Happiny | Route 212, Pokemon Mansion, and Trophy Garden: Catch wild Happiny, or use Thief or Covet without already holding an item. | personal common slot; personal_pearl common slot | Base held-item chance 50%. Special-system availability: Trophy Garden daily visitor: National Dex; speak to Mr. Backlot once per day Today's and yesterday's announced visitors occupy separate 5% replacement slots. | pret/pokediamond files/poketool/personal/personal.json + D/P encounter archives and curated special-system tables; pret/pokediamond files/poketool/personal_pearl/personal.json + D/P encounter archives and curated special-system tables |
| Passho Berry | Diamond / Pearl | Wild held item — Phanpy | Route 207: Catch wild Phanpy, or use Thief or Covet without already holding an item. | personal rare slot; personal_pearl rare slot | Base held-item chance 5%. Some listed locations use conditional tables: Post-National Dex daily swarm; replaces grass slots 0-1. | pret/pokediamond files/poketool/personal/personal.json + D/P encounter archives and curated special-system tables; pret/pokediamond files/poketool/personal_pearl/personal.json + D/P encounter archives and curated special-system tables |
| Payapa Berry | Diamond / Pearl | Wild held item — Mankey | Route 225, Route 226: Catch wild Mankey, or use Thief or Covet without already holding an item. | personal rare slot; personal_pearl rare slot | Base held-item chance 5%. Some listed locations use conditional tables: National Dex and Poké Radar required; replacement slot applies only in a hard/vigorous-shaking Radar patch. | pret/pokediamond files/poketool/personal/personal.json + D/P encounter archives and curated special-system tables; pret/pokediamond files/poketool/personal_pearl/personal.json + D/P encounter archives and curated special-system tables |
| Payapa Berry | Diamond / Pearl | Wild held item — Primeape | Route 225, Route 226: Catch wild Primeape, or use Thief or Covet without already holding an item. | personal rare slot; personal_pearl rare slot | Base held-item chance 5%. Some listed locations use conditional tables: National Dex and Poké Radar required; replacement slot applies only in a hard/vigorous-shaking Radar patch. | pret/pokediamond files/poketool/personal/personal.json + D/P encounter archives and curated special-system tables; pret/pokediamond files/poketool/personal_pearl/personal.json + D/P encounter archives and curated special-system tables |
| Pearl | Diamond / Pearl | Wild held item — Shellder | Fuego Ironworks Exterior, Route 205 South, Valley Windworks Exterior: Catch wild Shellder, or use Thief or Covet without already holding an item. | personal common slot; personal_pearl common slot | Base held-item chance 50%. Use the encounter rows for the named areas to choose a compatible method and time. | pret/pokediamond files/poketool/personal/personal.json + D/P encounter archives and curated special-system tables; pret/pokediamond files/poketool/personal_pearl/personal.json + D/P encounter archives and curated special-system tables |
| Pecha Berry | Diamond | Wild held item — Mightyena | Route 214, Route 215: Catch wild Mightyena, or use Thief or Covet without already holding an item. | personal rare slot | Base held-item chance 5%. Some listed locations use conditional tables: National Dex and Poké Radar required; replacement slot applies only in a hard/vigorous-shaking Radar patch. | pret/pokediamond files/poketool/personal/personal.json + D/P encounter archives and curated special-system tables |
| Pecha Berry | Diamond | Wild held item — Skuntank | Route 221, Route 225: Catch wild Skuntank, or use Thief or Covet without already holding an item. | personal rare slot | Base held-item chance 5%. Use the encounter rows for the named areas to choose a compatible method and time. | pret/pokediamond files/poketool/personal/personal.json + D/P encounter archives and curated special-system tables |
| Pecha Berry | Diamond | Wild held item — Stunky | Route 206, Route 214, Route 221: Catch wild Stunky, or use Thief or Covet without already holding an item. | personal rare slot | Base held-item chance 5%. Use the encounter rows for the named areas to choose a compatible method and time. | pret/pokediamond files/poketool/personal/personal.json + D/P encounter archives and curated special-system tables |
| Persim Berry | Diamond / Pearl | Wild held item — Girafarig | Route 214, Valor Lakefront: Catch wild Girafarig, or use Thief or Covet without already holding an item. | personal rare slot; personal_pearl rare slot | Base held-item chance 5%. Use the encounter rows for the named areas to choose a compatible method and time. | pret/pokediamond files/poketool/personal/personal.json + D/P encounter archives and curated special-system tables; pret/pokediamond files/poketool/personal_pearl/personal.json + D/P encounter archives and curated special-system tables |
| Persim Berry | Diamond | Wild held item — Kecleon | Route 210 North: Catch wild Kecleon, or use Thief or Covet without already holding an item. | personal rare slot | Base held-item chance 5%. Some listed locations use conditional tables: National Dex and Poké Radar required; replacement slot applies only in a hard/vigorous-shaking Radar patch. | pret/pokediamond files/poketool/personal/personal.json + D/P encounter archives and curated special-system tables |
| Poison Barb | Diamond / Pearl | Wild held item — Budew | Eterna Forest Interior, Great Marsh Area 1, Great Marsh Area 2, Great Marsh Area 3, Great Marsh Area 4, Great Marsh Area 5, Great Marsh Area 6, Route 204 North, Route 204 South, Route 212 North: Catch wild Budew, or use Thief or Covet without already holding an item. | personal rare slot; personal_pearl rare slot | Base held-item chance 5%. Use the encounter rows for the named areas to choose a compatible method and time. | pret/pokediamond files/poketool/personal/personal.json + D/P encounter archives and curated special-system tables; pret/pokediamond files/poketool/personal_pearl/personal.json + D/P encounter archives and curated special-system tables |
| Poison Barb | Diamond / Pearl | Wild held item — Drapion | Pastoria City, Great Marsh, and Barry: Catch wild Drapion and inspect it after capture. Thief and Covet cannot be used during the Great Marsh Safari Game; those moves remain options at any listed location outside the Marsh when the user holds no item. | personal rare slot; personal_pearl rare slot | Base held-item chance 5%. Special-system availability: Great Marsh daily replacement: National Dex obtained One of 32 post-National-Dex selection entries; replaces grass slots 6-7. | pret/pokediamond files/poketool/personal/personal.json + D/P encounter archives and curated special-system tables; pret/pokediamond files/poketool/personal_pearl/personal.json + D/P encounter archives and curated special-system tables |
| Poison Barb | Diamond / Pearl | Wild held item — Qwilfish | Iron Island Exterior: Catch wild Qwilfish, or use Thief or Covet without already holding an item. | personal rare slot; personal_pearl rare slot | Base held-item chance 5%. Use the encounter rows for the named areas to choose a compatible method and time. | pret/pokediamond files/poketool/personal/personal.json + D/P encounter archives and curated special-system tables; pret/pokediamond files/poketool/personal_pearl/personal.json + D/P encounter archives and curated special-system tables |
| Poison Barb | Diamond | Wild held item — Roselia | Pastoria City, Great Marsh, and Barry, Route 212 North, Route 212 South, Route 221, Route 224, Route 225, Route 229, Trophy Garden: Catch wild Roselia and inspect it after capture. Thief and Covet cannot be used during the Great Marsh Safari Game; those moves remain options at any listed location outside the Marsh when the user holds no item. | personal rare slot | Base held-item chance 5%. Special-system availability: Great Marsh daily replacement: Pre- or post-National Dex; one saved daily choice per area Three of 32 selection entries; replaces grass slots 6-7. | pret/pokediamond files/poketool/personal/personal.json + D/P encounter archives and curated special-system tables |
| Poison Barb | Pearl | Wild held item — Roselia | Pastoria City, Great Marsh, and Barry, Route 212 North, Route 212 South, Route 221, Route 224, Route 225, Trophy Garden: Catch wild Roselia and inspect it after capture. Thief and Covet cannot be used during the Great Marsh Safari Game; those moves remain options at any listed location outside the Marsh when the user holds no item. | personal_pearl rare slot | Base held-item chance 5%. Special-system availability: Great Marsh daily replacement: Pre- or post-National Dex; one saved daily choice per area Three of 32 selection entries; replaces grass slots 6-7. | pret/pokediamond files/poketool/personal_pearl/personal.json + D/P encounter archives and curated special-system tables |
| Poison Barb | Diamond / Pearl | Wild held item — Skorupi | Pastoria City, Great Marsh, and Barry: Catch wild Skorupi and inspect it after capture. Thief and Covet cannot be used during the Great Marsh Safari Game; those moves remain options at any listed location outside the Marsh when the user holds no item. | personal rare slot; personal_pearl rare slot | Base held-item chance 5%. Special-system availability: Great Marsh daily replacement: Pre- or post-National Dex; one saved daily choice per area Five of 32 selection entries; replaces grass slots 6-7. | pret/pokediamond files/poketool/personal/personal.json + D/P encounter archives and curated special-system tables; pret/pokediamond files/poketool/personal_pearl/personal.json + D/P encounter archives and curated special-system tables |
| Poison Barb | Diamond / Pearl | Wild held item — Tentacool | Canalave, Fuego Ironworks Exterior, Iron Island Exterior, Pastoria, Route 205 South, Route 213, Route 218, Route 219, Route 220, Route 221, Route 222, Valley Windworks Exterior: Catch wild Tentacool, or use Thief or Covet without already holding an item. | personal rare slot; personal_pearl rare slot | Base held-item chance 5%. Use the encounter rows for the named areas to choose a compatible method and time. | pret/pokediamond files/poketool/personal/personal.json + D/P encounter archives and curated special-system tables; pret/pokediamond files/poketool/personal_pearl/personal.json + D/P encounter archives and curated special-system tables |
| Poison Barb | Diamond / Pearl | Wild held item — Tentacruel | Canalave, Fuego Ironworks Exterior, Iron Island Exterior, Pastoria, Pokémon League, Route 205 South, Route 213, Route 218, Route 219, Route 220, Route 221, Route 222, Route 223, Route 224, Route 226, Route 230, Sunyshore, Valley Windworks Exterior: Catch wild Tentacruel, or use Thief or Covet without already holding an item. | personal rare slot; personal_pearl rare slot | Base held-item chance 5%. Use the encounter rows for the named areas to choose a compatible method and time. | pret/pokediamond files/poketool/personal/personal.json + D/P encounter archives and curated special-system tables; pret/pokediamond files/poketool/personal_pearl/personal.json + D/P encounter archives and curated special-system tables |
| Quick Claw | Diamond / Pearl | Wild held item — Meowth | Route 212, Pokemon Mansion, and Trophy Garden: Catch wild Meowth, or use Thief or Covet without already holding an item. | personal rare slot; personal_pearl rare slot | Base held-item chance 5%. Special-system availability: Trophy Garden daily visitor: National Dex; speak to Mr. Backlot once per day Today's and yesterday's announced visitors occupy separate 5% replacement slots. | pret/pokediamond files/poketool/personal/personal.json + D/P encounter archives and curated special-system tables; pret/pokediamond files/poketool/personal_pearl/personal.json + D/P encounter archives and curated special-system tables |
| Quick Claw | Diamond / Pearl | Wild held item — Sandshrew | Wayward Cave 1F, Wayward Cave B1F: Catch wild Sandshrew, or use Thief or Covet without already holding an item. | personal rare slot; personal_pearl rare slot | Base held-item chance 5%. Some listed locations use conditional tables: National Dex plus Pokémon LeafGreen inserted in the Nintendo DS GBA slot; replaces grass slots 8-9. | pret/pokediamond files/poketool/personal/personal.json + D/P encounter archives and curated special-system tables; pret/pokediamond files/poketool/personal_pearl/personal.json + D/P encounter archives and curated special-system tables |
| Quick Claw | Diamond / Pearl | Wild held item — Sandslash | Route 228: Catch wild Sandslash, or use Thief or Covet without already holding an item. | personal rare slot; personal_pearl rare slot | Base held-item chance 5%. Some listed locations use conditional tables: National Dex plus Pokémon LeafGreen inserted in the Nintendo DS GBA slot; replaces grass slots 8-9. | pret/pokediamond files/poketool/personal/personal.json + D/P encounter archives and curated special-system tables; pret/pokediamond files/poketool/personal_pearl/personal.json + D/P encounter archives and curated special-system tables |
| Quick Claw | Diamond / Pearl | Wild held item — Sneasel | Acuity Lakefront, Lake Acuity, Route 216, Route 217, Snowpoint Temple 1F, Snowpoint Temple B1F, Snowpoint Temple B2F, Snowpoint Temple B3F, Snowpoint Temple B4F, Snowpoint Temple B5F: Catch wild Sneasel, or use Thief or Covet without already holding an item. | personal rare slot; personal_pearl rare slot | Base held-item chance 5%. Use the encounter rows for the named areas to choose a compatible method and time. | pret/pokediamond files/poketool/personal/personal.json + D/P encounter archives and curated special-system tables; pret/pokediamond files/poketool/personal_pearl/personal.json + D/P encounter archives and curated special-system tables |
| Quick Claw | Diamond / Pearl | Wild held item — Zangoose | Route 208, Route 210 North: Catch wild Zangoose, or use Thief or Covet without already holding an item. | personal rare slot; personal_pearl rare slot | Base held-item chance 5%. Some listed locations use conditional tables: National Dex plus Pokémon Ruby inserted in the Nintendo DS GBA slot; replaces grass slots 8-9. | pret/pokediamond files/poketool/personal/personal.json + D/P encounter archives and curated special-system tables; pret/pokediamond files/poketool/personal_pearl/personal.json + D/P encounter archives and curated special-system tables |
| Quick Powder | Diamond / Pearl | Wild held item — Ditto | Route 218: Catch wild Ditto, or use Thief or Covet without already holding an item. | personal common slot; personal_pearl common slot | Base held-item chance 50%. Some listed locations use conditional tables: National Dex and Poké Radar required; replacement slot applies only in a hard/vigorous-shaking Radar patch. | pret/pokediamond files/poketool/personal/personal.json + D/P encounter archives and curated special-system tables; pret/pokediamond files/poketool/personal_pearl/personal.json + D/P encounter archives and curated special-system tables |
| Rawst Berry | Diamond / Pearl | Wild held item — Camerupt | Route 227, Stark Mountain Exterior, Stark Mountain Interior 1, Stark Mountain Interior 2: Catch wild Camerupt, or use Thief or Covet without already holding an item. | personal matching common+rare (guaranteed) slot; personal_pearl matching common+rare (guaranteed) slot | Base held-item chance 100%. Use the encounter rows for the named areas to choose a compatible method and time. | pret/pokediamond files/poketool/personal/personal.json + D/P encounter archives and curated special-system tables; pret/pokediamond files/poketool/personal_pearl/personal.json + D/P encounter archives and curated special-system tables |
| Rawst Berry | Diamond / Pearl | Wild held item — Growlithe | Route 201, Route 202: Catch wild Growlithe, or use Thief or Covet without already holding an item. | personal matching common+rare (guaranteed) slot; personal_pearl matching common+rare (guaranteed) slot | Base held-item chance 100%. Some listed locations use conditional tables: National Dex plus Pokémon FireRed inserted in the Nintendo DS GBA slot; replaces grass slots 8-9. | pret/pokediamond files/poketool/personal/personal.json + D/P encounter archives and curated special-system tables; pret/pokediamond files/poketool/personal_pearl/personal.json + D/P encounter archives and curated special-system tables |
| Rawst Berry | Diamond / Pearl | Wild held item — Numel | Route 227, Stark Mountain Exterior: Catch wild Numel, or use Thief or Covet without already holding an item. | personal matching common+rare (guaranteed) slot; personal_pearl matching common+rare (guaranteed) slot | Base held-item chance 100%. Use the encounter rows for the named areas to choose a compatible method and time. | pret/pokediamond files/poketool/personal/personal.json + D/P encounter archives and curated special-system tables; pret/pokediamond files/poketool/personal_pearl/personal.json + D/P encounter archives and curated special-system tables |
| Rawst Berry | Diamond / Pearl | Wild held item — Vulpix | Route 209, Route 214: Catch wild Vulpix, or use Thief or Covet without already holding an item. | personal matching common+rare (guaranteed) slot; personal_pearl matching common+rare (guaranteed) slot | Base held-item chance 100%. Some listed locations use conditional tables: National Dex plus Pokémon LeafGreen inserted in the Nintendo DS GBA slot; replaces grass slots 8-9. | pret/pokediamond files/poketool/personal/personal.json + D/P encounter archives and curated special-system tables; pret/pokediamond files/poketool/personal_pearl/personal.json + D/P encounter archives and curated special-system tables |
| Rindo Berry | Diamond / Pearl | Wild held item — Finneon | Canalave, Fuego Ironworks Exterior, Iron Island Exterior, Route 205 South, Route 218, Route 219, Route 220, Route 221, Valley Windworks Exterior: Catch wild Finneon, or use Thief or Covet without already holding an item. | personal rare slot; personal_pearl rare slot | Base held-item chance 5%. Use the encounter rows for the named areas to choose a compatible method and time. | pret/pokediamond files/poketool/personal/personal.json + D/P encounter archives and curated special-system tables; pret/pokediamond files/poketool/personal_pearl/personal.json + D/P encounter archives and curated special-system tables |
| Rindo Berry | Diamond / Pearl | Wild held item — Lumineon | Canalave, Fuego Ironworks Exterior, Iron Island Exterior, Route 205 South, Route 218, Route 219, Route 220, Route 221, Valley Windworks Exterior: Catch wild Lumineon, or use Thief or Covet without already holding an item. | personal rare slot; personal_pearl rare slot | Base held-item chance 5%. Use the encounter rows for the named areas to choose a compatible method and time. | pret/pokediamond files/poketool/personal/personal.json + D/P encounter archives and curated special-system tables; pret/pokediamond files/poketool/personal_pearl/personal.json + D/P encounter archives and curated special-system tables |
| Sharp Beak | Diamond / Pearl | Wild held item — Doduo | Route 201: Catch wild Doduo, or use Thief or Covet without already holding an item. | personal rare slot; personal_pearl rare slot | Base held-item chance 5%. Some listed locations use conditional tables: Post-National Dex daily swarm; replaces grass slots 0-1. | pret/pokediamond files/poketool/personal/personal.json + D/P encounter archives and curated special-system tables; pret/pokediamond files/poketool/personal_pearl/personal.json + D/P encounter archives and curated special-system tables |
| Sharp Beak | Diamond / Pearl | Wild held item — Fearow | Route 225, Route 226, Route 227, Stark Mountain Exterior: Catch wild Fearow, or use Thief or Covet without already holding an item. | personal rare slot; personal_pearl rare slot | Base held-item chance 5%. Use the encounter rows for the named areas to choose a compatible method and time. | pret/pokediamond files/poketool/personal/personal.json + D/P encounter archives and curated special-system tables; pret/pokediamond files/poketool/personal_pearl/personal.json + D/P encounter archives and curated special-system tables |
| Shed Shell | Diamond | Wild held item — Beautifly | Eterna Forest Interior, Route 224, Route 230: Catch wild Beautifly, or use Thief or Covet without already holding an item. | personal rare slot | Base held-item chance 5%. Use the encounter rows for the named areas to choose a compatible method and time. | pret/pokediamond files/poketool/personal/personal.json + D/P encounter archives and curated special-system tables |
| Shed Shell | Pearl | Wild held item — Beautifly | Route 224: Catch wild Beautifly, or use Thief or Covet without already holding an item. | personal_pearl rare slot | Base held-item chance 5%. Use the encounter rows for the named areas to choose a compatible method and time. | pret/pokediamond files/poketool/personal_pearl/personal.json + D/P encounter archives and curated special-system tables |
| Shed Shell | Pearl | Wild held item — Dustox | Eterna Forest Interior, Route 230: Catch wild Dustox, or use Thief or Covet without already holding an item. | personal_pearl rare slot | Base held-item chance 5%. Use the encounter rows for the named areas to choose a compatible method and time. | pret/pokediamond files/poketool/personal_pearl/personal.json + D/P encounter archives and curated special-system tables |
| Shed Shell | Diamond / Pearl | Wild held item — Venomoth | Route 229: Catch wild Venomoth, or use Thief or Covet without already holding an item. | personal rare slot; personal_pearl rare slot | Base held-item chance 5%. Some listed locations use conditional tables: National Dex and Poké Radar required; replacement slot applies only in a hard/vigorous-shaking Radar patch. | pret/pokediamond files/poketool/personal/personal.json + D/P encounter archives and curated special-system tables; pret/pokediamond files/poketool/personal_pearl/personal.json + D/P encounter archives and curated special-system tables |
| Shuca Berry | Diamond / Pearl | Wild held item — Ponyta | Route 206, Route 210 South, Route 211 East, Route 211 West, Route 214, Route 215: Catch wild Ponyta, or use Thief or Covet without already holding an item. | personal rare slot; personal_pearl rare slot | Base held-item chance 5%. Use the encounter rows for the named areas to choose a compatible method and time. | pret/pokediamond files/poketool/personal/personal.json + D/P encounter archives and curated special-system tables; pret/pokediamond files/poketool/personal_pearl/personal.json + D/P encounter archives and curated special-system tables |
| Sitrus Berry | Diamond / Pearl | Wild held item — Bibarel | Great Marsh Area 1, Great Marsh Area 2, Great Marsh Area 3, Great Marsh Area 4, Great Marsh Area 5, Great Marsh Area 6, Lake Acuity, Lake Valor, Lake Verity, Pastoria City, Great Marsh, and Barry, Route 208, Route 209, Route 210 North, Route 212 South, Sendoff Spring, Valor Lakefront: Catch wild Bibarel and inspect it after capture. Thief and Covet cannot be used during the Great Marsh Safari Game; those moves remain options at any listed location outside the Marsh when the user holds no item. | personal rare slot; personal_pearl rare slot | Base held-item chance 5%. Some listed locations use conditional tables: National Dex plus Pokémon Emerald inserted in the Nintendo DS GBA slot; replaces grass slots 8-9. National Dex plus Pokémon FireRed inserted in the Nintendo DS GBA slot; replaces grass slots 8-9. National Dex plus Pokémon LeafGreen inserted in the Nintendo DS GBA slot; replaces grass slots 8-9. Special-system availability: Great Marsh daily replacement: Before the National Dex One of 32 pre-National-Dex selection entries; replaces grass slots 6-7. | pret/pokediamond files/poketool/personal/personal.json + D/P encounter archives and curated special-system tables; pret/pokediamond files/poketool/personal_pearl/personal.json + D/P encounter archives and curated special-system tables |
| Smoke Ball | Diamond / Pearl | Wild held item — Weezing | Route 227, Stark Mountain Exterior, Stark Mountain Interior 1, Stark Mountain Interior 2: Catch wild Weezing, or use Thief or Covet without already holding an item. | personal rare slot; personal_pearl rare slot | Base held-item chance 5%. Use the encounter rows for the named areas to choose a compatible method and time. | pret/pokediamond files/poketool/personal/personal.json + D/P encounter archives and curated special-system tables; pret/pokediamond files/poketool/personal_pearl/personal.json + D/P encounter archives and curated special-system tables |
| Soft Sand | Diamond / Pearl | Wild held item — Diglett | Route 228: Catch wild Diglett, or use Thief or Covet without already holding an item. | personal rare slot; personal_pearl rare slot | Base held-item chance 5%. Use the encounter rows for the named areas to choose a compatible method and time. | pret/pokediamond files/poketool/personal/personal.json + D/P encounter archives and curated special-system tables; pret/pokediamond files/poketool/personal_pearl/personal.json + D/P encounter archives and curated special-system tables |
| Soft Sand | Diamond / Pearl | Wild held item — Dugtrio | Route 228: Catch wild Dugtrio, or use Thief or Covet without already holding an item. | personal rare slot; personal_pearl rare slot | Base held-item chance 5%. Use the encounter rows for the named areas to choose a compatible method and time. | pret/pokediamond files/poketool/personal/personal.json + D/P encounter archives and curated special-system tables; pret/pokediamond files/poketool/personal_pearl/personal.json + D/P encounter archives and curated special-system tables |
| Soft Sand | Diamond / Pearl | Wild held item — Trapinch | Route 228: Catch wild Trapinch, or use Thief or Covet without already holding an item. | personal rare slot; personal_pearl rare slot | Base held-item chance 5%. Some listed locations use conditional tables: National Dex and Poké Radar required; replacement slot applies only in a hard/vigorous-shaking Radar patch. | pret/pokediamond files/poketool/personal/personal.json + D/P encounter archives and curated special-system tables; pret/pokediamond files/poketool/personal_pearl/personal.json + D/P encounter archives and curated special-system tables |
| Spell Tag | Diamond / Pearl | Wild held item — Banette | Route 225, Route 226, Route 227, Stark Mountain Exterior: Catch wild Banette, or use Thief or Covet without already holding an item. | personal rare slot; personal_pearl rare slot | Base held-item chance 5%. Use the encounter rows for the named areas to choose a compatible method and time. | pret/pokediamond files/poketool/personal/personal.json + D/P encounter archives and curated special-system tables; pret/pokediamond files/poketool/personal_pearl/personal.json + D/P encounter archives and curated special-system tables |
| Star Piece | Diamond / Pearl | Wild held item — Staryu | Canalave, Sunyshore: Catch wild Staryu, or use Thief or Covet without already holding an item. | personal rare slot; personal_pearl rare slot | Base held-item chance 5%. Use the encounter rows for the named areas to choose a compatible method and time. | pret/pokediamond files/poketool/personal/personal.json + D/P encounter archives and curated special-system tables; pret/pokediamond files/poketool/personal_pearl/personal.json + D/P encounter archives and curated special-system tables |
| Stardust | Diamond / Pearl | Wild held item — Staryu | Canalave, Sunyshore: Catch wild Staryu, or use Thief or Covet without already holding an item. | personal common slot; personal_pearl common slot | Base held-item chance 50%. Use the encounter rows for the named areas to choose a compatible method and time. | pret/pokediamond files/poketool/personal/personal.json + D/P encounter archives and curated special-system tables; pret/pokediamond files/poketool/personal_pearl/personal.json + D/P encounter archives and curated special-system tables |
| Stick | Diamond / Pearl | Wild held item — Farfetchd | Route 221: Catch wild Farfetchd, or use Thief or Covet without already holding an item. | personal rare slot; personal_pearl rare slot | Base held-item chance 5%. Some listed locations use conditional tables: Post-National Dex daily swarm; replaces grass slots 0-1. | pret/pokediamond files/poketool/personal/personal.json + D/P encounter archives and curated special-system tables; pret/pokediamond files/poketool/personal_pearl/personal.json + D/P encounter archives and curated special-system tables |
| Sticky Barb | Diamond / Pearl | Wild held item — Cacnea | Route 228: Catch wild Cacnea, or use Thief or Covet without already holding an item. | personal rare slot; personal_pearl rare slot | Base held-item chance 5%. Use the encounter rows for the named areas to choose a compatible method and time. | pret/pokediamond files/poketool/personal/personal.json + D/P encounter archives and curated special-system tables; pret/pokediamond files/poketool/personal_pearl/personal.json + D/P encounter archives and curated special-system tables |
| Sticky Barb | Diamond / Pearl | Wild held item — Cacturne | Route 228: Catch wild Cacturne, or use Thief or Covet without already holding an item. | personal rare slot; personal_pearl rare slot | Base held-item chance 5%. Use the encounter rows for the named areas to choose a compatible method and time. | pret/pokediamond files/poketool/personal/personal.json + D/P encounter archives and curated special-system tables; pret/pokediamond files/poketool/personal_pearl/personal.json + D/P encounter archives and curated special-system tables |
| Sun Stone | Diamond / Pearl | Wild held item — Solrock | Lake Acuity, Lake Valor, Lake Verity, Mount Coronet 4F Room 1, Mount Coronet 4F Room 3, Mount Coronet 5F, Mount Coronet 6F, Mount Coronet North Mountainside, Mount Coronet South 2F, Mount Coronet South 3F, Mount Coronet South Mountainside, Mount Coronet Tunnel Room, Sendoff Spring, Turnback Cave Random Room 1, Turnback Cave Random Room 10, Turnback Cave Random Room 11, Turnback Cave Random Room 12, Turnback Cave Random Room 13, Turnback Cave Random Room 15, Turnback Cave Random Room 16, Turnback Cave Random Room 17, Turnback Cave Random Room 18, Turnback Cave Random Room 2, Turnback Cave Random Room 3, Turnback Cave Random Room 4, Turnback Cave Random Room 5, Turnback Cave Random Room 6, Turnback Cave Random Room 7, Turnback Cave Random Room 8, Turnback Cave Random Room 9: Catch wild Solrock, or use Thief or Covet without already holding an item. | personal rare slot; personal_pearl rare slot | Base held-item chance 5%. Some listed locations use conditional tables: National Dex plus Pokémon Ruby inserted in the Nintendo DS GBA slot; replaces grass slots 8-9. | pret/pokediamond files/poketool/personal/personal.json + D/P encounter archives and curated special-system tables; pret/pokediamond files/poketool/personal_pearl/personal.json + D/P encounter archives and curated special-system tables |
| Tanga Berry | Diamond / Pearl | Wild held item — Spoink | Route 214: Catch wild Spoink, or use Thief or Covet without already holding an item. | personal rare slot; personal_pearl rare slot | Base held-item chance 5%. Some listed locations use conditional tables: Post-National Dex daily swarm; replaces grass slots 0-1. | pret/pokediamond files/poketool/personal/personal.json + D/P encounter archives and curated special-system tables; pret/pokediamond files/poketool/personal_pearl/personal.json + D/P encounter archives and curated special-system tables |
| Thick Club | Diamond / Pearl | Wild held item — Cubone | Route 203: Catch wild Cubone, or use Thief or Covet without already holding an item. | personal rare slot; personal_pearl rare slot | Base held-item chance 5%. Some listed locations use conditional tables: Post-National Dex daily swarm; replaces grass slots 0-1. | pret/pokediamond files/poketool/personal/personal.json + D/P encounter archives and curated special-system tables; pret/pokediamond files/poketool/personal_pearl/personal.json + D/P encounter archives and curated special-system tables |
| Tinymushroom | Diamond / Pearl | Wild held item — Paras | Pastoria City, Great Marsh, and Barry: Catch wild Paras and inspect it after capture. Thief and Covet cannot be used during the Great Marsh Safari Game; those moves remain options at any listed location outside the Marsh when the user holds no item. | personal common slot; personal_pearl common slot | Base held-item chance 50%. Special-system availability: Great Marsh daily replacement: National Dex obtained One of 32 post-National-Dex selection entries; replaces grass slots 6-7. | pret/pokediamond files/poketool/personal/personal.json + D/P encounter archives and curated special-system tables; pret/pokediamond files/poketool/personal_pearl/personal.json + D/P encounter archives and curated special-system tables |
| Twistedspoon | Diamond / Pearl | Wild held item — Abra | Route 203, Route 215: Catch wild Abra, or use Thief or Covet without already holding an item. | personal rare slot; personal_pearl rare slot | Base held-item chance 5%. Use the encounter rows for the named areas to choose a compatible method and time. | pret/pokediamond files/poketool/personal/personal.json + D/P encounter archives and curated special-system tables; pret/pokediamond files/poketool/personal_pearl/personal.json + D/P encounter archives and curated special-system tables |
| Twistedspoon | Diamond / Pearl | Wild held item — Kadabra | Route 215, Victory Road 2F: Catch wild Kadabra, or use Thief or Covet without already holding an item. | personal rare slot; personal_pearl rare slot | Base held-item chance 5%. Use the encounter rows for the named areas to choose a compatible method and time. | pret/pokediamond files/poketool/personal/personal.json + D/P encounter archives and curated special-system tables; pret/pokediamond files/poketool/personal_pearl/personal.json + D/P encounter archives and curated special-system tables |
| Wacan Berry | Diamond / Pearl | Wild held item — Buizel | Route 205 North, Route 205 South, Route 213, Route 224, Valley Windworks Exterior: Catch wild Buizel, or use Thief or Covet without already holding an item. | personal rare slot; personal_pearl rare slot | Base held-item chance 5%. Use the encounter rows for the named areas to choose a compatible method and time. | pret/pokediamond files/poketool/personal/personal.json + D/P encounter archives and curated special-system tables; pret/pokediamond files/poketool/personal_pearl/personal.json + D/P encounter archives and curated special-system tables |
| Wacan Berry | Diamond / Pearl | Wild held item — Floatzel | Fuego Ironworks Exterior, Route 213, Route 218, Route 221, Route 222, Route 224, Route 230, Victory Road 1F Back 2, Victory Road B1F: Catch wild Floatzel, or use Thief or Covet without already holding an item. | personal rare slot; personal_pearl rare slot | Base held-item chance 5%. Use the encounter rows for the named areas to choose a compatible method and time. | pret/pokediamond files/poketool/personal/personal.json + D/P encounter archives and curated special-system tables; pret/pokediamond files/poketool/personal_pearl/personal.json + D/P encounter archives and curated special-system tables |
| Wide Lens | Diamond / Pearl | Wild held item — Yanma | Pastoria City, Great Marsh, and Barry: Catch wild Yanma and inspect it after capture. Thief and Covet cannot be used during the Great Marsh Safari Game; those moves remain options at any listed location outside the Marsh when the user holds no item. | personal rare slot; personal_pearl rare slot | Base held-item chance 5%. Special-system availability: Great Marsh daily replacement: National Dex obtained One of 32 post-National-Dex selection entries; replaces grass slots 6-7. | pret/pokediamond files/poketool/personal/personal.json + D/P encounter archives and curated special-system tables; pret/pokediamond files/poketool/personal_pearl/personal.json + D/P encounter archives and curated special-system tables |
| Yache Berry | Diamond / Pearl | Wild held item — Staravia | Lake Valor, Lake Verity, Pastoria City, Great Marsh, and Barry, Route 209, Route 212 North, Sendoff Spring, Trophy Garden, Valor Lakefront: Catch wild Staravia and inspect it after capture. Thief and Covet cannot be used during the Great Marsh Safari Game; those moves remain options at any listed location outside the Marsh when the user holds no item. | personal rare slot; personal_pearl rare slot | Base held-item chance 5%. Some listed locations use conditional tables: National Dex plus Pokémon Emerald inserted in the Nintendo DS GBA slot; replaces grass slots 8-9. National Dex plus Pokémon FireRed inserted in the Nintendo DS GBA slot; replaces grass slots 8-9. National Dex plus Pokémon LeafGreen inserted in the Nintendo DS GBA slot; replaces grass slots 8-9. Special-system availability: Great Marsh daily replacement: Pre- or post-National Dex; one saved daily choice per area Three of 32 selection entries; replaces grass slots 6-7. | pret/pokediamond files/poketool/personal/personal.json + D/P encounter archives and curated special-system tables; pret/pokediamond files/poketool/personal_pearl/personal.json + D/P encounter archives and curated special-system tables |
| Yache Berry | Diamond / Pearl | Wild held item — Starly | Great Marsh Area 1, Great Marsh Area 2, Great Marsh Area 3, Great Marsh Area 4, Great Marsh Area 5, Great Marsh Area 6, Lake Verity, Route 201, Route 202, Route 203, Route 204 North, Route 204 South, Route 209, Route 212 North: Catch wild Starly, or use Thief or Covet without already holding an item. | personal rare slot; personal_pearl rare slot | Base held-item chance 5%. Some listed locations use conditional tables: National Dex plus Pokémon Ruby inserted in the Nintendo DS GBA slot; replaces grass slots 8-9. National Dex plus Pokémon Sapphire inserted in the Nintendo DS GBA slot; replaces grass slots 8-9. National Dex plus Pokémon Emerald inserted in the Nintendo DS GBA slot; replaces grass slots 8-9. National Dex plus Pokémon LeafGreen inserted in the Nintendo DS GBA slot; replaces grass slots 8-9. | pret/pokediamond files/poketool/personal/personal.json + D/P encounter archives and curated special-system tables; pret/pokediamond files/poketool/personal_pearl/personal.json + D/P encounter archives and curated special-system tables |
Puzzles, Warps, And Switches
- For Poke Radar chains, start in a grass field large enough to keep all shaking patches on-screen, enter a patch at least four tiles away when possible, distinguish soft from hard/vigorous shakes, and recharge with 50 steps without leaving the field.
- Dual-slot encounters are selected at boot from the inserted Game Boy Advance cartridge: Ruby, Sapphire, Emerald, FireRed, and LeafGreen each activate different species slots.
Completion Checklist
- Complete the currently reachable part of this route plan: Audit the Sinnoh seen Pokedex; fill missing trainer-seen species; visit Rowan's Sandgem lab; receive the National Dex from Oak; collect the Poke Radar; speak to the assistant's sister once to enable swarms and revisit her to identify the current route; check Trophy Garden and Great Marsh rotations; insert a compatible GBA game before boot for dual-slot encounters; use Radar only in large grass patches.
- Review all 293 encounter rows across the per-area tables, including game markers, method band, time-of-day rates, levels, and each conditional requirement; mark conditional rows for their stated revisit.
Routes 219-221 and Pal Park
Surf south from Sandgem through three sea routes, clear the Pal Park approach, and learn permanent Generation III migration and catching-show rules.
Source maps
Pal Park Unused, Pal Park, Route 219, Route 221, Route 221 Pal Park Entrance, Route 221 Level Item House, and Route 220.
Route Plan
Start south of Sandgem; clear Route 219 swimmers; sweep Route 220's branching sea lanes; land on Route 221; battle every trainer; visit the level-item house with matching-level leads; enter Pal Park; migrate a planned set of six from a compatible GBA cartridge; complete the Catching Show.
- Migration is one-way: transferred Generation III Pokemon cannot return to the GBA game. Remove HM moves and verify held items before migrating.
- Pal Park migration requires a Nintendo DS or DS Lite with a physical Slot-2 and normally requires the GBA and DS games to use the same language. Korean Diamond/Pearl is the exception and accepts Japanese- or English-language GBA saves.
- Original Diamond/Pearl migrates exactly six Pokemon per batch and applies a 24-hour cooldown per source GBA save/Trainer ID before another batch from that source. A Nintendo DS clock or RTC-offset change can trigger the migration lockout rather than bypass it.
- Route 221's level house rolls a daily target from Lv. 2 through 99. Show a party Pokemon at exactly that level for one daily success; rewards cycle Black Belt, Expert Belt, Focus Sash, then repeat.
Routes and encounters on this page are compiled from 7 pret map headers.
Route 219
| Pokémon | Games | Levels | Rate | Requirement / notes | ||
|---|---|---|---|---|---|---|
| Morning | Day | Night | ||||
| Surfing | ||||||
 Tentacool Tentacool | DP | 20-30 | 60% | — | ||
 Wingull Wingull | DP | 20-30 | 30% | — | ||
 Pelipper Pelipper | DP | 20-40 | 5% | — | ||
 Tentacruel Tentacruel | DP | 20-40 | 5% | — | ||
| Fishing — Old Rod | ||||||
 Magikarp Magikarp | DP | 3-10 | 100% | — | ||
| Fishing — Good Rod | ||||||
| Magikarp | DP | 10-25 | 55% | — | ||
 Finneon Finneon | DP | 10-25 | 45% | — | ||
| Fishing — Super Rod | ||||||
 Lumineon Lumineon | DP | 20-50 | 45% | — | ||
 Gyarados Gyarados | DP | 30-40 | 40% | — | ||
 Clamperl Clamperl | DP | 20-30 | 15% | — | ||
Route 220
| Pokémon | Games | Levels | Rate | Requirement / notes | ||
|---|---|---|---|---|---|---|
| Morning | Day | Night | ||||
| Surfing | ||||||
| Tentacool | DP | 20-30 | 60% | — | ||
| Wingull | DP | 20-30 | 30% | — | ||
| Pelipper | DP | 20-40 | 5% | — | ||
| Tentacruel | DP | 20-40 | 5% | — | ||
| Fishing — Old Rod | ||||||
| Magikarp | DP | 3-10 | 100% | — | ||
| Fishing — Good Rod | ||||||
| Magikarp | DP | 10-25 | 55% | — | ||
| Finneon | DP | 10-25 | 45% | — | ||
| Fishing — Super Rod | ||||||
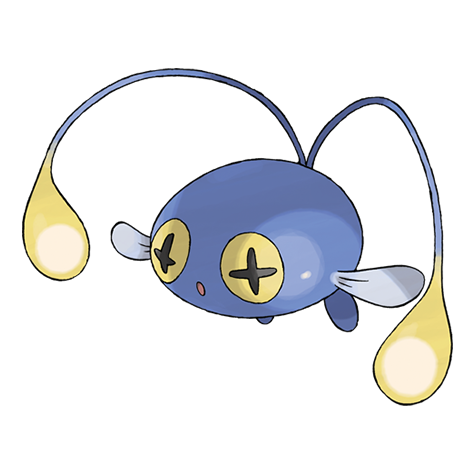 Chinchou Chinchou | DP | 15-25 | 40% | — | ||
| Gyarados | DP | 30-40 | 40% | — | ||
| Lumineon | DP | 30-40 | 15% | — | ||
 Lanturn Lanturn | DP | 20-45 | 5% | — | ||
Route 221
| Pokémon | Games | Levels | Rate | Requirement / notes | ||
|---|---|---|---|---|---|---|
| Morning | Day | Night | ||||
| Grass / cave floor | ||||||
| Floatzel | DP | 28 or 30 | 25% | Rate counts base slots temporarily replaced by the daily swarm. | ||
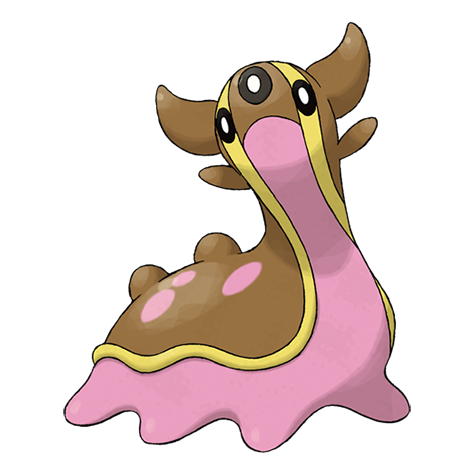 Gastrodon Gastrodon | DP | 28 | 20% | Rate counts base slots temporarily replaced by the daily swarm. | ||
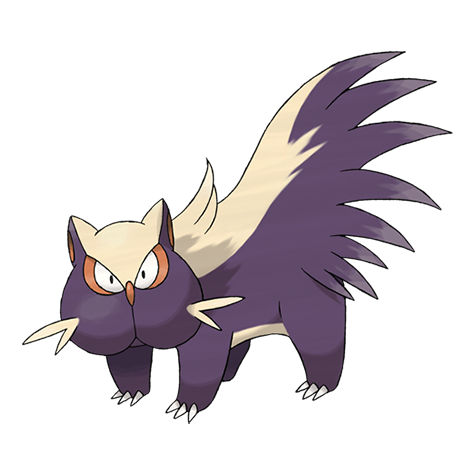 Stunky Stunky | DP | 28 | 20% | Rate counts base slots temporarily replaced by the daily swarm. | ||
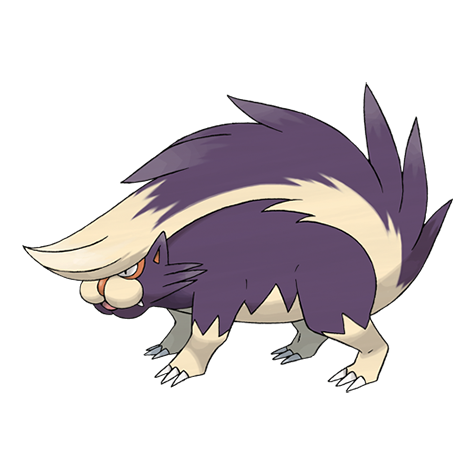 Skuntank Skuntank | DP | 29-30 | 15% | Rate counts base slots temporarily replaced by hard-shaking Poké Radar patches. | ||
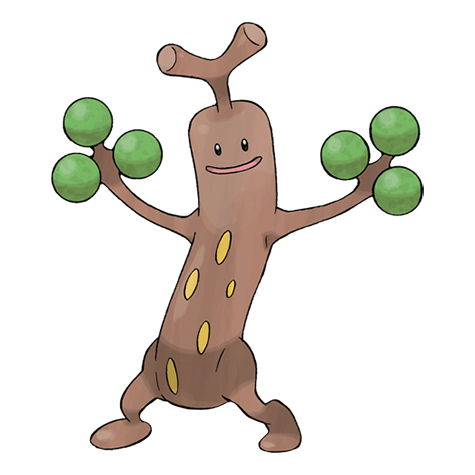 Sudowoodo Sudowoodo | DP | 29-30 | 15% | Rate counts base slots temporarily replaced by hard-shaking Poké Radar patches. | ||
| Gastrodon | DP | 29-30 | 10% | Rate counts base slots temporarily replaced by hard-shaking Poké Radar patches. | ||
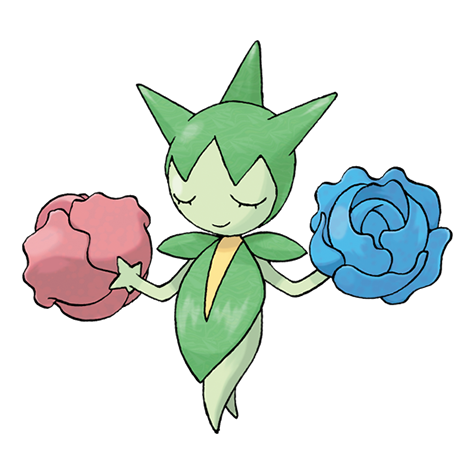 Roselia Roselia | DP | 29 | 10% | — | ||
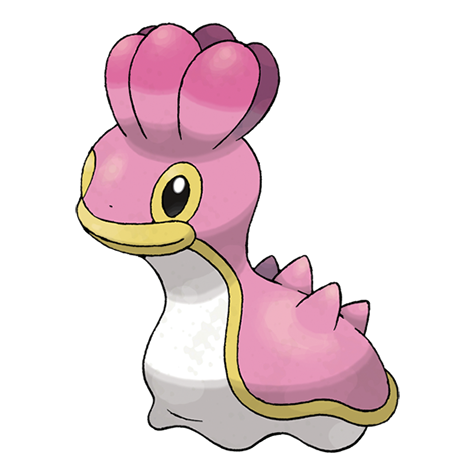 Shellos Shellos | DP | 28 | 10% | — | ||
| Wingull | DP | 29 | 10% | Rate counts base slots temporarily replaced by hard-shaking Poké Radar patches. | ||
| Swarm (post-National Dex daily announcement) | ||||||
| Farfetchd | DP | 28 | 40% | Post-National Dex daily swarm; replaces grass slots 0-1. | ||
| Poké Radar (post-National Dex) | ||||||
| Nidorina | DP | 29 | 20% | National Dex and Poké Radar required; replacement slot applies only in a hard/vigorous-shaking Radar patch. | ||
| Nidorino | DP | 29 | 20% | National Dex and Poké Radar required; replacement slot applies only in a hard/vigorous-shaking Radar patch. | ||
| Nidorina | DP | 30 | 2% | National Dex and Poké Radar required; replacement slot applies only in a hard/vigorous-shaking Radar patch. | ||
| Nidorino | DP | 30 | 2% | National Dex and Poké Radar required; replacement slot applies only in a hard/vigorous-shaking Radar patch. | ||
| Surfing | ||||||
| Tentacool | DP | 20-30 | 60% | — | ||
| Wingull | DP | 20-30 | 30% | — | ||
| Pelipper | DP | 20-40 | 5% | — | ||
| Tentacruel | DP | 20-40 | 5% | — | ||
| Fishing — Old Rod | ||||||
| Magikarp | DP | 3-10 | 100% | — | ||
| Fishing — Good Rod | ||||||
| Magikarp | DP | 10-25 | 55% | — | ||
| Finneon | DP | 10-25 | 45% | — | ||
| Fishing — Super Rod | ||||||
| Lumineon | DP | 20-50 | 45% | — | ||
| Gyarados | DP | 30-40 | 40% | — | ||
| Clamperl | DP | 20-30 | 15% | — | ||
Routes 219-221 and Pal Park
| Pokémon | Games | Levels | Rate | Requirement / notes | ||
|---|---|---|---|---|---|---|
| Morning | Day | Night | ||||
| Pal Park Catching Show | ||||||
| Six migrated Generation III Pokemon | DP | Transferred unchanged | Guaranteed catch after encounter | National Dex and six eligible Pokemon migrated from Ruby, Sapphire, Emerald, FireRed, or LeafGreen Species, level, moves, nature, and most data transfer from the source game; migration is permanent. | ||
Trainers
| Trainer | Route order / placement | Full team | Reward | Access requirement | Optional / rematch note |
|---|---|---|---|---|---|
 Tuber Male TrentonTuber Male • source ID 358 Tuber Male TrentonTuber Male • source ID 358 | Route 219 • field order 1 at (171, 887) | ₽116 | Reach the trainer's named field subarea; line of sight determines whether the battle is avoidable. | Field order 1, tile (171, 887); sightline/path determines whether it can be avoided. No higher-level same-trainer rematch variant is defined in trdata. | |
 Tuber Female MarielTuber Female • source ID 360 Tuber Female MarielTuber Female • source ID 360 | Route 219 • field order 2 at (176, 887) | ₽116 | Reach the trainer's named field subarea; line of sight determines whether the battle is avoidable. | Field order 2, tile (176, 887); sightline/path determines whether it can be avoided. No higher-level same-trainer rematch variant is defined in trdata. | |
 Swimmer Male DillonSwimmer Male • source ID 166 Swimmer Male DillonSwimmer Male • source ID 166 | Route 221 • field order 1 at (235, 912) | ₽512 | Reach the trainer's named field subarea; line of sight determines whether the battle is avoidable. | Field order 1, tile (235, 912); sightline/path determines whether it can be avoided. No higher-level same-trainer rematch variant is defined in trdata. | |
 Swimmer Female VanessaSwimmer Female • source ID 167 Swimmer Female VanessaSwimmer Female • source ID 167 | Route 221 • field order 2 at (237, 922) | ₽528 | Reach the trainer's named field subarea; line of sight determines whether the battle is avoidable. | Field order 2, tile (237, 922); sightline/path determines whether it can be avoided. No higher-level same-trainer rematch variant is defined in trdata. | |
 Fisherman CoryFisherman • source ID 168 Fisherman CoryFisherman • source ID 168 | Route 221 • field order 3 at (250, 919) | ₽1,024 | Reach the trainer's named field subarea; line of sight determines whether the battle is avoidable. | Field order 3, tile (250, 919); sightline/path determines whether it can be avoided. No higher-level same-trainer rematch variant is defined in trdata. | |
 Collector IvanCollector • source ID 274 Collector IvanCollector • source ID 274 | Route 221 • field order 4 at (288, 915) | ₽2,176 | Reach the trainer's named field subarea; line of sight determines whether the battle is avoidable. | Field order 4, tile (288, 915); sightline/path determines whether it can be avoided. Higher-level source variants used by the rematch system: ID 650: Lv. 51/Lv. 53/Lv. 52. | |
 Ace Trainer Male JakeAce Trainer Male • source ID 170 Ace Trainer Male JakeAce Trainer Male • source ID 170 | Route 221 • field order 5 at (305, 917) | ₽1,980 | Reach the trainer's named field subarea; line of sight determines whether the battle is avoidable. | Field order 5, tile (305, 917); sightline/path determines whether it can be avoided. Higher-level source variants used by the rematch system: ID 663: Lv. 55/Lv. 55. | |
 Ace Trainer Female ShannonAce Trainer Female • source ID 171 Ace Trainer Female ShannonAce Trainer Female • source ID 171 | Route 221 • field order 6 at (277, 923) | ₽2,040 | Reach the trainer's named field subarea; line of sight determines whether the battle is avoidable. | Field order 6, tile (277, 923); sightline/path determines whether it can be avoided. Higher-level source variants used by the rematch system: ID 668: Lv. 54/Lv. 54/Lv. 54. | |
| Swimmer Male ErikSwimmer Male • source ID 160 | Route 220 • field order 1 at (211, 917) | ₽496 | Reach the trainer's named field subarea; line of sight determines whether the battle is avoidable. | Field order 1, tile (211, 917); sightline/path determines whether it can be avoided. No higher-level same-trainer rematch variant is defined in trdata. | |
| Swimmer Male VincentSwimmer Male • source ID 161 | Route 220 • field order 2 at (198, 911) | ₽464 | Reach the trainer's named field subarea; line of sight determines whether the battle is avoidable. | Field order 2, tile (198, 911); sightline/path determines whether it can be avoided. No higher-level same-trainer rematch variant is defined in trdata. | |
| Swimmer Female JessicaSwimmer Female • source ID 162 | Route 220 • field order 3 at (175, 905) | ₽448 | Reach the trainer's named field subarea; line of sight determines whether the battle is avoidable. | Field order 3, tile (175, 905); sightline/path determines whether it can be avoided. No higher-level same-trainer rematch variant is defined in trdata. | |
| Swimmer Female EricaSwimmer Female • source ID 163 | Route 220 • field order 4 at (169, 907) | ₽464 | Reach the trainer's named field subarea; line of sight determines whether the battle is avoidable. | Field order 4, tile (169, 907); sightline/path determines whether it can be avoided. No higher-level same-trainer rematch variant is defined in trdata. | |
| Swimmer Male AdrianSwimmer Male • source ID 159 | Route 220 • field order 5 at (185, 918) | ₽464 | Reach the trainer's named field subarea; line of sight determines whether the battle is avoidable. | Field order 5, tile (185, 918); sightline/path determines whether it can be avoided. No higher-level same-trainer rematch variant is defined in trdata. | |
| Swimmer Female KatelynSwimmer Female • source ID 164 | Route 220 • field order 6 at (204, 903) | ₽448 | Reach the trainer's named field subarea; line of sight determines whether the battle is avoidable. | Field order 6, tile (204, 903); sightline/path determines whether it can be avoided. No higher-level same-trainer rematch variant is defined in trdata. | |
| Swimmer Female ClaireSwimmer Female • source ID 494 | Route 220 • field order 7 at (211, 911) | ₽496 | Reach the trainer's named field subarea; line of sight determines whether the battle is avoidable. | Field order 7, tile (211, 911); sightline/path determines whether it can be avoided. No higher-level same-trainer rematch variant is defined in trdata. |

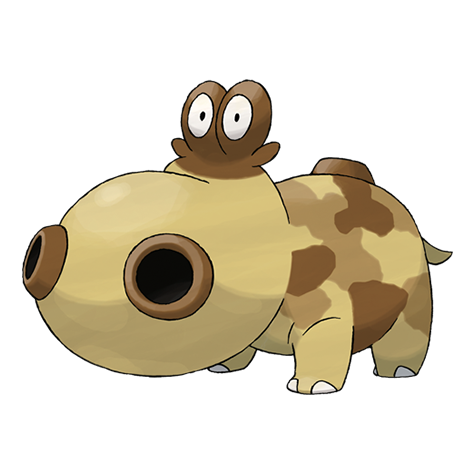
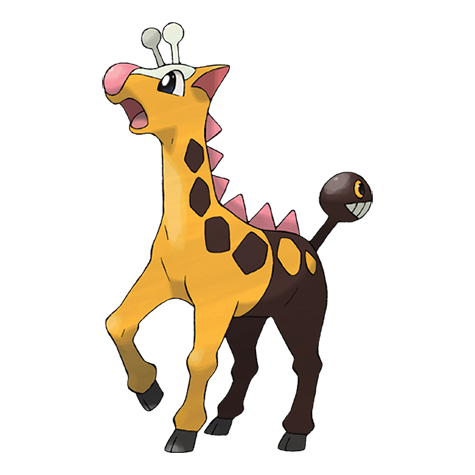
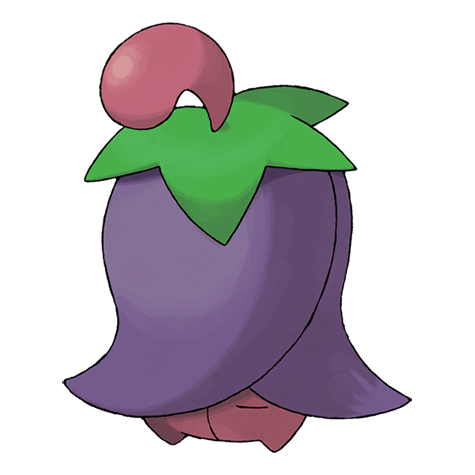
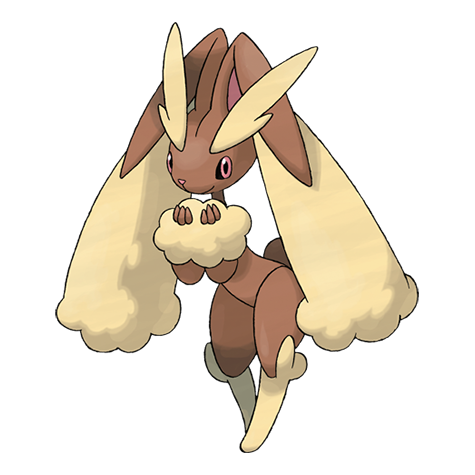
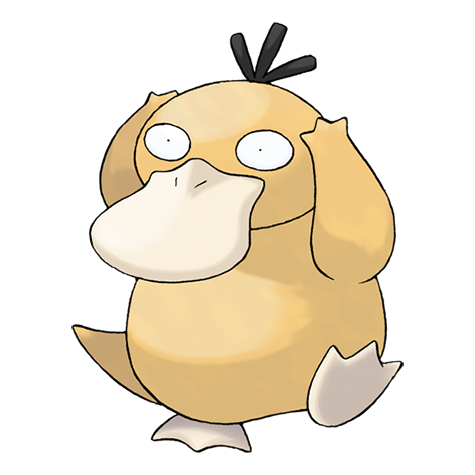

Items
| Item | Version | Type | Area / exact direction | Coordinate / script | Requirement | Source |
|---|---|---|---|---|---|---|
| Antidote | Diamond / Pearl | Visible item ball | Route 219: Pick up the item ball in the western part of Route 219, 2 tiles west and 10 tiles north of the Tuber Male Trenton's field position. | (169, 877) | Reach this subarea; check the route and puzzle notes for HM, Bicycle, time, or story gates. | event bank 376, script 7002 |
| Protein | Diamond / Pearl | Visible item ball | Route 221: Pick up the item ball in the western part of Route 221, 22 tiles west and 8 tiles south of the Route 221 Level Item House doorway or transition. | (239, 908) | Reach this subarea; check the route and puzzle notes for HM, Bicycle, time, or story gates. | event bank 377, script 7140 |
| TM81 | Diamond / Pearl | Visible item ball | Route 221: Pick up the item ball in the southeastern part of Route 221, 11 tiles west and 13 tiles south of the Route 221 Pal Park Entrance doorway or transition. | (295, 922) | Reach this subarea; check the route and puzzle notes for HM, Bicycle, time, or story gates. | event bank 377, script 7141 |
| Honey | Diamond / Pearl | Visible item ball | Route 221: Pick up the item ball in the southwestern part of Route 221, 5 tiles west and 16 tiles south of the Route 221 Level Item House doorway or transition. | (256, 916) | Reach this subarea; check the route and puzzle notes for HM, Bicycle, time, or story gates. | event bank 377, script 7139 |
| Pure Incense | Diamond / Pearl | Visible item ball | Route 221: Pick up the item ball in the northwestern part of Route 221, 11 tiles west and 2 tiles south of the Route 221 Level Item House doorway or transition. | (250, 902) | Reach this subarea; check the route and puzzle notes for HM, Bicycle, time, or story gates. | event bank 377, script 7142 |
| Carbos | Diamond / Pearl | Visible item ball | Route 220: Pick up the item ball in the southeastern part of Route 220, 1 tile east and 6 tiles south of the Swimmer Male Vincent's field position. | (199, 917) | Reach this subarea; check the route and puzzle notes for HM, Bicycle, time, or story gates. | event bank 445, script 7137 |
| Splash Plate | Diamond / Pearl | Visible item ball | Route 220: Pick up the item ball in the southwestern part of Route 220, 2 tiles east and 11 tiles south of the Swimmer Female Erica's field position. | (171, 918) | Reach this subarea; check the route and puzzle notes for HM, Bicycle, time, or story gates. | event bank 445, script 7136 |
| Ether | Diamond / Pearl | Visible item ball | Route 220: Pick up the item ball in the western part of Route 220, 5 tiles east and 5 tiles south of the Swimmer Female Jessica's field position. | (180, 910) | Reach this subarea; check the route and puzzle notes for HM, Bicycle, time, or story gates. | event bank 445, script 7138 |
| Leppa Berry | Diamond / Pearl | Berry tree | Route 221: Harvest berry patch 78 in the southern part of Route 221, 17 tiles east and 18 tiles south of the Route 221 Level Item House doorway or transition. The plot can be replanted after the initial harvest. | (278, 918) | Reach the outdoor patch on the named route or town; harvest its initial berries before planting a replacement. | berry table ov52_021D76F8, patch 78 |
| Pecha Berry | Diamond / Pearl | Berry tree | Route 221: Harvest berry patch 79 in the southern part of Route 221, 18 tiles east and 18 tiles south of the Route 221 Level Item House doorway or transition. The plot can be replanted after the initial harvest. | (279, 918) | Reach the outdoor patch on the named route or town; harvest its initial berries before planting a replacement. | berry table ov52_021D76F8, patch 79 |
| Mago Berry | Diamond / Pearl | Berry tree | Route 221: Harvest berry patch 80 in the southern part of Route 221, 26 tiles west and 9 tiles south of the Route 221 Pal Park Entrance doorway or transition. The plot can be replanted after the initial harvest. | (280, 918) | Reach the outdoor patch on the named route or town; harvest its initial berries before planting a replacement. | berry table ov52_021D76F8, patch 80 |
| Hondew Berry | Diamond / Pearl | Berry tree | Route 221: Harvest berry patch 81 in the southern part of Route 221, 25 tiles west and 9 tiles south of the Route 221 Pal Park Entrance doorway or transition. The plot can be replanted after the initial harvest. | (281, 918) | Reach the outdoor patch on the named route or town; harvest its initial berries before planting a replacement. | berry table ov52_021D76F8, patch 81 |
| Black Belt / Expert Belt / Focus Sash | Diamond / Pearl | Route 221 daily level-match reward cycle | Routes 219-221 and Pal Park: Successful days award Black Belt, then Expert Belt, then Focus Sash, cycling back to Black Belt. | NPC / system | Once per day; show a party Pokemon whose level exactly matches the house's random Lv. 2-99 target. | editorial script/system note |
Hidden Items
| Hidden item | Area / plain-English placement | QA coordinate | Requirement | Source |
|---|---|---|---|---|
| Honey | Route 221: Use the Dowsing Machine in the southern part of Route 221, 6 tiles east and 23 tiles south of the Route 221 Level Item House doorway or transition and inspect that exact ground tile. | (267, 923) | Dowsing Machine Pokétch app. Reach this subarea; check the route and puzzle notes for HM, Bicycle, time, or story gates. | event bank 377, script 8050 |
| Tinymushroom | Route 221: Use the Dowsing Machine in the northern part of Route 221, 2 tiles east and 2 tiles north of the Route 221 Level Item House doorway or transition and inspect that exact ground tile. | (263, 898) | Dowsing Machine Pokétch app. Reach this subarea; check the route and puzzle notes for HM, Bicycle, time, or story gates. | event bank 377, script 8049 |
| Ultra Ball | Route 221: Use the Dowsing Machine in the southern part of Route 221, 26 tiles west and 13 tiles south of the Route 221 Pal Park Entrance doorway or transition and inspect that exact ground tile. | (280, 922) | Dowsing Machine Pokétch app. Reach this subarea; check the route and puzzle notes for HM, Bicycle, time, or story gates. | event bank 377, script 8190 |
| Carbos | Route 221: Use the Dowsing Machine in the southeastern part of Route 221, 5 tiles west and 15 tiles south of the Route 221 Pal Park Entrance doorway or transition and inspect that exact ground tile. | (301, 924) | Dowsing Machine Pokétch app. Reach this subarea; check the route and puzzle notes for HM, Bicycle, time, or story gates. | event bank 377, script 8191 |
| Max Revive | Route 221: Use the Dowsing Machine in the southern part of Route 221, 11 tiles east and 17 tiles south of the Route 221 Level Item House doorway or transition and inspect that exact ground tile. | (272, 917) | Dowsing Machine Pokétch app. Reach this subarea; check the route and puzzle notes for HM, Bicycle, time, or story gates. | event bank 377, script 8192 |
| Pearl | Route 220: Use the Dowsing Machine in the southwest sea lane beside the long rock bar. | (181, 922) | Dowsing Machine Pokétch app. Relic Badge and Surf. | event bank 445, script 8048 |
| Super Potion | Route 220: Use the Dowsing Machine in the northwest water at the Route 219/220 boundary, beside the first rock outcrop. | (175, 889) | Dowsing Machine Pokétch app. Relic Badge and Surf; the Route 219 event object is a boundary alias, not a second item. | event bank 445, script 8169 |
Puzzles, Warps, And Switches
- Route 220 divides around long rock bars. Clear the western channel southbound and eastern channel northbound so every swimmer and item is covered.
- In a Catching Show, search Pal Park's field, forest, mountain, pond, and sea biomes according to each migrated species. Park Balls cannot fail once the target appears.
Completion Checklist
- Complete the currently reachable part of this route plan: Start south of Sandgem; clear Route 219 swimmers; sweep Route 220's branching sea lanes; land on Route 221; battle every trainer; visit the level-item house with matching-level leads; enter Pal Park; migrate a planned set of six from a compatible GBA cartridge; complete the Catching Show.
- Review all 46 encounter rows across the per-area tables, including game markers, method band, time-of-day rates, levels, and each conditional requirement; mark conditional rows for their stated revisit.
Fight Area and Postgame Barry Rematches
Sail from Snowpoint to the Battle Zone, meet Buck, unlock the island hub, and challenge Barry's escalating weekend teams.
Source maps
Fight Area, Fight Area Pokémon Center, Fight Area Pokémon Center 2F, Fight Area Poké Mart, Fight Area Battle Park Gatehouse, Fight Area Route 225 Gatehouse, Fight Area Southeast House, Fight Area Southwest House, Fight Area Unused 1, and Fight Area Pokémon Center B1F.
Route Plan
Sail from Snowpoint; tour Fight Area and collect gifts; meet Barry and Buck; open the Battle Park gate; return on Saturday or Sunday after Stark Mountain for Barry's rematch; clear the Elite Four repeatedly if pursuing his highest-level team.
- Snowpoint's ferry to Fight Area becomes available after the first Hall of Fame entry. Fight Area, Battle Park, Battle Tower, and the BP exchange can be used before obtaining the National Dex; the National Dex opens the exits toward Routes 225-230 and the rest of the island.
- Barry's postgame rematch has three starter branches at two strength tiers. List all six IDs but explain the progression rather than presenting six simultaneous battles.
- Barry appears on Saturday or Sunday after the Stark Mountain story. His lower rematch tier is used below 20 Pokemon League victories; at 20 or more Hall of Fame clears the higher IDs activate and reach Lv. 74.
Routes and encounters on this page are compiled from 10 pret map headers.
Trainers
| Trainer | Route order / placement | Full team | Reward | Access requirement | Optional / rematch note |
|---|---|---|---|---|---|
| Pokémon Trainer BarryPokémon Trainer Barry • source ID 837 | Fight Area • scripted |
| ₽6,400 | Hall of Fame required; sail from Snowpoint to Fight Area, then enter Battle Park. The National Dex is not required for the Fight Area hub, Battle Park, Battle Tower, or BP exchange. | Major or story battle; not a VS Seeker rematch row. |
| Pokémon Trainer BarryPokémon Trainer Barry • source ID 840 | Fight Area • scripted |
| ₽7,400 | Hall of Fame required; sail from Snowpoint to Fight Area, then enter Battle Park. The National Dex is not required for the Fight Area hub, Battle Park, Battle Tower, or BP exchange. | Major or story battle; not a VS Seeker rematch row. |
| Pokémon Trainer BarryPokémon Trainer Barry • source ID 838 | Fight Area • scripted |
| ₽6,400 | Hall of Fame required; sail from Snowpoint to Fight Area, then enter Battle Park. The National Dex is not required for the Fight Area hub, Battle Park, Battle Tower, or BP exchange. | Major or story battle; not a VS Seeker rematch row. |
| Pokémon Trainer BarryPokémon Trainer Barry • source ID 841 | Fight Area • scripted |
| ₽7,400 | Hall of Fame required; sail from Snowpoint to Fight Area, then enter Battle Park. The National Dex is not required for the Fight Area hub, Battle Park, Battle Tower, or BP exchange. | Major or story battle; not a VS Seeker rematch row. |
| Pokémon Trainer BarryPokémon Trainer Barry • source ID 839 | Fight Area • scripted |
| ₽6,400 | Hall of Fame required; sail from Snowpoint to Fight Area, then enter Battle Park. The National Dex is not required for the Fight Area hub, Battle Park, Battle Tower, or BP exchange. | Major or story battle; not a VS Seeker rematch row. |
| Pokémon Trainer BarryPokémon Trainer Barry • source ID 842 | Fight Area • scripted |
| ₽7,400 | Hall of Fame required; sail from Snowpoint to Fight Area, then enter Battle Park. The National Dex is not required for the Fight Area hub, Battle Park, Battle Tower, or BP exchange. | Major or story battle; not a VS Seeker rematch row. |
Items
| Item | Version | Type | Area / exact direction | Coordinate / script | Requirement | Source |
|---|---|---|---|---|---|---|
| Pomeg Berry | Diamond / Pearl | Berry tree | Fight Area: Harvest berry patch 90 in the central part of Fight Area, 8 tiles west and 2 tiles north of the Fight Area Pokémon Center doorway or transition. The plot can be replanted after the initial harvest. | (639, 429) | Hall of Fame required; sail from Snowpoint to Fight Area, then enter Battle Park. The National Dex is not required for the Fight Area hub, Battle Park, Battle Tower, or BP exchange. | berry table ov52_021D76F8, patch 90 |
| Pomeg Berry | Diamond / Pearl | Berry tree | Fight Area: Harvest berry patch 91 in the central part of Fight Area, 7 tiles west and 2 tiles north of the Fight Area Pokémon Center doorway or transition. The plot can be replanted after the initial harvest. | (640, 429) | Hall of Fame required; sail from Snowpoint to Fight Area, then enter Battle Park. The National Dex is not required for the Fight Area hub, Battle Park, Battle Tower, or BP exchange. | berry table ov52_021D76F8, patch 91 |
| 2× Hondew Berry | Diamond / Pearl | Berry tree | Fight Area: Harvest berry patch 92 in the central part of Fight Area, 6 tiles west and 2 tiles north of the Fight Area Pokémon Center doorway or transition. The plot can be replanted after the initial harvest. | (641, 429) | Hall of Fame required; sail from Snowpoint to Fight Area, then enter Battle Park. The National Dex is not required for the Fight Area hub, Battle Park, Battle Tower, or BP exchange. | berry table ov52_021D76F8, patch 92 |
| 2× Hondew Berry | Diamond / Pearl | Berry tree | Fight Area: Harvest berry patch 93 in the central part of Fight Area, 5 tiles west and 2 tiles north of the Fight Area Pokémon Center doorway or transition. The plot can be replanted after the initial harvest. | (642, 429) | Hall of Fame required; sail from Snowpoint to Fight Area, then enter Battle Park. The National Dex is not required for the Fight Area hub, Battle Park, Battle Tower, or BP exchange. | berry table ov52_021D76F8, patch 93 |
| Super Rod | Diamond / Pearl | NPC / scripted gift | Fight Area: Speak to the fisherman near Fight Area's north exit and answer yes to his fishing question. | NPC (633, 423); script 8 | Reach the Fight Area after entering the Hall of Fame. | script bank 195 |
| Scope Lens | Diamond / Pearl | NPC / scripted gift | Fight Area Poké Mart: Speak to the item-giving NPC in the southwestern part of Fight Area Poké Mart, 1 tile west and 2 tiles north of the Fight Area doorway or transition. | NPC (2, 9); script 3 | Hall of Fame required; sail from Snowpoint to Fight Area, then enter Battle Park. The National Dex is not required for the Fight Area hub, Battle Park, Battle Tower, or BP exchange. | script bank 196 |
| Point Card | Diamond / Pearl | NPC / scripted gift | Fight Area Battle Park Gatehouse: Receive it from the attendant while entering the Battle Park through its Fight Area gatehouse. | script 1 | Hall of Fame only; sail from Snowpoint to Fight Area and enter Battle Park. The National Dex is not required. | script bank 200 |
Puzzles, Warps, And Switches
- The Fight Area is the island transport hub: west leads to Route 225 and the survival route, while the north gate leads to Battle Park.
Completion Checklist
- Complete the currently reachable part of this route plan: Sail from Snowpoint; tour Fight Area and collect gifts; meet Barry and Buck; open the Battle Park gate; return on Saturday or Sunday after Stark Mountain for Barry's rematch; clear the Elite Four repeatedly if pursuing his highest-level team.
Battle Park, Battle Tower, and Palmer
Learn Battle Point streak rules, choose Singles or Doubles, recruit stat trainers for Multi Battles, and challenge Tower Tycoon Palmer.
Source maps
Battle Park, Battle Park Exchange Service Corner, Battle Park Unused 1, Battle Park Unused 2, Battle Tower Lobby, Battle Tower Elevator, Battle Tower Corridor Multi, Battle Tower Corridor Wifi, Battle Tower Arena Multi, Battle Tower Arena Wifi, Wifi Single Battle Area, Wifi Multi Battle Area, and Battle Tower Partner Room.
Route Plan
Collect the Point Card; inspect the exchange counter; build a legal three-Pokemon Singles team; begin a seven-battle set; challenge Palmer on the 21st Singles win; continue toward the second Palmer battle at win 49; spend BP only after checking the full prize list.
- The source's overworld trainer ID 826 is only a placeholder header with a test party. Palmer's real teams come from Battle Tower trainer records 305 and 306 plus facility Pokemon sets 469/476/481 and 948/949/950; the placeholder is never rendered as an opponent.
- Battle Tower battles grant no experience or ordinary prize money. Most Pokemon are set to Lv. 50 under facility rules, with species and item restrictions enforced.
- Cheryl, Mira, Riley, Marley, and Buck become selectable computer partners for Multi Battles after completing their Eterna Forest, Wayward Cave, Iron Island, Victory Road, and Stark Mountain escort events, respectively. Their Tower pairs are drawn from facility rosters rather than their one-Pokemon story teams.
- Cheryl, Mira, and Riley can therefore be available on the immediate post-Hall-of-Fame, pre-National-Dex Tower visit. Marley and Buck wait for their National-Dex-gated escort areas.
Routes and encounters on this page are compiled from 13 pret map headers.
Items
| Item | Version | Type | Area / exact direction | Coordinate / script | Requirement | Source |
|---|---|---|---|---|---|---|
| Razor Fang | Diamond / Pearl | Visible item ball | Battle Park: Pick up the item ball in the southwestern part of Battle Park, 14 tiles west and 1 tile north of the Fight Area Battle Park Gatehouse doorway or transition. | (10, 52) | Hall of Fame required; sail from Snowpoint to Fight Area, then enter Battle Park. The National Dex is not required for the Fight Area hub, Battle Park, Battle Tower, or BP exchange. | event bank 309, script 7215 |
| Protein / Calcium / Iron / Zinc / Carbos / HP Up | Diamond / Pearl | Battle Park BP exchange | Battle Park, Battle Tower, and Palmer: Each vitamin costs 1 BP. | NPC / system | Earn BP in Battle Tower modes and exchange it at the item counter. | editorial script/system note |
| Power Bracer / Power Belt / Power Lens / Power Band / Power Anklet / Power Weight | Diamond / Pearl | Battle Park BP exchange | Battle Park, Battle Tower, and Palmer: Each Power item costs 16 BP. | NPC / system | Earn BP in Battle Tower modes and exchange it at the item counter. | editorial script/system note |
| Toxic Orb / Flame Orb | Diamond / Pearl | Battle Park BP exchange | Battle Park, Battle Tower, and Palmer: Each orb costs 16 BP. | NPC / system | Earn BP in Battle Tower modes and exchange it at the item counter. | editorial script/system note |
| White Herb / Power Herb | Diamond / Pearl | Battle Park BP exchange | Battle Park, Battle Tower, and Palmer: Each herb costs 32 BP. | NPC / system | Earn BP in Battle Tower modes and exchange it at the item counter. | editorial script/system note |
| BrightPowder / Choice Band / Focus Band / Scope Lens / Muscle Band | Diamond / Pearl | Battle Park BP exchange | Battle Park, Battle Tower, and Palmer: Each held item costs 48 BP. | NPC / system | Earn BP in Battle Tower modes and exchange it at the item counter. | editorial script/system note |
| Focus Sash / Choice Scarf / Razor Claw / Razor Fang / Rare Candy | Diamond / Pearl | Battle Park BP exchange | Battle Park, Battle Tower, and Palmer: Each item costs 48 BP. | NPC / system | Earn BP in Battle Tower modes and exchange it at the item counter. | editorial script/system note |
| TM06 Toxic / TM73 Thunder Wave / TM61 Will-O-Wisp / TM45 Attract | Diamond / Pearl | Battle Park TM exchange | Battle Park, Battle Tower, and Palmer: Each TM costs 32 BP. | NPC / system | Earn BP in Battle Tower modes and exchange it at the TM counter. | editorial script/system note |
| TM40 Aerial Ace / TM31 Brick Break | Diamond / Pearl | Battle Park TM exchange | Battle Park, Battle Tower, and Palmer: Each TM costs 40 BP. | NPC / system | Earn BP in Battle Tower modes and exchange it at the TM counter. | editorial script/system note |
| TM08 Bulk Up / TM04 Calm Mind | Diamond / Pearl | Battle Park TM exchange | Battle Park, Battle Tower, and Palmer: Each TM costs 48 BP. | NPC / system | Earn BP in Battle Tower modes and exchange it at the TM counter. | editorial script/system note |
| TM81 X-Scissor / TM30 Shadow Ball / TM53 Energy Ball | Diamond / Pearl | Battle Park TM exchange | Battle Park, Battle Tower, and Palmer: Each TM costs 64 BP. | NPC / system | Earn BP in Battle Tower modes and exchange it at the TM counter. | editorial script/system note |
| TM36 Sludge Bomb / TM59 Dragon Pulse / TM71 Stone Edge / TM26 Earthquake | Diamond / Pearl | Battle Park TM exchange | Battle Park, Battle Tower, and Palmer: Each TM costs 80 BP. | NPC / system | Earn BP in Battle Tower modes and exchange it at the TM counter. | editorial script/system note |
Puzzles, Warps, And Switches
- A streak is saved between seven-battle sets but ends on a loss or disconnection. Singles Palmer appears at battles 21 and 49; prepare distinct answers for both scripted rosters.
Completion Checklist
- Complete the currently reachable part of this route plan: Collect the Point Card; inspect the exchange counter; build a legal three-Pokemon Singles team; begin a seven-battle set; challenge Palmer on the 21st Singles win; continue toward the second Palmer battle at win 49; spend BP only after checking the full prize list.
Routes 225-226 and Survival Area
Clear the western Battle Zone trail, reach Survival Area, then use Surf and Rock Climb across Route 226's broken coastline.
Source maps
Route 225, Route 226 Unused 1, Route 226 Unused 2, Survival Area, Survival Area Poké Mart, Survival Area Pokémon Center, Survival Area Pokémon Center 2F, Survival Area West House, Survival Area South House, Survival Area North House, Route 226, Survival Area Pokémon Center B1F, Route 225 House, and Route 226 House.
Route Plan
Leave Fight Area west; clear Route 225's cliffs and Cut branches; visit the route house; heal in Survival Area; tour every house; continue east to Route 226; Rock Climb both cliff faces; Surf around the central rocks; complete the local trade; collect hidden shoreline items.
- Battle Zone trainers jump sharply in level and frequently use evolved teams; bring the Hall of Fame roster rather than treating the island as a low-risk catching trip.
- The Survival Area house becomes Buck's post-Stark-Mountain story checkpoint before Heatran can appear.
Routes and encounters on this page are compiled from 14 pret map headers.
Route 225
| Pokémon | Games | Levels | Rate | Requirement / notes | ||
|---|---|---|---|---|---|---|
| Morning | Day | Night | ||||
| Grass / cave floor | ||||||
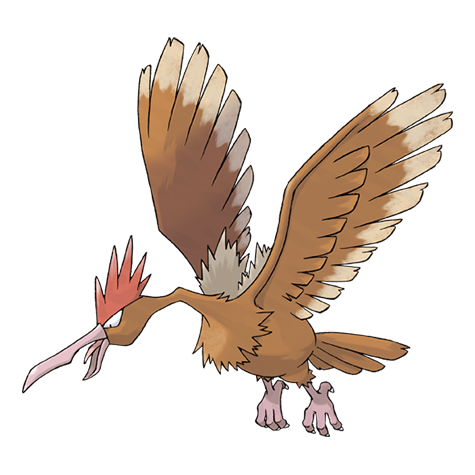 Fearow Fearow | DP | 50-52 | 40% | 40% | 20% | Rate counts base slots temporarily replaced by the daily swarm. |
 Raticate Raticate | DP | 50 or 52 | 30% | Rate counts base slots temporarily replaced by the daily swarm and hard-shaking Poké Radar patches. | ||
 Banette Banette | DP | 50 or 52 | — | — | 20% | — |
| Roselia | DP | 51 | 10% | Rate counts base slots temporarily replaced by hard-shaking Poké Radar patches. | ||
| Skuntank | DP | 51 | 10% | Rate counts base slots temporarily replaced by hard-shaking Poké Radar patches. | ||
 Machoke Machoke | DP | 51 | 5% | — | ||
 Rattata Rattata | DP | 20 or 22 | 5% | Rate counts base slots temporarily replaced by hard-shaking Poké Radar patches. | ||
| Roselia | DP | 51 | 5% | — | ||
 Spearow Spearow | DP | 20 or 22 | 5% | Rate counts base slots temporarily replaced by hard-shaking Poké Radar patches. | ||
| Swarm (post-National Dex daily announcement) | ||||||
| Makuhita | DP | 50-51 | 40% | Post-National Dex daily swarm; replaces grass slots 0-1. | ||
| Poké Radar (post-National Dex) | ||||||
| Primeape | DP | 51-52 | 20% | National Dex and Poké Radar required; replacement slot applies only in a hard/vigorous-shaking Radar patch. | ||
| Mankey | DP | 22 | 2% | National Dex and Poké Radar required; replacement slot applies only in a hard/vigorous-shaking Radar patch. | ||
| Surfing | ||||||
 Golduck Golduck | DP | 40-55 | 70% | — | ||
 Poliwhirl Poliwhirl | DP | 40-50 | 30% | — | ||
| Fishing — Old Rod | ||||||
| Magikarp | DP | 3-10 | 100% | — | ||
| Fishing — Good Rod | ||||||
| Magikarp | DP | 10-25 | 55% | — | ||
 Poliwag Poliwag | DP | 10-25 | 45% | — | ||
| Fishing — Super Rod | ||||||
| Gyarados | DP | 30-55 | 55% | — | ||
| Poliwhirl | DP | 30-55 | 45% | — | ||
Route 226
| Pokémon | Games | Levels | Rate | Requirement / notes | ||
|---|---|---|---|---|---|---|
| Morning | Day | Night | ||||
| Grass / cave floor | ||||||
| Fearow | DP | 51-53 | 40% | 40% | 20% | Rate counts base slots temporarily replaced by the daily swarm. |
| Raticate | DP | 51-52 | 30% | Rate counts base slots temporarily replaced by the daily swarm and hard-shaking Poké Radar patches. | ||
| Banette | DP | 51 or 53 | — | — | 20% | — |
| Golduck | DP | 51 or 53 | 10% | — | ||
| Machoke | DP | 53 | 10% | Rate counts base slots temporarily replaced by hard-shaking Poké Radar patches. | ||
| Rattata | DP | 20 or 22 | 5% | Rate counts base slots temporarily replaced by hard-shaking Poké Radar patches. | ||
| Spearow | DP | 20 or 22 | 5% | Rate counts base slots temporarily replaced by hard-shaking Poké Radar patches. | ||
| Swarm (post-National Dex daily announcement) | ||||||
| Krabby | DP | 52 | 40% | Post-National Dex daily swarm; replaces grass slots 0-1. | ||
| Poké Radar (post-National Dex) | ||||||
| Primeape | DP | 51 or 53 | 20% | National Dex and Poké Radar required; replacement slot applies only in a hard/vigorous-shaking Radar patch. | ||
| Mankey | DP | 22 | 2% | National Dex and Poké Radar required; replacement slot applies only in a hard/vigorous-shaking Radar patch. | ||
| Surfing | ||||||
| Pelipper | DP | 40-55 | 60% | — | ||
 Seel Seel | DP | 35-45 | 30% | — | ||
 Spheal Spheal | DP | 35-45 | 30% | — | ||
 Dewgong Dewgong | DP | 40-55 | 5% | — | ||
 Sealeo Sealeo | DP | 40-55 | 5% | — | ||
| Tentacruel | DP | 40-55 | 5% | — | ||
| Fishing — Old Rod | ||||||
| Magikarp | DP | 3-10 | 100% | — | ||
| Fishing — Good Rod | ||||||
| Magikarp | DP | 10-25 | 55% | — | ||
 Horsea Horsea | DP | 10-25 | 45% | — | ||
| Fishing — Super Rod | ||||||
 Seadra Seadra | DP | 30-55 | 45% | — | ||
| Gyarados | DP | 30-40 | 40% | — | ||
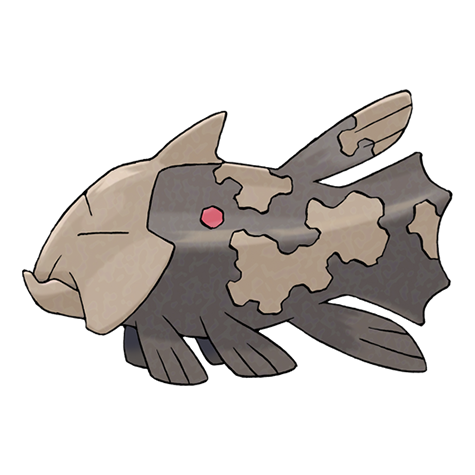 Relicanth Relicanth | DP | 40-50 | 15% | — | ||
Route 226 House
| Pokémon | Games | Levels | Rate | Requirement / notes | ||
|---|---|---|---|---|---|---|
| Morning | Day | Night | ||||
| In-game trade | ||||||
| Magikarp | DP | Matches traded Pokémon | Guaranteed trade | Trade Finneon to the local NPC to receive Magikarp; trade ID 3. Its nickname is Foppa and its original Trainer is Meister. It arrives holding Lum Berry. Fixed IVs: hp 15, attack 25, defense 15, speed 20, special attack 25, special defense 15. OT language flag: German. | ||
Trainers
| Trainer | Route order / placement | Full team | Reward | Access requirement | Optional / rematch note |
|---|---|---|---|---|---|
| Ace Trainer Male RodolfoAce Trainer Male • source ID 563 | Route 225 • field order 1 at (612, 377) | ₽3,180 | Hall of Fame and National Dex required to leave the Fight Area hub for the rest of the Battle Zone; individual cliffs and cave branches use Surf, Rock Smash, Strength, Rock Climb, or the Bicycle as described in the route plan. | Field order 1, tile (612, 377); sightline/path determines whether it can be avoided. Higher-level source variants used by the rematch system: ID 666: Lv. 60/Lv. 60. | |
 Pokémon Ranger Female AshleePokémon Ranger Female • source ID 594 Pokémon Ranger Female AshleePokémon Ranger Female • source ID 594 | Route 225 • field order 2 at (628, 392) | ₽3,360 | Hall of Fame and National Dex required to leave the Fight Area hub for the rest of the Battle Zone; individual cliffs and cave branches use Surf, Rock Smash, Strength, Rock Climb, or the Bicycle as described in the route plan. | Field order 2, tile (628, 392); sightline/path determines whether it can be avoided. Higher-level source variants used by the rematch system: ID 739: Lv. 60/Lv. 60. | |
 Bird Keeper AudreyBird Keeper • source ID 554 Bird Keeper AudreyBird Keeper • source ID 554 | Route 225 • field order 3 at (628, 397) | ₽1,728 | Hall of Fame and National Dex required to leave the Fight Area hub for the rest of the Battle Zone; individual cliffs and cave branches use Surf, Rock Smash, Strength, Rock Climb, or the Bicycle as described in the route plan. | Field order 3, tile (628, 397); sightline/path determines whether it can be avoided. Higher-level source variants used by the rematch system: ID 638: Lv. 59/Lv. 59. | |
 Psychic Female DaisyPsychic Female • source ID 585 Psychic Female DaisyPsychic Female • source ID 585 | Route 225 • field order 4 at (631, 392) | ₽1,760 | Hall of Fame and National Dex required to leave the Fight Area hub for the rest of the Battle Zone; individual cliffs and cave branches use Surf, Rock Smash, Strength, Rock Climb, or the Bicycle as described in the route plan. | Field order 4, tile (631, 392); sightline/path determines whether it can be avoided. Higher-level source variants used by the rematch system: ID 680: Lv. 58/Lv. 60. | |
 Dragon Tamer GeoffreyDragon Tamer • source ID 557 Dragon Tamer GeoffreyDragon Tamer • source ID 557 | Route 225 • field order 5 at (627, 322) | ₽1,760 | Hall of Fame and National Dex required to leave the Fight Area hub for the rest of the Battle Zone; individual cliffs and cave branches use Surf, Rock Smash, Strength, Rock Climb, or the Bicycle as described in the route plan. | Field order 5, tile (627, 322); sightline/path determines whether it can be avoided. Higher-level source variants used by the rematch system: ID 662: Lv. 61/Lv. 61. | |
| Ace Trainer Female DeannaAce Trainer Female • source ID 573 | Route 225 • field order 6 at (619, 340) | ₽3,180 | Hall of Fame and National Dex required to leave the Fight Area hub for the rest of the Battle Zone; individual cliffs and cave branches use Surf, Rock Smash, Strength, Rock Climb, or the Bicycle as described in the route plan. | Field order 6, tile (619, 340); sightline/path determines whether it can be avoided. Higher-level source variants used by the rematch system: ID 671: Lv. 60/Lv. 60. | |
 Pokémon Ranger Male DwaynePokémon Ranger Male • source ID 593 Pokémon Ranger Male DwaynePokémon Ranger Male • source ID 593 | Route 225 • field order 7 at (612, 397) | ₽3,300 | Hall of Fame and National Dex required to leave the Fight Area hub for the rest of the Battle Zone; individual cliffs and cave branches use Surf, Rock Smash, Strength, Rock Climb, or the Bicycle as described in the route plan. | Field order 7, tile (612, 397); sightline/path determines whether it can be avoided. No higher-level same-trainer rematch variant is defined in trdata. | |
| Ace Trainer Male QuinnAce Trainer Male • source ID 567 | Route 225 • field order 8 at (624, 367) | ₽3,180 | Hall of Fame and National Dex required to leave the Fight Area hub for the rest of the Battle Zone; individual cliffs and cave branches use Surf, Rock Smash, Strength, Rock Climb, or the Bicycle as described in the route plan. | Field order 8, tile (624, 367); sightline/path determines whether it can be avoided. No higher-level same-trainer rematch variant is defined in trdata. | |
| Swimmer Female LydiaSwimmer Female • source ID 604 | Route 226 • field order 1 at (727, 342) | ₽832 | Hall of Fame and National Dex required to leave the Fight Area hub for the rest of the Battle Zone; individual cliffs and cave branches use Surf, Rock Smash, Strength, Rock Climb, or the Bicycle as described in the route plan. | Field order 1, tile (727, 342); sightline/path determines whether it can be avoided. No higher-level same-trainer rematch variant is defined in trdata. | |
| Ace Trainer Male GrahamAce Trainer Male • source ID 568 | Route 226 • field order 2 at (689, 335) |
| ₽3,360 | Hall of Fame and National Dex required to leave the Fight Area hub for the rest of the Battle Zone; individual cliffs and cave branches use Surf, Rock Smash, Strength, Rock Climb, or the Bicycle as described in the route plan. | Field order 2, tile (689, 335); sightline/path determines whether it can be avoided. No higher-level same-trainer rematch variant is defined in trdata. |
| Bird Keeper GenevaBird Keeper • source ID 555 | Route 226 • field order 3 at (707, 331) | ₽1,824 | Hall of Fame and National Dex required to leave the Fight Area hub for the rest of the Battle Zone; individual cliffs and cave branches use Surf, Rock Smash, Strength, Rock Climb, or the Bicycle as described in the route plan. | Field order 3, tile (707, 331); sightline/path determines whether it can be avoided. No higher-level same-trainer rematch variant is defined in trdata. | |
| Dragon Tamer StanleyDragon Tamer • source ID 560 | Route 226 • field order 4 at (707, 329) | ₽1,792 | Hall of Fame and National Dex required to leave the Fight Area hub for the rest of the Battle Zone; individual cliffs and cave branches use Surf, Rock Smash, Strength, Rock Climb, or the Bicycle as described in the route plan. | Field order 4, tile (707, 329); sightline/path determines whether it can be avoided. No higher-level same-trainer rematch variant is defined in trdata. | |
| Swimmer Male WadeSwimmer Male • source ID 600 | Route 226 • field order 5 at (760, 342) | ₽864 | Hall of Fame and National Dex required to leave the Fight Area hub for the rest of the Battle Zone; individual cliffs and cave branches use Surf, Rock Smash, Strength, Rock Climb, or the Bicycle as described in the route plan. | Field order 5, tile (760, 342); sightline/path determines whether it can be avoided. No higher-level same-trainer rematch variant is defined in trdata. |
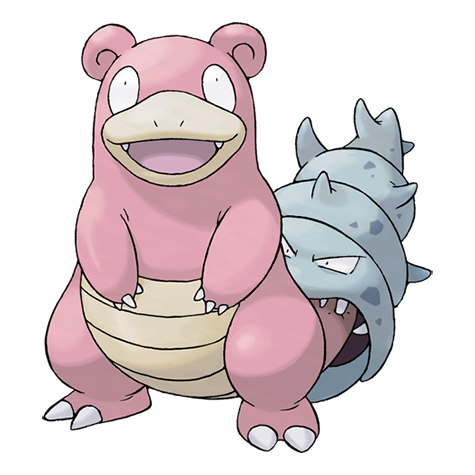


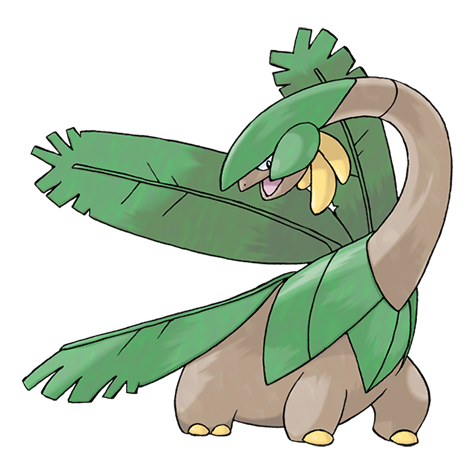
Items
| Item | Version | Type | Area / exact direction | Coordinate / script | Requirement | Source |
|---|---|---|---|---|---|---|
| HP Up | Diamond / Pearl | Visible item ball | Route 225: Pick up the item ball in the southwestern part of Route 225, 19 tiles west and 3 tiles north of the Fight Area Route 225 Gatehouse doorway or transition. | (611, 410) | Hall of Fame and National Dex required to leave the Fight Area hub for the rest of the Battle Zone; individual cliffs and cave branches use Surf, Rock Smash, Strength, Rock Climb, or the Bicycle as described in the route plan. | event bank 385, script 7216 |
| Rare Candy | Diamond / Pearl | Visible item ball | Route 225: Pick up the item ball in the southeastern part of Route 225, 6 tiles east and 19 tiles north of the Fight Area Route 225 Gatehouse doorway or transition. | (637, 394) | Hall of Fame and National Dex required to leave the Fight Area hub for the rest of the Battle Zone; individual cliffs and cave branches use Surf, Rock Smash, Strength, Rock Climb, or the Bicycle as described in the route plan. | event bank 385, script 7217 |
| Ultra Ball | Diamond / Pearl | Visible item ball | Route 225: Pick up the item ball in the southwestern part of Route 225, 12 tiles west and 14 tiles north of the Fight Area Route 225 Gatehouse doorway or transition. | (618, 399) | Hall of Fame and National Dex required to leave the Fight Area hub for the rest of the Battle Zone; individual cliffs and cave branches use Surf, Rock Smash, Strength, Rock Climb, or the Bicycle as described in the route plan. | event bank 385, script 7218 |
| Lax Incense | Diamond / Pearl | Visible item ball | Route 225: Pick up the item ball in the western part of Route 225, 7 tiles west of the Route 225 House doorway or transition. | (610, 368) | Hall of Fame and National Dex required to leave the Fight Area hub for the rest of the Battle Zone; individual cliffs and cave branches use Surf, Rock Smash, Strength, Rock Climb, or the Bicycle as described in the route plan. | event bank 385, script 7219 |
| Dubious Disc | Diamond / Pearl | Visible item ball | Route 225: Pick up the item ball in the northwestern part of Route 225, 7 tiles west and 18 tiles north of the Route 225 House doorway or transition. | (610, 350) | Hall of Fame and National Dex required to leave the Fight Area hub for the rest of the Battle Zone; individual cliffs and cave branches use Surf, Rock Smash, Strength, Rock Climb, or the Bicycle as described in the route plan. | event bank 385, script 7220 |
| Dawn Stone | Diamond / Pearl | Visible item ball | Route 225: Pick up the item ball in the northern part of Route 225, 11 tiles east and 47 tiles north of the Route 225 House doorway or transition. | (628, 321) | Hall of Fame and National Dex required to leave the Fight Area hub for the rest of the Battle Zone; individual cliffs and cave branches use Surf, Rock Smash, Strength, Rock Climb, or the Bicycle as described in the route plan. | event bank 385, script 7221 |
| Revive | Diamond / Pearl | Visible item ball | Route 225: Pick up the item ball in the southwestern part of Route 225, 6 tiles west and 20 tiles south of the Route 225 House doorway or transition. | (611, 388) | Hall of Fame and National Dex required to leave the Fight Area hub for the rest of the Battle Zone; individual cliffs and cave branches use Surf, Rock Smash, Strength, Rock Climb, or the Bicycle as described in the route plan. | event bank 385, script 7222 |
| TM53 | Diamond / Pearl | Visible item ball | Route 226: Pick up the item ball in the southern part of Route 226, 22 tiles west of the Route 226 House doorway or transition. | (717, 339) | Hall of Fame and National Dex required to leave the Fight Area hub for the rest of the Battle Zone; individual cliffs and cave branches use Surf, Rock Smash, Strength, Rock Climb, or the Bicycle as described in the route plan. | event bank 447, script 7223 |
| Carbos | Diamond / Pearl | Visible item ball | Route 226: Pick up the item ball in the southwestern part of Route 226, 49 tiles west and 5 tiles south of the Route 226 House doorway or transition. | (690, 344) | Hall of Fame and National Dex required to leave the Fight Area hub for the rest of the Battle Zone; individual cliffs and cave branches use Surf, Rock Smash, Strength, Rock Climb, or the Bicycle as described in the route plan. | event bank 447, script 7225 |
| Lagging Tail | Diamond / Pearl | Visible item ball | Route 226: Pick up the item ball in the western part of Route 226, 46 tiles west and 6 tiles north of the Route 226 House doorway or transition. | (693, 333) | Hall of Fame and National Dex required to leave the Fight Area hub for the rest of the Battle Zone; individual cliffs and cave branches use Surf, Rock Smash, Strength, Rock Climb, or the Bicycle as described in the route plan. | event bank 447, script 7224 |
| Tamato Berry | Diamond / Pearl | Berry tree | Route 225: Harvest berry patch 97 in the northwestern part of Route 225, 7 tiles west and 31 tiles north of the Route 225 House doorway or transition. The plot can be replanted after the initial harvest. | (610, 337) | Hall of Fame and National Dex required to leave the Fight Area hub for the rest of the Battle Zone; individual cliffs and cave branches use Surf, Rock Smash, Strength, Rock Climb, or the Bicycle as described in the route plan. | berry table ov52_021D76F8, patch 97 |
| Tamato Berry | Diamond / Pearl | Berry tree | Route 225: Harvest berry patch 96 in the northwestern part of Route 225, 4 tiles west and 31 tiles north of the Route 225 House doorway or transition. The plot can be replanted after the initial harvest. | (613, 337) | Hall of Fame and National Dex required to leave the Fight Area hub for the rest of the Battle Zone; individual cliffs and cave branches use Surf, Rock Smash, Strength, Rock Climb, or the Bicycle as described in the route plan. | berry table ov52_021D76F8, patch 96 |
| Kelpsy Berry | Diamond / Pearl | Berry tree | Route 225: Harvest berry patch 95 in the northwestern part of Route 225, 6 tiles west and 31 tiles north of the Route 225 House doorway or transition. The plot can be replanted after the initial harvest. | (611, 337) | Hall of Fame and National Dex required to leave the Fight Area hub for the rest of the Battle Zone; individual cliffs and cave branches use Surf, Rock Smash, Strength, Rock Climb, or the Bicycle as described in the route plan. | berry table ov52_021D76F8, patch 95 |
| Kelpsy Berry | Diamond / Pearl | Berry tree | Route 225: Harvest berry patch 94 in the northwestern part of Route 225, 5 tiles west and 31 tiles north of the Route 225 House doorway or transition. The plot can be replanted after the initial harvest. | (612, 337) | Hall of Fame and National Dex required to leave the Fight Area hub for the rest of the Battle Zone; individual cliffs and cave branches use Surf, Rock Smash, Strength, Rock Climb, or the Bicycle as described in the route plan. | berry table ov52_021D76F8, patch 94 |
| Qualot Berry | Diamond / Pearl | Berry tree | Route 226: Harvest berry patch 98 in the western part of Route 226, 50 tiles west and 11 tiles north of the Route 226 House doorway or transition. The plot can be replanted after the initial harvest. | (689, 328) | Hall of Fame and National Dex required to leave the Fight Area hub for the rest of the Battle Zone; individual cliffs and cave branches use Surf, Rock Smash, Strength, Rock Climb, or the Bicycle as described in the route plan. | berry table ov52_021D76F8, patch 98 |
| Qualot Berry | Diamond / Pearl | Berry tree | Route 226: Harvest berry patch 99 in the western part of Route 226, 47 tiles west and 11 tiles north of the Route 226 House doorway or transition. The plot can be replanted after the initial harvest. | (692, 328) | Hall of Fame and National Dex required to leave the Fight Area hub for the rest of the Battle Zone; individual cliffs and cave branches use Surf, Rock Smash, Strength, Rock Climb, or the Bicycle as described in the route plan. | berry table ov52_021D76F8, patch 99 |
| Pomeg Berry | Diamond / Pearl | Berry tree | Route 226: Harvest berry patch 100 in the western part of Route 226, 49 tiles west and 11 tiles north of the Route 226 House doorway or transition. The plot can be replanted after the initial harvest. | (690, 328) | Hall of Fame and National Dex required to leave the Fight Area hub for the rest of the Battle Zone; individual cliffs and cave branches use Surf, Rock Smash, Strength, Rock Climb, or the Bicycle as described in the route plan. | berry table ov52_021D76F8, patch 100 |
| Pomeg Berry | Diamond / Pearl | Berry tree | Route 226: Harvest berry patch 101 in the western part of Route 226, 48 tiles west and 11 tiles north of the Route 226 House doorway or transition. The plot can be replanted after the initial harvest. | (691, 328) | Hall of Fame and National Dex required to leave the Fight Area hub for the rest of the Battle Zone; individual cliffs and cave branches use Surf, Rock Smash, Strength, Rock Climb, or the Bicycle as described in the route plan. | berry table ov52_021D76F8, patch 101 |
| TM42 | Diamond / Pearl | NPC / scripted gift | Survival Area South House: Speak to the man in Survival Area's south house who explains Facade's doubled power under poison, paralysis, or burn. | NPC (4, 5); script 1 | Hall of Fame and National Dex to reach Survival Area; unconditional one-time gift. | script bank 1028 |
| Fresh Water | Diamond / Pearl | NPC / scripted gift | Route 225 House: Speak to the item-giving NPC in the northeastern part of Route 225 House, 1 tile east and 2 tiles north of the Route 225 doorway or transition. | NPC (5, 6); script 1 | Hall of Fame and National Dex required to leave the Fight Area hub for the rest of the Battle Zone; individual cliffs and cave branches use Surf, Rock Smash, Strength, Rock Climb, or the Bicycle as described in the route plan. | script bank 452 |
Hidden Items
| Hidden item | Area / plain-English placement | QA coordinate | Requirement | Source |
|---|---|---|---|---|
| Ultra Ball | Route 225: Use the Dowsing Machine in the central part of Route 225, 10 tiles east and 2 tiles south of the Route 225 House doorway or transition and inspect that exact ground tile. | (627, 370) | Dowsing Machine Pokétch app. Hall of Fame and National Dex required to leave the Fight Area hub for the rest of the Battle Zone; individual cliffs and cave branches use Surf, Rock Smash, Strength, Rock Climb, or the Bicycle as described in the route plan. | event bank 385, script 8130 |
| Hyper Potion | Route 225: Use the Dowsing Machine in the southeastern part of Route 225, 5 tiles east and 24 tiles north of the Fight Area Route 225 Gatehouse doorway or transition and inspect that exact ground tile. | (636, 389) | Dowsing Machine Pokétch app. Hall of Fame and National Dex required to leave the Fight Area hub for the rest of the Battle Zone; individual cliffs and cave branches use Surf, Rock Smash, Strength, Rock Climb, or the Bicycle as described in the route plan. | event bank 385, script 8173 |
| Rare Candy | Route 225: Use the Dowsing Machine in the western part of Route 225, 2 tiles west and 3 tiles south of the Route 225 House doorway or transition and inspect that exact ground tile. | (615, 371) | Dowsing Machine Pokétch app. Hall of Fame and National Dex required to leave the Fight Area hub for the rest of the Battle Zone; individual cliffs and cave branches use Surf, Rock Smash, Strength, Rock Climb, or the Bicycle as described in the route plan. | event bank 385, script 8203 |
| Max Repel | Route 225: Use the Dowsing Machine in the northwestern part of Route 225, 4 tiles east and 37 tiles north of the Route 225 House doorway or transition and inspect that exact ground tile. | (621, 331) | Dowsing Machine Pokétch app. Hall of Fame and National Dex required to leave the Fight Area hub for the rest of the Battle Zone; individual cliffs and cave branches use Surf, Rock Smash, Strength, Rock Climb, or the Bicycle as described in the route plan. | event bank 385, script 8204 |
| Max Revive | Survival Area: Use the Dowsing Machine in the northwestern part of Survival Area, 7 tiles west and 1 tile north of the Survival Area North House doorway or transition and inspect that exact ground tile. | (649, 324) | Dowsing Machine Pokétch app. Hall of Fame and National Dex required to leave the Fight Area hub for the rest of the Battle Zone; individual cliffs and cave branches use Surf, Rock Smash, Strength, Rock Climb, or the Bicycle as described in the route plan. | event bank 428, script 8131 |
| Big Pearl | Route 226: Use the Dowsing Machine in the southern part of Route 226, 24 tiles west and 6 tiles south of the Route 226 House doorway or transition and inspect that exact ground tile. | (715, 345) | Dowsing Machine Pokétch app. Hall of Fame and National Dex required to leave the Fight Area hub for the rest of the Battle Zone; individual cliffs and cave branches use Surf, Rock Smash, Strength, Rock Climb, or the Bicycle as described in the route plan. | event bank 447, script 8135 |
| Big Mushroom | Route 226: Use the Dowsing Machine in the central part of Route 226, 21 tiles west and 9 tiles north of the Route 226 House doorway or transition and inspect that exact ground tile. | (718, 330) | Dowsing Machine Pokétch app. Hall of Fame and National Dex required to leave the Fight Area hub for the rest of the Battle Zone; individual cliffs and cave branches use Surf, Rock Smash, Strength, Rock Climb, or the Bicycle as described in the route plan. | event bank 447, script 8132 |
| Tinymushroom | Route 226: Use the Dowsing Machine in the central part of Route 226, 14 tiles west and 5 tiles north of the Route 226 House doorway or transition and inspect that exact ground tile. | (725, 334) | Dowsing Machine Pokétch app. Hall of Fame and National Dex required to leave the Fight Area hub for the rest of the Battle Zone; individual cliffs and cave branches use Surf, Rock Smash, Strength, Rock Climb, or the Bicycle as described in the route plan. | event bank 447, script 8134 |
| Tinymushroom | Route 226: Use the Dowsing Machine in the central part of Route 226, 16 tiles west and 8 tiles north of the Route 226 House doorway or transition and inspect that exact ground tile. | (723, 331) | Dowsing Machine Pokétch app. Hall of Fame and National Dex required to leave the Fight Area hub for the rest of the Battle Zone; individual cliffs and cave branches use Surf, Rock Smash, Strength, Rock Climb, or the Bicycle as described in the route plan. | event bank 447, script 8133 |
| PP Up | Route 226: Use the Dowsing Machine in the eastern part of Route 226, 5 tiles east and 14 tiles north of the Route 226 House doorway or transition and inspect that exact ground tile. | (744, 325) | Dowsing Machine Pokétch app. Hall of Fame and National Dex required to leave the Fight Area hub for the rest of the Battle Zone; individual cliffs and cave branches use Surf, Rock Smash, Strength, Rock Climb, or the Bicycle as described in the route plan. | event bank 447, script 8159 |
Puzzles, Warps, And Switches
- Route 225 alternates Cut shortcuts and elevated ledges; clear the lower path before jumping. Route 226 requires Surf around rocks to reach cliff ladders that look adjacent on the map but are not connected by land.
Completion Checklist
- Complete the currently reachable part of this route plan: Leave Fight Area west; clear Route 225's cliffs and Cut branches; visit the route house; heal in Survival Area; tour every house; continue east to Route 226; Rock Climb both cliff faces; Surf around the central rocks; complete the local trade; collect hidden shoreline items.
- Review all 42 encounter rows across the per-area tables, including game markers, method band, time-of-day rates, levels, and each conditional requirement; mark conditional rows for their stated revisit.
Route 227 and Stark Mountain Approach
Cross ash fields and Bicycle beams, meet Buck again, and reach Stark Mountain's exterior entrance.
Source maps
Stark Mountain Exterior, Route 227, Route 227 Unused 1, Route 227 Unused 2, and Route 227 House.
Route Plan
Leave Route 226 north; clear every ash-grass trainer; visit the rest house; use the Bicycle across narrow rails; climb with Rock Climb; collect items around crater ledges; meet Buck; enter Stark Mountain fully stocked.
- Route 227's ash is environmental only in Diamond and Pearl; do not add Hoenn soot-collection mechanics.
- The rest house provides free healing and is the safest staging point for the long paired section inside Stark Mountain.
Routes and encounters on this page are compiled from 5 pret map headers.
Route 227
| Pokémon | Games | Levels | Rate | Requirement / notes | ||
|---|---|---|---|---|---|---|
| Morning | Day | Night | ||||
| Grass / cave floor | ||||||
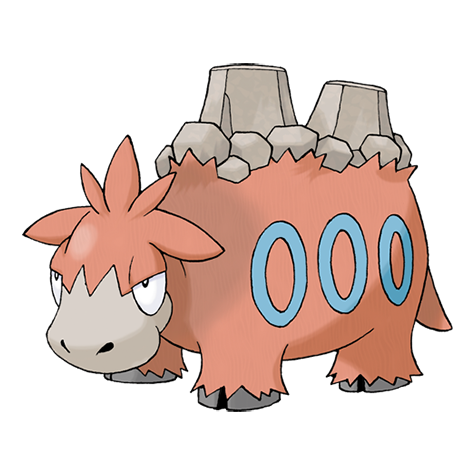 Camerupt Camerupt | DP | 55 | 20% | Rate counts base slots temporarily replaced by the daily swarm. | ||
| Fearow | DP | 54-55 | 20% | 20% | 10% | Rate counts base slots temporarily replaced by hard-shaking Poké Radar patches. |
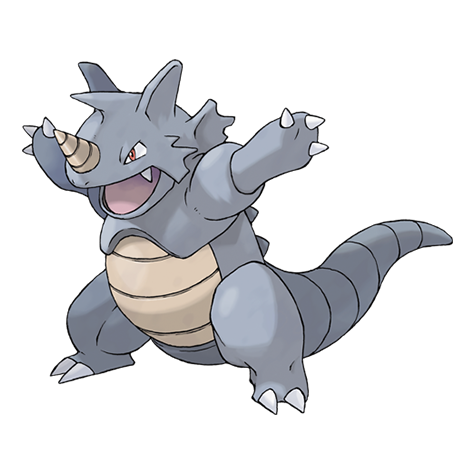 Rhydon Rhydon | DP | 55 | 20% | Rate counts base slots temporarily replaced by the daily swarm. | ||
 Graveler Graveler | DP | 54 or 56 | 15% | 15% | 5% | — |
 Weezing Weezing | DP | 55 | 10% | Rate counts base slots temporarily replaced by hard-shaking Poké Radar patches. | ||
| Banette | DP | 54 | — | — | 10% | — |
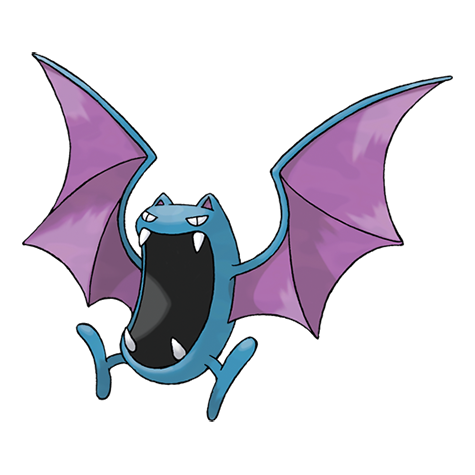 Golbat Golbat | DP | 54 | — | — | 10% | — |
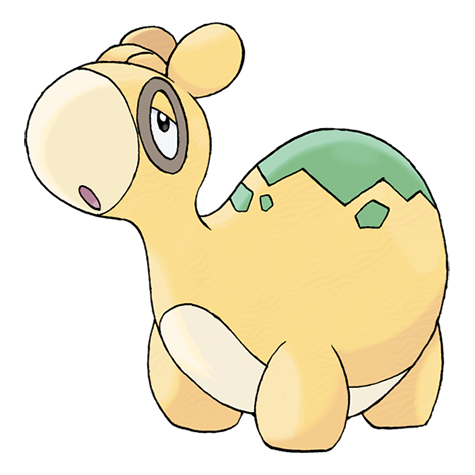 Numel Numel | DP | 22 or 24 | 5% | Rate counts base slots temporarily replaced by hard-shaking Poké Radar patches and GBA dual-slot insertions. | ||
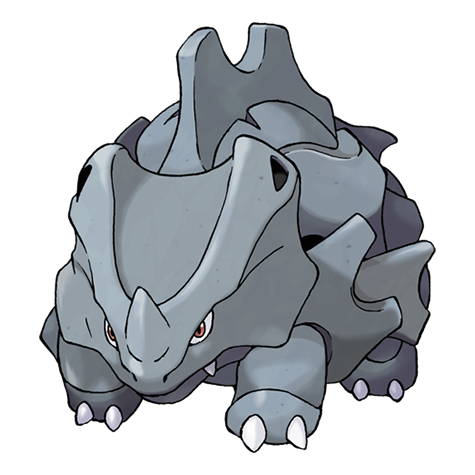 Rhyhorn Rhyhorn | DP | 22 or 24 | 5% | Rate counts base slots temporarily replaced by hard-shaking Poké Radar patches and GBA dual-slot insertions. | ||
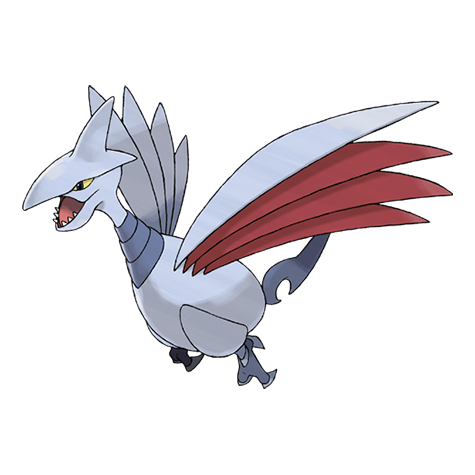 Skarmory Skarmory | DP | 56 | 5% | — | ||
| Swarm (post-National Dex daily announcement) | ||||||
| Spinda | DP | 55 | 40% | Post-National Dex daily swarm; replaces grass slots 0-1. | ||
| Poké Radar (post-National Dex) | ||||||
| Torkoal | DP | 24 or 55 | 22% | National Dex and Poké Radar required; replacement slot applies only in a hard/vigorous-shaking Radar patch. | ||
| Dual-slot GBA insertion (post-National Dex) | ||||||
| Gligar | DP | 22 | 8% | National Dex plus Pokémon Emerald inserted in the Nintendo DS GBA slot; replaces grass slots 8-9. | ||
| Magby | DP | 22 | 8% | National Dex plus Pokémon LeafGreen inserted in the Nintendo DS GBA slot; replaces grass slots 8-9. | ||
| Surfing | ||||||
| Poliwhirl | DP | 40-55 | 70% | — | ||
| Poliwag | DP | 20-30 | 30% | — | ||
| Fishing — Old Rod | ||||||
| Magikarp | DP | 3-10 | 100% | — | ||
| Fishing — Good Rod | ||||||
| Magikarp | DP | 10-25 | 55% | — | ||
 Barboach Barboach | DP | 10-25 | 45% | — | ||
| Fishing — Super Rod | ||||||
| Gyarados | DP | 30-55 | 55% | — | ||
 Whiscash Whiscash | DP | 20-50 | 45% | — | ||
Stark Mountain Exterior
| Pokémon | Games | Levels | Rate | Requirement / notes | ||
|---|---|---|---|---|---|---|
| Morning | Day | Night | ||||
| Grass / cave floor | ||||||
| Camerupt | DP | 55 | 20% | — | ||
| Fearow | DP | 54-55 | 20% | 20% | 10% | Rate counts base slots temporarily replaced by hard-shaking Poké Radar patches. |
| Rhydon | DP | 55 | 20% | — | ||
| Graveler | DP | 54 or 56 | 15% | 15% | 5% | — |
| Weezing | DP | 55 | 10% | Rate counts base slots temporarily replaced by hard-shaking Poké Radar patches. | ||
| Banette | DP | 54 | — | — | 10% | — |
| Golbat | DP | 54 | — | — | 10% | — |
| Numel | DP | 22 or 24 | 5% | Rate counts base slots temporarily replaced by hard-shaking Poké Radar patches and GBA dual-slot insertions. | ||
| Rhyhorn | DP | 22 or 24 | 5% | Rate counts base slots temporarily replaced by hard-shaking Poké Radar patches and GBA dual-slot insertions. | ||
| Skarmory | DP | 56 | 5% | — | ||
| Poké Radar (post-National Dex) | ||||||
| Torkoal | DP | 24 or 55 | 22% | National Dex and Poké Radar required; replacement slot applies only in a hard/vigorous-shaking Radar patch. | ||
| Dual-slot GBA insertion (post-National Dex) | ||||||
| Gligar | DP | 22 | 8% | National Dex plus Pokémon Emerald inserted in the Nintendo DS GBA slot; replaces grass slots 8-9. | ||
| Magby | DP | 22 | 8% | National Dex plus Pokémon LeafGreen inserted in the Nintendo DS GBA slot; replaces grass slots 8-9. | ||
Trainers
| Trainer | Route order / placement | Full team | Reward | Access requirement | Optional / rematch note |
|---|---|---|---|---|---|
| Dragon Tamer DarienDragon Tamer • source ID 558 | Stark Mountain Exterior • field order 1 at (749, 245) | ₽1,920 | Hall of Fame and National Dex required to leave the Fight Area hub for the rest of the Battle Zone; individual cliffs and cave branches use Surf, Rock Smash, Strength, Rock Climb, or the Bicycle as described in the route plan. | Field order 1, tile (749, 245); sightline/path determines whether it can be avoided. No higher-level same-trainer rematch variant is defined in trdata. | |
| Ace Trainer Male SaulAce Trainer Male • source ID 564 | Route 227 • field order 1 at (756, 308) |
| ₽3,300 | Hall of Fame and National Dex required to leave the Fight Area hub for the rest of the Battle Zone; individual cliffs and cave branches use Surf, Rock Smash, Strength, Rock Climb, or the Bicycle as described in the route plan. | Field order 1, tile (756, 308); sightline/path determines whether it can be avoided. Higher-level source variants used by the rematch system: ID 667: Lv. 62. |
| Pokémon Ranger Female FeliciaPokémon Ranger Female • source ID 595 | Route 227 • field order 2 at (747, 311) | ₽3,420 | Hall of Fame and National Dex required to leave the Fight Area hub for the rest of the Battle Zone; individual cliffs and cave branches use Surf, Rock Smash, Strength, Rock Climb, or the Bicycle as described in the route plan. | Field order 2, tile (747, 311); sightline/path determines whether it can be avoided. No higher-level same-trainer rematch variant is defined in trdata. | |
 Black Belt GriffinBlack Belt • source ID 588 Black Belt GriffinBlack Belt • source ID 588 | Route 227 • field order 3 at (764, 266) | ₽1,368 | Hall of Fame and National Dex required to leave the Fight Area hub for the rest of the Battle Zone; individual cliffs and cave branches use Surf, Rock Smash, Strength, Rock Climb, or the Bicycle as described in the route plan. | Field order 3, tile (764, 266); sightline/path determines whether it can be avoided. No higher-level same-trainer rematch variant is defined in trdata. | |
| Ace Trainer Female MikaylaAce Trainer Female • source ID 576 | Route 227 • field order 4 at (752, 295) | ₽3,360 | Hall of Fame and National Dex required to leave the Fight Area hub for the rest of the Battle Zone; individual cliffs and cave branches use Surf, Rock Smash, Strength, Rock Climb, or the Bicycle as described in the route plan. | Field order 4, tile (752, 295); sightline/path determines whether it can be avoided. No higher-level same-trainer rematch variant is defined in trdata. |
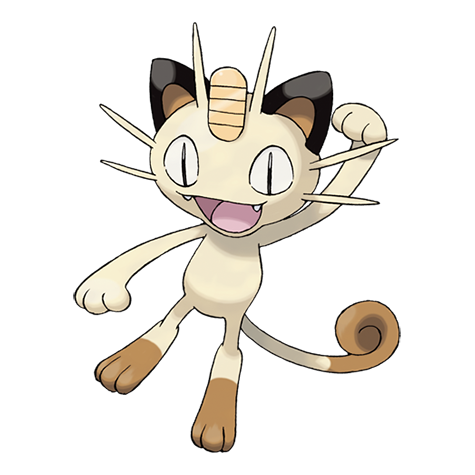
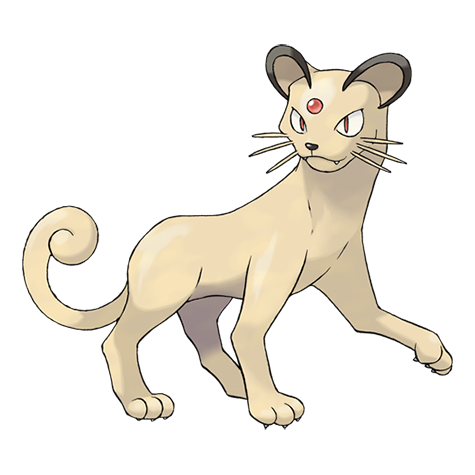
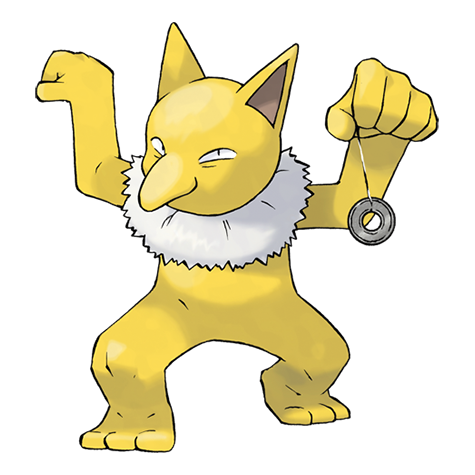
Items
| Item | Version | Type | Area / exact direction | Coordinate / script | Requirement | Source |
|---|---|---|---|---|---|---|
| Life Orb | Diamond / Pearl | Visible item ball | Stark Mountain Exterior: Pick up the item ball in the southwestern part of Stark Mountain Exterior, 5 tiles west and 9 tiles south of the Stark Mountain Interior 1 doorway or transition. | (742, 243) | Hall of Fame and National Dex required to leave the Fight Area hub for the rest of the Battle Zone; individual cliffs and cave branches use Surf, Rock Smash, Strength, Rock Climb, or the Bicycle as described in the route plan. | event bank 254, script 7229 |
| Ether | Diamond / Pearl | Visible item ball | Stark Mountain Exterior: Pick up the item ball in the northeastern part of Stark Mountain Exterior, 15 tiles east and 2 tiles north of the Stark Mountain Interior 1 doorway or transition. | (762, 232) | Hall of Fame and National Dex required to leave the Fight Area hub for the rest of the Battle Zone; individual cliffs and cave branches use Surf, Rock Smash, Strength, Rock Climb, or the Bicycle as described in the route plan. | event bank 254, script 7228 |
| Charcoal | Diamond / Pearl | Visible item ball | Route 227: Pick up the item ball in the northeastern part of Route 227, 19 tiles east and 19 tiles north of the Route 227 House doorway or transition. | (759, 283) | Hall of Fame and National Dex required to leave the Fight Area hub for the rest of the Battle Zone; individual cliffs and cave branches use Surf, Rock Smash, Strength, Rock Climb, or the Bicycle as described in the route plan. | event bank 386, script 7226 |
| Zinc | Diamond / Pearl | Visible item ball | Route 227: Pick up the item ball in the western part of Route 227, 5 tiles east and 7 tiles north of the Route 227 House doorway or transition. | (745, 295) | Hall of Fame and National Dex required to leave the Fight Area hub for the rest of the Battle Zone; individual cliffs and cave branches use Surf, Rock Smash, Strength, Rock Climb, or the Bicycle as described in the route plan. | event bank 386, script 7227 |
Hidden Items
| Hidden item | Area / plain-English placement | QA coordinate | Requirement | Source |
|---|---|---|---|---|
| Protein | Route 227: Use the Dowsing Machine in the northwestern part of Route 227, 1 tile east and 38 tiles north of the Route 227 House doorway or transition and inspect that exact ground tile. | (741, 264) | Dowsing Machine Pokétch app. Hall of Fame and National Dex required to leave the Fight Area hub for the rest of the Battle Zone; individual cliffs and cave branches use Surf, Rock Smash, Strength, Rock Climb, or the Bicycle as described in the route plan. | event bank 386, script 8136 |
| Full Heal | Route 227: Use the Dowsing Machine in the northern part of Route 227, 9 tiles east and 22 tiles north of the Route 227 House doorway or transition and inspect that exact ground tile. | (749, 280) | Dowsing Machine Pokétch app. Hall of Fame and National Dex required to leave the Fight Area hub for the rest of the Battle Zone; individual cliffs and cave branches use Surf, Rock Smash, Strength, Rock Climb, or the Bicycle as described in the route plan. | event bank 386, script 8137 |
Puzzles, Warps, And Switches
- Align carefully before each narrow Bicycle beam; dropping sends the player to a lower loop. Finish each Rock Climb side ledge before approaching the cave mouth.
Completion Checklist
- Complete the currently reachable part of this route plan: Leave Route 226 north; clear every ash-grass trainer; visit the rest house; use the Bicycle across narrow rails; climb with Rock Climb; collect items around crater ledges; meet Buck; enter Stark Mountain fully stocked.
- Review all 34 encounter rows across the per-area tables, including game markers, method band, time-of-day rates, levels, and each conditional requirement; mark conditional rows for their stated revisit.
Stark Mountain, Buck, and Heatran
Navigate the volcanic maze, partner with Buck, reach the Magma Stone chamber, trigger his return, then revisit for Heatran.
Source maps
Stark Mountain Interior 1, Stark Mountain Interior 2, and Stark Mountain Interior 3.
Route Plan
Clear the solo entrance rooms; meet Buck; use his healing through the paired interior; defeat every trainer duo; solve Strength and Rock Smash routes; reach the rear chamber; watch Buck take the Magma Stone; return to Survival Area; speak to Buck in the house; revisit the same chamber; save and catch Heatran.
- Buck's Claydol heals the party after each battle and forces double wild encounters during the escort. Complete difficult trainer pairs while that free healing is active.
- Heatran does not appear immediately when Buck takes the Magma Stone. Speak to Buck in Survival Area first, then return to the final chamber.
Routes and encounters on this page are compiled from 3 pret map headers.
Stark Mountain Interior 1
| Pokémon | Games | Levels | Rate | Requirement / notes | ||
|---|---|---|---|---|---|---|
| Morning | Day | Night | ||||
| Grass / cave floor | ||||||
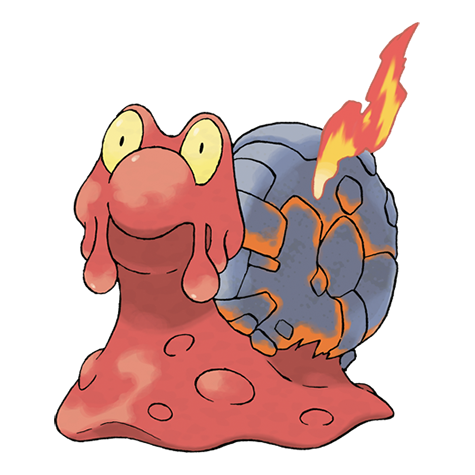 Magcargo Magcargo | DP | 55-56 | 30% | — | ||
| Graveler | DP | 55 | 20% | — | ||
| Golbat | DP | 54 | 10% | — | ||
| Machoke | DP | 56 | 10% | — | ||
| Weezing | DP | 56 | 10% | — | ||
| Camerupt | DP | 56 | 5% | — | ||
 Geodude Geodude | DP | 25 or 27 | 5% | Rate counts base slots temporarily replaced by GBA dual-slot insertions. | ||
 Onix Onix | DP | 54 | 5% | — | ||
 Slugma Slugma | DP | 25 or 27 | 5% | Rate counts base slots temporarily replaced by GBA dual-slot insertions. | ||
| Dual-slot GBA insertion (post-National Dex) | ||||||
| Magby | DP | 25 | 8% | National Dex plus Pokémon LeafGreen inserted in the Nintendo DS GBA slot; replaces grass slots 8-9. | ||
Stark Mountain Interior 2
| Pokémon | Games | Levels | Rate | Requirement / notes | ||
|---|---|---|---|---|---|---|
| Morning | Day | Night | ||||
| Grass / cave floor | ||||||
| Magcargo | DP | 57-58 | 30% | — | ||
| Graveler | DP | 57 | 20% | — | ||
| Golbat | DP | 56 | 10% | — | ||
| Machoke | DP | 58 | 10% | — | ||
| Weezing | DP | 58 | 10% | — | ||
| Camerupt | DP | 58 | 5% | — | ||
| Geodude | DP | 27 or 29 | 5% | Rate counts base slots temporarily replaced by GBA dual-slot insertions. | ||
| Onix | DP | 56 | 5% | — | ||
| Slugma | DP | 27 or 29 | 5% | Rate counts base slots temporarily replaced by GBA dual-slot insertions. | ||
| Dual-slot GBA insertion (post-National Dex) | ||||||
| Magby | DP | 27 | 8% | National Dex plus Pokémon LeafGreen inserted in the Nintendo DS GBA slot; replaces grass slots 8-9. | ||
Stark Mountain, Buck, and Heatran
| Pokémon | Games | Levels | Rate | Requirement / notes | ||
|---|---|---|---|---|---|---|
| Morning | Day | Night | ||||
| Overworld static encounter | ||||||
| Heatran | DP | 70 | One | Finish Buck's Stark Mountain escort, speak to him in Survival Area, then return to the Magma Stone chamber Save before interaction; Fire/Steel typing and high level demand status and durable Water, Ground, or Fighting pressure. | ||
Trainers
| Trainer | Route order / placement | Full team | Reward | Access requirement | Optional / rematch note |
|---|---|---|---|---|---|
| Ace Trainer Male KeenanAce Trainer Male • source ID 569 | Stark Mountain Interior 2 • field order 1 at (31, 73) | ₽3,420 | Hall of Fame and National Dex required to leave the Fight Area hub for the rest of the Battle Zone; individual cliffs and cave branches use Surf, Rock Smash, Strength, Rock Climb, or the Bicycle as described in the route plan. | Field order 1, tile (31, 73); sightline/path determines whether it can be avoided. No higher-level same-trainer rematch variant is defined in trdata. | |
| Ace Trainer Female KassandraAce Trainer Female • source ID 579 | Stark Mountain Interior 2 • field order 2 at (33, 76) | ₽3,480 | Hall of Fame and National Dex required to leave the Fight Area hub for the rest of the Battle Zone; individual cliffs and cave branches use Surf, Rock Smash, Strength, Rock Climb, or the Bicycle as described in the route plan. | Field order 2, tile (33, 76); sightline/path determines whether it can be avoided. No higher-level same-trainer rematch variant is defined in trdata. | |
| Ace Trainer Male SkylarAce Trainer Male • source ID 571 | Stark Mountain Interior 2 • field order 3 at (52, 11) | ₽3,420 | Hall of Fame and National Dex required to leave the Fight Area hub for the rest of the Battle Zone; individual cliffs and cave branches use Surf, Rock Smash, Strength, Rock Climb, or the Bicycle as described in the route plan. | Field order 3, tile (52, 11); sightline/path determines whether it can be avoided. No higher-level same-trainer rematch variant is defined in trdata. | |
| Ace Trainer Female NatashaAce Trainer Female • source ID 581 | Stark Mountain Interior 2 • field order 4 at (54, 11) | ₽3,360 | Hall of Fame and National Dex required to leave the Fight Area hub for the rest of the Battle Zone; individual cliffs and cave branches use Surf, Rock Smash, Strength, Rock Climb, or the Bicycle as described in the route plan. | Field order 4, tile (54, 11); sightline/path determines whether it can be avoided. No higher-level same-trainer rematch variant is defined in trdata. | |
| Psychic Female ChelseyPsychic Female • source ID 586 | Stark Mountain Interior 2 • field order 5 at (86, 75) | ₽1,856 | Hall of Fame and National Dex required to leave the Fight Area hub for the rest of the Battle Zone; individual cliffs and cave branches use Surf, Rock Smash, Strength, Rock Climb, or the Bicycle as described in the route plan. | Field order 5, tile (86, 75); sightline/path determines whether it can be avoided. No higher-level same-trainer rematch variant is defined in trdata. | |
 Psychic Male SterlingPsychic Male • source ID 584 Psychic Male SterlingPsychic Male • source ID 584 | Stark Mountain Interior 2 • field order 6 at (83, 75) | ₽1,856 | Hall of Fame and National Dex required to leave the Fight Area hub for the rest of the Battle Zone; individual cliffs and cave branches use Surf, Rock Smash, Strength, Rock Climb, or the Bicycle as described in the route plan. | Field order 6, tile (83, 75); sightline/path determines whether it can be avoided. No higher-level same-trainer rematch variant is defined in trdata. | |
| Bird Keeper KrystalBird Keeper • source ID 556 | Stark Mountain Interior 2 • field order 7 at (48, 53) | ₽1,760 | Hall of Fame and National Dex required to leave the Fight Area hub for the rest of the Battle Zone; individual cliffs and cave branches use Surf, Rock Smash, Strength, Rock Climb, or the Bicycle as described in the route plan. | Field order 7, tile (48, 53); sightline/path determines whether it can be avoided. No higher-level same-trainer rematch variant is defined in trdata. | |
| Black Belt RayBlack Belt • source ID 589 | Stark Mountain Interior 2 • field order 8 at (48, 57) | ₽1,392 | Hall of Fame and National Dex required to leave the Fight Area hub for the rest of the Battle Zone; individual cliffs and cave branches use Surf, Rock Smash, Strength, Rock Climb, or the Bicycle as described in the route plan. | Field order 8, tile (48, 57); sightline/path determines whether it can be avoided. No higher-level same-trainer rematch variant is defined in trdata. | |
| Ace Trainer Male StefanAce Trainer Male • source ID 570 | Stark Mountain Interior 2 • field order 9 at (13, 36) | ₽3,420 | Hall of Fame and National Dex required to leave the Fight Area hub for the rest of the Battle Zone; individual cliffs and cave branches use Surf, Rock Smash, Strength, Rock Climb, or the Bicycle as described in the route plan. | Field order 9, tile (13, 36); sightline/path determines whether it can be avoided. No higher-level same-trainer rematch variant is defined in trdata. | |
| Ace Trainer Female JasminAce Trainer Female • source ID 580 | Stark Mountain Interior 2 • field order 10 at (9, 36) |
| ₽3,540 | Hall of Fame and National Dex required to leave the Fight Area hub for the rest of the Battle Zone; individual cliffs and cave branches use Surf, Rock Smash, Strength, Rock Climb, or the Bicycle as described in the route plan. | Field order 10, tile (9, 36); sightline/path determines whether it can be avoided. No higher-level same-trainer rematch variant is defined in trdata. |
| Dragon Tamer DrakeDragon Tamer • source ID 561 | Stark Mountain Interior 2 • field order 11 at (15, 22) | ₽1,824 | Hall of Fame and National Dex required to leave the Fight Area hub for the rest of the Battle Zone; individual cliffs and cave branches use Surf, Rock Smash, Strength, Rock Climb, or the Bicycle as described in the route plan. | Field order 11, tile (15, 22); sightline/path determines whether it can be avoided. No higher-level same-trainer rematch variant is defined in trdata. | |
| Black Belt JarrettBlack Belt • source ID 590 | Stark Mountain Interior 2 • field order 12 at (17, 22) | ₽1,416 | Hall of Fame and National Dex required to leave the Fight Area hub for the rest of the Battle Zone; individual cliffs and cave branches use Surf, Rock Smash, Strength, Rock Climb, or the Bicycle as described in the route plan. | Field order 12, tile (17, 22); sightline/path determines whether it can be avoided. No higher-level same-trainer rematch variant is defined in trdata. | |
| Ace Trainer Male AbelAce Trainer Male • source ID 572 | Stark Mountain Interior 2 • field order 13 at (77, 64) |
| ₽3,540 | Hall of Fame and National Dex required to leave the Fight Area hub for the rest of the Battle Zone; individual cliffs and cave branches use Surf, Rock Smash, Strength, Rock Climb, or the Bicycle as described in the route plan. | Field order 13, tile (77, 64); sightline/path determines whether it can be avoided. No higher-level same-trainer rematch variant is defined in trdata. |
| Ace Trainer Female MoniqueAce Trainer Female • source ID 582 | Stark Mountain Interior 2 • field order 14 at (77, 66) |
| ₽3,420 | Hall of Fame and National Dex required to leave the Fight Area hub for the rest of the Battle Zone; individual cliffs and cave branches use Surf, Rock Smash, Strength, Rock Climb, or the Bicycle as described in the route plan. | Field order 14, tile (77, 66); sightline/path determines whether it can be avoided. No higher-level same-trainer rematch variant is defined in trdata. |
 Veteran HarlanVeteran • source ID 606 Veteran HarlanVeteran • source ID 606 | Stark Mountain Interior 2 • field order 15 at (62, 10) | ₽4,480 | Hall of Fame and National Dex required to leave the Fight Area hub for the rest of the Battle Zone; individual cliffs and cave branches use Surf, Rock Smash, Strength, Rock Climb, or the Bicycle as described in the route plan. | Field order 15, tile (62, 10); sightline/path determines whether it can be avoided. No higher-level same-trainer rematch variant is defined in trdata. | |
| Dragon Tamer KennyDragon Tamer • source ID 562 | Stark Mountain Interior 2 • field order 16 at (67, 12) | ₽1,888 | Hall of Fame and National Dex required to leave the Fight Area hub for the rest of the Battle Zone; individual cliffs and cave branches use Surf, Rock Smash, Strength, Rock Climb, or the Bicycle as described in the route plan. | Field order 16, tile (67, 12); sightline/path determines whether it can be avoided. No higher-level same-trainer rematch variant is defined in trdata. |

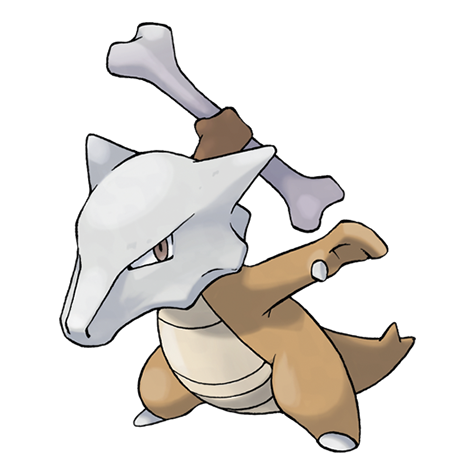
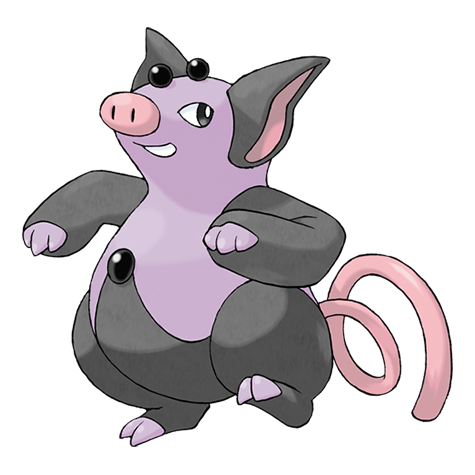
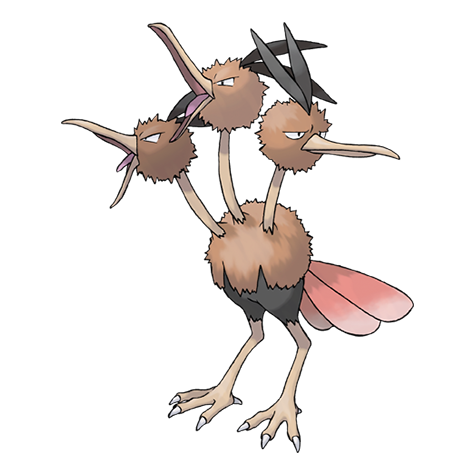
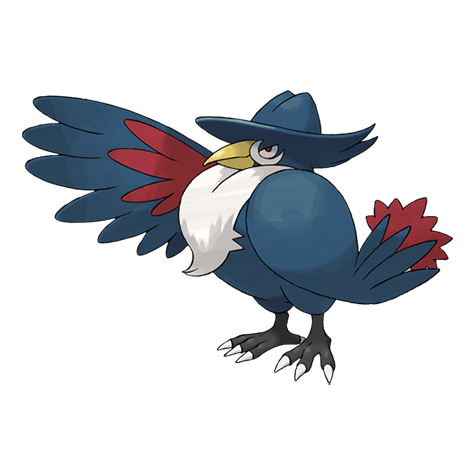
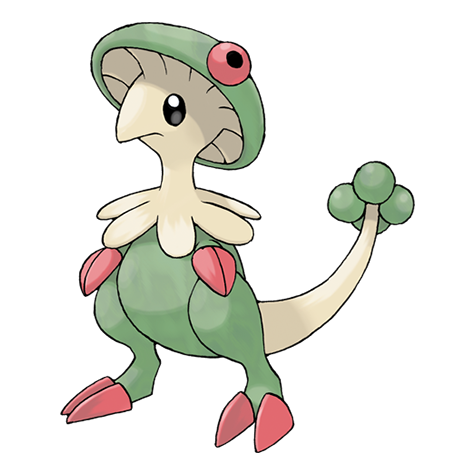
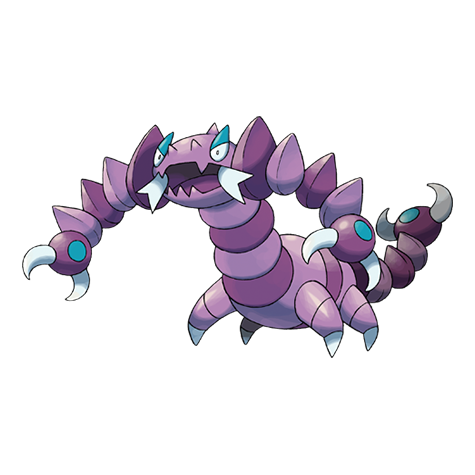
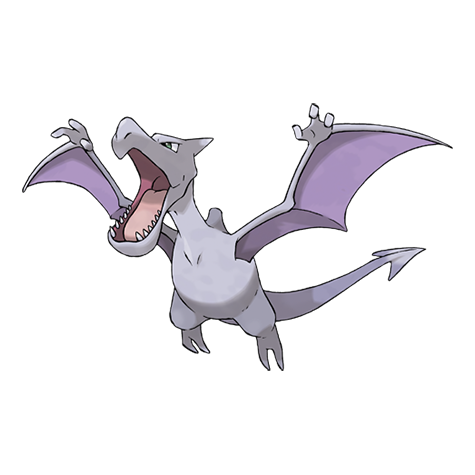
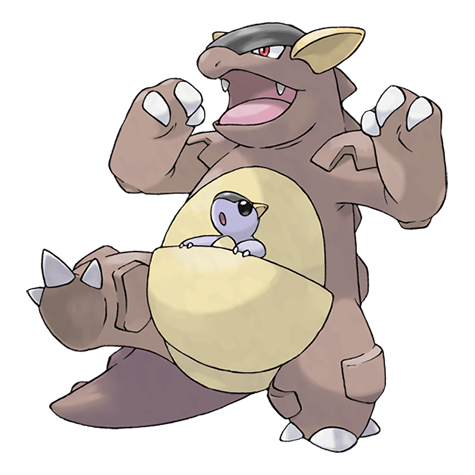
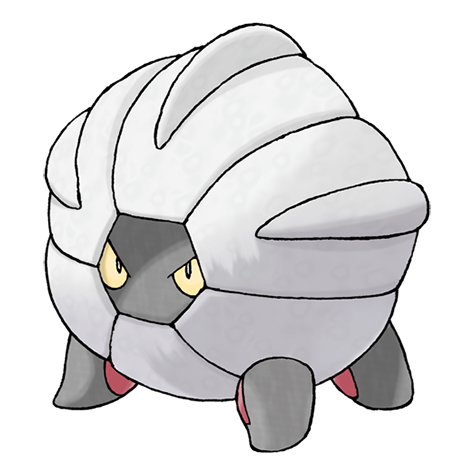
Items
| Item | Version | Type | Area / exact direction | Coordinate / script | Requirement | Source |
|---|---|---|---|---|---|---|
| Burn Heal | Diamond / Pearl | Visible item ball | Stark Mountain Interior 1: Pick up the item ball in the northwestern part of Stark Mountain Interior 1, 11 tiles west and 4 tiles south of the Stark Mountain Interior 2 doorway or transition. | (6, 6) | Hall of Fame and National Dex required to leave the Fight Area hub for the rest of the Battle Zone; individual cliffs and cave branches use Surf, Rock Smash, Strength, Rock Climb, or the Bicycle as described in the route plan. | event bank 255, script 7230 |
| Escape Rope | Diamond / Pearl | Visible item ball | Stark Mountain Interior 1: Pick up the item ball in the southwestern part of Stark Mountain Interior 1, 12 tiles west and 6 tiles north of the Stark Mountain Exterior doorway or transition. | (8, 23) | Hall of Fame and National Dex required to leave the Fight Area hub for the rest of the Battle Zone; individual cliffs and cave branches use Surf, Rock Smash, Strength, Rock Climb, or the Bicycle as described in the route plan. | event bank 255, script 7231 |
| PP Up | Diamond / Pearl | Visible item ball | Stark Mountain Interior 1: Pick up the item ball in the southeastern part of Stark Mountain Interior 1, 13 tiles east and 4 tiles north of the Stark Mountain Exterior doorway or transition. | (33, 25) | Hall of Fame and National Dex required to leave the Fight Area hub for the rest of the Battle Zone; individual cliffs and cave branches use Surf, Rock Smash, Strength, Rock Climb, or the Bicycle as described in the route plan. | event bank 255, script 7232 |
| Full Restore | Diamond / Pearl | Visible item ball | Stark Mountain Interior 1: Pick up the item ball in the northeastern part of Stark Mountain Interior 1, 8 tiles east and 5 tiles south of the Stark Mountain Interior 2 doorway or transition. | (25, 7) | Hall of Fame and National Dex required to leave the Fight Area hub for the rest of the Battle Zone; individual cliffs and cave branches use Surf, Rock Smash, Strength, Rock Climb, or the Bicycle as described in the route plan. | event bank 255, script 7233 |
| TM50 | Diamond / Pearl | Visible item ball | Stark Mountain Interior 2: Pick up the item ball in the western part of Stark Mountain Interior 2, 31 tiles west and 42 tiles north of the Stark Mountain Interior 1 doorway or transition. | (11, 44) | Hall of Fame and National Dex required to leave the Fight Area hub for the rest of the Battle Zone; individual cliffs and cave branches use Surf, Rock Smash, Strength, Rock Climb, or the Bicycle as described in the route plan. | event bank 256, script 7234 |
| Calcium | Diamond / Pearl | Visible item ball | Stark Mountain Interior 2: Pick up the item ball in the central part of Stark Mountain Interior 2, 7 tiles east and 37 tiles north of the Stark Mountain Interior 1 doorway or transition. | (49, 49) | Hall of Fame and National Dex required to leave the Fight Area hub for the rest of the Battle Zone; individual cliffs and cave branches use Surf, Rock Smash, Strength, Rock Climb, or the Bicycle as described in the route plan. | event bank 256, script 7241 |
| Max Revive | Diamond / Pearl | Visible item ball | Stark Mountain Interior 2: Pick up the item ball in the northern part of Stark Mountain Interior 2, 7 tiles east and 1 tile south of the Stark Mountain Interior 3 doorway or transition. | (54, 3) | Hall of Fame and National Dex required to leave the Fight Area hub for the rest of the Battle Zone; individual cliffs and cave branches use Surf, Rock Smash, Strength, Rock Climb, or the Bicycle as described in the route plan. | event bank 256, script 7240 |
| Rare Candy | Diamond / Pearl | Visible item ball | Stark Mountain Interior 2: Pick up the item ball in the southwestern part of Stark Mountain Interior 2, 30 tiles west and 10 tiles north of the Stark Mountain Interior 1 doorway or transition. | (12, 76) | Hall of Fame and National Dex required to leave the Fight Area hub for the rest of the Battle Zone; individual cliffs and cave branches use Surf, Rock Smash, Strength, Rock Climb, or the Bicycle as described in the route plan. | event bank 256, script 7238 |
| Iron Ball | Diamond / Pearl | Visible item ball | Stark Mountain Interior 2: Pick up the item ball in the southern part of Stark Mountain Interior 2, 14 tiles east and 9 tiles north of the Stark Mountain Interior 1 doorway or transition. | (56, 77) | Hall of Fame and National Dex required to leave the Fight Area hub for the rest of the Battle Zone; individual cliffs and cave branches use Surf, Rock Smash, Strength, Rock Climb, or the Bicycle as described in the route plan. | event bank 256, script 7235 |
| Max Elixir | Diamond / Pearl | Visible item ball | Stark Mountain Interior 2: Pick up the item ball in the eastern part of Stark Mountain Interior 2, 27 tiles east and 31 tiles north of the Stark Mountain Interior 1 doorway or transition. | (69, 55) | Hall of Fame and National Dex required to leave the Fight Area hub for the rest of the Battle Zone; individual cliffs and cave branches use Surf, Rock Smash, Strength, Rock Climb, or the Bicycle as described in the route plan. | event bank 256, script 7236 |
| Nugget | Diamond / Pearl | Visible item ball | Stark Mountain Interior 2: Pick up the item ball in the northeastern part of Stark Mountain Interior 2, 45 tiles east and 1 tile south of the Stark Mountain Interior 3 doorway or transition. | (92, 3) | Hall of Fame and National Dex required to leave the Fight Area hub for the rest of the Battle Zone; individual cliffs and cave branches use Surf, Rock Smash, Strength, Rock Climb, or the Bicycle as described in the route plan. | event bank 256, script 7237 |
| Ultra Ball | Diamond / Pearl | Visible item ball | Stark Mountain Interior 2: Pick up the item ball in the central part of Stark Mountain Interior 2, 4 tiles west and 42 tiles north of the Stark Mountain Interior 1 doorway or transition. | (38, 44) | Hall of Fame and National Dex required to leave the Fight Area hub for the rest of the Battle Zone; individual cliffs and cave branches use Surf, Rock Smash, Strength, Rock Climb, or the Bicycle as described in the route plan. | event bank 256, script 7239 |
Hidden Items
| Hidden item | Area / plain-English placement | QA coordinate | Requirement | Source |
|---|---|---|---|---|
| Max Elixir | Stark Mountain Interior 1: Use the Dowsing Machine in the northeastern part of Stark Mountain Interior 1, 8 tiles east and 2 tiles south of the Stark Mountain Interior 2 doorway or transition and inspect that exact ground tile. | (25, 4) | Dowsing Machine Pokétch app. Hall of Fame and National Dex required to leave the Fight Area hub for the rest of the Battle Zone; individual cliffs and cave branches use Surf, Rock Smash, Strength, Rock Climb, or the Bicycle as described in the route plan. | event bank 255, script 8138 |
| Zinc | Stark Mountain Interior 2: Use the Dowsing Machine in the eastern part of Stark Mountain Interior 2, 43 tiles east and 37 tiles north of the Stark Mountain Interior 1 doorway or transition and inspect that exact ground tile. | (85, 49) | Dowsing Machine Pokétch app. Hall of Fame and National Dex required to leave the Fight Area hub for the rest of the Battle Zone; individual cliffs and cave branches use Surf, Rock Smash, Strength, Rock Climb, or the Bicycle as described in the route plan. | event bank 256, script 8140 |
| Iron | Stark Mountain Interior 2: Use the Dowsing Machine in the northern part of Stark Mountain Interior 2, 13 tiles east and 9 tiles south of the Stark Mountain Interior 3 doorway or transition and inspect that exact ground tile. | (60, 11) | Dowsing Machine Pokétch app. Hall of Fame and National Dex required to leave the Fight Area hub for the rest of the Battle Zone; individual cliffs and cave branches use Surf, Rock Smash, Strength, Rock Climb, or the Bicycle as described in the route plan. | event bank 256, script 8141 |
| Flame Plate | Stark Mountain Interior 2: Use the Dowsing Machine in the western part of Stark Mountain Interior 2, 37 tiles west and 38 tiles north of the Stark Mountain Interior 1 doorway or transition and inspect that exact ground tile. | (5, 48) | Dowsing Machine Pokétch app. Hall of Fame and National Dex required to leave the Fight Area hub for the rest of the Battle Zone; individual cliffs and cave branches use Surf, Rock Smash, Strength, Rock Climb, or the Bicycle as described in the route plan. | event bank 256, script 8139 |
| Hyper Potion | Stark Mountain Interior 2: Use the Dowsing Machine in the southwestern part of Stark Mountain Interior 2, 16 tiles west and 20 tiles north of the Stark Mountain Interior 1 doorway or transition and inspect that exact ground tile. | (26, 66) | Dowsing Machine Pokétch app. Hall of Fame and National Dex required to leave the Fight Area hub for the rest of the Battle Zone; individual cliffs and cave branches use Surf, Rock Smash, Strength, Rock Climb, or the Bicycle as described in the route plan. | event bank 256, script 8175 |
| Revive | Stark Mountain Interior 2: Use the Dowsing Machine in the central part of Stark Mountain Interior 2, 6 tiles east and 37 tiles south of the Stark Mountain Interior 3 doorway or transition and inspect that exact ground tile. | (53, 39) | Dowsing Machine Pokétch app. Hall of Fame and National Dex required to leave the Fight Area hub for the rest of the Battle Zone; individual cliffs and cave branches use Surf, Rock Smash, Strength, Rock Climb, or the Bicycle as described in the route plan. | event bank 256, script 8176 |
| Full Heal | Stark Mountain Interior 2: Use the Dowsing Machine in the southeastern part of Stark Mountain Interior 2, 23 tiles east and 21 tiles north of the Stark Mountain Interior 1 doorway or transition and inspect that exact ground tile. | (65, 65) | Dowsing Machine Pokétch app. Hall of Fame and National Dex required to leave the Fight Area hub for the rest of the Battle Zone; individual cliffs and cave branches use Surf, Rock Smash, Strength, Rock Climb, or the Bicycle as described in the route plan. | event bank 256, script 8177 |
Puzzles, Warps, And Switches
- Interior 2 is a large multi-level hub. Clear one clockwise branch at a time, reset misplaced Strength boulders by leaving the room, and use Rock Smash shortcuts only after their item pockets are complete.
- After Buck leaves, the return trip is solo; Repels and an Escape Rope reduce attrition around the Heatran save point.
Boss Strategy And Partners
Pokémon Trainer BuckPokémon Trainer Buck • source ID 611Partner team
- ClaydolPsychic / Ancient Power / Light Screen / Reflect
Partner role
This stat trainer travels beside the player, turns eligible fights into doubles, and heals the party after each battle during the escort.
How to use the partner
Focus one opposing Pokémon to reduce incoming actions. In wild doubles, leave only the intended catch on the field before throwing a Ball.
Completion Checklist
- Complete the currently reachable part of this route plan: Clear the solo entrance rooms; meet Buck; use his healing through the paired interior; defeat every trainer duo; solve Strength and Rock Smash routes; reach the rear chamber; watch Buck take the Magma Stone; return to Survival Area; speak to Buck in the house; revisit the same chamber; save and catch Heatran.
- Review all 21 encounter rows across the per-area tables, including game markers, method band, time-of-day rates, levels, and each conditional requirement; mark conditional rows for their stated revisit.
Routes 228-230 and Resort Area
Cross the sandstorm, clear the resort coast and island routes, unlock the Ribbon Syndicate, and finish the Battle Zone circuit.
Source maps
Route 228, Route 229, Route 230 Unused, Resort Area, Resort Area Unused Poké Mart, Resort Area Pokémon Center, Resort Area Pokémon Center 2F, Resort Area Ribbon Syndicate 1F, Resort Area Ribbon Syndicate 2F, Resort Area Ribbon Syndicate Elevator, Resort Area Southwest House, Resort Area Southeast House, Route 229 Unused, Route 230, Resort Area Pokémon Center B1F, and Route 228 Route 226 Gatehouse, and 2 more submaps.
Route Plan
Travel east from Route 226 or south from Route 227; clear Route 228's upper and lower lanes; visit both houses and the Route 226 gatehouse; use Bicycle mud ramps; enter Route 229; sweep both grass lanes; tour Resort Area; check Ribbon Syndicate eligibility; Surf through Route 230's islands; return to Fight Area.
- Route 228's permanent sandstorm damages most types and reduces visibility; heal before long trainer chains and use Dowsing systematically around the dunes.
- Ribbon Syndicate access requires at least 10 distinct Ribbon kinds counted across the current party. A Diamond/Pearl counting bug stops at the first Egg, so Ribbons on later party slots are ignored until the Egg is moved.
- Route 228's move tutor teaches Frenzy Plant, Blast Burn, or Hydro Cannon to the matching fully evolved Kanto, Johto, Hoenn, or Sinnoh starter at maximum friendship. The service is free and repeatable for other eligible Pokemon.
Routes and encounters on this page are compiled from 18 pret map headers.
Resort Area
| Pokémon | Games | Levels | Rate | Requirement / notes | ||
|---|---|---|---|---|---|---|
| Morning | Day | Night | ||||
| Surfing | ||||||
| Golduck | DP | 40-55 | 100% | — | ||
| Fishing — Old Rod | ||||||
| Magikarp | DP | 3-10 | 100% | — | ||
| Fishing — Good Rod | ||||||
| Magikarp | DP | 10-25 | 55% | — | ||
 Goldeen Goldeen | DP | 10-25 | 45% | — | ||
| Fishing — Super Rod | ||||||
| Gyarados | DP | 30-55 | 55% | — | ||
 Seaking Seaking | DP | 20-50 | 45% | — | ||
Route 228
| Pokémon | Games | Levels | Rate | Requirement / notes | ||
|---|---|---|---|---|---|---|
| Morning | Day | Night | ||||
| Grass / cave floor | ||||||
 Cacturne Cacturne | DP | 52-53 | 20% | 20% | 40% | Rate counts base slots temporarily replaced by the daily swarm. |
 Dugtrio Dugtrio | DP | 52-54 | 30% | Rate counts base slots temporarily replaced by the daily swarm. | ||
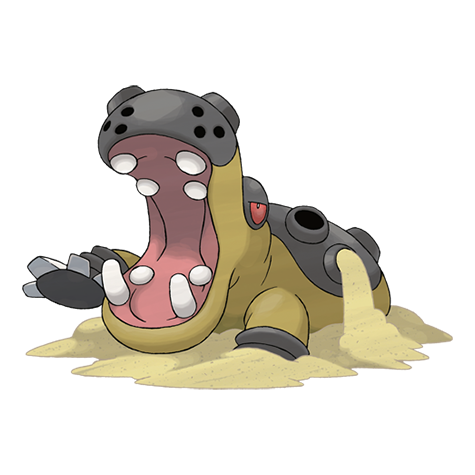 Hippowdon Hippowdon | DP | 52 or 54 | 20% | 20% | 10% | Rate counts base slots temporarily replaced by hard-shaking Poké Radar patches. |
| Rhydon | DP | 52-53 | 20% | 20% | 10% | Rate counts base slots temporarily replaced by hard-shaking Poké Radar patches. |
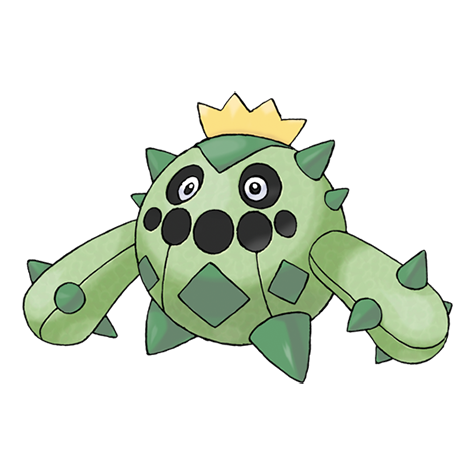 Cacnea Cacnea | DP | 23 or 25 | 5% | Rate counts base slots temporarily replaced by hard-shaking Poké Radar patches and GBA dual-slot insertions. | ||
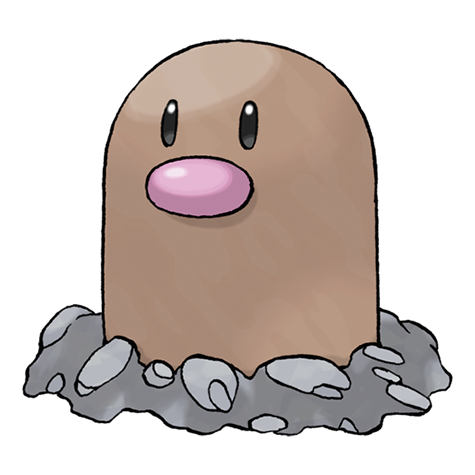 Diglett Diglett | DP | 23 or 25 | 5% | Rate counts base slots temporarily replaced by hard-shaking Poké Radar patches and GBA dual-slot insertions. | ||
| Swarm (post-National Dex daily announcement) | ||||||
| Beldum | DP | 53 | 40% | Post-National Dex daily swarm; replaces grass slots 0-1. | ||
| Poké Radar (post-National Dex) | ||||||
| Vibrava | DP | 53-54 | 20% | National Dex and Poké Radar required; replacement slot applies only in a hard/vigorous-shaking Radar patch. | ||
| Trapinch | DP | 25 | 2% | National Dex and Poké Radar required; replacement slot applies only in a hard/vigorous-shaking Radar patch. | ||
| Dual-slot GBA insertion (post-National Dex) | ||||||
| Sandslash | DP | 23 | 8% | National Dex plus Pokémon LeafGreen inserted in the Nintendo DS GBA slot; replaces grass slots 8-9. | ||
| Surfing | ||||||
| Poliwhirl | DP | 40-55 | 70% | — | ||
| Poliwag | DP | 20-30 | 30% | — | ||
| Fishing — Old Rod | ||||||
| Magikarp | DP | 3-10 | 100% | — | ||
| Fishing — Good Rod | ||||||
| Magikarp | DP | 10-25 | 55% | — | ||
| Barboach | DP | 10-25 | 45% | — | ||
| Fishing — Super Rod | ||||||
| Gyarados | DP | 30-55 | 55% | — | ||
| Whiscash | DP | 20-50 | 45% | — | ||
Route 229
| Pokémon | Games | Levels | Rate | Requirement / notes | ||
|---|---|---|---|---|---|---|
| Morning | Day | Night | ||||
| Grass / cave floor | ||||||
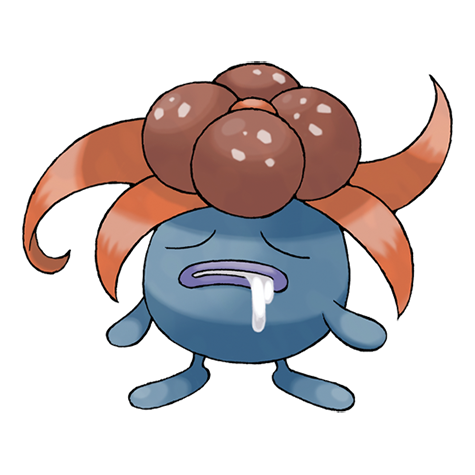 Gloom Gloom | DP | 51-52 | 20% | 30% | 20% | Rate counts base slots temporarily replaced by the daily swarm. |
 Weepinbell Weepinbell | DP | 51-52 | 20% | 30% | 20% | Rate counts base slots temporarily replaced by the daily swarm. |
 Ledian Ledian | DP | 52 | 20% | — | — | — |
 Ariados Ariados | DP | 52 | — | — | 20% | — |
 Illumise Illumise | DP | 50 | 10% | Rate counts base slots temporarily replaced by hard-shaking Poké Radar patches. | ||
 Purugly Purugly | DP | 50 | 10% | Rate counts base slots temporarily replaced by hard-shaking Poké Radar patches. | ||
| Roselia | DP | 50 | 10% | Rate counts base slots temporarily replaced by hard-shaking Poké Radar patches. | ||
 Volbeat Volbeat | DP | 50 | 10% | Rate counts base slots temporarily replaced by hard-shaking Poké Radar patches. | ||
 Bellsprout Bellsprout | DP | 20 or 22 | 5% | Rate counts base slots temporarily replaced by hard-shaking Poké Radar patches and GBA dual-slot insertions. | ||
| Illumise | DP | 50 | 5% | — | ||
 Oddish Oddish | DP | 20 or 22 | 5% | Rate counts base slots temporarily replaced by hard-shaking Poké Radar patches and GBA dual-slot insertions. | ||
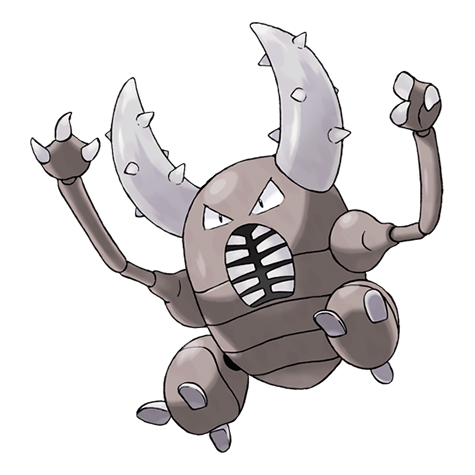 Pinsir Pinsir | DP | 52 | 5% | — | ||
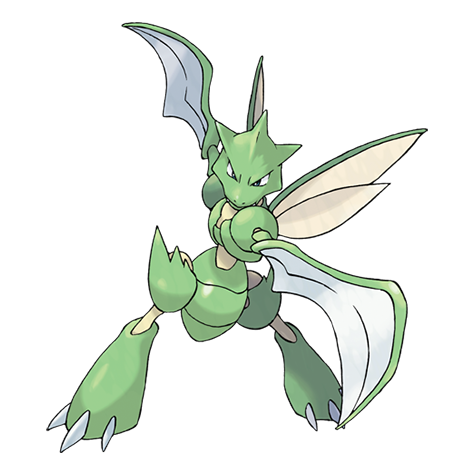 Scyther Scyther | DP | 52 | 5% | — | ||
| Volbeat | DP | 50 | 5% | — | ||
| Swarm (post-National Dex daily announcement) | ||||||
| Pidgey | DP | 51 | 40% | Post-National Dex daily swarm; replaces grass slots 0-1. | ||
| Poké Radar (post-National Dex) | ||||||
| Venomoth | DP | 50 | 20% | National Dex and Poké Radar required; replacement slot applies only in a hard/vigorous-shaking Radar patch. | ||
| Venonat | DP | 22 | 2% | National Dex and Poké Radar required; replacement slot applies only in a hard/vigorous-shaking Radar patch. | ||
| Dual-slot GBA insertion (post-National Dex) | ||||||
| Lombre | DP | 20 | 8% | National Dex plus Pokémon Sapphire inserted in the Nintendo DS GBA slot; replaces grass slots 8-9. | ||
| Nuzleaf | DP | 20 | 8% | National Dex plus Pokémon Ruby inserted in the Nintendo DS GBA slot; replaces grass slots 8-9. | ||
| Pineco | DP | 20 | 8% | National Dex plus Pokémon Emerald inserted in the Nintendo DS GBA slot; replaces grass slots 8-9. | ||
| Surfing | ||||||
| Wingull | DP | 40-55 | 70% | — | ||
| Pelipper | DP | 45-55 | 30% | — | ||
| Fishing — Old Rod | ||||||
| Magikarp | DP | 3-10 | 100% | — | ||
| Fishing — Good Rod | ||||||
| Magikarp | DP | 10-25 | 100% | — | ||
| Fishing — Super Rod | ||||||
| Gyarados | DP | 20-55 | 100% | — | ||
Route 230
| Pokémon | Games | Levels | Rate | Requirement / notes | ||
|---|---|---|---|---|---|---|
| Morning | Day | Night | ||||
| Grass / cave floor | ||||||
| Gloom | DP | 50 | 20% | Rate counts base slots temporarily replaced by the daily swarm. | ||
| Weepinbell | DP | 50 | 20% | Rate counts base slots temporarily replaced by the daily swarm. | ||
| Floatzel | DP | 50-52 | 13% | — | ||
| Bellsprout | DP | 18 or 23 | 11% | Rate counts base slots temporarily replaced by hard-shaking Poké Radar patches. | ||
| Oddish | DP | 18 or 23 | 11% | Rate counts base slots temporarily replaced by hard-shaking Poké Radar patches. | ||
 Beautifly Beautifly | DP | 51 | 10% | — | ||
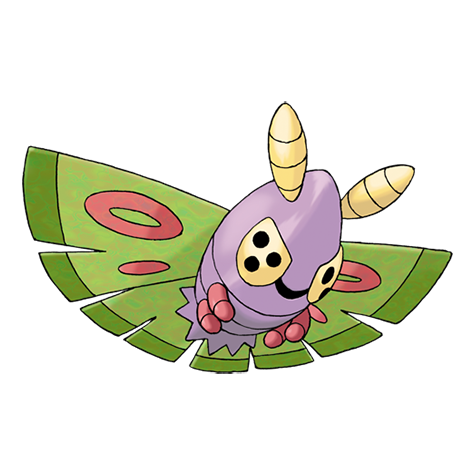 Dustox Dustox | DP | 51 | 10% | — | ||
| Golduck | DP | 52 | 10% | — | ||
| Gastrodon | DP | 51 | 5% | — | ||
| Swarm (post-National Dex daily announcement) | ||||||
| Corsola | DP | 50 | 40% | Post-National Dex daily swarm; replaces grass slots 0-1. | ||
| Poké Radar (post-National Dex) | ||||||
| Togepi | DP | 18 or 23 | 22% | National Dex and Poké Radar required; replacement slot applies only in a hard/vigorous-shaking Radar patch. | ||
| Surfing | ||||||
| Pelipper | DP | 40-55 | 60% | — | ||
| Seel | DP | 35-45 | 30% | — | ||
| Spheal | DP | 35-45 | 30% | — | ||
| Dewgong | DP | 40-55 | 5% | — | ||
| Sealeo | DP | 40-55 | 5% | — | ||
| Tentacruel | DP | 40-55 | 5% | — | ||
| Fishing — Old Rod | ||||||
| Magikarp | DP | 3-10 | 100% | — | ||
| Fishing — Good Rod | ||||||
| Magikarp | DP | 10-25 | 55% | — | ||
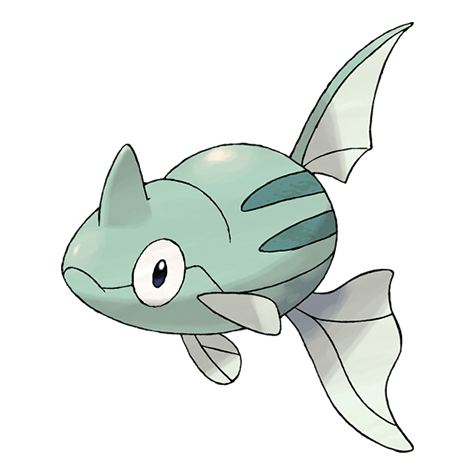 Remoraid Remoraid | DP | 10-25 | 45% | — | ||
| Fishing — Super Rod | ||||||
| Gyarados | DP | 30-40 | 40% | — | ||
 Wailmer Wailmer | DP | 30-40 | 40% | — | ||
 Octillery Octillery | DP | 40-55 | 15% | — | ||
 Wailord Wailord | DP | 35-55 | 5% | — | ||
Trainers
| Trainer | Route order / placement | Full team | Reward | Access requirement | Optional / rematch note |
|---|---|---|---|---|---|
| Ace Trainer Male JoseAce Trainer Male • source ID 565 | Route 228 • field order 1 at (779, 325) | ₽3,300 | Hall of Fame and National Dex required to leave the Fight Area hub for the rest of the Battle Zone; individual cliffs and cave branches use Surf, Rock Smash, Strength, Rock Climb, or the Bicycle as described in the route plan. | Field order 1, tile (779, 325); sightline/path determines whether it can be avoided. No higher-level same-trainer rematch variant is defined in trdata. | |
| Ace Trainer Female ArianaAce Trainer Female • source ID 574 | Route 228 • field order 2 at (773, 346) | ₽3,240 | Hall of Fame and National Dex required to leave the Fight Area hub for the rest of the Battle Zone; individual cliffs and cave branches use Surf, Rock Smash, Strength, Rock Climb, or the Bicycle as described in the route plan. | Field order 2, tile (773, 346); sightline/path determines whether it can be avoided. Higher-level source variants used by the rematch system: ID 672: Lv. 59/Lv. 59/Lv. 59. | |
| Pokémon Ranger Male KylerPokémon Ranger Male • source ID 591 | Route 228 • field order 3 at (789, 375) | ₽3,480 | Hall of Fame and National Dex required to leave the Fight Area hub for the rest of the Battle Zone; individual cliffs and cave branches use Surf, Rock Smash, Strength, Rock Climb, or the Bicycle as described in the route plan. | Field order 3, tile (789, 375); sightline/path determines whether it can be avoided. Higher-level source variants used by the rematch system: ID 735: Lv. 60/Lv. 60. | |
| Pokémon Ranger Female KristaPokémon Ranger Female • source ID 596 | Route 228 • field order 4 at (786, 375) | ₽3,360 | Hall of Fame and National Dex required to leave the Fight Area hub for the rest of the Battle Zone; individual cliffs and cave branches use Surf, Rock Smash, Strength, Rock Climb, or the Bicycle as described in the route plan. | Field order 4, tile (786, 375); sightline/path determines whether it can be avoided. No higher-level same-trainer rematch variant is defined in trdata. | |
| Dragon Tamer KeeganDragon Tamer • source ID 559 | Route 228 • field order 5 at (796, 327) | ₽1,856 | Hall of Fame and National Dex required to leave the Fight Area hub for the rest of the Battle Zone; individual cliffs and cave branches use Surf, Rock Smash, Strength, Rock Climb, or the Bicycle as described in the route plan. | Field order 5, tile (796, 327); sightline/path determines whether it can be avoided. No higher-level same-trainer rematch variant is defined in trdata. | |
| Psychic Male CorbinPsychic Male • source ID 583 | Route 228 • field order 6 at (785, 398) | ₽1,760 | Hall of Fame and National Dex required to leave the Fight Area hub for the rest of the Battle Zone; individual cliffs and cave branches use Surf, Rock Smash, Strength, Rock Climb, or the Bicycle as described in the route plan. | Field order 6, tile (785, 398); sightline/path determines whether it can be avoided. Higher-level source variants used by the rematch system: ID 676: Lv. 58/Lv. 60. | |
| Ace Trainer Female MeaganAce Trainer Female • source ID 577 | Route 228 • field order 7 at (795, 394) | ₽3,300 | Hall of Fame and National Dex required to leave the Fight Area hub for the rest of the Battle Zone; individual cliffs and cave branches use Surf, Rock Smash, Strength, Rock Climb, or the Bicycle as described in the route plan. | Field order 7, tile (795, 394); sightline/path determines whether it can be avoided. No higher-level same-trainer rematch variant is defined in trdata. | |
| Black Belt DavonBlack Belt • source ID 587 | Route 228 • field order 8 at (776, 338) | ₽1,320 | Hall of Fame and National Dex required to leave the Fight Area hub for the rest of the Battle Zone; individual cliffs and cave branches use Surf, Rock Smash, Strength, Rock Climb, or the Bicycle as described in the route plan. | Field order 8, tile (776, 338); sightline/path determines whether it can be avoided. Higher-level source variants used by the rematch system: ID 700: Lv. 58/Lv. 59/Lv. 60. | |
| Pokémon Ranger Male DeshawnPokémon Ranger Male • source ID 592 | Route 229 • field order 1 at (829, 433) | ₽3,300 | Hall of Fame and National Dex required to leave the Fight Area hub for the rest of the Battle Zone; individual cliffs and cave branches use Surf, Rock Smash, Strength, Rock Climb, or the Bicycle as described in the route plan. | Field order 1, tile (829, 433); sightline/path determines whether it can be avoided. No higher-level same-trainer rematch variant is defined in trdata. | |
| Ace Trainer Male FelixAce Trainer Male • source ID 566 | Route 229 • field order 2 at (796, 432) | ₽3,300 | Hall of Fame and National Dex required to leave the Fight Area hub for the rest of the Battle Zone; individual cliffs and cave branches use Surf, Rock Smash, Strength, Rock Climb, or the Bicycle as described in the route plan. | Field order 2, tile (796, 432); sightline/path determines whether it can be avoided. No higher-level same-trainer rematch variant is defined in trdata. | |
| Ace Trainer Female DanaAce Trainer Female • source ID 575 | Route 229 • field order 3 at (801, 432) | ₽3,300 | Hall of Fame and National Dex required to leave the Fight Area hub for the rest of the Battle Zone; individual cliffs and cave branches use Surf, Rock Smash, Strength, Rock Climb, or the Bicycle as described in the route plan. | Field order 3, tile (801, 432); sightline/path determines whether it can be avoided. No higher-level same-trainer rematch variant is defined in trdata. | |
| Ace Trainer Female SandraAce Trainer Female • source ID 578 | Route 229 • field order 4 at (820, 418) |
| ₽3,420 | Hall of Fame and National Dex required to leave the Fight Area hub for the rest of the Battle Zone; individual cliffs and cave branches use Surf, Rock Smash, Strength, Rock Climb, or the Bicycle as described in the route plan. | Field order 4, tile (820, 418); sightline/path determines whether it can be avoided. No higher-level same-trainer rematch variant is defined in trdata. |
| Swimmer Male GlennSwimmer Male • source ID 597 | Route 230 • field order 1 at (731, 440) | ₽816 | Hall of Fame and National Dex required to leave the Fight Area hub for the rest of the Battle Zone; individual cliffs and cave branches use Surf, Rock Smash, Strength, Rock Climb, or the Bicycle as described in the route plan. | Field order 1, tile (731, 440); sightline/path determines whether it can be avoided. Higher-level source variants used by the rematch system: ID 761: Lv. 58/Lv. 58. | |
| Swimmer Female JoannaSwimmer Female • source ID 601 | Route 230 • field order 2 at (734, 433) | ₽864 | Hall of Fame and National Dex required to leave the Fight Area hub for the rest of the Battle Zone; individual cliffs and cave branches use Surf, Rock Smash, Strength, Rock Climb, or the Bicycle as described in the route plan. | Field order 2, tile (734, 433); sightline/path determines whether it can be avoided. Higher-level source variants used by the rematch system: ID 764: Lv. 56/Lv. 60. | |
| Swimmer Male KurtSwimmer Male • source ID 598 | Route 230 • field order 3 at (750, 430) | ₽848 | Hall of Fame and National Dex required to leave the Fight Area hub for the rest of the Battle Zone; individual cliffs and cave branches use Surf, Rock Smash, Strength, Rock Climb, or the Bicycle as described in the route plan. | Field order 3, tile (750, 430); sightline/path determines whether it can be avoided. No higher-level same-trainer rematch variant is defined in trdata. | |
| Swimmer Female SophiaSwimmer Female • source ID 602 | Route 230 • field order 4 at (699, 438) | ₽832 | Hall of Fame and National Dex required to leave the Fight Area hub for the rest of the Battle Zone; individual cliffs and cave branches use Surf, Rock Smash, Strength, Rock Climb, or the Bicycle as described in the route plan. | Field order 4, tile (699, 438); sightline/path determines whether it can be avoided. No higher-level same-trainer rematch variant is defined in trdata. | |
| Swimmer Male SamSwimmer Male • source ID 599 | Route 230 • field order 5 at (699, 433) | ₽816 | Hall of Fame and National Dex required to leave the Fight Area hub for the rest of the Battle Zone; individual cliffs and cave branches use Surf, Rock Smash, Strength, Rock Climb, or the Bicycle as described in the route plan. | Field order 5, tile (699, 433); sightline/path determines whether it can be avoided. No higher-level same-trainer rematch variant is defined in trdata. | |
| Swimmer Female MallorySwimmer Female • source ID 603 | Route 230 • field order 6 at (738, 425) | ₽864 | Hall of Fame and National Dex required to leave the Fight Area hub for the rest of the Battle Zone; individual cliffs and cave branches use Surf, Rock Smash, Strength, Rock Climb, or the Bicycle as described in the route plan. | Field order 6, tile (738, 425); sightline/path determines whether it can be avoided. No higher-level same-trainer rematch variant is defined in trdata. |
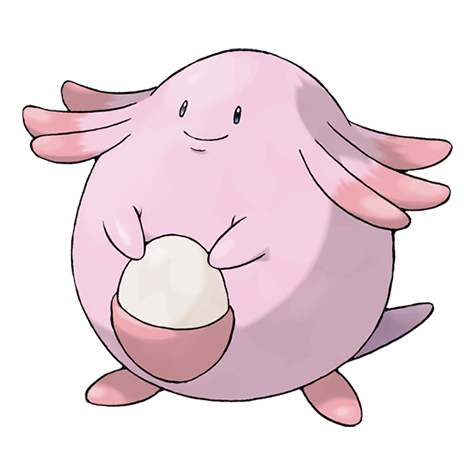
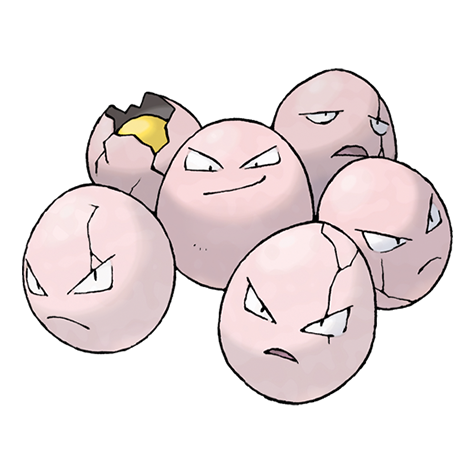
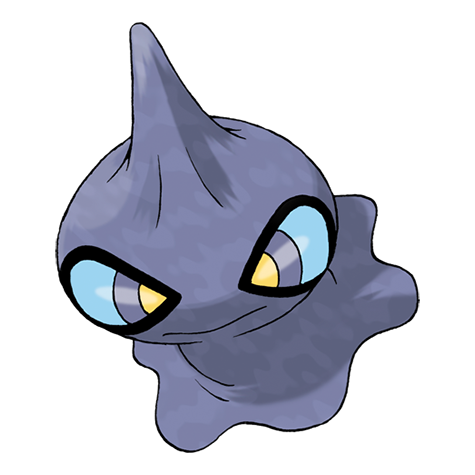
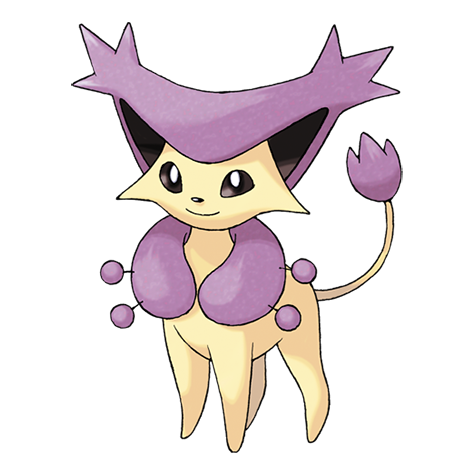
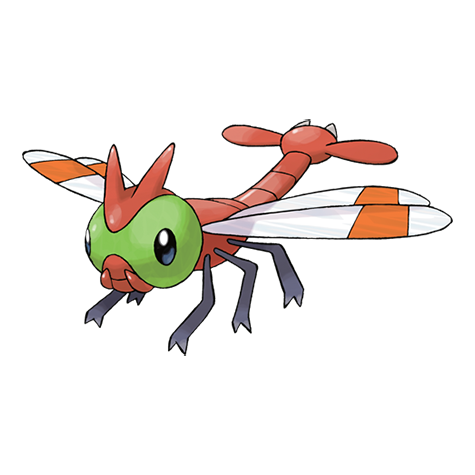
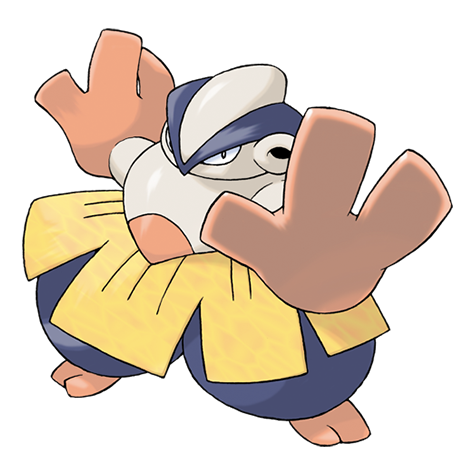
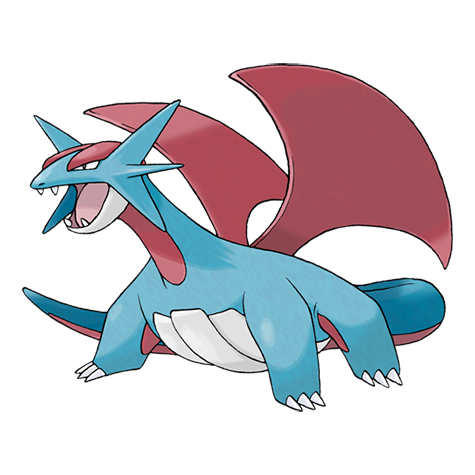
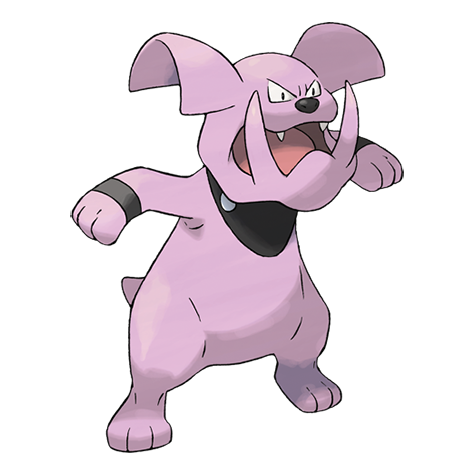
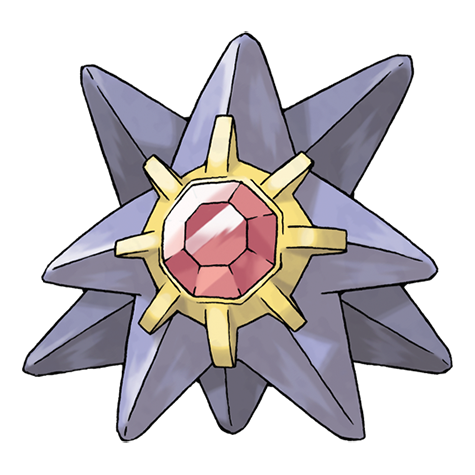
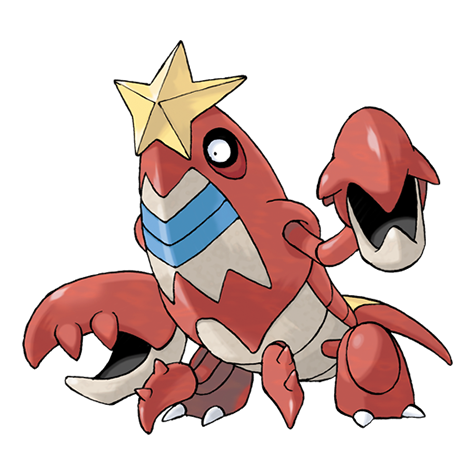
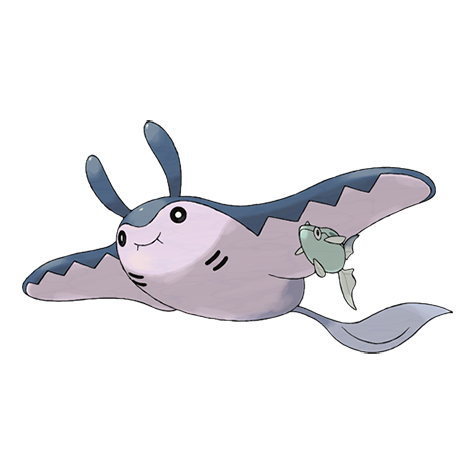
Items
| Item | Version | Type | Area / exact direction | Coordinate / script | Requirement | Source |
|---|---|---|---|---|---|---|
| Protector | Diamond / Pearl | Visible item ball | Route 228: Pick up the item ball in the northern part of Route 228, 12 tiles east and 2 tiles south of the Route 228 Route 226 Gatehouse doorway or transition. | (786, 333) | Hall of Fame and National Dex required to leave the Fight Area hub for the rest of the Battle Zone; individual cliffs and cave branches use Surf, Rock Smash, Strength, Rock Climb, or the Bicycle as described in the route plan. | event bank 387, script 7242 |
| Iron | Diamond / Pearl | Visible item ball | Route 228: Pick up the item ball in the northeastern part of Route 228, 7 tiles east and 10 tiles north of the Route 228 North House doorway or transition. | (796, 346) | Hall of Fame and National Dex required to leave the Fight Area hub for the rest of the Battle Zone; individual cliffs and cave branches use Surf, Rock Smash, Strength, Rock Climb, or the Bicycle as described in the route plan. | event bank 387, script 7243 |
| Shiny Stone | Diamond / Pearl | Visible item ball | Route 228: Pick up the item ball in the southeastern part of Route 228, 19 tiles east and 1 tile north of the Route 228 South House doorway or transition. | (794, 385) | Hall of Fame and National Dex required to leave the Fight Area hub for the rest of the Battle Zone; individual cliffs and cave branches use Surf, Rock Smash, Strength, Rock Climb, or the Bicycle as described in the route plan. | event bank 387, script 7244 |
| Shed Shell | Diamond / Pearl | Visible item ball | Route 228: Pick up the item ball in the northwestern part of Route 228, 6 tiles east and 14 tiles south of the Route 228 Route 226 Gatehouse doorway or transition. | (780, 345) | Hall of Fame and National Dex required to leave the Fight Area hub for the rest of the Battle Zone; individual cliffs and cave branches use Surf, Rock Smash, Strength, Rock Climb, or the Bicycle as described in the route plan. | event bank 387, script 7245 |
| TM37 | Diamond / Pearl | Visible item ball | Route 228: Pick up the item ball in the southwestern part of Route 228, 4 tiles east and 6 tiles north of the Route 228 South House doorway or transition. | (779, 380) | Hall of Fame and National Dex required to leave the Fight Area hub for the rest of the Battle Zone; individual cliffs and cave branches use Surf, Rock Smash, Strength, Rock Climb, or the Bicycle as described in the route plan. | event bank 387, script 7246 |
| Reaper Cloth | Diamond / Pearl | Visible item ball | Route 229: Pick up the item ball in the northern part of Route 229, 2 tiles east and 5 tiles north of the nearest visible NPC. | (816, 426) | Hall of Fame and National Dex required to leave the Fight Area hub for the rest of the Battle Zone; individual cliffs and cave branches use Surf, Rock Smash, Strength, Rock Climb, or the Bicycle as described in the route plan. | event bank 388, script 7247 |
| Full Restore | Diamond / Pearl | Visible item ball | Route 229: Pick up the item ball in the northeastern part of Route 229, 8 tiles east and 2 tiles south of the Ace Trainer Female Sandra's field position. | (828, 420) | Hall of Fame and National Dex required to leave the Fight Area hub for the rest of the Battle Zone; individual cliffs and cave branches use Surf, Rock Smash, Strength, Rock Climb, or the Bicycle as described in the route plan. | event bank 388, script 7249 |
| Protein | Diamond / Pearl | Visible item ball | Route 229: Pick up the item ball in the eastern part of Route 229, 2 tiles east and 1 tile south of the nearest visible NPC. | (828, 438) | Hall of Fame and National Dex required to leave the Fight Area hub for the rest of the Battle Zone; individual cliffs and cave branches use Surf, Rock Smash, Strength, Rock Climb, or the Bicycle as described in the route plan. | event bank 388, script 7248 |
| Nugget | Diamond / Pearl | Visible item ball | Resort Area: Pick up the item ball in the southeastern part of Resort Area, 13 tiles east and 3 tiles north of the Resort Area Southeast House doorway or transition. | (829, 466) | Hall of Fame and National Dex required to leave the Fight Area hub for the rest of the Battle Zone; individual cliffs and cave branches use Surf, Rock Smash, Strength, Rock Climb, or the Bicycle as described in the route plan. | event bank 435, script 7250 |
| Rare Candy | Diamond / Pearl | Visible item ball | Route 230: Pick up the item ball in the eastern part of Route 230, 2 tiles east of the nearest sign or interactable landmark. | (727, 427) | Hall of Fame and National Dex required to leave the Fight Area hub for the rest of the Battle Zone; individual cliffs and cave branches use Surf, Rock Smash, Strength, Rock Climb, or the Bicycle as described in the route plan. | event bank 448, script 7251 |
| Hondew Berry | Diamond / Pearl | Berry tree | Route 228: Harvest berry patch 102 in the southwestern part of Route 228, 4 tiles east and 3 tiles south of the Route 228 South House doorway or transition. The plot can be replanted after the initial harvest. | (779, 389) | Hall of Fame and National Dex required to leave the Fight Area hub for the rest of the Battle Zone; individual cliffs and cave branches use Surf, Rock Smash, Strength, Rock Climb, or the Bicycle as described in the route plan. | berry table ov52_021D76F8, patch 102 |
| Hondew Berry | Diamond / Pearl | Berry tree | Route 228: Harvest berry patch 103 in the southern part of Route 228, 7 tiles east and 3 tiles south of the Route 228 South House doorway or transition. The plot can be replanted after the initial harvest. | (782, 389) | Hall of Fame and National Dex required to leave the Fight Area hub for the rest of the Battle Zone; individual cliffs and cave branches use Surf, Rock Smash, Strength, Rock Climb, or the Bicycle as described in the route plan. | berry table ov52_021D76F8, patch 103 |
| Tamato Berry | Diamond / Pearl | Berry tree | Route 228: Harvest berry patch 104 in the southwestern part of Route 228, 5 tiles east and 3 tiles south of the Route 228 South House doorway or transition. The plot can be replanted after the initial harvest. | (780, 389) | Hall of Fame and National Dex required to leave the Fight Area hub for the rest of the Battle Zone; individual cliffs and cave branches use Surf, Rock Smash, Strength, Rock Climb, or the Bicycle as described in the route plan. | berry table ov52_021D76F8, patch 104 |
| Tamato Berry | Diamond / Pearl | Berry tree | Route 228: Harvest berry patch 105 in the southern part of Route 228, 6 tiles east and 3 tiles south of the Route 228 South House doorway or transition. The plot can be replanted after the initial harvest. | (781, 389) | Hall of Fame and National Dex required to leave the Fight Area hub for the rest of the Battle Zone; individual cliffs and cave branches use Surf, Rock Smash, Strength, Rock Climb, or the Bicycle as described in the route plan. | berry table ov52_021D76F8, patch 105 |
| Grepa Berry | Diamond / Pearl | Berry tree | Route 229: Harvest berry patch 106 in the central part of Route 229, beside the nearest visible NPC. The plot can be replanted after the initial harvest. | (810, 434) | Hall of Fame and National Dex required to leave the Fight Area hub for the rest of the Battle Zone; individual cliffs and cave branches use Surf, Rock Smash, Strength, Rock Climb, or the Bicycle as described in the route plan. | berry table ov52_021D76F8, patch 106 |
| Grepa Berry | Diamond / Pearl | Berry tree | Route 229: Harvest berry patch 107 in the central part of Route 229, beside the nearest visible NPC. The plot can be replanted after the initial harvest. | (811, 434) | Hall of Fame and National Dex required to leave the Fight Area hub for the rest of the Battle Zone; individual cliffs and cave branches use Surf, Rock Smash, Strength, Rock Climb, or the Bicycle as described in the route plan. | berry table ov52_021D76F8, patch 107 |
| Qualot Berry | Diamond / Pearl | Berry tree | Route 229: Harvest berry patch 108 in the central part of Route 229, beside the nearest visible NPC. The plot can be replanted after the initial harvest. | (812, 434) | Hall of Fame and National Dex required to leave the Fight Area hub for the rest of the Battle Zone; individual cliffs and cave branches use Surf, Rock Smash, Strength, Rock Climb, or the Bicycle as described in the route plan. | berry table ov52_021D76F8, patch 108 |
| Qualot Berry | Diamond / Pearl | Berry tree | Route 229: Harvest berry patch 109 in the central part of Route 229, beside the nearest visible NPC. The plot can be replanted after the initial harvest. | (813, 434) | Hall of Fame and National Dex required to leave the Fight Area hub for the rest of the Battle Zone; individual cliffs and cave branches use Surf, Rock Smash, Strength, Rock Climb, or the Bicycle as described in the route plan. | berry table ov52_021D76F8, patch 109 |
| Lum Berry | Diamond / Pearl | Berry tree | Resort Area: Harvest berry patch 110 in the southern part of Resort Area, 4 tiles west of the Resort Area Southeast House doorway or transition. The plot can be replanted after the initial harvest. | (812, 469) | Hall of Fame and National Dex required to leave the Fight Area hub for the rest of the Battle Zone; individual cliffs and cave branches use Surf, Rock Smash, Strength, Rock Climb, or the Bicycle as described in the route plan. | berry table ov52_021D76F8, patch 110 |
| Leppa Berry | Diamond / Pearl | Berry tree | Resort Area: Harvest berry patch 111 in the southwestern part of Resort Area, 4 tiles south of the Resort Area Southwest House doorway or transition. The plot can be replanted after the initial harvest. | (802, 469) | Hall of Fame and National Dex required to leave the Fight Area hub for the rest of the Battle Zone; individual cliffs and cave branches use Surf, Rock Smash, Strength, Rock Climb, or the Bicycle as described in the route plan. | berry table ov52_021D76F8, patch 111 |
| 2× Qualot Berry | Diamond / Pearl | Berry tree | Resort Area: Harvest berry patch 112 in the southwestern part of Resort Area, 1 tile east and 4 tiles south of the Resort Area Southwest House doorway or transition. The plot can be replanted after the initial harvest. | (803, 469) | Hall of Fame and National Dex required to leave the Fight Area hub for the rest of the Battle Zone; individual cliffs and cave branches use Surf, Rock Smash, Strength, Rock Climb, or the Bicycle as described in the route plan. | berry table ov52_021D76F8, patch 112 |
| 2× Grepa Berry | Diamond / Pearl | Berry tree | Resort Area: Harvest berry patch 113 in the southwestern part of Resort Area, 5 tiles west of the Resort Area Southeast House doorway or transition. The plot can be replanted after the initial harvest. | (811, 469) | Hall of Fame and National Dex required to leave the Fight Area hub for the rest of the Battle Zone; individual cliffs and cave branches use Surf, Rock Smash, Strength, Rock Climb, or the Bicycle as described in the route plan. | berry table ov52_021D76F8, patch 113 |
| 2× Kelpsy Berry | Diamond / Pearl | Berry tree | Route 230: Harvest berry patch 114 in the northwestern part of Route 230, beside the nearest visible NPC. The plot can be replanted after the initial harvest. | (684, 420) | Hall of Fame and National Dex required to leave the Fight Area hub for the rest of the Battle Zone; individual cliffs and cave branches use Surf, Rock Smash, Strength, Rock Climb, or the Bicycle as described in the route plan. | berry table ov52_021D76F8, patch 114 |
| 2× Kelpsy Berry | Diamond / Pearl | Berry tree | Route 230: Harvest berry patch 115 in the northwestern part of Route 230, beside the nearest visible NPC. The plot can be replanted after the initial harvest. | (685, 420) | Hall of Fame and National Dex required to leave the Fight Area hub for the rest of the Battle Zone; individual cliffs and cave branches use Surf, Rock Smash, Strength, Rock Climb, or the Bicycle as described in the route plan. | berry table ov52_021D76F8, patch 115 |
| Grepa Berry | Diamond / Pearl | Berry tree | Route 230: Harvest berry patch 116 in the northwestern part of Route 230, beside the nearest visible NPC. The plot can be replanted after the initial harvest. | (686, 420) | Hall of Fame and National Dex required to leave the Fight Area hub for the rest of the Battle Zone; individual cliffs and cave branches use Surf, Rock Smash, Strength, Rock Climb, or the Bicycle as described in the route plan. | berry table ov52_021D76F8, patch 116 |
| Grepa Berry | Diamond / Pearl | Berry tree | Route 230: Harvest berry patch 117 in the northwestern part of Route 230, beside the nearest visible NPC. The plot can be replanted after the initial harvest. | (687, 420) | Hall of Fame and National Dex required to leave the Fight Area hub for the rest of the Battle Zone; individual cliffs and cave branches use Surf, Rock Smash, Strength, Rock Climb, or the Bicycle as described in the route plan. | berry table ov52_021D76F8, patch 117 |
| Nugget | Diamond / Pearl | NPC / scripted gift | Route 229: Speak to the item-giving NPC in the central part of Route 229, beside the nearest visible NPC. | NPC (814, 431); script 1 | Hall of Fame and National Dex required to leave the Fight Area hub for the rest of the Battle Zone; individual cliffs and cave branches use Surf, Rock Smash, Strength, Rock Climb, or the Bicycle as described in the route plan. | script bank 460 |
| Frenzy Plant / Blast Burn / Hydro Cannon move tutor | Diamond / Pearl | Free repeatable move-tutor service | Routes 228-230 and Resort Area: The Route 228 tutor teaches the matching ultimate move to a fully evolved Kanto, Johto, Hoenn, or Sinnoh starter at maximum friendship. | NPC / system | Bring an eligible fully evolved starter at maximum friendship; the service costs nothing and can be repeated for other eligible Pokemon. | editorial script/system note |
| Gorgeous / Royal / Gorgeous Royal Ribbons | Diamond / Pearl | Ribbon Syndicate purchase sequence | Routes 228-230 and Resort Area: Buy Gorgeous for ₽10,000, then Royal for ₽100,000, then Gorgeous Royal for ₽999,999; they are applied sequentially to the lead Pokemon. | NPC / system | Enter the Ribbon Syndicate with at least 10 qualifying Ribbon kinds across the party, then buy each Ribbon in order. | editorial script/system note |
| Ribbon Syndicate spa treatment | Diamond / Pearl | Once-daily friendship service | Routes 228-230 and Resort Area: The upstairs spa can treat up to five party members once per day; Eggs are accepted by the service. | NPC / system | Unlock Ribbon Syndicate access; once per day. | editorial script/system note |
Hidden Items
| Hidden item | Area / plain-English placement | QA coordinate | Requirement | Source |
|---|---|---|---|---|
| Calcium | Route 228: Use the Dowsing Machine in the southeastern part of Route 228, 18 tiles east and 17 tiles south of the Route 228 South House doorway or transition and inspect that exact ground tile. | (793, 403) | Dowsing Machine Pokétch app. Hall of Fame and National Dex required to leave the Fight Area hub for the rest of the Battle Zone; individual cliffs and cave branches use Surf, Rock Smash, Strength, Rock Climb, or the Bicycle as described in the route plan. | event bank 387, script 8142 |
| Stardust | Route 228: Use the Dowsing Machine in the western part of Route 228, 4 tiles east and 10 tiles north of the Route 228 South House doorway or transition and inspect that exact ground tile. | (779, 376) | Dowsing Machine Pokétch app. Hall of Fame and National Dex required to leave the Fight Area hub for the rest of the Battle Zone; individual cliffs and cave branches use Surf, Rock Smash, Strength, Rock Climb, or the Bicycle as described in the route plan. | event bank 387, script 8144 |
| Ultra Ball | Route 228: Use the Dowsing Machine in the central part of Route 228, 8 tiles west and 9 tiles south of the Route 228 North House doorway or transition and inspect that exact ground tile. | (781, 365) | Dowsing Machine Pokétch app. Hall of Fame and National Dex required to leave the Fight Area hub for the rest of the Battle Zone; individual cliffs and cave branches use Surf, Rock Smash, Strength, Rock Climb, or the Bicycle as described in the route plan. | event bank 387, script 8143 |
| Rare Candy | Route 228: Use the Dowsing Machine in the northwestern part of Route 228, 6 tiles east and 3 tiles south of the Route 228 Route 226 Gatehouse doorway or transition and inspect that exact ground tile. | (780, 334) | Dowsing Machine Pokétch app. Hall of Fame and National Dex required to leave the Fight Area hub for the rest of the Battle Zone; individual cliffs and cave branches use Surf, Rock Smash, Strength, Rock Climb, or the Bicycle as described in the route plan. | event bank 387, script 8205 |
| PP Up | Route 228: Use the Dowsing Machine in the northwestern part of Route 228, 5 tiles east and 6 tiles north of the Route 228 Route 226 Gatehouse doorway or transition and inspect that exact ground tile. | (779, 324) | Dowsing Machine Pokétch app. Hall of Fame and National Dex required to leave the Fight Area hub for the rest of the Battle Zone; individual cliffs and cave branches use Surf, Rock Smash, Strength, Rock Climb, or the Bicycle as described in the route plan. | event bank 387, script 8206 |
| Full Restore | Route 228: Use the Dowsing Machine in the southwestern part of Route 228, 18 tiles south of the Route 228 South House doorway or transition and inspect that exact ground tile. | (775, 404) | Dowsing Machine Pokétch app. Hall of Fame and National Dex required to leave the Fight Area hub for the rest of the Battle Zone; individual cliffs and cave branches use Surf, Rock Smash, Strength, Rock Climb, or the Bicycle as described in the route plan. | event bank 387, script 8207 |
| Big Mushroom | Route 229: Use the Dowsing Machine in Route 229's southeast grass near the Resort Area boundary. | (822, 445) | Dowsing Machine Pokétch app. Hall of Fame and National Dex to reach the Battle Zone. | event bank 388, script 8145 |
| Nugget | Resort Area: Use the Dowsing Machine in the southeastern part of Resort Area, 8 tiles east and 2 tiles south of the Resort Area Southeast House doorway or transition and inspect that exact ground tile. | (824, 471) | Dowsing Machine Pokétch app. Hall of Fame and National Dex required to leave the Fight Area hub for the rest of the Battle Zone; individual cliffs and cave branches use Surf, Rock Smash, Strength, Rock Climb, or the Bicycle as described in the route plan. | event bank 435, script 8146 |
| Carbos | Route 230: Use the Dowsing Machine on the north edge of Route 230's central island, just above the grass. | (718, 419) | Dowsing Machine Pokétch app. Hall of Fame, National Dex, and Surf. | event bank 448, script 8147 |
| HP Up | Route 230: Use the Dowsing Machine in the central grass of Route 230's main island, near the visible Rare Candy. | (725, 427) | Dowsing Machine Pokétch app. Hall of Fame, National Dex, and Surf. | event bank 448, script 8148 |
Puzzles, Warps, And Switches
- Use fast Bicycle gear for Route 228's muddy slopes and slow gear for narrow turns at the top. On Route 230, circle each island completely before moving to the next water lane.
Completion Checklist
- Complete the currently reachable part of this route plan: Travel east from Route 226 or south from Route 227; clear Route 228's upper and lower lanes; visit both houses and the Route 226 gatehouse; use Bicycle mud ramps; enter Route 229; sweep both grass lanes; tour Resort Area; check Ribbon Syndicate eligibility; Surf through Route 230's islands; return to Fight Area.
- Review all 72 encounter rows across the per-area tables, including game markers, method band, time-of-day rates, levels, and each conditional requirement; mark conditional rows for their stated revisit.
Route 224 and Marley
Enter Victory Road's newly opened rear section, escort Marley through high-level double battles, and fully clear Route 224 up to the polished stone.
Source maps
Victory Road 1F Back 2, Victory Road 1F Back 1, Victory Road 1F Back 3, and Route 224.
Route Plan
Return to Victory Road after the National Dex; enter the east rear room; meet Marley; use her Arcanine and free healing to clear every trainer and item; escort her to the Route 224 exit; sweep Route 224's land and water branches; inspect the polished white rock; reserve its event extension for Oak's Letter.
- Route 224 itself is normal National Dex postgame content. Only the white-rock event and path to Shaymin require Oak's Letter.
- Marley heals after battles and forces doubles, making her escort the best time to defeat the rear cave's paired Ace Trainers.
Routes and encounters on this page are compiled from 4 pret map headers.
Route 224
| Pokémon | Games | Levels | Rate | Requirement / notes | ||
|---|---|---|---|---|---|---|
| Morning | Day | Night | ||||
| Grass / cave floor | ||||||
| Floatzel | DP | 53-54 | 20% | 20% | 30% | Rate counts base slots temporarily replaced by the daily swarm. |
| Gastrodon | DP | 52-53 | 20% | 20% | 30% | Rate counts base slots temporarily replaced by the daily swarm. |
| Roselia | DP | 52 or 54 | 20% | Rate counts base slots temporarily replaced by hard-shaking Poké Radar patches. | ||
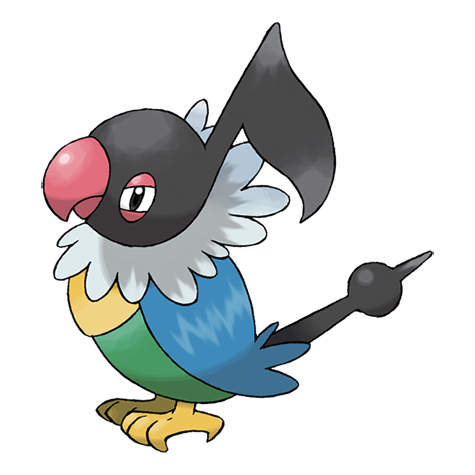 Chatot Chatot | DP | 52 or 54 | 20% | 20% | — | — |
| Beautifly | DP | 23 | 5% | Rate counts base slots temporarily replaced by hard-shaking Poké Radar patches and GBA dual-slot insertions. | ||
| Gloom | DP | 53 | 5% | — | ||
| Weepinbell | DP | 53 | 5% | — | ||
 Buizel Buizel | DP | 23 | 4% | Rate counts base slots temporarily replaced by GBA dual-slot insertions. | ||
| Shellos | DP | 23 | 1% | Rate counts base slots temporarily replaced by hard-shaking Poké Radar patches. | ||
| Swarm (post-National Dex daily announcement) | ||||||
| Natu | DP | 53 | 40% | Post-National Dex daily swarm; replaces grass slots 0-1. | ||
| Poké Radar (post-National Dex) | ||||||
| Dusclops | DP | 52 or 54 | 20% | National Dex and Poké Radar required; replacement slot applies only in a hard/vigorous-shaking Radar patch. | ||
| Duskull | DP | 23 | 2% | National Dex and Poké Radar required; replacement slot applies only in a hard/vigorous-shaking Radar patch. | ||
| Dual-slot GBA insertion (post-National Dex) | ||||||
| Shuckle | DP | 23 | 8% | National Dex plus Pokémon Emerald inserted in the Nintendo DS GBA slot; replaces grass slots 8-9. | ||
| Surfing | ||||||
| Pelipper | DP | 40-55 | 65% | — | ||
| Tentacruel | DP | 40-55 | 35% | — | ||
| Fishing — Old Rod | ||||||
| Magikarp | DP | 3-10 | 100% | — | ||
| Fishing — Good Rod | ||||||
| Magikarp | DP | 10-25 | 55% | — | ||
| Remoraid | DP | 10-25 | 45% | — | ||
| Fishing — Super Rod | ||||||
| Octillery | DP | 20-50 | 45% | — | ||
| Gyarados | DP | 30-40 | 40% | — | ||
 Luvdisc Luvdisc | DP | 20-30 | 15% | — | ||
Victory Road 1F Back 1
| Pokémon | Games | Levels | Rate | Requirement / notes | ||
|---|---|---|---|---|---|---|
| Morning | Day | Night | ||||
| Grass / cave floor | ||||||
| Machoke | DP | 50-52 | 25% | — | ||
| Golbat | DP | 50-52 | 20% | — | ||
| Graveler | DP | 51 | 20% | — | ||
 Medicham Medicham | DP | 50-52 | 15% | — | ||
| Onix | DP | 50 | 10% | — | ||
 Steelix Steelix | DP | 52 | 10% | — | ||
Victory Road 1F Back 2
| Pokémon | Games | Levels | Rate | Requirement / notes | ||
|---|---|---|---|---|---|---|
| Morning | Day | Night | ||||
| Grass / cave floor | ||||||
| Floatzel | DP | 50-51 | 30% | — | ||
| Machoke | DP | 50-52 | 25% | — | ||
| Golbat | DP | 50-52 | 20% | — | ||
| Medicham | DP | 50-52 | 15% | — | ||
| Steelix | DP | 52 | 10% | — | ||
| Surfing | ||||||
| Golbat | DP | 40-55 | 90% | — | ||
 Lapras Lapras | DP | 40-60 | 10% | — | ||
| Fishing — Old Rod | ||||||
| Magikarp | DP | 3-10 | 100% | — | ||
| Fishing — Good Rod | ||||||
| Magikarp | DP | 10-25 | 100% | — | ||
| Fishing — Super Rod | ||||||
| Gyarados | DP | 20-55 | 100% | — | ||
Victory Road 1F Back 3
| Pokémon | Games | Levels | Rate | Requirement / notes | ||
|---|---|---|---|---|---|---|
| Morning | Day | Night | ||||
| Grass / cave floor | ||||||
| Machoke | DP | 50-52 | 25% | — | ||
| Golbat | DP | 50-52 | 20% | — | ||
| Graveler | DP | 51 | 20% | — | ||
| Medicham | DP | 50-52 | 15% | — | ||
| Onix | DP | 50 | 10% | — | ||
| Steelix | DP | 52 | 10% | — | ||
Trainers
| Trainer | Route order / placement | Full team | Reward | Access requirement | Optional / rematch note |
|---|---|---|---|---|---|
| Ace Trainer Male MicahAce Trainer Male • source ID 389 | Victory Road 1F Back 2 • field order 1 at (10, 47) | ₽3,240 | The Pokemon League approach requires Waterfall; Victory Road branches also use Surf, Strength, and Rock Smash. The eastern postgame wing waits for the National Dex. | Field order 1, tile (10, 47); sightline/path determines whether it can be avoided. No higher-level same-trainer rematch variant is defined in trdata. | |
| Ace Trainer Female BrandiAce Trainer Female • source ID 393 | Victory Road 1F Back 2 • field order 2 at (6, 47) | ₽3,240 | The Pokemon League approach requires Waterfall; Victory Road branches also use Surf, Strength, and Rock Smash. The eastern postgame wing waits for the National Dex. | Field order 2, tile (6, 47); sightline/path determines whether it can be avoided. No higher-level same-trainer rematch variant is defined in trdata. | |
| Psychic Female DesireePsychic Female • source ID 399 | Victory Road 1F Back 2 • field order 3 at (7, 13) | ₽1,728 | The Pokemon League approach requires Waterfall; Victory Road branches also use Surf, Strength, and Rock Smash. The eastern postgame wing waits for the National Dex. | Field order 3, tile (7, 13); sightline/path determines whether it can be avoided. No higher-level same-trainer rematch variant is defined in trdata. | |
| Psychic Male LandonPsychic Male • source ID 396 | Victory Road 1F Back 2 • field order 4 at (6, 17) | ₽1,792 | The Pokemon League approach requires Waterfall; Victory Road branches also use Surf, Strength, and Rock Smash. The eastern postgame wing waits for the National Dex. | Field order 4, tile (6, 17); sightline/path determines whether it can be avoided. No higher-level same-trainer rematch variant is defined in trdata. | |
| Black Belt EddieBlack Belt • source ID 446 | Victory Road 1F Back 2 • field order 5 at (16, 12) | ₽1,392 | The Pokemon League approach requires Waterfall; Victory Road branches also use Surf, Strength, and Rock Smash. The eastern postgame wing waits for the National Dex. | Field order 5, tile (16, 12); sightline/path determines whether it can be avoided. No higher-level same-trainer rematch variant is defined in trdata. | |
| Veteran TerrellVeteran • source ID 499 | Victory Road 1F Back 2 • field order 6 at (16, 10) |
| ₽4,320 | The Pokemon League approach requires Waterfall; Victory Road branches also use Surf, Strength, and Rock Smash. The eastern postgame wing waits for the National Dex. | Field order 6, tile (16, 10); sightline/path determines whether it can be avoided. No higher-level same-trainer rematch variant is defined in trdata. |
| Ace Trainer Male ArthurAce Trainer Male • source ID 390 | Victory Road 1F Back 2 • field order 7 at (44, 57) | ₽3,300 | The Pokemon League approach requires Waterfall; Victory Road branches also use Surf, Strength, and Rock Smash. The eastern postgame wing waits for the National Dex. | Field order 7, tile (44, 57); sightline/path determines whether it can be avoided. No higher-level same-trainer rematch variant is defined in trdata. | |
| Ace Trainer Female ClariceAce Trainer Female • source ID 394 | Victory Road 1F Back 2 • field order 8 at (42, 57) | ₽3,240 | The Pokemon League approach requires Waterfall; Victory Road branches also use Surf, Strength, and Rock Smash. The eastern postgame wing waits for the National Dex. | Field order 8, tile (42, 57); sightline/path determines whether it can be avoided. No higher-level same-trainer rematch variant is defined in trdata. | |
| Psychic Male DeandrePsychic Male • source ID 397 | Victory Road 1F Back 2 • field order 9 at (38, 17) | ₽1,792 | The Pokemon League approach requires Waterfall; Victory Road branches also use Surf, Strength, and Rock Smash. The eastern postgame wing waits for the National Dex. | Field order 9, tile (38, 17); sightline/path determines whether it can be avoided. No higher-level same-trainer rematch variant is defined in trdata. | |
| Psychic Female KendraPsychic Female • source ID 400 | Victory Road 1F Back 2 • field order 10 at (36, 17) | ₽1,760 | The Pokemon League approach requires Waterfall; Victory Road branches also use Surf, Strength, and Rock Smash. The eastern postgame wing waits for the National Dex. | Field order 10, tile (36, 17); sightline/path determines whether it can be avoided. No higher-level same-trainer rematch variant is defined in trdata. | |
| Bird Keeper AutumnBird Keeper • source ID 373 | Victory Road 1F Back 2 • field order 11 at (28, 12) | ₽1,824 | The Pokemon League approach requires Waterfall; Victory Road branches also use Surf, Strength, and Rock Smash. The eastern postgame wing waits for the National Dex. | Field order 11, tile (28, 12); sightline/path determines whether it can be avoided. No higher-level same-trainer rematch variant is defined in trdata. | |
| Dragon Tamer JoeDragon Tamer • source ID 386 | Victory Road 1F Back 2 • field order 12 at (28, 10) | ₽1,792 | The Pokemon League approach requires Waterfall; Victory Road branches also use Surf, Strength, and Rock Smash. The eastern postgame wing waits for the National Dex. | Field order 12, tile (28, 10); sightline/path determines whether it can be avoided. No higher-level same-trainer rematch variant is defined in trdata. | |
| Black Belt WillieBlack Belt • source ID 447 | Victory Road 1F Back 2 • field order 13 at (46, 25) | ₽1,344 | The Pokemon League approach requires Waterfall; Victory Road branches also use Surf, Strength, and Rock Smash. The eastern postgame wing waits for the National Dex. | Field order 13, tile (46, 25); sightline/path determines whether it can be avoided. No higher-level same-trainer rematch variant is defined in trdata. | |
| Veteran BrendenVeteran • source ID 500 | Victory Road 1F Back 2 • field order 14 at (46, 23) | ₽4,320 | The Pokemon League approach requires Waterfall; Victory Road branches also use Surf, Strength, and Rock Smash. The eastern postgame wing waits for the National Dex. | Field order 14, tile (46, 23); sightline/path determines whether it can be avoided. No higher-level same-trainer rematch variant is defined in trdata. | |
| Ace Trainer Male RubenAce Trainer Male • source ID 282 | Route 224 • field order 1 at (883, 547) | ₽3,240 | National Dex required to open Victory Road's rear passage; the Oak's Letter extension is unreleased event data in original Diamond/Pearl. | Field order 1, tile (883, 547); sightline/path determines whether it can be avoided. No higher-level same-trainer rematch variant is defined in trdata. | |
| Psychic Male MaxwellPsychic Male • source ID 288 | Route 224 • field order 2 at (875, 529) | ₽1,728 | National Dex required to open Victory Road's rear passage; the Oak's Letter extension is unreleased event data in original Diamond/Pearl. | Field order 2, tile (875, 529); sightline/path determines whether it can be avoided. Higher-level source variants used by the rematch system: ID 675: Lv. 56/Lv. 58. | |
| Black Belt CarlBlack Belt • source ID 313 | Route 224 • field order 3 at (901, 532) | ₽1,344 | National Dex required to open Victory Road's rear passage; the Oak's Letter extension is unreleased event data in original Diamond/Pearl. | Field order 3, tile (901, 532); sightline/path determines whether it can be avoided. No higher-level same-trainer rematch variant is defined in trdata. | |
| Veteran ArmandoVeteran • source ID 362 | Route 224 • field order 4 at (885, 533) | ₽4,320 | National Dex required to open Victory Road's rear passage; the Oak's Letter extension is unreleased event data in original Diamond/Pearl. | Field order 4, tile (885, 533); sightline/path determines whether it can be avoided. Higher-level source variants used by the rematch system: ID 777: Lv. 58/Lv. 58/Lv. 58. | |
| Psychic Female BrittneyPsychic Female • source ID 289 | Route 224 • field order 5 at (869, 536) | ₽1,728 | National Dex required to open Victory Road's rear passage; the Oak's Letter extension is unreleased event data in original Diamond/Pearl. | Field order 5, tile (869, 536); sightline/path determines whether it can be avoided. Higher-level source variants used by the rematch system: ID 679: Lv. 58/Lv. 58. | |
| Ace Trainer Female JamieAce Trainer Female • source ID 286 | Route 224 • field order 6 at (915, 518) |
| ₽3,360 | National Dex required to open Victory Road's rear passage; the Oak's Letter extension is unreleased event data in original Diamond/Pearl. | Field order 6, tile (915, 518); sightline/path determines whether it can be avoided. No higher-level same-trainer rematch variant is defined in trdata. |
 Ruin Maniac LarryRuin Maniac • source ID 305 Ruin Maniac LarryRuin Maniac • source ID 305 | Route 224 • field order 7 at (913, 522) | ₽2,592 | National Dex required to open Victory Road's rear passage; the Oak's Letter extension is unreleased event data in original Diamond/Pearl. | Field order 7, tile (913, 522); sightline/path determines whether it can be avoided. No higher-level same-trainer rematch variant is defined in trdata. | |
| Dragon Tamer HaydenDragon Tamer • source ID 277 | Route 224 • field order 8 at (904, 511) | ₽1,824 | National Dex required to open Victory Road's rear passage; the Oak's Letter extension is unreleased event data in original Diamond/Pearl. | Field order 8, tile (904, 511); sightline/path determines whether it can be avoided. Higher-level source variants used by the rematch system: ID 661: Lv. 60/Lv. 60. |



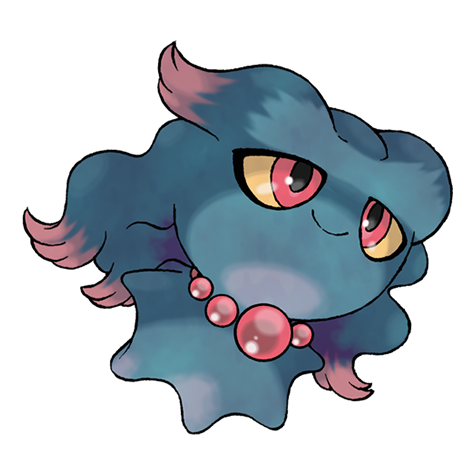
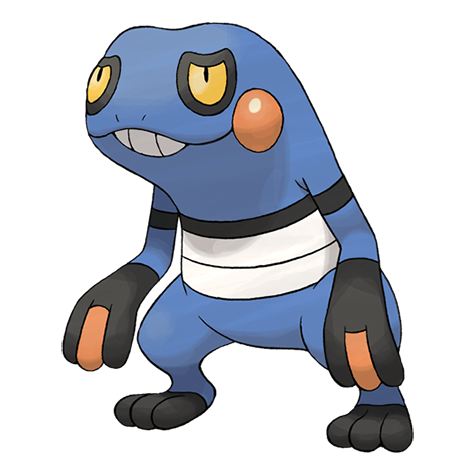
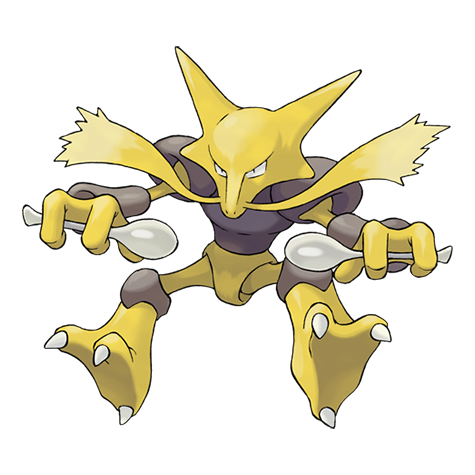
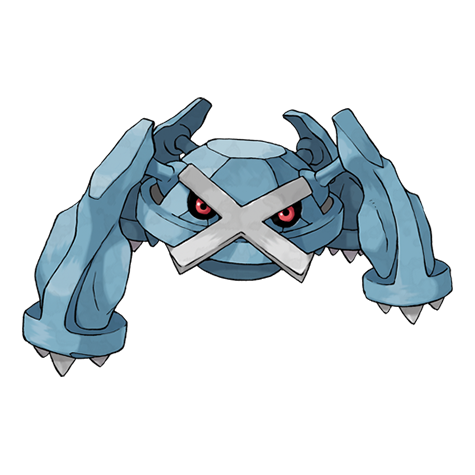

Items
| Item | Version | Type | Area / exact direction | Coordinate / script | Requirement | Source |
|---|---|---|---|---|---|---|
| Big Pearl | Diamond / Pearl | Visible item ball | Victory Road 1F Back 2: Pick up the item ball in the northeastern part of Victory Road 1F Back 2, 12 tiles west and 4 tiles north of the Victory Road 1F Back 3 doorway or transition. | (44, 9) | The Pokemon League approach requires Waterfall; Victory Road branches also use Surf, Strength, and Rock Smash. The eastern postgame wing waits for the National Dex. | event bank 240, script 7210 |
| Elixir | Diamond / Pearl | Visible item ball | Victory Road 1F Back 2: Pick up the item ball in the northwestern part of Victory Road 1F Back 2, 42 tiles west and 6 tiles north of the Victory Road 1F Back 3 doorway or transition. | (14, 7) | The Pokemon League approach requires Waterfall; Victory Road branches also use Surf, Strength, and Rock Smash. The eastern postgame wing waits for the National Dex. | event bank 240, script 7208 |
| Dusk Stone | Diamond / Pearl | Visible item ball | Victory Road 1F Back 2: Pick up the item ball in the northwestern part of Victory Road 1F Back 2, 42 tiles west and 9 tiles north of the Victory Road 1F Back 3 doorway or transition. | (14, 4) | The Pokemon League approach requires Waterfall; Victory Road branches also use Surf, Strength, and Rock Smash. The eastern postgame wing waits for the National Dex. | event bank 240, script 7209 |
| Leftovers | Diamond / Pearl | Visible item ball | Victory Road 1F Back 2: Pick up the item ball in the southern part of Victory Road 1F Back 2, 24 tiles east and 2 tiles south of the Victory Road 1F Back 1 doorway or transition. | (27, 60) | The Pokemon League approach requires Waterfall; Victory Road branches also use Surf, Strength, and Rock Smash. The eastern postgame wing waits for the National Dex. | event bank 240, script 7214 |
| Razor Claw | Diamond / Pearl | Visible item ball | Route 224: Pick up the item ball in the southwestern part of Route 224, 6 tiles east and 10 tiles south of the Victory Road 1F Back 3 doorway or transition. | (884, 570) | National Dex required to open Victory Road's rear passage; the Oak's Letter extension is unreleased event data in original Diamond/Pearl. | event bank 384, script 7211 |
| Rare Candy | Diamond / Pearl | Visible item ball | Route 224: Pick up the item ball in the eastern part of Route 224, 26 tiles east and 36 tiles north of the Victory Road 1F Back 3 doorway or transition. | (904, 524) | National Dex required to open Victory Road's rear passage; the Oak's Letter extension is unreleased event data in original Diamond/Pearl. | event bank 384, script 7212 |
| Destiny Knot | Diamond / Pearl | Visible item ball | Route 224: Pick up the item ball in the northeastern part of Route 224, 29 tiles east and 51 tiles north of the Victory Road 1F Back 3 doorway or transition. | (907, 509) | National Dex required to open Victory Road's rear passage; the Oak's Letter extension is unreleased event data in original Diamond/Pearl. | event bank 384, script 7213 |
| 2× Sitrus Berry | Diamond / Pearl | Berry tree | Route 224: Harvest berry patch 86 in the eastern part of Route 224, 28 tiles east and 38 tiles north of the Victory Road 1F Back 3 doorway or transition. The plot can be replanted after the initial harvest. | (906, 522) | National Dex required to open Victory Road's rear passage; the Oak's Letter extension is unreleased event data in original Diamond/Pearl. | berry table ov52_021D76F8, patch 86 |
| 3× Bluk Berry | Diamond / Pearl | Berry tree | Route 224: Harvest berry patch 87 in the eastern part of Route 224, 29 tiles east and 38 tiles north of the Victory Road 1F Back 3 doorway or transition. The plot can be replanted after the initial harvest. | (907, 522) | National Dex required to open Victory Road's rear passage; the Oak's Letter extension is unreleased event data in original Diamond/Pearl. | berry table ov52_021D76F8, patch 87 |
| 3× Nanab Berry | Diamond / Pearl | Berry tree | Route 224: Harvest berry patch 88 in the eastern part of Route 224, 30 tiles east and 38 tiles north of the Victory Road 1F Back 3 doorway or transition. The plot can be replanted after the initial harvest. | (908, 522) | National Dex required to open Victory Road's rear passage; the Oak's Letter extension is unreleased event data in original Diamond/Pearl. | berry table ov52_021D76F8, patch 88 |
| 3× Wepear Berry | Diamond / Pearl | Berry tree | Route 224: Harvest berry patch 89 in the eastern part of Route 224, 31 tiles east and 38 tiles north of the Victory Road 1F Back 3 doorway or transition. The plot can be replanted after the initial harvest. | (909, 522) | National Dex required to open Victory Road's rear passage; the Oak's Letter extension is unreleased event data in original Diamond/Pearl. | berry table ov52_021D76F8, patch 89 |
Hidden Items
| Hidden item | Area / plain-English placement | QA coordinate | Requirement | Source |
|---|---|---|---|---|
| Max Revive | Victory Road 1F Back 2: Use the Dowsing Machine in the northern part of Victory Road 1F Back 2, 34 tiles west and 3 tiles north of the Victory Road 1F Back 3 doorway or transition and inspect that exact ground tile. | (22, 10) | Dowsing Machine Pokétch app. The Pokemon League approach requires Waterfall; Victory Road branches also use Surf, Strength, and Rock Smash. The eastern postgame wing waits for the National Dex. | event bank 240, script 8123 |
| Big Mushroom | Victory Road 1F Back 2: Use the Dowsing Machine in the eastern part of Victory Road 1F Back 2, 1 tile west and 13 tiles south of the Victory Road 1F Back 3 doorway or transition and inspect that exact ground tile. | (55, 26) | Dowsing Machine Pokétch app. The Pokemon League approach requires Waterfall; Victory Road branches also use Surf, Strength, and Rock Smash. The eastern postgame wing waits for the National Dex. | event bank 240, script 8122 |
| Full Restore | Victory Road 1F Back 2: Use the Dowsing Machine in the central part of Victory Road 1F Back 2, 27 tiles west and 13 tiles south of the Victory Road 1F Back 3 doorway or transition and inspect that exact ground tile. | (29, 26) | Dowsing Machine Pokétch app. The Pokemon League approach requires Waterfall; Victory Road branches also use Surf, Strength, and Rock Smash. The eastern postgame wing waits for the National Dex. | event bank 240, script 8121 |
| Rare Candy | Victory Road 1F Back 2: Use the Dowsing Machine in the northern part of Victory Road 1F Back 2, 23 tiles west and 6 tiles north of the Victory Road 1F Back 3 doorway or transition and inspect that exact ground tile. | (33, 7) | Dowsing Machine Pokétch app. The Pokemon League approach requires Waterfall; Victory Road branches also use Surf, Strength, and Rock Smash. The eastern postgame wing waits for the National Dex. | event bank 240, script 8129 |
| Nugget | Victory Road 1F Back 2: Use the Dowsing Machine in the southern part of Victory Road 1F Back 2, 21 tiles east and 12 tiles north of the Victory Road 1F Back 1 doorway or transition and inspect that exact ground tile. | (24, 46) | Dowsing Machine Pokétch app. The Pokemon League approach requires Waterfall; Victory Road branches also use Surf, Strength, and Rock Smash. The eastern postgame wing waits for the National Dex. | event bank 240, script 8128 |
| PP Max | Route 224: Use the Dowsing Machine in the southern part of Route 224, 10 tiles east and 6 tiles north of the Victory Road 1F Back 3 doorway or transition and inspect that exact ground tile. | (888, 554) | Dowsing Machine Pokétch app. National Dex required to open Victory Road's rear passage; the Oak's Letter extension is unreleased event data in original Diamond/Pearl. | event bank 384, script 8124 |
| Stardust | Route 224: Use the Dowsing Machine in the eastern part of Route 224, 30 tiles east and 30 tiles north of the Victory Road 1F Back 3 doorway or transition and inspect that exact ground tile. | (908, 530) | Dowsing Machine Pokétch app. National Dex required to open Victory Road's rear passage; the Oak's Letter extension is unreleased event data in original Diamond/Pearl. | event bank 384, script 8125 |
| Stardust | Route 224: Use the Dowsing Machine in the central part of Route 224, 21 tiles east and 25 tiles north of the Victory Road 1F Back 3 doorway or transition and inspect that exact ground tile. | (899, 535) | Dowsing Machine Pokétch app. National Dex required to open Victory Road's rear passage; the Oak's Letter extension is unreleased event data in original Diamond/Pearl. | event bank 384, script 8126 |
| Stardust | Route 224: Use the Dowsing Machine in the eastern part of Route 224, 36 tiles east and 27 tiles north of the Victory Road 1F Back 3 doorway or transition and inspect that exact ground tile. | (914, 533) | Dowsing Machine Pokétch app. National Dex required to open Victory Road's rear passage; the Oak's Letter extension is unreleased event data in original Diamond/Pearl. | event bank 384, script 8127 |
| Pearl | Route 224: Use the Dowsing Machine in the northeastern part of Route 224, 41 tiles east and 60 tiles north of the Victory Road 1F Back 3 doorway or transition and inspect that exact ground tile. | (919, 500) | Dowsing Machine Pokétch app. National Dex required to open Victory Road's rear passage; the Oak's Letter extension is unreleased event data in original Diamond/Pearl. | event bank 384, script 8170 |
| Pearl | Route 224: Use the Dowsing Machine in the northeastern part of Route 224, 39 tiles east and 60 tiles north of the Victory Road 1F Back 3 doorway or transition and inspect that exact ground tile. | (917, 500) | Dowsing Machine Pokétch app. National Dex required to open Victory Road's rear passage; the Oak's Letter extension is unreleased event data in original Diamond/Pearl. | event bank 384, script 8171 |
| Big Pearl | Route 224: Use the Dowsing Machine in the northeastern part of Route 224, 34 tiles east and 60 tiles north of the Victory Road 1F Back 3 doorway or transition and inspect that exact ground tile. | (912, 500) | Dowsing Machine Pokétch app. National Dex required to open Victory Road's rear passage; the Oak's Letter extension is unreleased event data in original Diamond/Pearl. | event bank 384, script 8172 |
Puzzles, Warps, And Switches
- The rear cave has Strength and Surf loops around paired trainers. Clear every side chamber before taking Marley to the exit because she leaves at Route 224.
- The polished stone at Route 224's end does nothing without the Oak's Letter event flag; do not present glitches as an alternative route.
Boss Strategy And Partners
Pokémon Trainer MarleyPokémon Trainer Marley • source ID 610Partner team
- ArcanineExtreme Speed / Fire Fang / Helping Hand / Agility
Partner role
This stat trainer travels beside the player, turns eligible fights into doubles, and heals the party after each battle during the escort.
How to use the partner
Focus one opposing Pokémon to reduce incoming actions. In wild doubles, leave only the intended catch on the field before throwing a Ball.
Completion Checklist
- Complete the currently reachable part of this route plan: Return to Victory Road after the National Dex; enter the east rear room; meet Marley; use her Arcanine and free healing to clear every trainer and item; escort her to the Route 224 exit; sweep Route 224's land and water branches; inspect the polished white rock; reserve its event extension for Oak's Letter.
- Review all 43 encounter rows across the per-area tables, including game markers, method band, time-of-day rates, levels, and each conditional requirement; mark conditional rows for their stated revisit.
Fullmoon Island and Cresselia
Help Sailor Eldritch's son, sail to Fullmoon Island, release Cresselia, retrieve the Lunar Wing, and track the roaming legendary.
Source maps
Fullmoon Island Exterior and Fullmoon Island Interior.
Route Plan
Visit the sailor's house in Canalave after the National Dex; speak to the sleeping child and mother; ask Eldritch to sail to Fullmoon Island; enter the grove; save if desired; interact with Cresselia; collect the Lunar Wing it leaves; return to the child; use Marking Map and a route-boundary loop to catch Cresselia.
- Cresselia begins roaming immediately and retains damage and status between encounters, like Mesprit.
- The Lunar Wing remains on Fullmoon Island after Cresselia flees; collect it before sailing back to wake the sailor's son.
Routes and encounters on this page are compiled from 2 pret map headers.
Wild Pokémon
| Pokémon | Games | Levels | Rate | Requirement / notes | ||
|---|---|---|---|---|---|---|
| Morning | Day | Night | ||||
| Roaming encounter | ||||||
| Cresselia | DP | 50 | One roaming individual | National Dex; interact on Fullmoon Island during Sailor Eldritch's nightmare quest Flees from the island and then from wild meetings; retains HP and status and can be tracked with Marking Map. | ||
Items
| Item | Version | Type | Area / exact direction | Coordinate / script | Requirement | Source |
|---|---|---|---|---|---|---|
| Lunar Wing | Diamond / Pearl | Visible item ball | Fullmoon Island Interior: Pick up the item ball in the northwestern part of Fullmoon Island Interior, 6 tiles north of the Fullmoon Island Exterior doorway or transition. | (16, 15) | National Dex and the Sailor Eldritch family event are required before the Fullmoon Island trip. | event bank 253, script 7252 |
| Lunar Wing | Diamond / Pearl | Story field pickup | Fullmoon Island and Cresselia: Left in Fullmoon Island's grove when Cresselia begins roaming; return it to the sleeping child in Canalave. | NPC / system | See the route plan. | editorial script/system note |
Puzzles, Warps, And Switches
- Fullmoon Island itself is a short linear path. The real capture puzzle is route tracking: cross adjacent route boundaries until Cresselia shares the current route, then enter grass without Flying.
Completion Checklist
- Complete the currently reachable part of this route plan: Visit the sailor's house in Canalave after the National Dex; speak to the sleeping child and mother; ask Eldritch to sail to Fullmoon Island; enter the grove; save if desired; interact with Cresselia; collect the Lunar Wing it leaves; return to the child; use Marking Map and a route-boundary loop to catch Cresselia.
- Review all 1 encounter rows across the per-area tables, including game markers, method band, time-of-day rates, levels, and each conditional requirement; mark conditional rows for their stated revisit.
Spring Path, Sendoff Spring, and Turnback Cave
Enter the postgame path from Route 214, navigate Turnback Cave's randomized rooms, pass three pillars within thirty rooms, and catch Giratina.
Source maps
Sendoff Spring Unused, Sendoff Spring, Turnback Cave Entrance, Turnback Cave Pillar Room, Turnback Cave Giratina Room, Turnback Cave Random Room 3, Turnback Cave Random Room 6, Turnback Cave Random Room 5, Spring Path, Turnback Cave Random Room 4, Turnback Cave Random Room 2, Turnback Cave Random Room 1, Turnback Cave Random Room 12, Turnback Cave Random Room 9, Turnback Cave Random Room 10, and Turnback Cave Random Room 11, and 33 more submaps.
Route Plan
Find the newly opened Spring Path on Route 214; use Rock Climb to descend around Sendoff Spring; enter Turnback Cave; use Defog; choose doors while counting rooms; find the first, second, and third pillar before thirty rooms; enter Giratina's chamber; save and catch it; collect the post-capture item according to route efficiency.
- Turnback Cave rearranges its room sequence as doors are chosen. The inscriptions report pillar count and rooms traversed; there is no fixed left-right solution.
- Reaching Giratina after three pillars within fewer rooms improves the item reward on later visits.
Routes and encounters on this page are compiled from 49 pret map headers.
Sendoff Spring
| Pokémon | Games | Levels | Rate | Requirement / notes | ||
|---|---|---|---|---|---|---|
| Morning | Day | Night | ||||
| Grass / cave floor | ||||||
| Bibarel | DP | 52-54 | 45% | Rate counts base slots temporarily replaced by GBA dual-slot insertions. | ||
| Staravia | DP | 52-54 | 25% | 25% | 5% | Rate counts base slots temporarily replaced by GBA dual-slot insertions. |
| Golduck | DP | 53-54 | 20% | — | ||
 Noctowl Noctowl | DP | 53-54 | — | — | 20% | — |
 Chimecho Chimecho | DP | 52 or 54 | 10% | — | ||
| Dual-slot GBA insertion (post-National Dex) | ||||||
| Lunatone | DP | 52 | 8% | National Dex plus Pokémon Sapphire inserted in the Nintendo DS GBA slot; replaces grass slots 8-9. | ||
| Solrock | DP | 52 | 8% | National Dex plus Pokémon Ruby inserted in the Nintendo DS GBA slot; replaces grass slots 8-9. | ||
| Surfing | ||||||
| Golduck | DP | 40-55 | 100% | — | ||
| Fishing — Old Rod | ||||||
| Magikarp | DP | 3-10 | 100% | — | ||
| Fishing — Good Rod | ||||||
| Magikarp | DP | 10-25 | 55% | — | ||
| Goldeen | DP | 10-25 | 45% | — | ||
| Fishing — Super Rod | ||||||
| Gyarados | DP | 30-55 | 55% | — | ||
| Seaking | DP | 20-50 | 45% | — | ||
Turnback Cave Random Room 1
| Pokémon | Games | Levels | Rate | Requirement / notes | ||
|---|---|---|---|---|---|---|
| Morning | Day | Night | ||||
| Grass / cave floor | ||||||
 Bronzong Bronzong | DP | 45-46 | 35% | Rate counts base slots temporarily replaced by GBA dual-slot insertions. | ||
| Golbat | DP | 45-46 | 30% | — | ||
| Haunter | DP | 44-46 | 30% | — | ||
 Bronzor Bronzor | DP | 44 | 5% | Rate counts base slots temporarily replaced by GBA dual-slot insertions. | ||
| Dual-slot GBA insertion (post-National Dex) | ||||||
| Lunatone | DP | 44 or 46 | 8% | National Dex plus Pokémon Sapphire inserted in the Nintendo DS GBA slot; replaces grass slots 8-9. | ||
| Solrock | DP | 44 or 46 | 8% | National Dex plus Pokémon Ruby inserted in the Nintendo DS GBA slot; replaces grass slots 8-9. | ||
Turnback Cave Random Room 10
| Pokémon | Games | Levels | Rate | Requirement / notes | ||
|---|---|---|---|---|---|---|
| Morning | Day | Night | ||||
| Grass / cave floor | ||||||
| Bronzong | DP | 55-56 | 35% | Rate counts base slots temporarily replaced by GBA dual-slot insertions. | ||
| Golbat | DP | 55-56 | 30% | — | ||
| Haunter | DP | 54-56 | 30% | — | ||
| Bronzor | DP | 54 | 5% | Rate counts base slots temporarily replaced by GBA dual-slot insertions. | ||
| Dual-slot GBA insertion (post-National Dex) | ||||||
| Lunatone | DP | 54 or 56 | 8% | National Dex plus Pokémon Sapphire inserted in the Nintendo DS GBA slot; replaces grass slots 8-9. | ||
| Solrock | DP | 54 or 56 | 8% | National Dex plus Pokémon Ruby inserted in the Nintendo DS GBA slot; replaces grass slots 8-9. | ||
Turnback Cave Random Room 11
| Pokémon | Games | Levels | Rate | Requirement / notes | ||
|---|---|---|---|---|---|---|
| Morning | Day | Night | ||||
| Grass / cave floor | ||||||
| Bronzong | DP | 55-56 | 35% | Rate counts base slots temporarily replaced by GBA dual-slot insertions. | ||
| Golbat | DP | 55-56 | 30% | — | ||
| Haunter | DP | 54-56 | 30% | — | ||
| Bronzor | DP | 54 | 5% | Rate counts base slots temporarily replaced by GBA dual-slot insertions. | ||
| Dual-slot GBA insertion (post-National Dex) | ||||||
| Lunatone | DP | 54 or 56 | 8% | National Dex plus Pokémon Sapphire inserted in the Nintendo DS GBA slot; replaces grass slots 8-9. | ||
| Solrock | DP | 54 or 56 | 8% | National Dex plus Pokémon Ruby inserted in the Nintendo DS GBA slot; replaces grass slots 8-9. | ||
Turnback Cave Random Room 12
| Pokémon | Games | Levels | Rate | Requirement / notes | ||
|---|---|---|---|---|---|---|
| Morning | Day | Night | ||||
| Grass / cave floor | ||||||
| Bronzong | DP | 55-56 | 35% | Rate counts base slots temporarily replaced by GBA dual-slot insertions. | ||
| Golbat | DP | 55-56 | 30% | — | ||
| Haunter | DP | 54-56 | 30% | — | ||
| Bronzor | DP | 54 | 5% | Rate counts base slots temporarily replaced by GBA dual-slot insertions. | ||
| Dual-slot GBA insertion (post-National Dex) | ||||||
| Lunatone | DP | 54 or 56 | 8% | National Dex plus Pokémon Sapphire inserted in the Nintendo DS GBA slot; replaces grass slots 8-9. | ||
| Solrock | DP | 54 or 56 | 8% | National Dex plus Pokémon Ruby inserted in the Nintendo DS GBA slot; replaces grass slots 8-9. | ||
Turnback Cave Random Room 13
| Pokémon | Games | Levels | Rate | Requirement / notes | ||
|---|---|---|---|---|---|---|
| Morning | Day | Night | ||||
| Grass / cave floor | ||||||
| Bronzong | DP | 65-66 | 35% | Rate counts base slots temporarily replaced by GBA dual-slot insertions. | ||
| Golbat | DP | 65-66 | 30% | — | ||
| Haunter | DP | 64-66 | 30% | — | ||
| Bronzor | DP | 64 | 5% | Rate counts base slots temporarily replaced by GBA dual-slot insertions. | ||
| Dual-slot GBA insertion (post-National Dex) | ||||||
| Lunatone | DP | 64 or 66 | 8% | National Dex plus Pokémon Sapphire inserted in the Nintendo DS GBA slot; replaces grass slots 8-9. | ||
| Solrock | DP | 64 or 66 | 8% | National Dex plus Pokémon Ruby inserted in the Nintendo DS GBA slot; replaces grass slots 8-9. | ||
Turnback Cave Random Room 15
| Pokémon | Games | Levels | Rate | Requirement / notes | ||
|---|---|---|---|---|---|---|
| Morning | Day | Night | ||||
| Grass / cave floor | ||||||
| Bronzong | DP | 65-66 | 35% | Rate counts base slots temporarily replaced by GBA dual-slot insertions. | ||
| Golbat | DP | 65-66 | 30% | — | ||
| Haunter | DP | 64-66 | 30% | — | ||
| Bronzor | DP | 64 | 5% | Rate counts base slots temporarily replaced by GBA dual-slot insertions. | ||
| Dual-slot GBA insertion (post-National Dex) | ||||||
| Lunatone | DP | 64 or 66 | 8% | National Dex plus Pokémon Sapphire inserted in the Nintendo DS GBA slot; replaces grass slots 8-9. | ||
| Solrock | DP | 64 or 66 | 8% | National Dex plus Pokémon Ruby inserted in the Nintendo DS GBA slot; replaces grass slots 8-9. | ||
Turnback Cave Random Room 16
| Pokémon | Games | Levels | Rate | Requirement / notes | ||
|---|---|---|---|---|---|---|
| Morning | Day | Night | ||||
| Grass / cave floor | ||||||
| Bronzong | DP | 65-66 | 35% | Rate counts base slots temporarily replaced by GBA dual-slot insertions. | ||
| Golbat | DP | 65-66 | 30% | — | ||
| Haunter | DP | 64-66 | 30% | — | ||
| Bronzor | DP | 64 | 5% | Rate counts base slots temporarily replaced by GBA dual-slot insertions. | ||
| Dual-slot GBA insertion (post-National Dex) | ||||||
| Lunatone | DP | 64 or 66 | 8% | National Dex plus Pokémon Sapphire inserted in the Nintendo DS GBA slot; replaces grass slots 8-9. | ||
| Solrock | DP | 64 or 66 | 8% | National Dex plus Pokémon Ruby inserted in the Nintendo DS GBA slot; replaces grass slots 8-9. | ||
Turnback Cave Random Room 17
| Pokémon | Games | Levels | Rate | Requirement / notes | ||
|---|---|---|---|---|---|---|
| Morning | Day | Night | ||||
| Grass / cave floor | ||||||
| Bronzong | DP | 65-66 | 35% | Rate counts base slots temporarily replaced by GBA dual-slot insertions. | ||
| Golbat | DP | 65-66 | 30% | — | ||
| Haunter | DP | 64-66 | 30% | — | ||
| Bronzor | DP | 64 | 5% | Rate counts base slots temporarily replaced by GBA dual-slot insertions. | ||
| Dual-slot GBA insertion (post-National Dex) | ||||||
| Lunatone | DP | 64 or 66 | 8% | National Dex plus Pokémon Sapphire inserted in the Nintendo DS GBA slot; replaces grass slots 8-9. | ||
| Solrock | DP | 64 or 66 | 8% | National Dex plus Pokémon Ruby inserted in the Nintendo DS GBA slot; replaces grass slots 8-9. | ||
Turnback Cave Random Room 18
| Pokémon | Games | Levels | Rate | Requirement / notes | ||
|---|---|---|---|---|---|---|
| Morning | Day | Night | ||||
| Grass / cave floor | ||||||
| Bronzong | DP | 65-66 | 35% | Rate counts base slots temporarily replaced by GBA dual-slot insertions. | ||
| Golbat | DP | 65-66 | 30% | — | ||
| Haunter | DP | 64-66 | 30% | — | ||
| Bronzor | DP | 64 | 5% | Rate counts base slots temporarily replaced by GBA dual-slot insertions. | ||
| Dual-slot GBA insertion (post-National Dex) | ||||||
| Lunatone | DP | 64 or 66 | 8% | National Dex plus Pokémon Sapphire inserted in the Nintendo DS GBA slot; replaces grass slots 8-9. | ||
| Solrock | DP | 64 or 66 | 8% | National Dex plus Pokémon Ruby inserted in the Nintendo DS GBA slot; replaces grass slots 8-9. | ||
Turnback Cave Random Room 2
| Pokémon | Games | Levels | Rate | Requirement / notes | ||
|---|---|---|---|---|---|---|
| Morning | Day | Night | ||||
| Grass / cave floor | ||||||
| Bronzong | DP | 45-46 | 35% | Rate counts base slots temporarily replaced by GBA dual-slot insertions. | ||
| Golbat | DP | 45-46 | 30% | — | ||
| Haunter | DP | 44-46 | 30% | — | ||
| Bronzor | DP | 44 | 5% | Rate counts base slots temporarily replaced by GBA dual-slot insertions. | ||
| Dual-slot GBA insertion (post-National Dex) | ||||||
| Lunatone | DP | 44 or 46 | 8% | National Dex plus Pokémon Sapphire inserted in the Nintendo DS GBA slot; replaces grass slots 8-9. | ||
| Solrock | DP | 44 or 46 | 8% | National Dex plus Pokémon Ruby inserted in the Nintendo DS GBA slot; replaces grass slots 8-9. | ||
Turnback Cave Random Room 3
| Pokémon | Games | Levels | Rate | Requirement / notes | ||
|---|---|---|---|---|---|---|
| Morning | Day | Night | ||||
| Grass / cave floor | ||||||
| Bronzong | DP | 45-46 | 35% | Rate counts base slots temporarily replaced by GBA dual-slot insertions. | ||
| Golbat | DP | 45-46 | 30% | — | ||
| Haunter | DP | 44-46 | 30% | — | ||
| Bronzor | DP | 44 | 5% | Rate counts base slots temporarily replaced by GBA dual-slot insertions. | ||
| Dual-slot GBA insertion (post-National Dex) | ||||||
| Lunatone | DP | 44 or 46 | 8% | National Dex plus Pokémon Sapphire inserted in the Nintendo DS GBA slot; replaces grass slots 8-9. | ||
| Solrock | DP | 44 or 46 | 8% | National Dex plus Pokémon Ruby inserted in the Nintendo DS GBA slot; replaces grass slots 8-9. | ||
Turnback Cave Random Room 4
| Pokémon | Games | Levels | Rate | Requirement / notes | ||
|---|---|---|---|---|---|---|
| Morning | Day | Night | ||||
| Grass / cave floor | ||||||
| Bronzong | DP | 45-46 | 35% | Rate counts base slots temporarily replaced by GBA dual-slot insertions. | ||
| Golbat | DP | 45-46 | 30% | — | ||
| Haunter | DP | 44-46 | 30% | — | ||
| Bronzor | DP | 44 | 5% | Rate counts base slots temporarily replaced by GBA dual-slot insertions. | ||
| Dual-slot GBA insertion (post-National Dex) | ||||||
| Lunatone | DP | 44 or 46 | 8% | National Dex plus Pokémon Sapphire inserted in the Nintendo DS GBA slot; replaces grass slots 8-9. | ||
| Solrock | DP | 44 or 46 | 8% | National Dex plus Pokémon Ruby inserted in the Nintendo DS GBA slot; replaces grass slots 8-9. | ||
Turnback Cave Random Room 5
| Pokémon | Games | Levels | Rate | Requirement / notes | ||
|---|---|---|---|---|---|---|
| Morning | Day | Night | ||||
| Grass / cave floor | ||||||
| Bronzong | DP | 45-46 | 35% | Rate counts base slots temporarily replaced by GBA dual-slot insertions. | ||
| Golbat | DP | 45-46 | 30% | — | ||
| Haunter | DP | 44-46 | 30% | — | ||
| Bronzor | DP | 44 | 5% | Rate counts base slots temporarily replaced by GBA dual-slot insertions. | ||
| Dual-slot GBA insertion (post-National Dex) | ||||||
| Lunatone | DP | 44 or 46 | 8% | National Dex plus Pokémon Sapphire inserted in the Nintendo DS GBA slot; replaces grass slots 8-9. | ||
| Solrock | DP | 44 or 46 | 8% | National Dex plus Pokémon Ruby inserted in the Nintendo DS GBA slot; replaces grass slots 8-9. | ||
Turnback Cave Random Room 6
| Pokémon | Games | Levels | Rate | Requirement / notes | ||
|---|---|---|---|---|---|---|
| Morning | Day | Night | ||||
| Grass / cave floor | ||||||
| Bronzong | DP | 45-46 | 35% | Rate counts base slots temporarily replaced by GBA dual-slot insertions. | ||
| Golbat | DP | 45-46 | 30% | — | ||
| Haunter | DP | 44-46 | 30% | — | ||
| Bronzor | DP | 44 | 5% | Rate counts base slots temporarily replaced by GBA dual-slot insertions. | ||
| Dual-slot GBA insertion (post-National Dex) | ||||||
| Lunatone | DP | 44 or 46 | 8% | National Dex plus Pokémon Sapphire inserted in the Nintendo DS GBA slot; replaces grass slots 8-9. | ||
| Solrock | DP | 44 or 46 | 8% | National Dex plus Pokémon Ruby inserted in the Nintendo DS GBA slot; replaces grass slots 8-9. | ||
Turnback Cave Random Room 7
| Pokémon | Games | Levels | Rate | Requirement / notes | ||
|---|---|---|---|---|---|---|
| Morning | Day | Night | ||||
| Grass / cave floor | ||||||
| Bronzong | DP | 55-56 | 35% | Rate counts base slots temporarily replaced by GBA dual-slot insertions. | ||
| Golbat | DP | 55-56 | 30% | — | ||
| Haunter | DP | 54-56 | 30% | — | ||
| Bronzor | DP | 54 | 5% | Rate counts base slots temporarily replaced by GBA dual-slot insertions. | ||
| Dual-slot GBA insertion (post-National Dex) | ||||||
| Lunatone | DP | 54 or 56 | 8% | National Dex plus Pokémon Sapphire inserted in the Nintendo DS GBA slot; replaces grass slots 8-9. | ||
| Solrock | DP | 54 or 56 | 8% | National Dex plus Pokémon Ruby inserted in the Nintendo DS GBA slot; replaces grass slots 8-9. | ||
Turnback Cave Random Room 8
| Pokémon | Games | Levels | Rate | Requirement / notes | ||
|---|---|---|---|---|---|---|
| Morning | Day | Night | ||||
| Grass / cave floor | ||||||
| Bronzong | DP | 55-56 | 35% | Rate counts base slots temporarily replaced by GBA dual-slot insertions. | ||
| Golbat | DP | 55-56 | 30% | — | ||
| Haunter | DP | 54-56 | 30% | — | ||
| Bronzor | DP | 54 | 5% | Rate counts base slots temporarily replaced by GBA dual-slot insertions. | ||
| Dual-slot GBA insertion (post-National Dex) | ||||||
| Lunatone | DP | 54 or 56 | 8% | National Dex plus Pokémon Sapphire inserted in the Nintendo DS GBA slot; replaces grass slots 8-9. | ||
| Solrock | DP | 54 or 56 | 8% | National Dex plus Pokémon Ruby inserted in the Nintendo DS GBA slot; replaces grass slots 8-9. | ||
Turnback Cave Random Room 9
| Pokémon | Games | Levels | Rate | Requirement / notes | ||
|---|---|---|---|---|---|---|
| Morning | Day | Night | ||||
| Grass / cave floor | ||||||
| Bronzong | DP | 55-56 | 35% | Rate counts base slots temporarily replaced by GBA dual-slot insertions. | ||
| Golbat | DP | 55-56 | 30% | — | ||
| Haunter | DP | 54-56 | 30% | — | ||
| Bronzor | DP | 54 | 5% | Rate counts base slots temporarily replaced by GBA dual-slot insertions. | ||
| Dual-slot GBA insertion (post-National Dex) | ||||||
| Lunatone | DP | 54 or 56 | 8% | National Dex plus Pokémon Sapphire inserted in the Nintendo DS GBA slot; replaces grass slots 8-9. | ||
| Solrock | DP | 54 or 56 | 8% | National Dex plus Pokémon Ruby inserted in the Nintendo DS GBA slot; replaces grass slots 8-9. | ||
Spring Path, Sendoff Spring, and Turnback Cave
| Pokémon | Games | Levels | Rate | Requirement / notes | ||
|---|---|---|---|---|---|---|
| Morning | Day | Night | ||||
| Overworld static encounter | ||||||
 Giratina Giratina | DP | 70 | One | National Dex; reach the chamber after three Turnback Cave pillars This is Altered Forme in Diamond and Pearl; the Distortion World and Origin Forme are Platinum content and excluded. | ||
Items
| Item | Version | Type | Area / exact direction | Coordinate / script | Requirement | Source |
|---|---|---|---|---|---|---|
| Reaper Cloth | Diamond / Pearl | Repeatable Turnback Cave reward | Spring Path, Sendoff Spring, and Turnback Cave: Appears in Giratina's former room after passing the three pillars in exactly 3 rooms. | NPC / system | Giratina absent; complete a return run in exactly 3 rooms. | editorial script/system note |
| Rare Bone | Diamond / Pearl | Repeatable Turnback Cave reward | Spring Path, Sendoff Spring, and Turnback Cave: Appears in Giratina's former room after reaching it in 4-15 rooms. | NPC / system | Giratina absent; complete a return run in 4-15 rooms. | editorial script/system note |
| Stardust | Diamond / Pearl | Repeatable Turnback Cave reward | Spring Path, Sendoff Spring, and Turnback Cave: Appears in Giratina's former room after reaching it in 16-30 rooms. | NPC / system | Giratina absent; complete a return run in 16-30 rooms. | editorial script/system note |
Puzzles, Warps, And Switches
- Use Defog immediately and keep a written room count. Avoid returning through the door just used when possible, read every pillar inscription, and reset the attempt if thirty rooms pass before the third pillar.
- After the third pillar, the next successful chamber is Giratina's room. Save before approaching the center.
Completion Checklist
- Complete the currently reachable part of this route plan: Find the newly opened Spring Path on Route 214; use Rock Climb to descend around Sendoff Spring; enter Turnback Cave; use Defog; choose doors while counting rooms; find the first, second, and third pillar before thirty rooms; enter Giratina's chamber; save and catch it; collect the post-capture item according to route efficiency.
- Review all 116 encounter rows across the per-area tables, including game markers, method band, time-of-day rates, levels, and each conditional requirement; mark conditional rows for their stated revisit.
Old Chateau and Rotom
Cut into Eterna Forest's haunted mansion, search every room and hidden item, then activate the television at night for Rotom.
Source maps
Old Chateau Entrance, Old Chateau 1F, Old Chateau 2F Side Rooms, Old Chateau 2F Corridor, Old Chateau 2F Room 1, Old Chateau 2F Room 2, Old Chateau 2F Room 3, Old Chateau 2F Room 4, Old Chateau 2F Room 5, and Old Chateau Unused.
Route Plan
Enter Eterna Forest from the south; use Cut at the Old Chateau fence; clear 1F and all 2F side rooms; collect the Old Gateau and hidden items; return between 8:00 p.m. and 3:59 a.m.; save in the television room; interact with the TV; catch Rotom.
- Rotom requires the National Dex and the nighttime encounter period in Diamond and Pearl. Its appliance forms are not normally obtainable in these versions.
- Ghostly NPC visuals are atmospheric events rather than catchable Pokemon and should be described without inventing trainer or encounter rows.
Routes and encounters on this page are compiled from 10 pret map headers.
Old Chateau 1F
| Pokémon | Games | Levels | Rate | Requirement / notes | ||
|---|---|---|---|---|---|---|
| Morning | Day | Night | ||||
| Grass / cave floor | ||||||
 Gastly Gastly | DP | 12-16 | 100% | Rate counts base slots temporarily replaced by GBA dual-slot insertions. | ||
| Dual-slot GBA insertion (post-National Dex) | ||||||
| Haunter | DP | 16 | 8% | National Dex plus Pokémon Ruby inserted in the Nintendo DS GBA slot; replaces grass slots 8-9. | ||
| Haunter | DP | 16 | 8% | National Dex plus Pokémon Sapphire inserted in the Nintendo DS GBA slot; replaces grass slots 8-9. | ||
| Haunter | DP | 16 | 8% | National Dex plus Pokémon Emerald inserted in the Nintendo DS GBA slot; replaces grass slots 8-9. | ||
| Haunter | DP | 16 | 8% | National Dex plus Pokémon FireRed inserted in the Nintendo DS GBA slot; replaces grass slots 8-9. | ||
| Haunter | DP | 16 | 8% | National Dex plus Pokémon LeafGreen inserted in the Nintendo DS GBA slot; replaces grass slots 8-9. | ||
Old Chateau 2F Corridor
| Pokémon | Games | Levels | Rate | Requirement / notes | ||
|---|---|---|---|---|---|---|
| Morning | Day | Night | ||||
| Grass / cave floor | ||||||
| Gastly | DP | 12-16 | 100% | Rate counts base slots temporarily replaced by GBA dual-slot insertions. | ||
| Dual-slot GBA insertion (post-National Dex) | ||||||
| Haunter | DP | 16 | 8% | National Dex plus Pokémon Ruby inserted in the Nintendo DS GBA slot; replaces grass slots 8-9. | ||
| Haunter | DP | 16 | 8% | National Dex plus Pokémon Sapphire inserted in the Nintendo DS GBA slot; replaces grass slots 8-9. | ||
| Haunter | DP | 16 | 8% | National Dex plus Pokémon Emerald inserted in the Nintendo DS GBA slot; replaces grass slots 8-9. | ||
| Haunter | DP | 16 | 8% | National Dex plus Pokémon FireRed inserted in the Nintendo DS GBA slot; replaces grass slots 8-9. | ||
| Haunter | DP | 16 | 8% | National Dex plus Pokémon LeafGreen inserted in the Nintendo DS GBA slot; replaces grass slots 8-9. | ||
Old Chateau 2F Room 1
| Pokémon | Games | Levels | Rate | Requirement / notes | ||
|---|---|---|---|---|---|---|
| Morning | Day | Night | ||||
| Grass / cave floor | ||||||
| Gastly | DP | 12-16 | 100% | Rate counts base slots temporarily replaced by GBA dual-slot insertions. | ||
| Dual-slot GBA insertion (post-National Dex) | ||||||
| Haunter | DP | 16 | 8% | National Dex plus Pokémon Ruby inserted in the Nintendo DS GBA slot; replaces grass slots 8-9. | ||
| Haunter | DP | 16 | 8% | National Dex plus Pokémon Sapphire inserted in the Nintendo DS GBA slot; replaces grass slots 8-9. | ||
| Haunter | DP | 16 | 8% | National Dex plus Pokémon Emerald inserted in the Nintendo DS GBA slot; replaces grass slots 8-9. | ||
| Haunter | DP | 16 | 8% | National Dex plus Pokémon FireRed inserted in the Nintendo DS GBA slot; replaces grass slots 8-9. | ||
| Haunter | DP | 16 | 8% | National Dex plus Pokémon LeafGreen inserted in the Nintendo DS GBA slot; replaces grass slots 8-9. | ||
Old Chateau 2F Room 2
| Pokémon | Games | Levels | Rate | Requirement / notes | ||
|---|---|---|---|---|---|---|
| Morning | Day | Night | ||||
| Grass / cave floor | ||||||
| Gastly | DP | 12-16 | 100% | Rate counts base slots temporarily replaced by GBA dual-slot insertions. | ||
| Dual-slot GBA insertion (post-National Dex) | ||||||
| Haunter | DP | 16 | 8% | National Dex plus Pokémon Ruby inserted in the Nintendo DS GBA slot; replaces grass slots 8-9. | ||
| Haunter | DP | 16 | 8% | National Dex plus Pokémon Sapphire inserted in the Nintendo DS GBA slot; replaces grass slots 8-9. | ||
| Haunter | DP | 16 | 8% | National Dex plus Pokémon Emerald inserted in the Nintendo DS GBA slot; replaces grass slots 8-9. | ||
| Haunter | DP | 16 | 8% | National Dex plus Pokémon FireRed inserted in the Nintendo DS GBA slot; replaces grass slots 8-9. | ||
| Haunter | DP | 16 | 8% | National Dex plus Pokémon LeafGreen inserted in the Nintendo DS GBA slot; replaces grass slots 8-9. | ||
Old Chateau 2F Room 3
| Pokémon | Games | Levels | Rate | Requirement / notes | ||
|---|---|---|---|---|---|---|
| Morning | Day | Night | ||||
| Grass / cave floor | ||||||
| Gastly | DP | 12-16 | 100% | Rate counts base slots temporarily replaced by GBA dual-slot insertions. | ||
| Dual-slot GBA insertion (post-National Dex) | ||||||
| Haunter | DP | 16 | 8% | National Dex plus Pokémon Ruby inserted in the Nintendo DS GBA slot; replaces grass slots 8-9. | ||
| Haunter | DP | 16 | 8% | National Dex plus Pokémon Sapphire inserted in the Nintendo DS GBA slot; replaces grass slots 8-9. | ||
| Haunter | DP | 16 | 8% | National Dex plus Pokémon Emerald inserted in the Nintendo DS GBA slot; replaces grass slots 8-9. | ||
| Haunter | DP | 16 | 8% | National Dex plus Pokémon FireRed inserted in the Nintendo DS GBA slot; replaces grass slots 8-9. | ||
| Haunter | DP | 16 | 8% | National Dex plus Pokémon LeafGreen inserted in the Nintendo DS GBA slot; replaces grass slots 8-9. | ||
Old Chateau 2F Room 4
| Pokémon | Games | Levels | Rate | Requirement / notes | ||
|---|---|---|---|---|---|---|
| Morning | Day | Night | ||||
| Grass / cave floor | ||||||
| Gastly | DP | 12-16 | 100% | Rate counts base slots temporarily replaced by GBA dual-slot insertions. | ||
| Dual-slot GBA insertion (post-National Dex) | ||||||
| Gengar | DP | 16 | 4% | National Dex plus Pokémon Ruby inserted in the Nintendo DS GBA slot; replaces grass slots 8-9. | ||
| Gengar | DP | 16 | 4% | National Dex plus Pokémon Sapphire inserted in the Nintendo DS GBA slot; replaces grass slots 8-9. | ||
| Gengar | DP | 16 | 4% | National Dex plus Pokémon Emerald inserted in the Nintendo DS GBA slot; replaces grass slots 8-9. | ||
| Gengar | DP | 16 | 4% | National Dex plus Pokémon FireRed inserted in the Nintendo DS GBA slot; replaces grass slots 8-9. | ||
| Gengar | DP | 16 | 4% | National Dex plus Pokémon LeafGreen inserted in the Nintendo DS GBA slot; replaces grass slots 8-9. | ||
| Haunter | DP | 16 | 4% | National Dex plus Pokémon Ruby inserted in the Nintendo DS GBA slot; replaces grass slots 8-9. | ||
| Haunter | DP | 16 | 4% | National Dex plus Pokémon Sapphire inserted in the Nintendo DS GBA slot; replaces grass slots 8-9. | ||
| Haunter | DP | 16 | 4% | National Dex plus Pokémon Emerald inserted in the Nintendo DS GBA slot; replaces grass slots 8-9. | ||
| Haunter | DP | 16 | 4% | National Dex plus Pokémon FireRed inserted in the Nintendo DS GBA slot; replaces grass slots 8-9. | ||
| Haunter | DP | 16 | 4% | National Dex plus Pokémon LeafGreen inserted in the Nintendo DS GBA slot; replaces grass slots 8-9. | ||
Old Chateau 2F Room 5
| Pokémon | Games | Levels | Rate | Requirement / notes | ||
|---|---|---|---|---|---|---|
| Morning | Day | Night | ||||
| Grass / cave floor | ||||||
| Gastly | DP | 12-16 | 100% | Rate counts base slots temporarily replaced by GBA dual-slot insertions. | ||
| Dual-slot GBA insertion (post-National Dex) | ||||||
| Haunter | DP | 16 | 8% | National Dex plus Pokémon Ruby inserted in the Nintendo DS GBA slot; replaces grass slots 8-9. | ||
| Haunter | DP | 16 | 8% | National Dex plus Pokémon Sapphire inserted in the Nintendo DS GBA slot; replaces grass slots 8-9. | ||
| Haunter | DP | 16 | 8% | National Dex plus Pokémon Emerald inserted in the Nintendo DS GBA slot; replaces grass slots 8-9. | ||
| Haunter | DP | 16 | 8% | National Dex plus Pokémon FireRed inserted in the Nintendo DS GBA slot; replaces grass slots 8-9. | ||
| Haunter | DP | 16 | 8% | National Dex plus Pokémon LeafGreen inserted in the Nintendo DS GBA slot; replaces grass slots 8-9. | ||
Old Chateau 2F Side Rooms
| Pokémon | Games | Levels | Rate | Requirement / notes | ||
|---|---|---|---|---|---|---|
| Morning | Day | Night | ||||
| Grass / cave floor | ||||||
| Gastly | DP | 12-16 | 100% | Rate counts base slots temporarily replaced by GBA dual-slot insertions. | ||
| Dual-slot GBA insertion (post-National Dex) | ||||||
| Haunter | DP | 16 | 8% | National Dex plus Pokémon Ruby inserted in the Nintendo DS GBA slot; replaces grass slots 8-9. | ||
| Haunter | DP | 16 | 8% | National Dex plus Pokémon Sapphire inserted in the Nintendo DS GBA slot; replaces grass slots 8-9. | ||
| Haunter | DP | 16 | 8% | National Dex plus Pokémon Emerald inserted in the Nintendo DS GBA slot; replaces grass slots 8-9. | ||
| Haunter | DP | 16 | 8% | National Dex plus Pokémon FireRed inserted in the Nintendo DS GBA slot; replaces grass slots 8-9. | ||
| Haunter | DP | 16 | 8% | National Dex plus Pokémon LeafGreen inserted in the Nintendo DS GBA slot; replaces grass slots 8-9. | ||
Old Chateau Entrance
| Pokémon | Games | Levels | Rate | Requirement / notes | ||
|---|---|---|---|---|---|---|
| Morning | Day | Night | ||||
| Grass / cave floor | ||||||
| Gastly | DP | 12-16 | 100% | Rate counts base slots temporarily replaced by GBA dual-slot insertions. | ||
| Dual-slot GBA insertion (post-National Dex) | ||||||
| Haunter | DP | 16 | 8% | National Dex plus Pokémon Ruby inserted in the Nintendo DS GBA slot; replaces grass slots 8-9. | ||
| Haunter | DP | 16 | 8% | National Dex plus Pokémon Sapphire inserted in the Nintendo DS GBA slot; replaces grass slots 8-9. | ||
| Haunter | DP | 16 | 8% | National Dex plus Pokémon Emerald inserted in the Nintendo DS GBA slot; replaces grass slots 8-9. | ||
| Haunter | DP | 16 | 8% | National Dex plus Pokémon FireRed inserted in the Nintendo DS GBA slot; replaces grass slots 8-9. | ||
| Haunter | DP | 16 | 8% | National Dex plus Pokémon LeafGreen inserted in the Nintendo DS GBA slot; replaces grass slots 8-9. | ||
Old Chateau and Rotom
| Pokémon | Games | Levels | Rate | Requirement / notes | ||
|---|---|---|---|---|---|---|
| Morning | Day | Night | ||||
| Overworld static encounter | ||||||
 Rotom Rotom | DP | 15 | One | National Dex; interact with Old Chateau television from 8:00 p.m. to 3:59 a.m. Save before interaction. Only base Rotom is normally available in Diamond and Pearl. | ||
Items
| Item | Version | Type | Area / exact direction | Coordinate / script | Requirement | Source |
|---|---|---|---|---|---|---|
| Old Gateau | Diamond / Pearl | Visible item ball | Old Chateau 2F Side Rooms: Pick up the item ball in the southwestern part of Old Chateau 2F Side Rooms, 3 tiles west and 1 tile south of the Old Chateau Entrance doorway or transition. | (4, 6) | Forest Badge and Cut are required to reach the Old Chateau through Eterna Forest. | event bank 285, script 7035 |
| Dread Plate | Diamond / Pearl | Visible item ball | Old Chateau 2F Room 1: In the westernmost Old Chateau bedroom; the adjacent-room event object is an inaccessible alias of this same pickup. | (3, 4) | Forest Badge and Cut to enter Old Chateau. | event bank 287, script 7036 |
| TM90 | Diamond / Pearl | Visible item ball | Old Chateau 2F Room 5: In the easternmost Old Chateau bedroom; the adjacent-room event object is an inaccessible alias of this same pickup. | (10, 4) | Forest Badge and Cut to enter Old Chateau. | event bank 291, script 7037 |
Hidden Items
| Hidden item | Area / plain-English placement | QA coordinate | Requirement | Source |
|---|---|---|---|---|
| Antidote | Old Chateau 1F: Use the Dowsing Machine in the northwestern part of Old Chateau 1F, 13 tiles west and 8 tiles north of the Old Chateau Entrance doorway or transition and inspect that exact ground tile. | (6, 3) | Dowsing Machine Pokétch app. Forest Badge and Cut are required to reach the Old Chateau through Eterna Forest. | event bank 284, script 8167 |
Puzzles, Warps, And Switches
- Search the dining room, kitchen, central upstairs corridor, and every side bedroom before the TV room. The haunted visuals trigger only from certain approaches and are optional.
- The television gives a distinctive message at night when Rotom is available; save before choosing to thump it.
Completion Checklist
- Complete the currently reachable part of this route plan: Enter Eterna Forest from the south; use Cut at the Old Chateau fence; clear 1F and all 2F side rooms; collect the Old Gateau and hidden items; return between 8:00 p.m. and 3:59 a.m.; save in the television room; interact with the TV; catch Rotom.
- Review all 60 encounter rows across the per-area tables, including game markers, method band, time-of-day rates, levels, and each conditional requirement; mark conditional rows for their stated revisit.
Snowpoint Temple and Regigigas
Gain postgame entry, solve ice and Strength floors, descend to B5F, and awaken Regigigas with all three Hoenn Regis in the party.
Source maps
Snowpoint Temple 1F, Snowpoint Temple B1F, Snowpoint Temple B2F, Snowpoint Temple B3F, Snowpoint Temple B4F, and Snowpoint Temple B5F.
Route Plan
Obtain the National Dex; return to Snowpoint and gain temple permission; bring Strength, Rock Smash, and a controlled capture team; descend every floor for items; solve B5F's ice slide; place Regirock, Regice, and Registeel in the active party; save before the statue; interact and catch Regigigas.
- Regirock, Regice, and Registeel are not natively catchable in ordinary Diamond/Pearl; migrate them through Pal Park or trade them in before Regigigas will awaken.
- Regigigas stays an inert statue if any required Regi is absent from the current party, even if all three are registered in the Pokedex.
Routes and encounters on this page are compiled from 6 pret map headers.
Snowpoint Temple 1F
| Pokémon | Games | Levels | Rate | Requirement / notes | ||
|---|---|---|---|---|---|---|
| Morning | Day | Night | ||||
| Grass / cave floor | ||||||
| Golbat | DP | 50-52 | 35% | — | ||
 Sneasel Sneasel | DP | 50-52 | 35% | — | ||
| Onix | DP | 50-52 | 15% | — | ||
| Graveler | DP | 52 | 10% | — | ||
| Steelix | DP | 52 | 5% | — | ||
Snowpoint Temple B1F
| Pokémon | Games | Levels | Rate | Requirement / notes | ||
|---|---|---|---|---|---|---|
| Morning | Day | Night | ||||
| Grass / cave floor | ||||||
| Golbat | DP | 52-54 | 35% | — | ||
| Sneasel | DP | 52-54 | 35% | — | ||
| Steelix | DP | 53-54 | 15% | — | ||
| Graveler | DP | 54 | 10% | — | ||
| Onix | DP | 52-53 | 5% | — | ||
Snowpoint Temple B2F
| Pokémon | Games | Levels | Rate | Requirement / notes | ||
|---|---|---|---|---|---|---|
| Morning | Day | Night | ||||
| Grass / cave floor | ||||||
| Golbat | DP | 52-54 | 35% | — | ||
| Sneasel | DP | 52-54 | 35% | — | ||
| Steelix | DP | 53-54 | 15% | — | ||
| Graveler | DP | 54 | 10% | — | ||
| Onix | DP | 52-53 | 5% | — | ||
Snowpoint Temple B3F
| Pokémon | Games | Levels | Rate | Requirement / notes | ||
|---|---|---|---|---|---|---|
| Morning | Day | Night | ||||
| Grass / cave floor | ||||||
| Golbat | DP | 52-54 | 35% | — | ||
| Sneasel | DP | 52-54 | 35% | — | ||
| Steelix | DP | 53-54 | 15% | — | ||
| Graveler | DP | 54 | 10% | — | ||
| Onix | DP | 52-53 | 5% | — | ||
Snowpoint Temple B4F
| Pokémon | Games | Levels | Rate | Requirement / notes | ||
|---|---|---|---|---|---|---|
| Morning | Day | Night | ||||
| Grass / cave floor | ||||||
| Golbat | DP | 54-56 | 35% | — | ||
| Sneasel | DP | 54-56 | 35% | — | ||
| Steelix | DP | 54-56 | 20% | — | ||
| Graveler | DP | 56 | 10% | — | ||
Snowpoint Temple B5F
| Pokémon | Games | Levels | Rate | Requirement / notes | ||
|---|---|---|---|---|---|---|
| Morning | Day | Night | ||||
| Grass / cave floor | ||||||
| Golbat | DP | 54-56 | 35% | — | ||
| Sneasel | DP | 54-56 | 35% | — | ||
| Steelix | DP | 54-56 | 20% | — | ||
| Graveler | DP | 56 | 10% | — | ||
Snowpoint Temple and Regigigas
| Pokémon | Games | Levels | Rate | Requirement / notes | ||
|---|---|---|---|---|---|---|
| Morning | Day | Night | ||||
| Overworld static encounter | ||||||
| Regigigas | DP | 70 | One | National Dex; Regirock, Regice, and Registeel all in the party at Snowpoint Temple B5F Save before inspecting the statue; Slow Start is active during battle. | ||
Items
| Item | Version | Type | Area / exact direction | Coordinate / script | Requirement | Source |
|---|---|---|---|---|---|---|
| Calcium | Diamond / Pearl | Visible item ball | Snowpoint Temple B1F: Pick up the item ball in the southeastern part of Snowpoint Temple B1F, 2 tiles west and 10 tiles south of the Snowpoint Temple B2F doorway or transition. | (12, 13) | National Dex and Snowpoint Temple story permission required; deeper floors use ice-floor and Strength puzzles. | event bank 267, script 7178 |
| Nevermeltice | Diamond / Pearl | Visible item ball | Snowpoint Temple B4F: Pick up the item ball in the southeastern part of Snowpoint Temple B4F, 3 tiles west and 15 tiles south of the Snowpoint Temple B5F doorway or transition. | (11, 18) | National Dex and Snowpoint Temple story permission required; deeper floors use ice-floor and Strength puzzles. | event bank 270, script 7179 |
Hidden Items
| Hidden item | Area / plain-English placement | QA coordinate | Requirement | Source |
|---|---|---|---|---|
| Full Restore | Snowpoint Temple B3F: Use the Dowsing Machine in the southern part of Snowpoint Temple B3F, 4 tiles east and 5 tiles south of the Snowpoint Temple B2F doorway or transition and inspect that exact ground tile. | (10, 8) | Dowsing Machine Pokétch app. National Dex and Snowpoint Temple story permission required; deeper floors use ice-floor and Strength puzzles. | event bank 269, script 8179 |
Puzzles, Warps, And Switches
- Strength boulders can block narrow lanes; solve their item branch before pushing toward the next stairs. On the final ice floor, use rocks and walls as stopping points to line up with the central statue.
- Bring all three Regis plus no more than three capture-team members, leaving enough battle roles for status, False Swipe or controlled damage, and healing.
Completion Checklist
- Complete the currently reachable part of this route plan: Obtain the National Dex; return to Snowpoint and gain temple permission; bring Strength, Rock Smash, and a controlled capture team; descend every floor for items; solve B5F's ice slide; place Regirock, Regice, and Registeel in the active party; save before the statue; interact and catch Regigigas.
- Review all 29 encounter rows across the per-area tables, including game markers, method band, time-of-day rates, levels, and each conditional requirement; mark conditional rows for their stated revisit.
Dex quick links